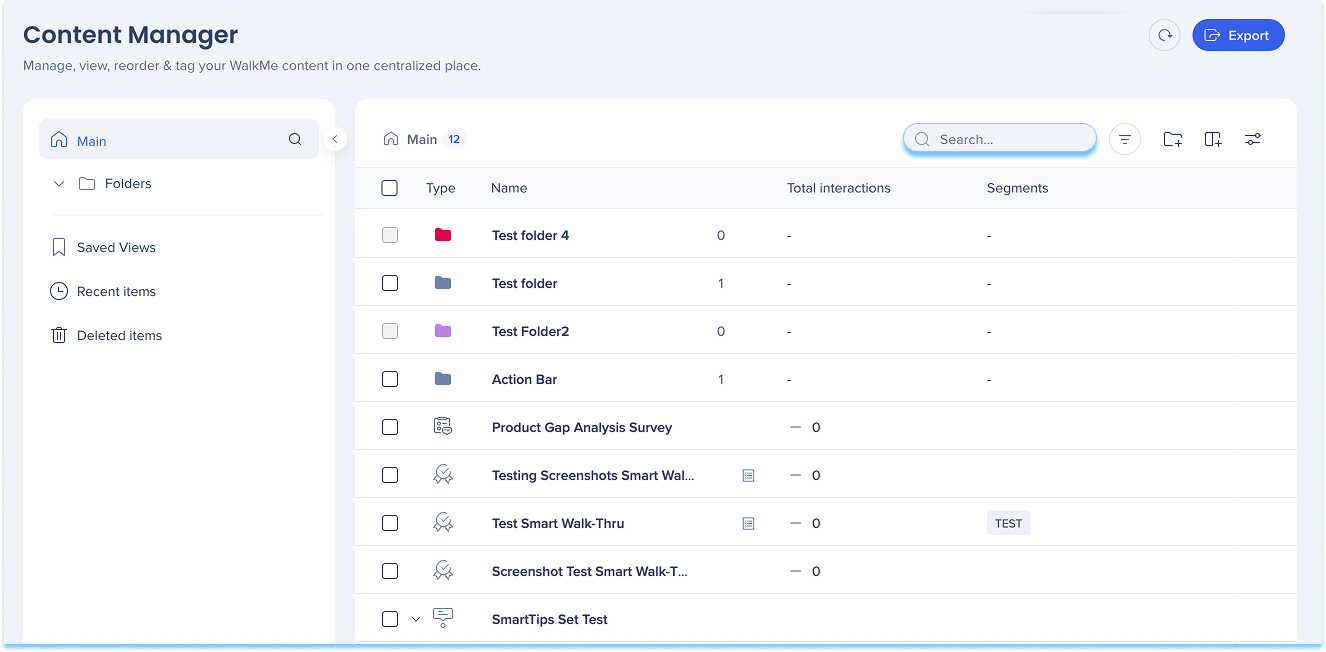
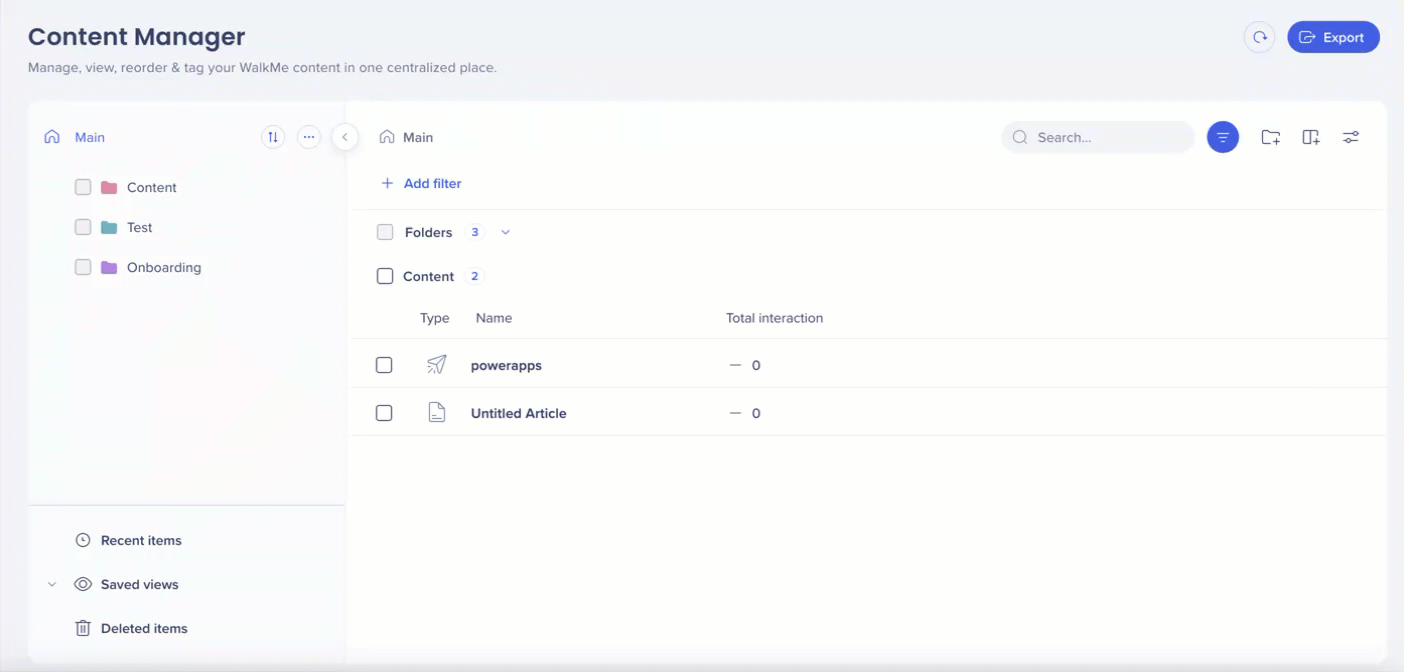
Content Manager provides a centralized workspace for managing WalkMe items. It includes a table-based interface that supports flexible views for organizing content, collaborating with teammates, and opening items in the editor.
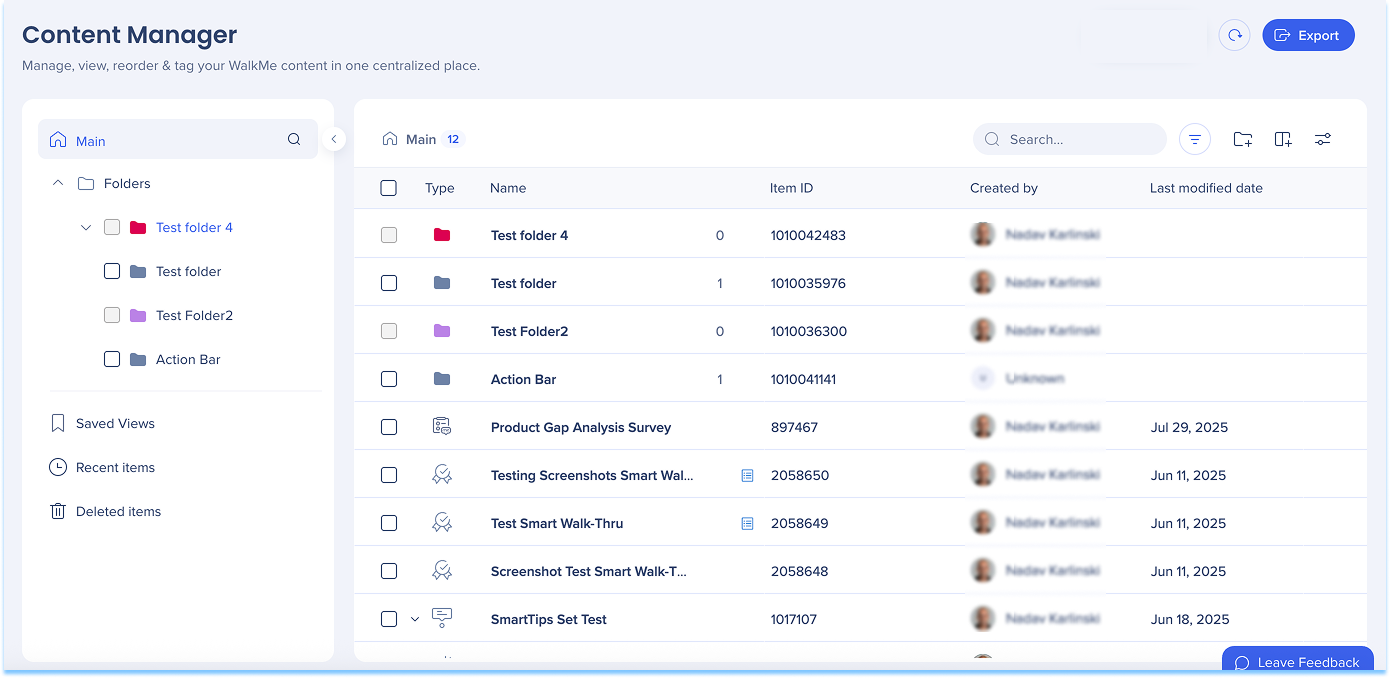
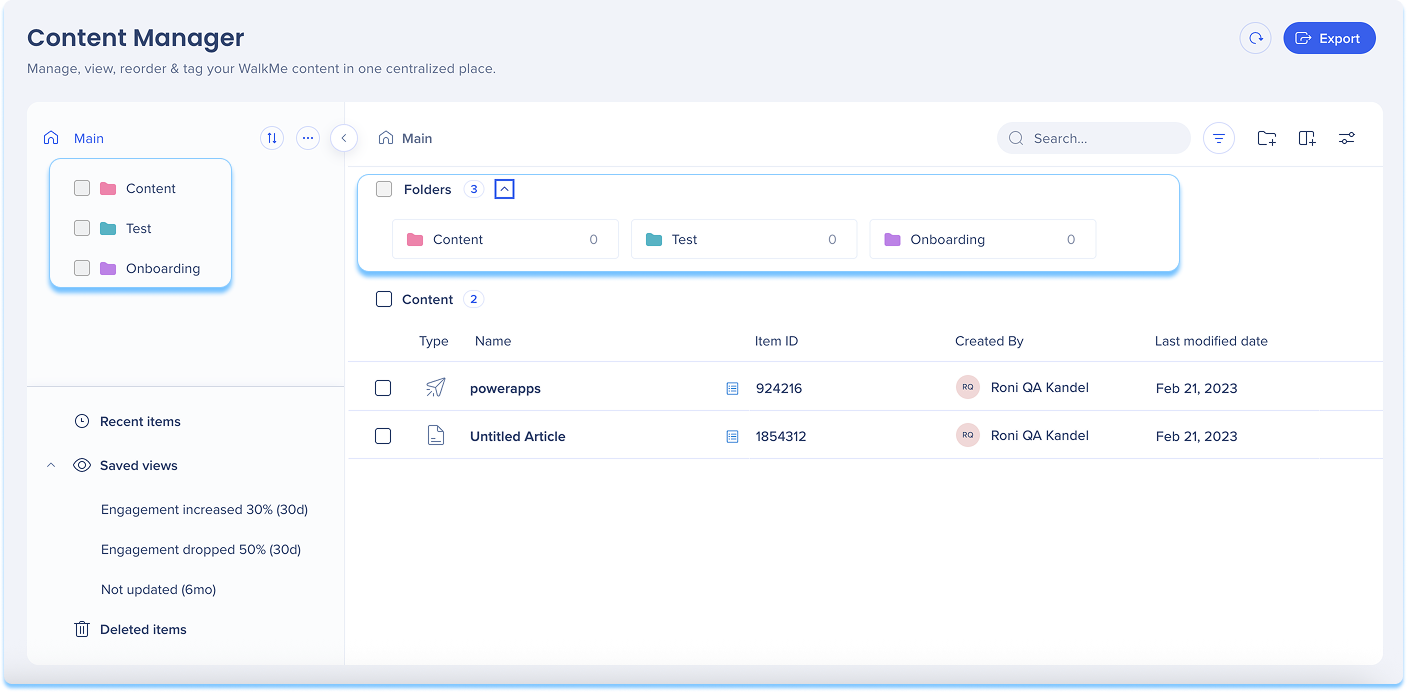
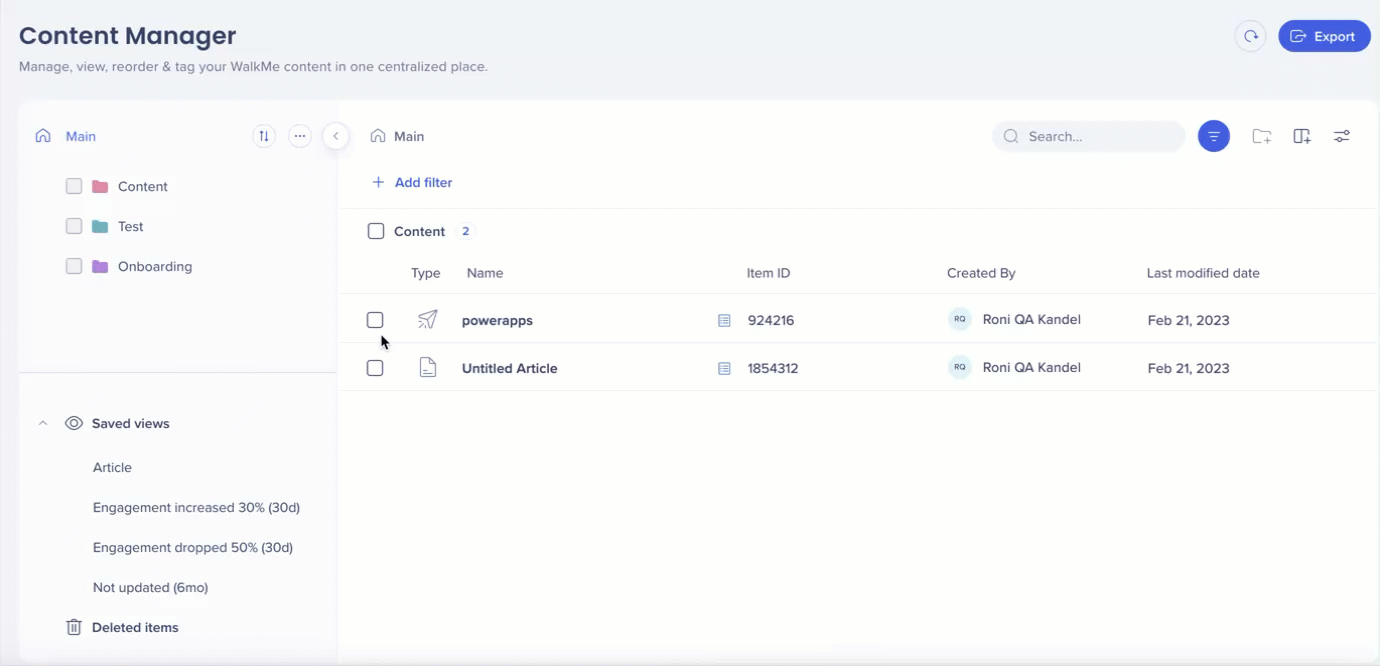
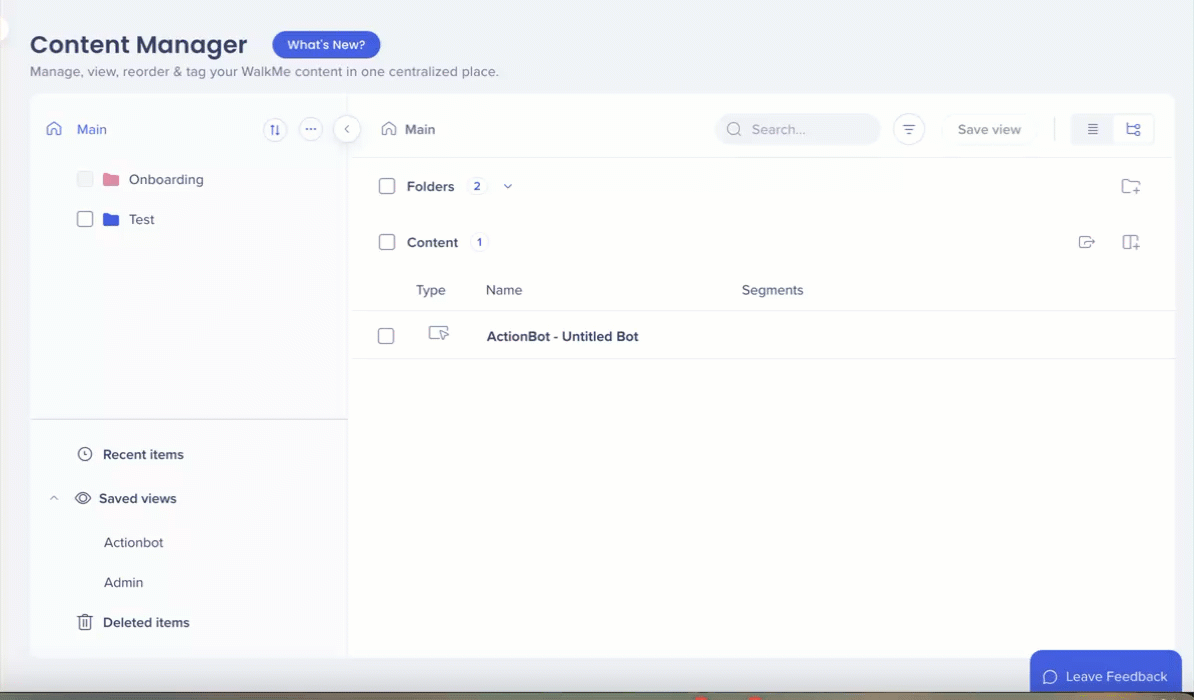
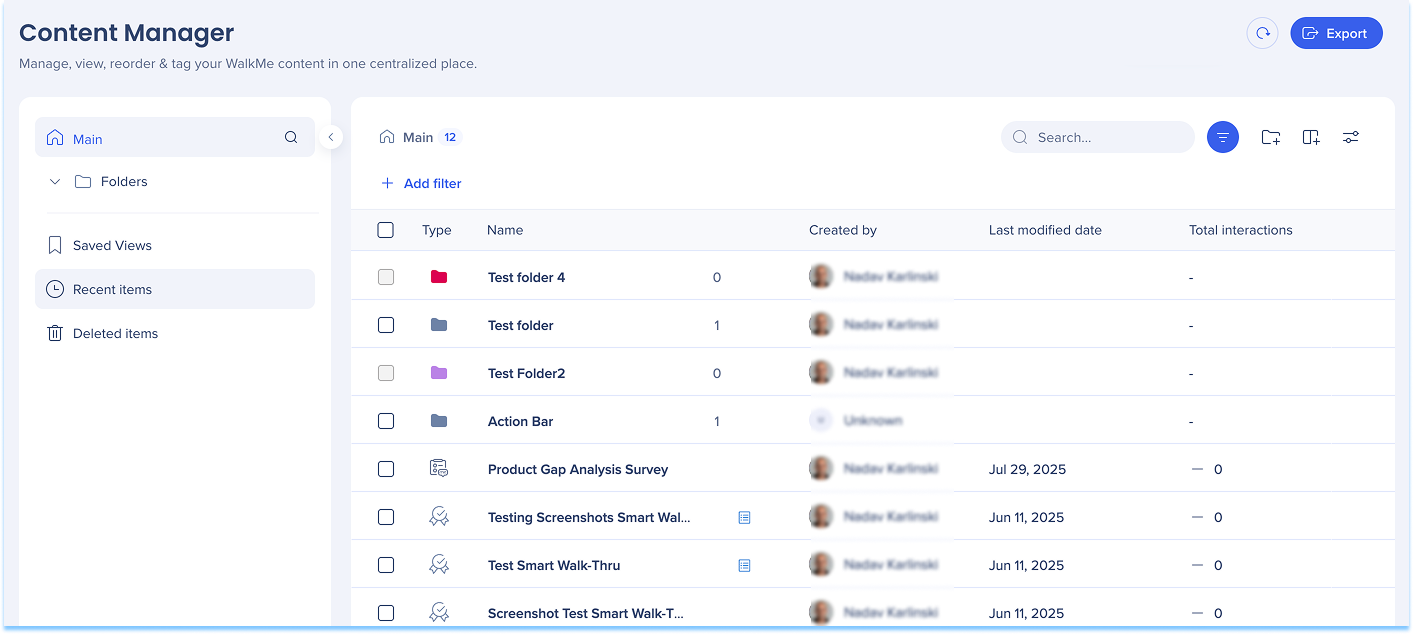
Folders appear in the left panel and organize items hierarchically. Select a folder to view its contents in the main list. In Tree view, folders also appear directly in the list.
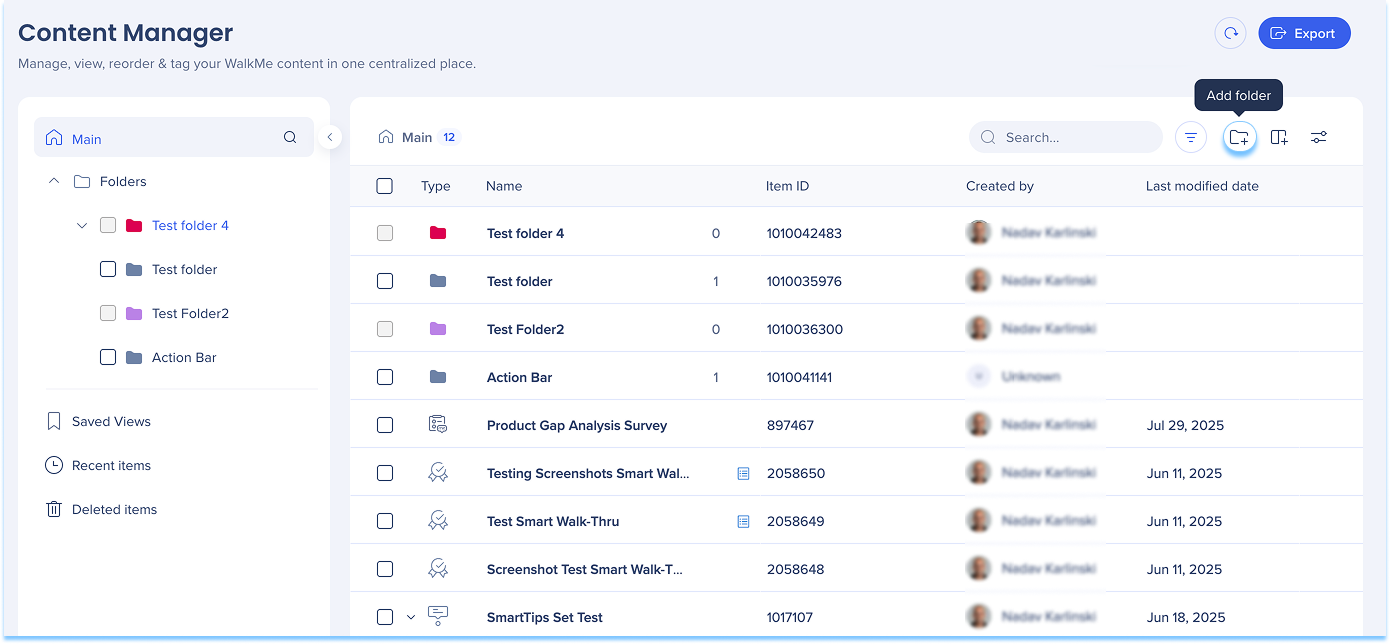
Creating a folder
Select Folder +, or
Open the Options menu and select Add Folder
Enter a folder name and select a color
Select Add folder
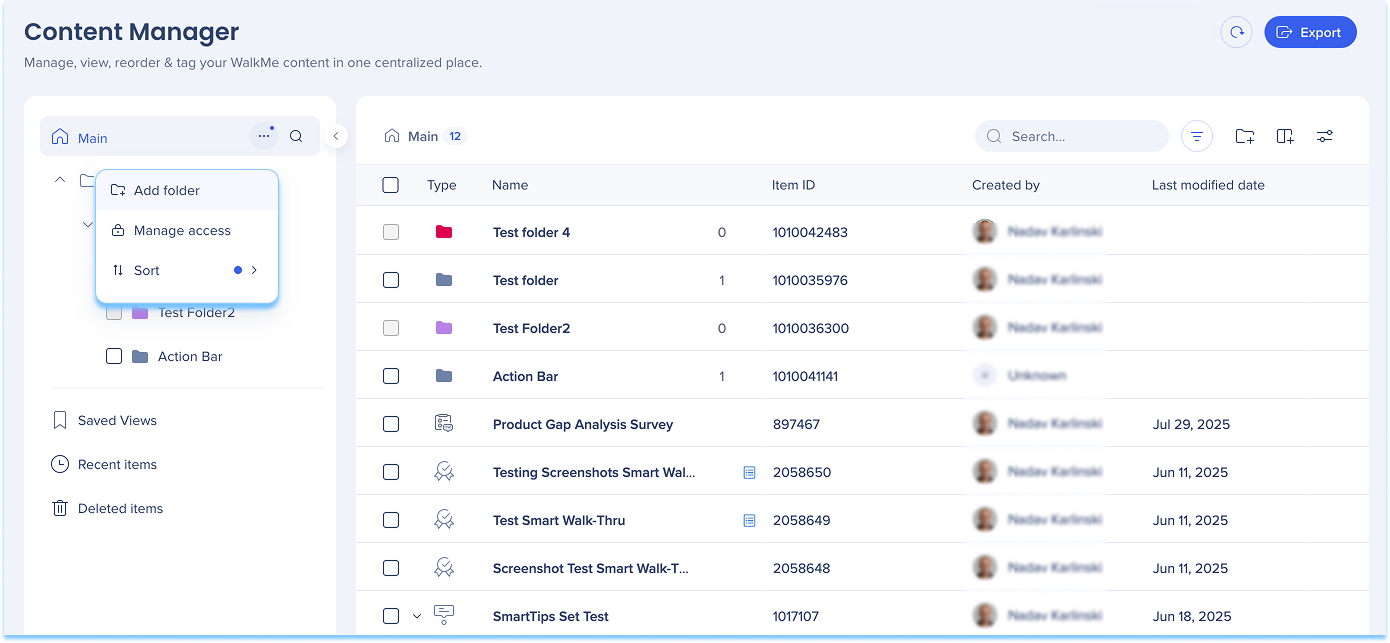
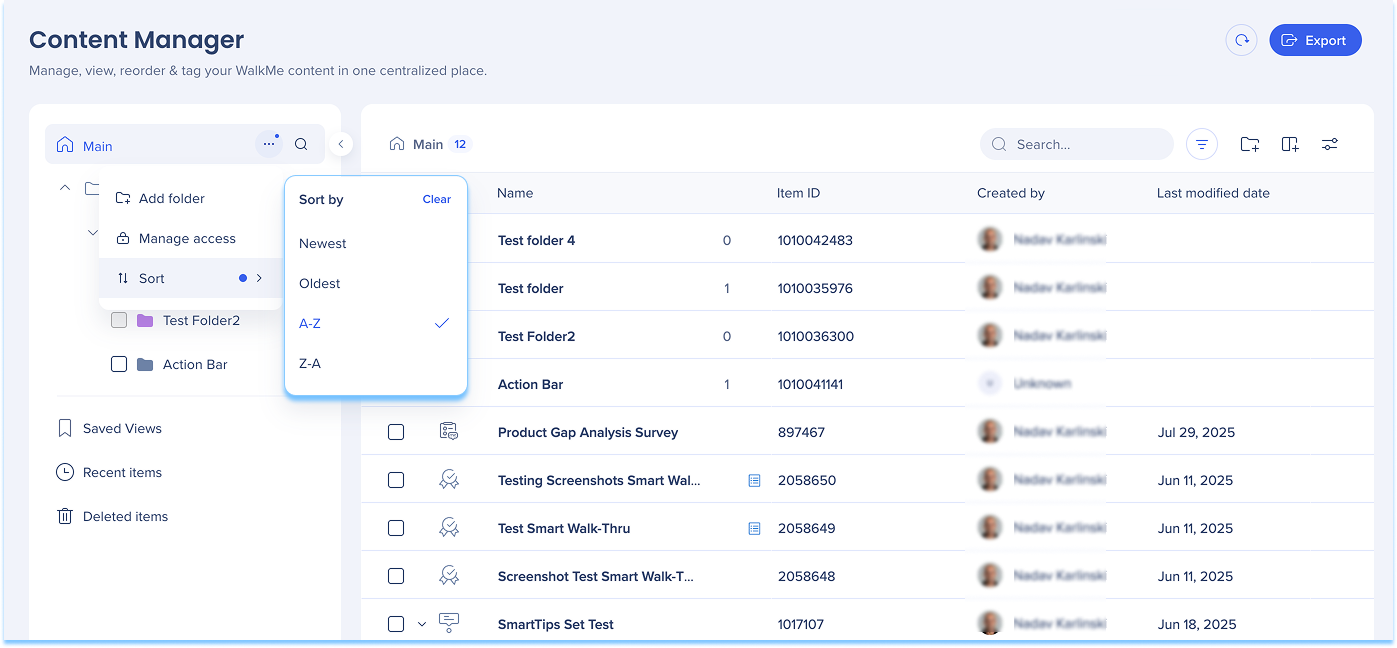
Sort folders
Select the Sort icon
Choose a sort order:
Newest
Oldest
A-Z
Z-A
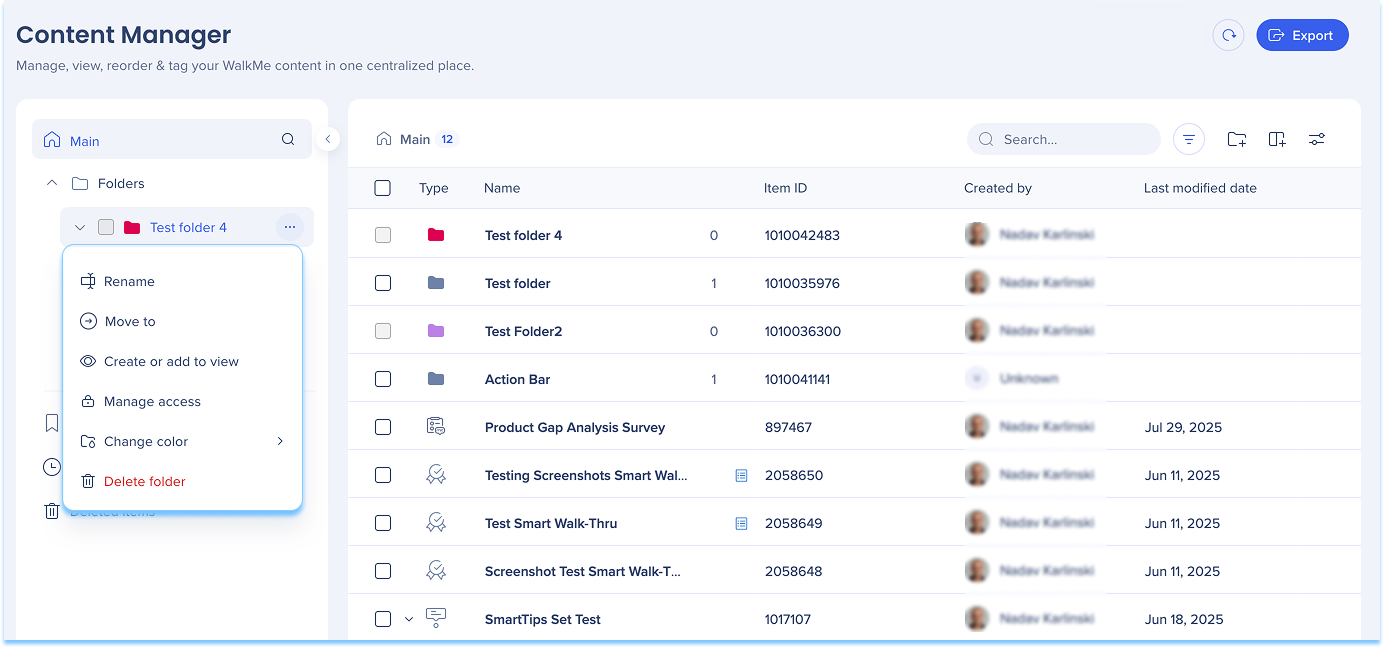
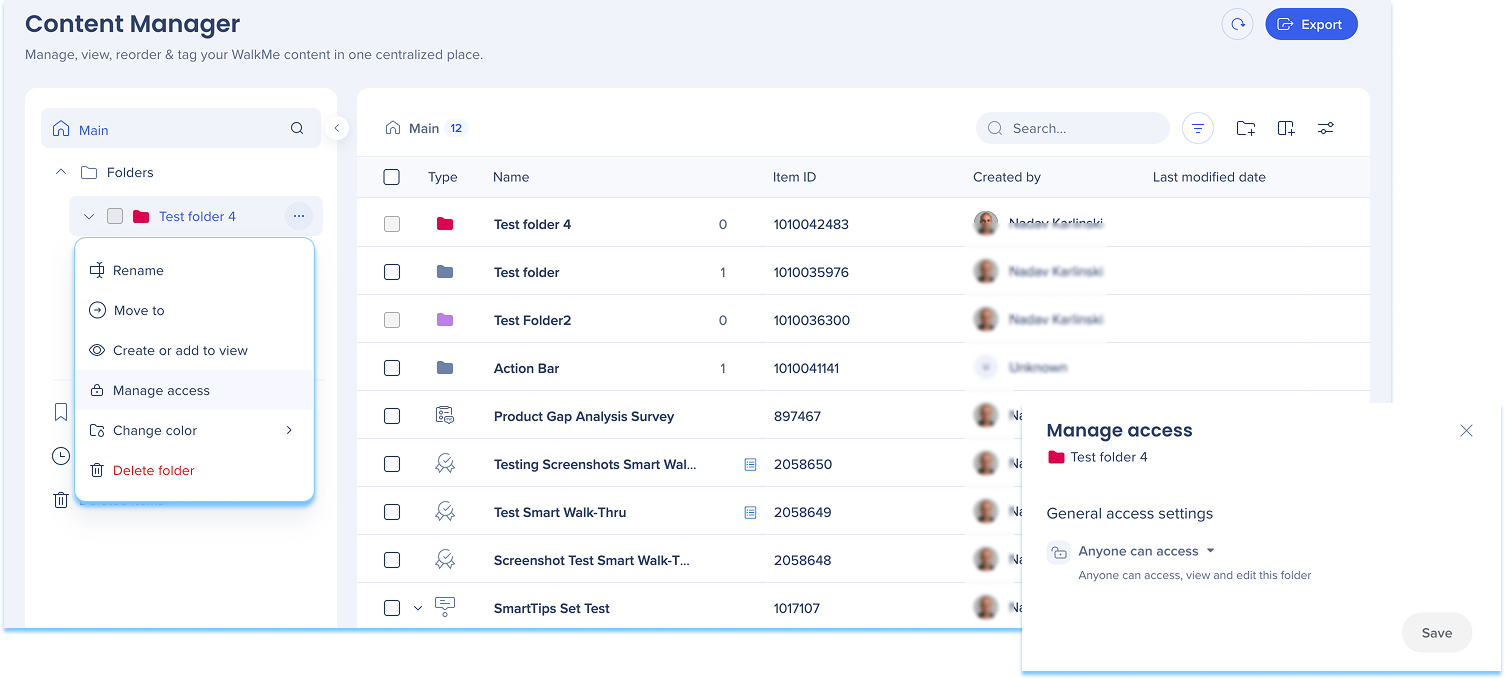
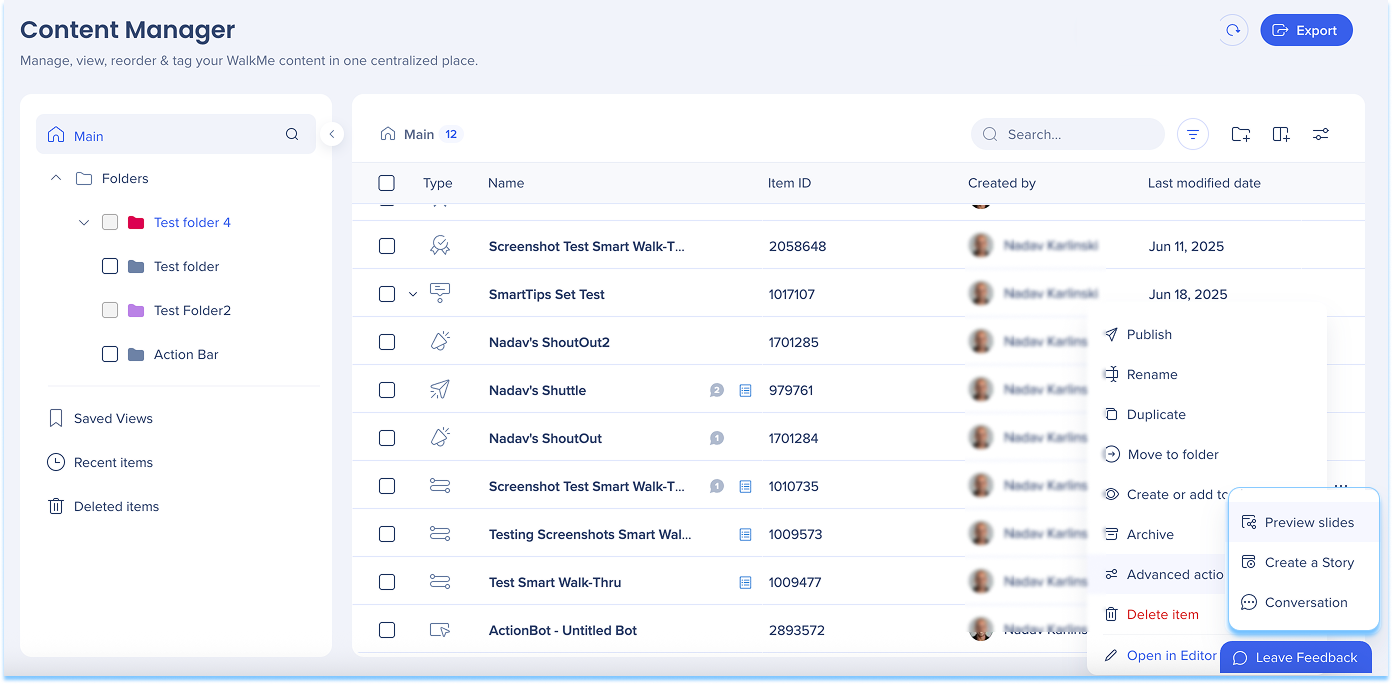
Folder actions
Select the Options menu next to a folder to manage it:
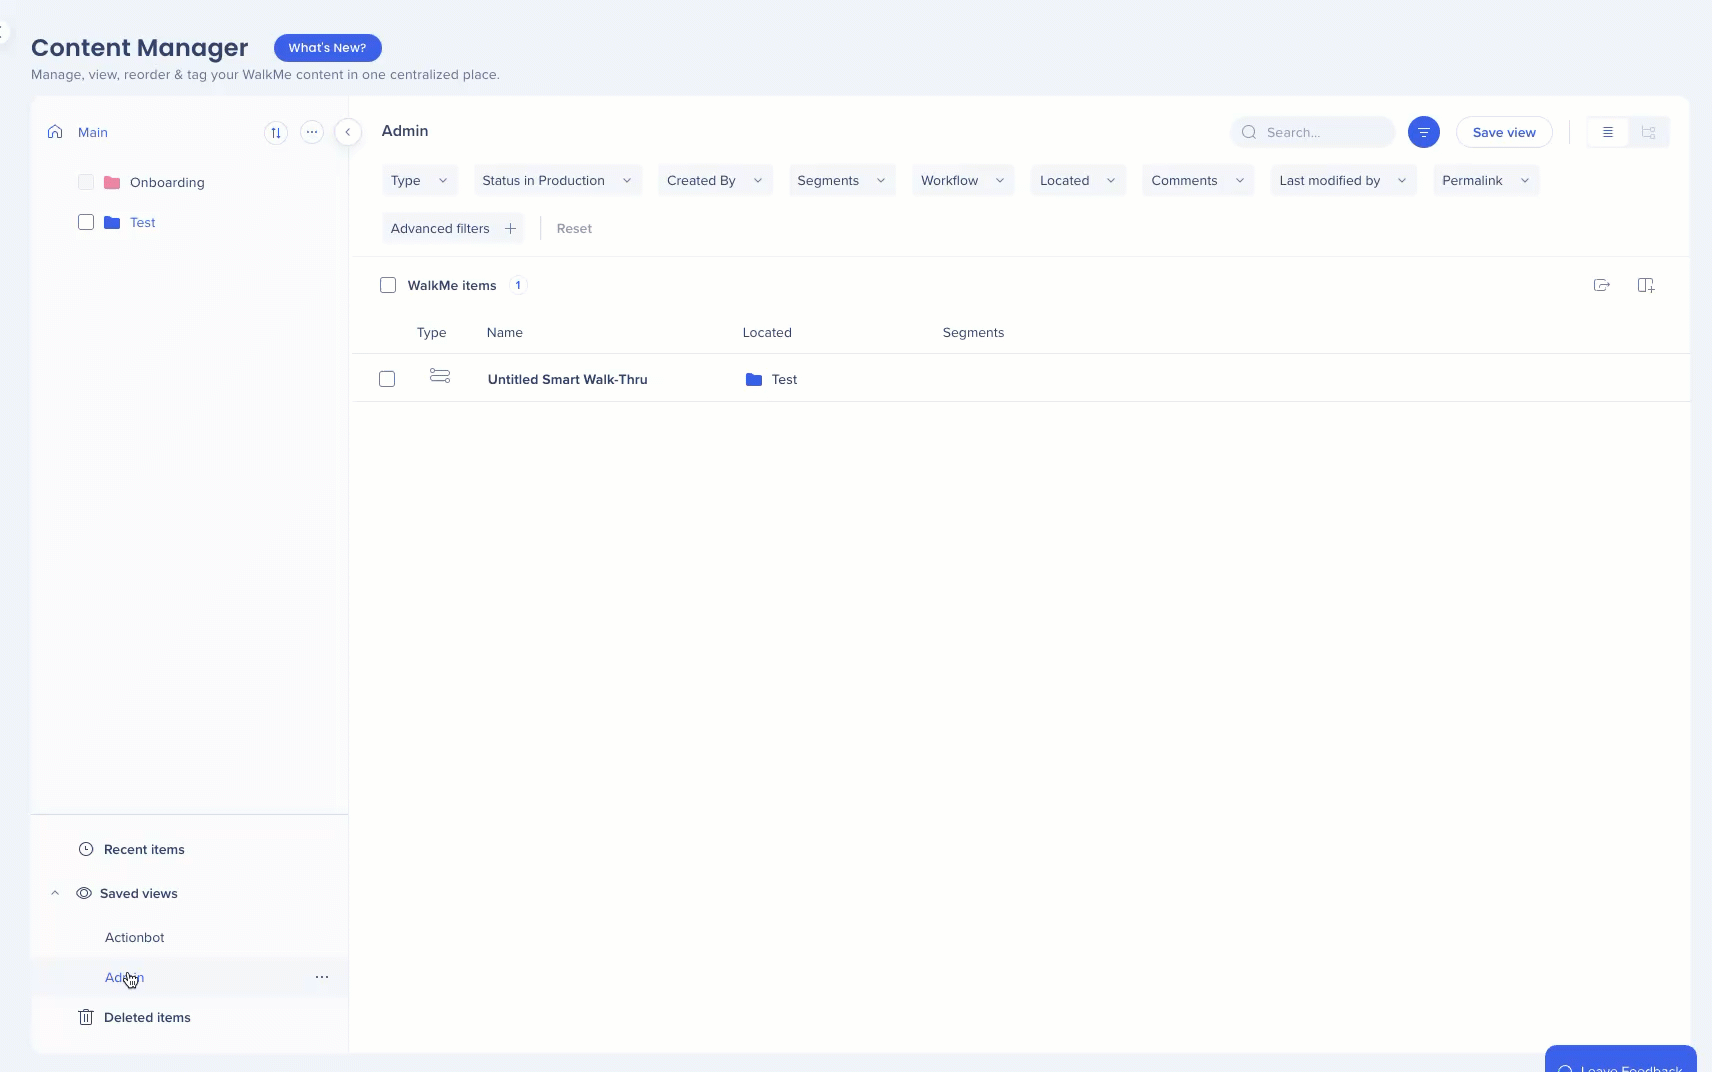
Use search and filters to quickly locate items across folders, views, and environments.
Global search
Use the search bar in the left panel to find items and folders.
To refine results:
Switch between Items and Folders
Enter a full or partial name
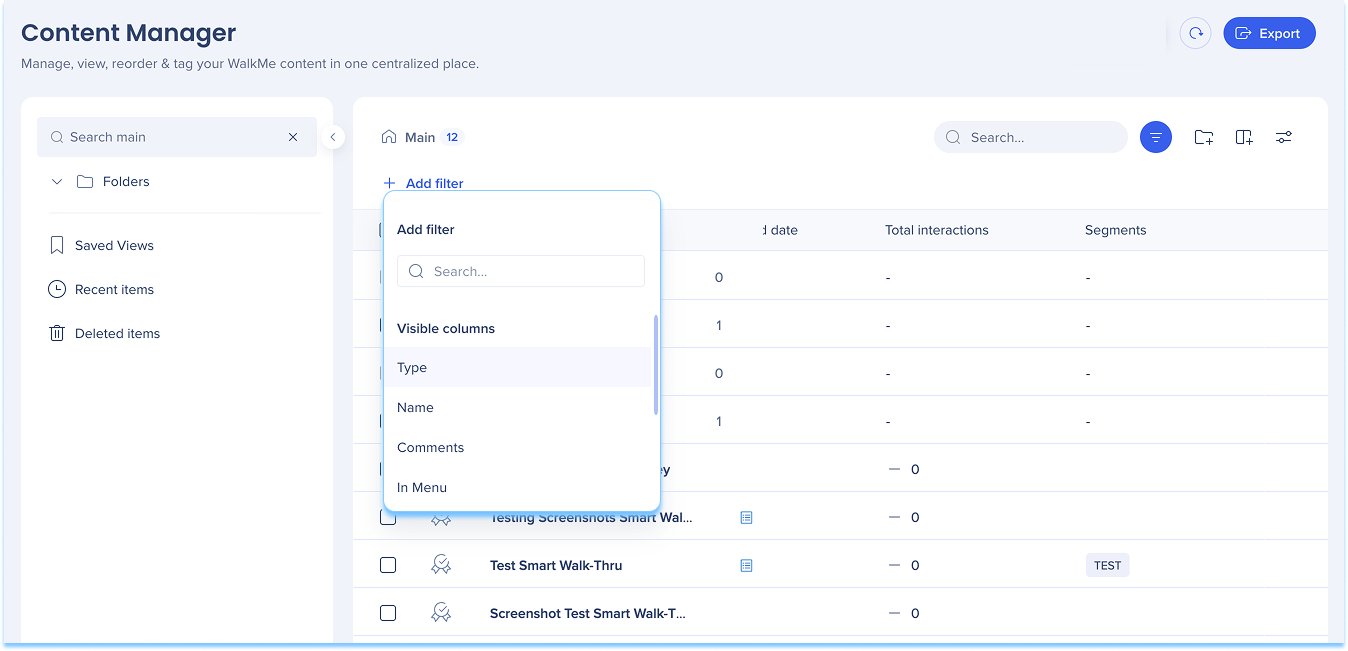
Filters
Filter content by:
Content attributes, such as item type, workflow tag, location, and keywords
Ownership and status, such as creator, publish status, and last modified by
Delivery and visibility, such as segment, status by environment, and in-menu status
Collaboration, such as comment status and permalink availability
Note
Filters are organized by visible and hidden columns.
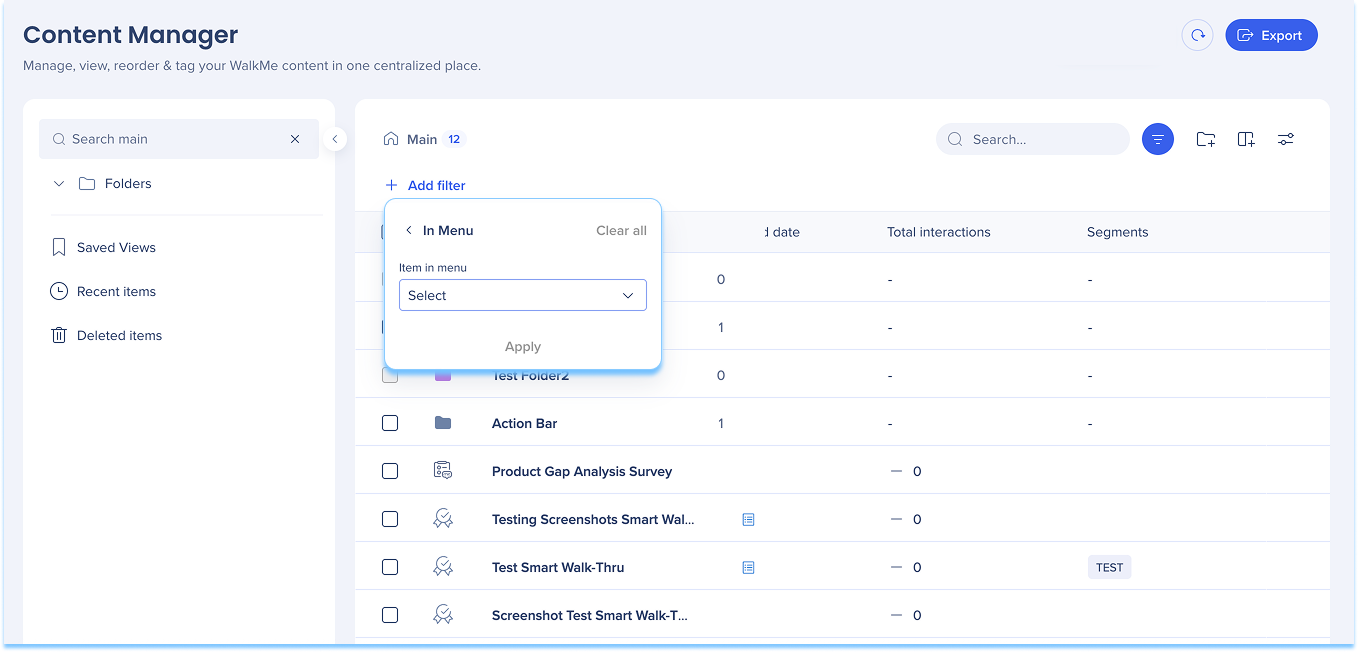
In menu filter
Filter content based on whether it appears in the WalkMe Menu.
Select the In Menu filter
Select Yes (appears in the menu) or No (doesn't appear in the menu)
Select Apply
Items that appear in the menu show an icon in the Type column.
Add filters
To narrow your results:
Select the Filter icon
Select + Add Filter
Choose a column
Set the condition and value
Select Apply
Contextual search
Use contextual search to find items by:
Item name
Item ID
Item type
Example: Type Launcher to view launcher results.
Bulk selection across searches
Keep selected items while running new searches, then apply a single bulk action to all selected items.
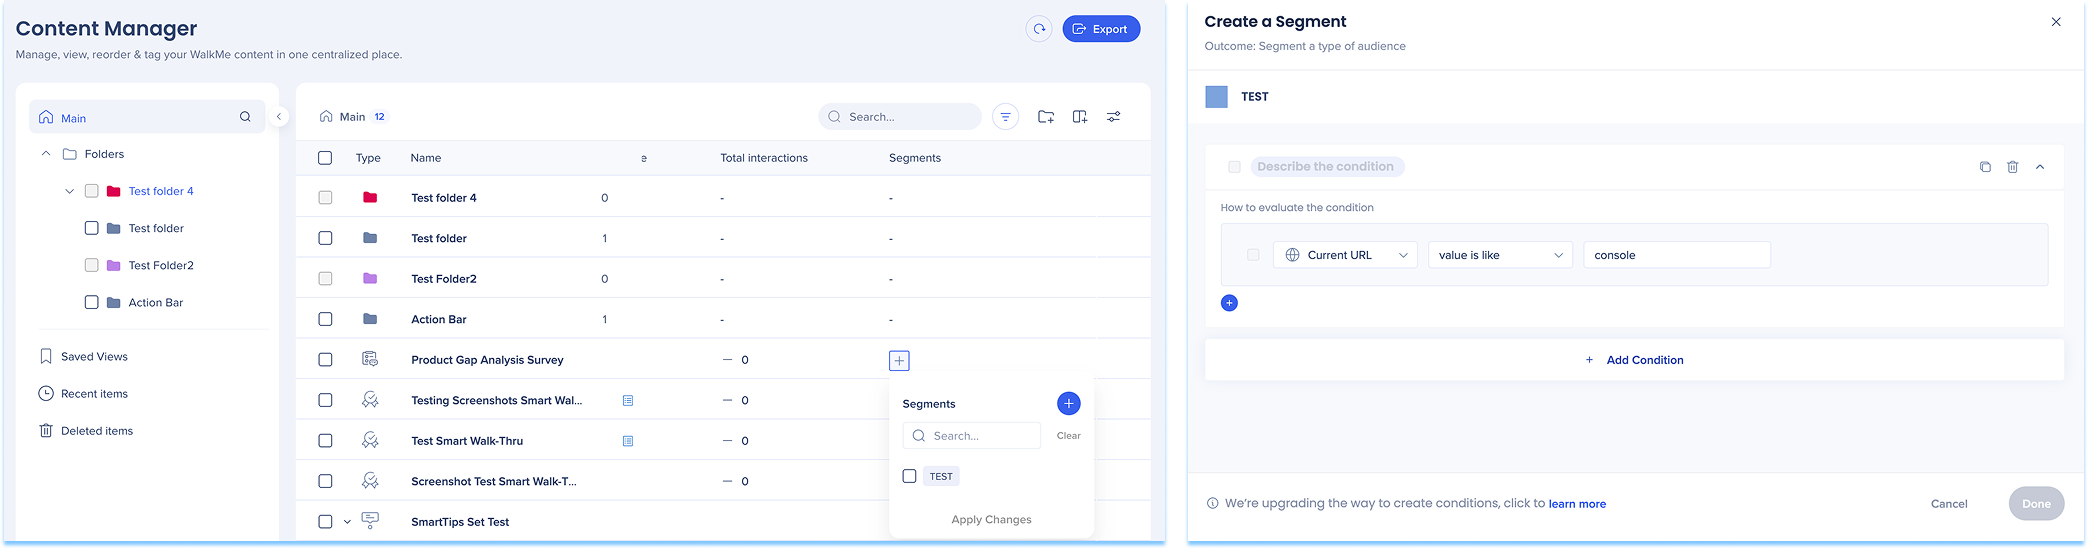
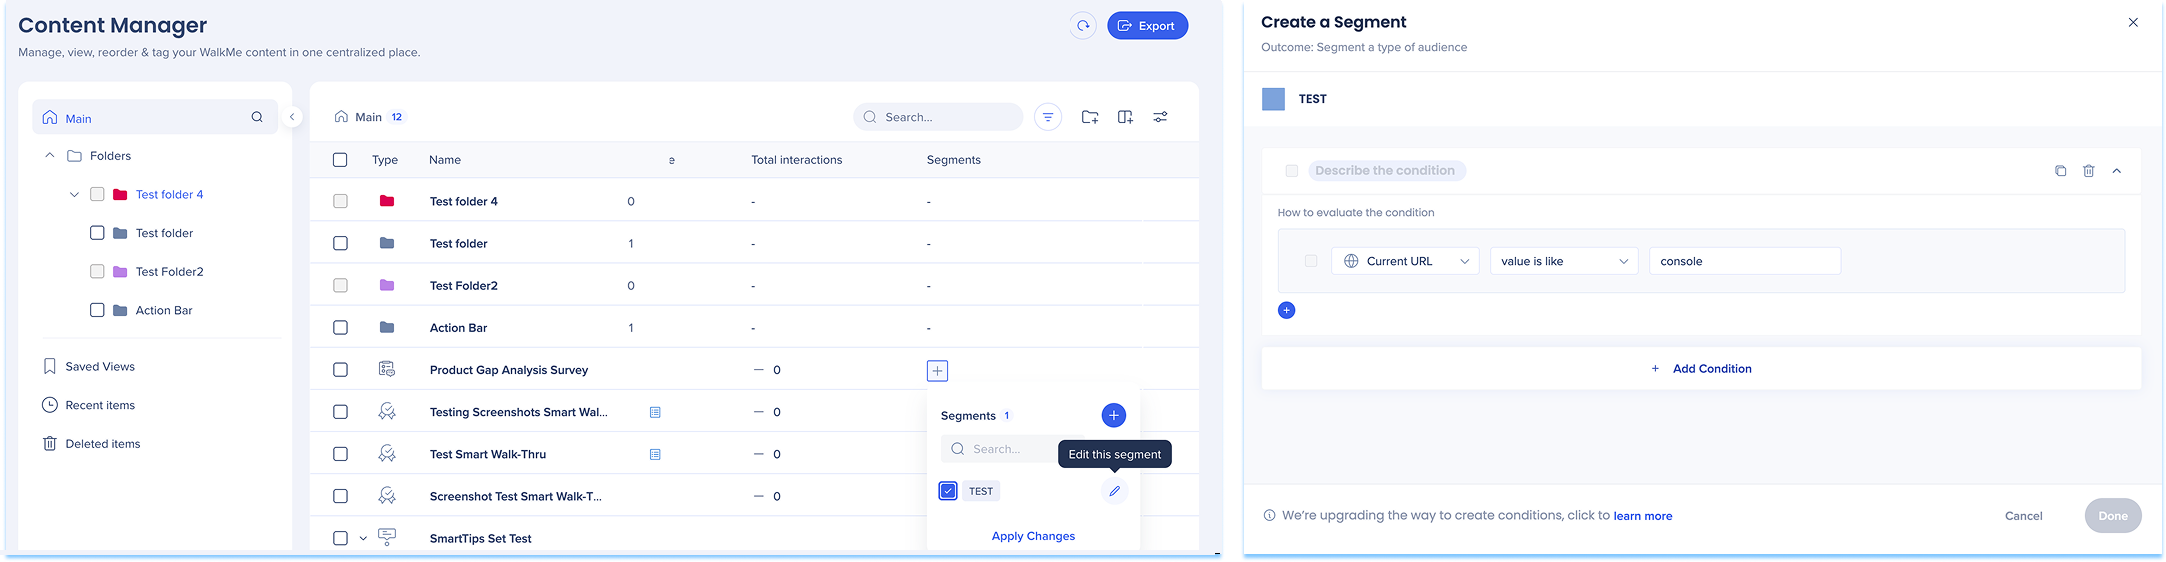
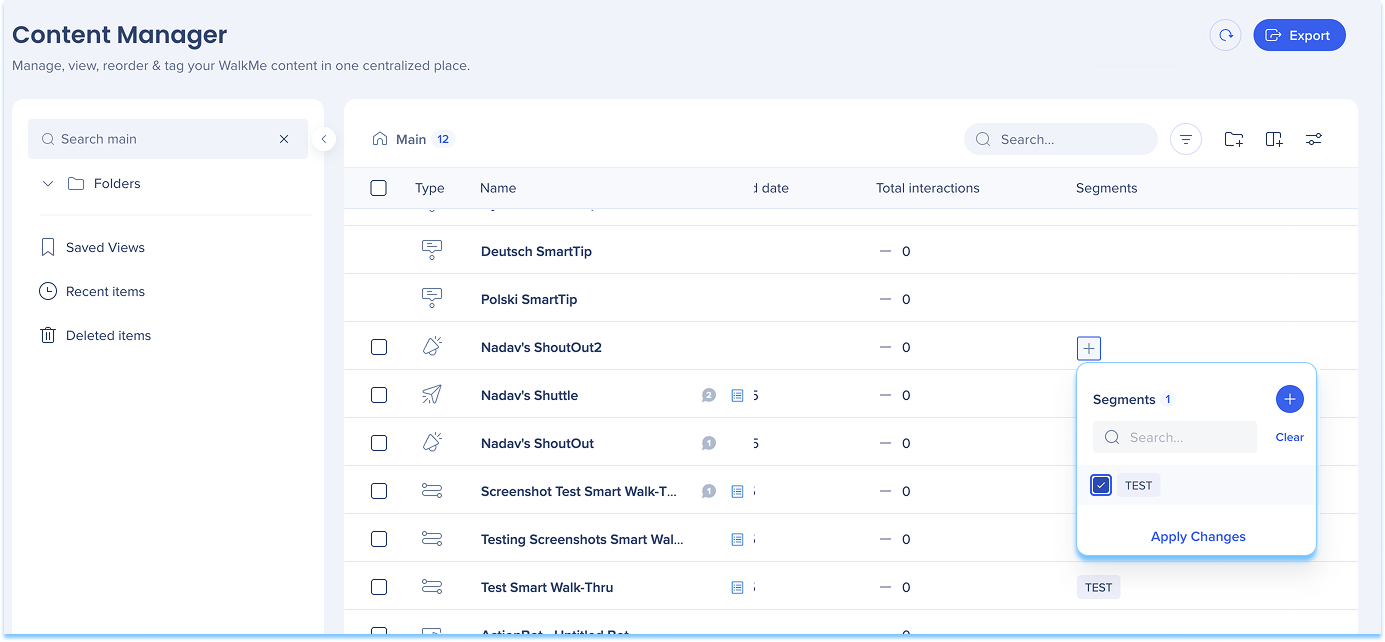
Segments
Create, define, apply, and manage segments directly within the Content Manager. This functionality mirrors the capabilities available in the editor, enabling users to streamline their segmentation workflows.
To create a segment:
Select the + icon in the Segment column of the item line
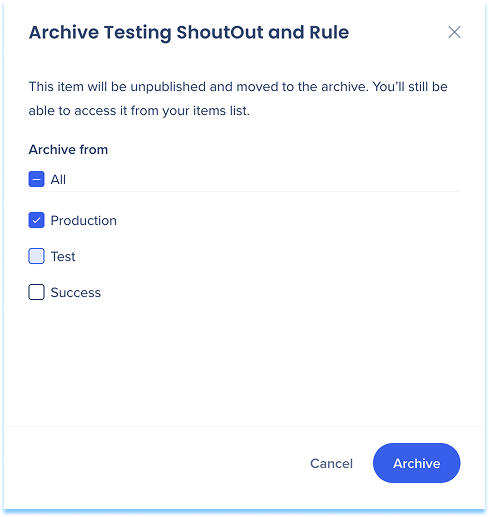
You can archive an item across multiple environments at once, so you don't need to repeat the archive action in each environment separately.
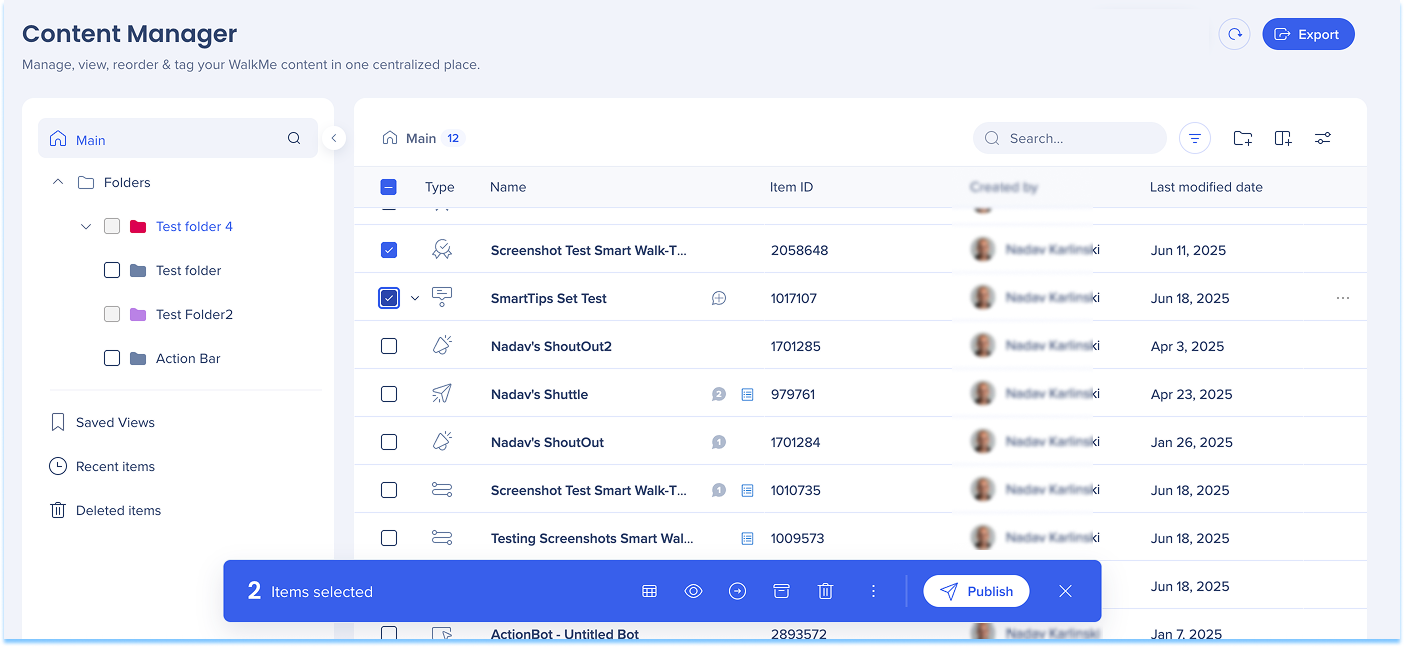
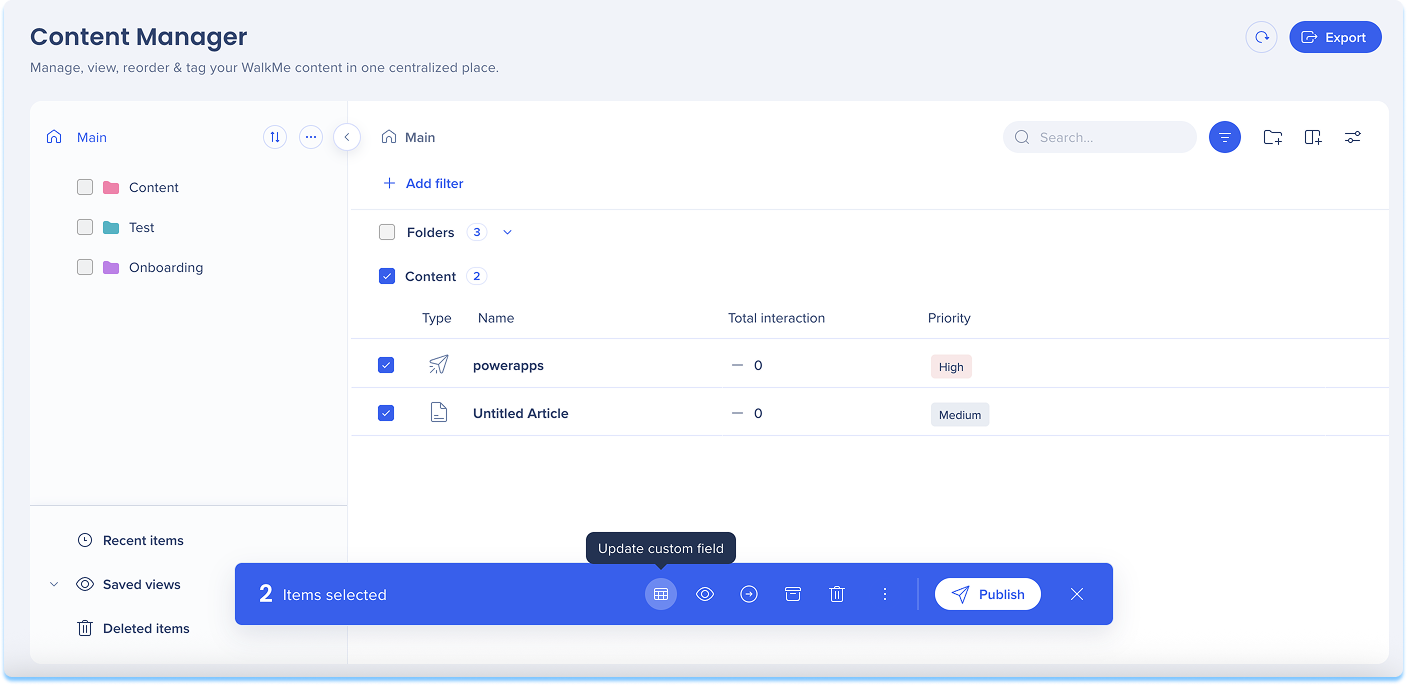
Bulk actions
Select one or more items using the checkbox
Select an action from the bulk actions toolbar, such as:
Assign segments or workflow
Move or archive items
Publish or delete items
Create or add to views
Merge keywords or update custom fields
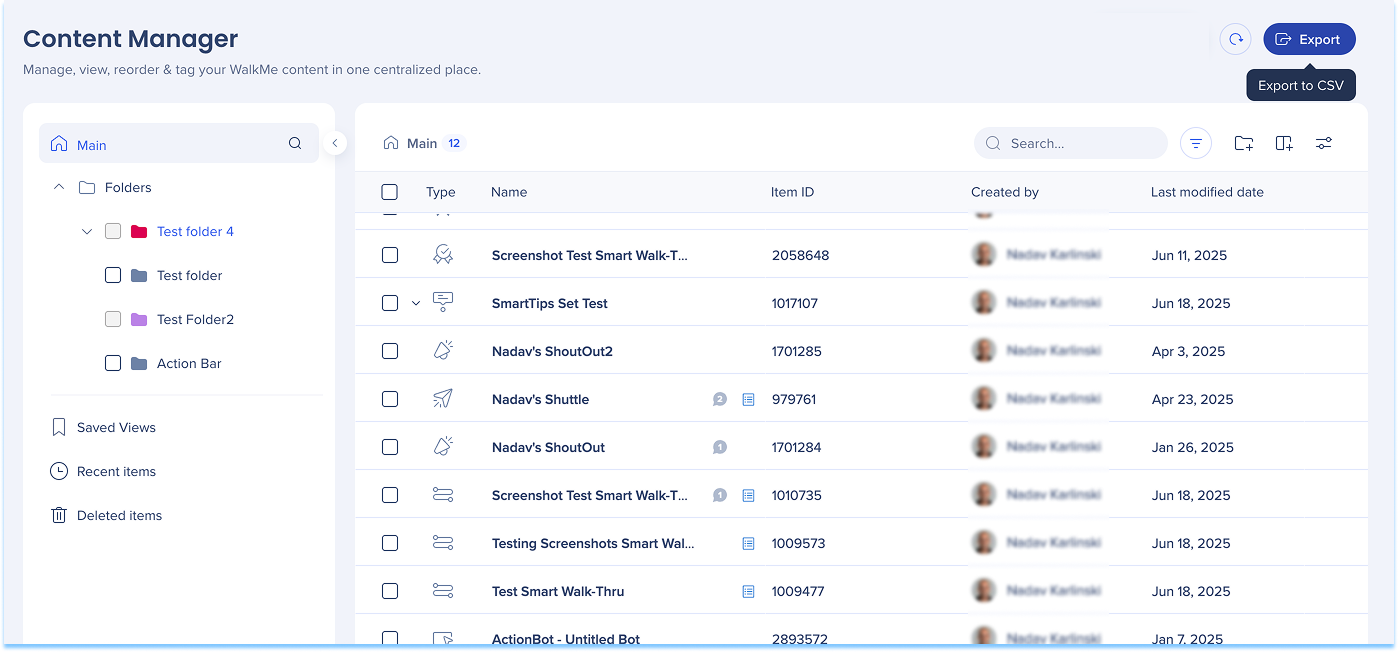
Export content
Export content data from any view to a CSV file.
Select the Export icon
Download the CSV file
The CSV reflects the current view, including visible columns and column order.
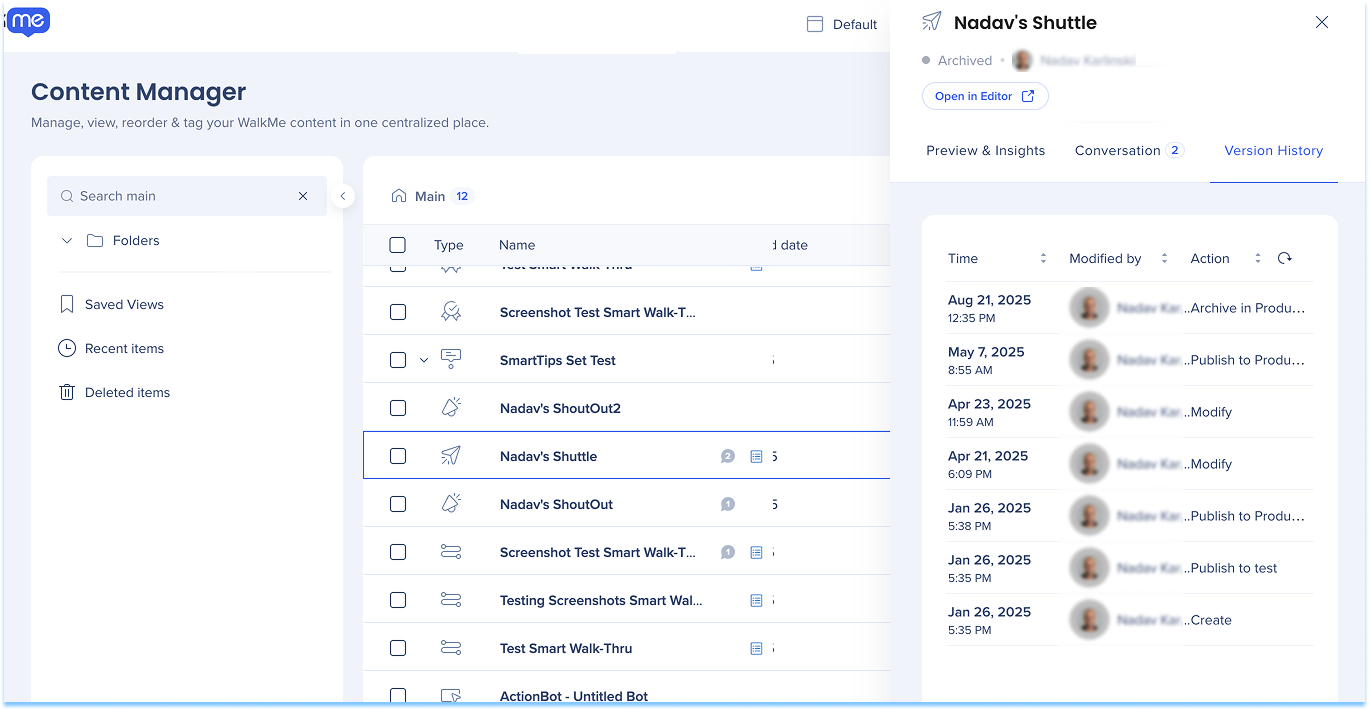
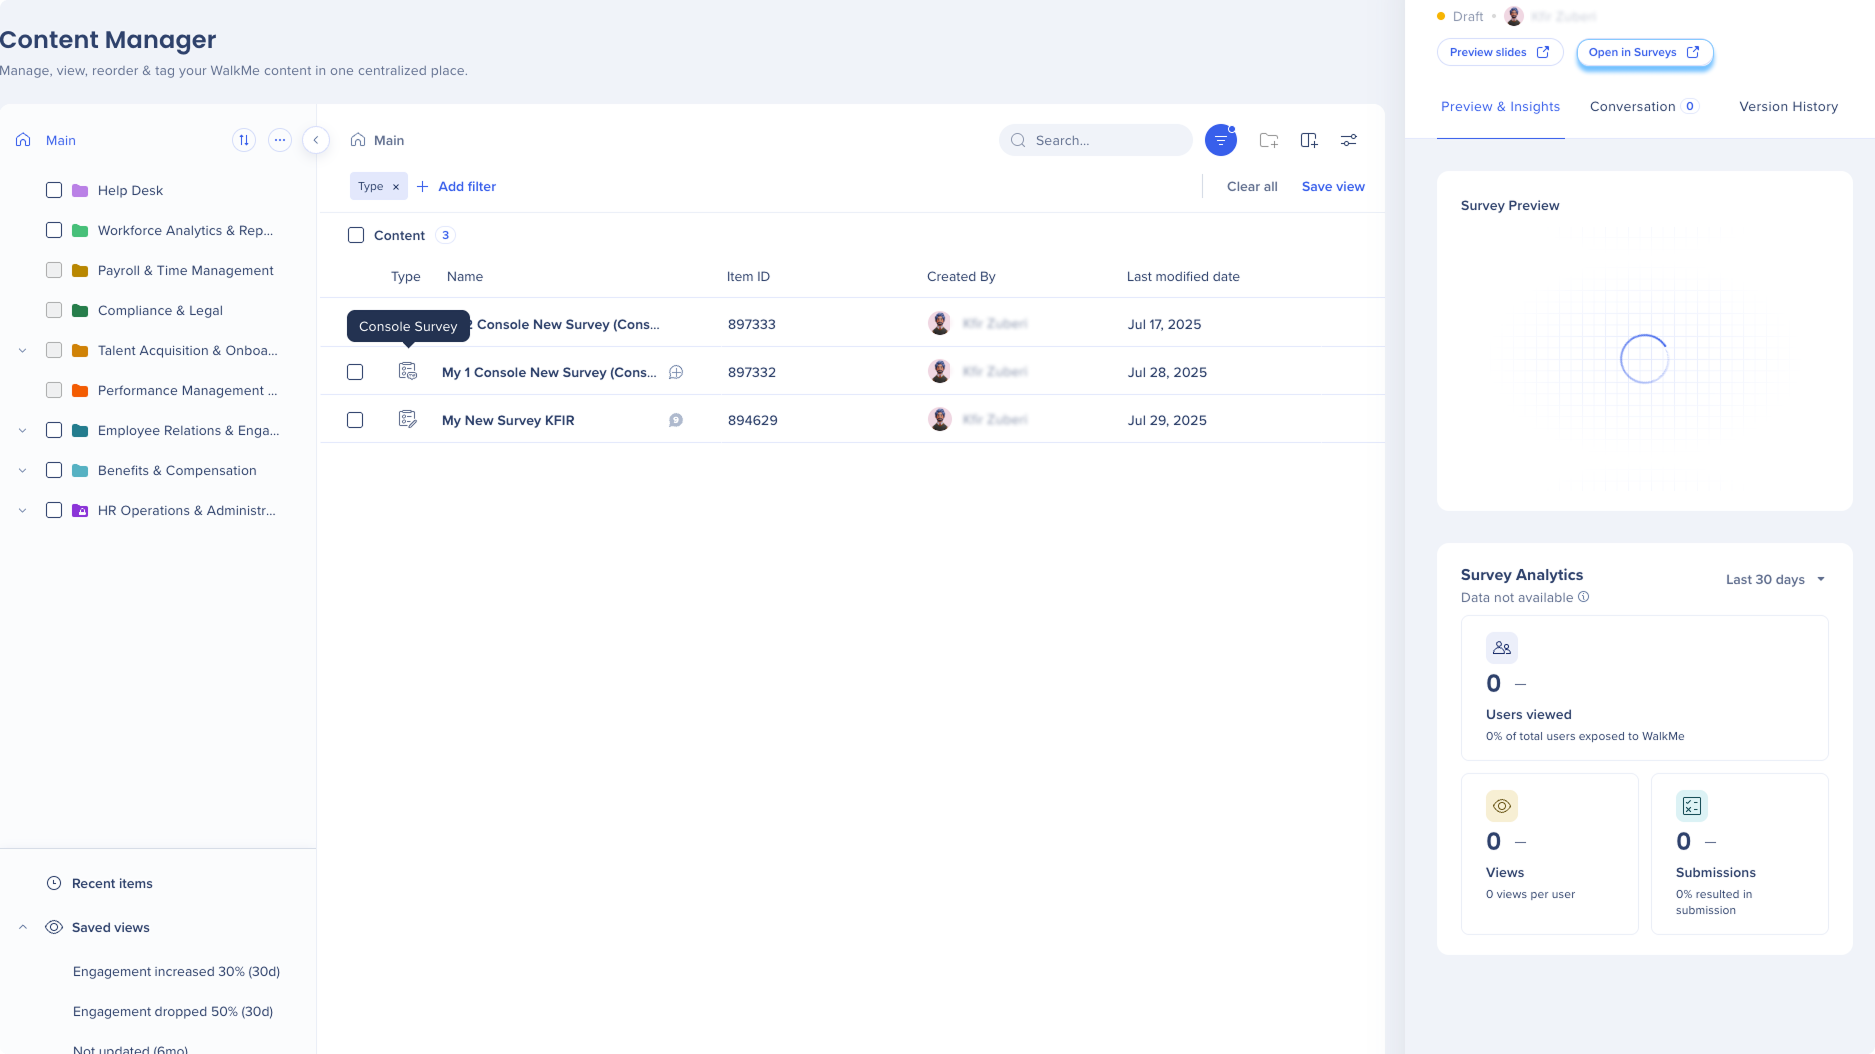
Preview, Collaborate, and Track Changes
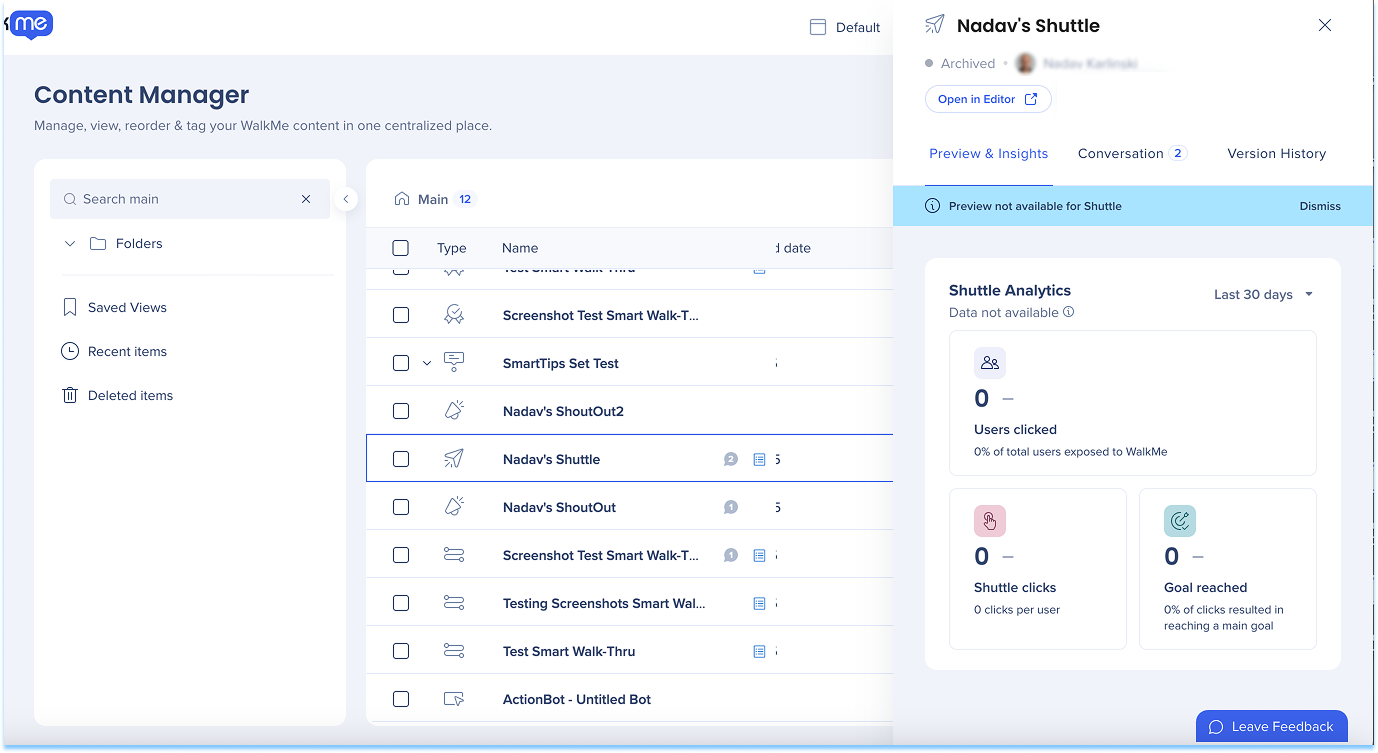
Item preview
Select an item in the table to open the item drawer, which includes:
Preview & Insights: Preview the item, review Insights data from the last 30 days, and view related Stories
Conversations: View and leave comments, and tag collaborators
Version history: Review previous edit versions of the item
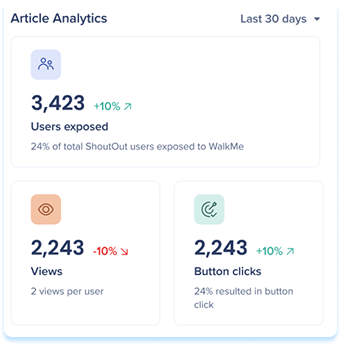
Preview & Insights
Use Preview & Insights to view item screenshots and analytics.
Preview item screenshots
Hover over the preview
Select the Slides preview icon
Expand the preview
Hover over the preview
Select the Expand icon
Note
The preview shows an image of the balloon as it appears to users
Smart Walk-Thrus show the entire play sequence
Shuttles, resources (videos and articles), and onboarding tasks don't have a preview
Translated preview
Preview translated versions of your content directly in the preview window.
Select the Language dropdown to view the item in each translated language
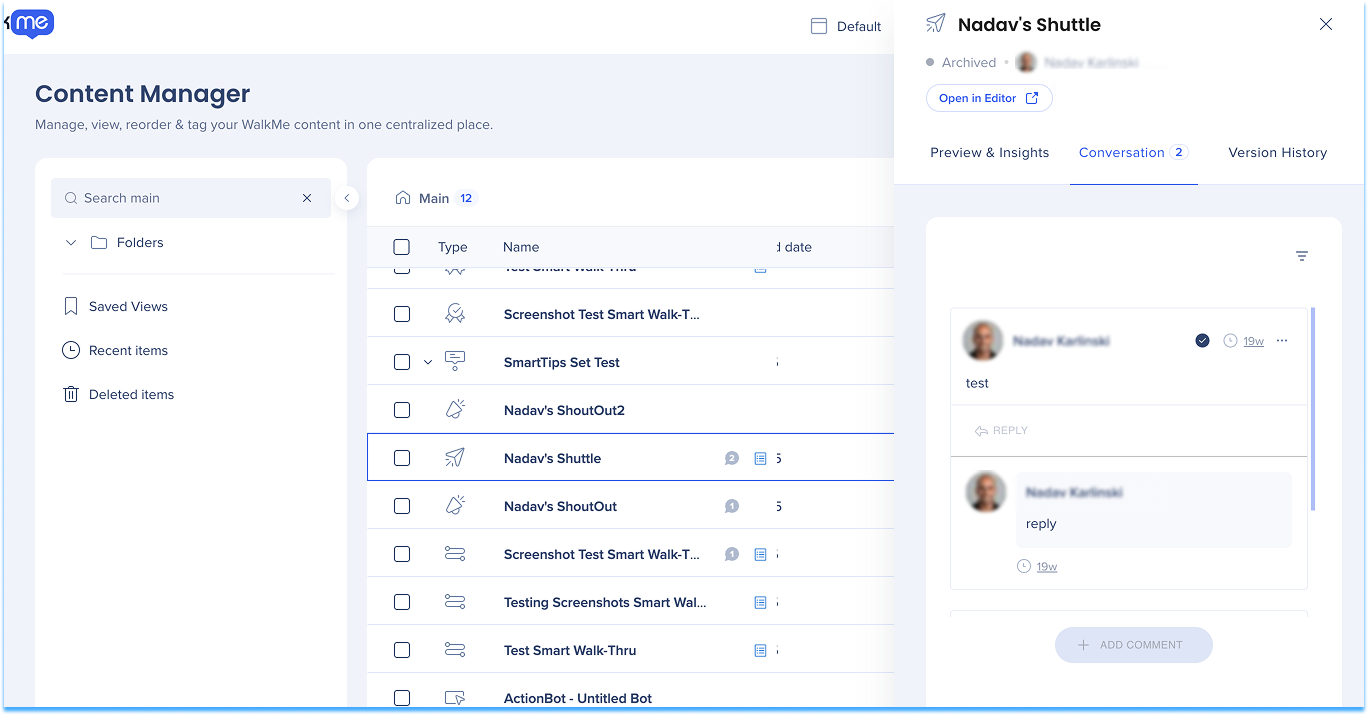
Conversations
Use Conversations to view and leave comments on items or preview slides, and tag collaborators. When a user is tagged, they receive a notification.
A message indicator will appear next to each item's name in the table showing the number of messages.
A blue indicator means there are unread messages
A gray indicator means all messages have been read
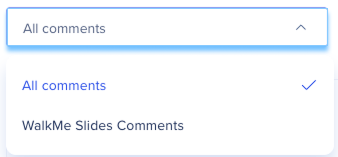
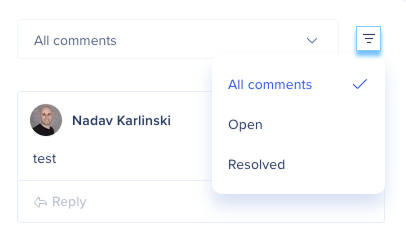
Comments
View comments
Select the message Indicator to open the Conversations tab
Optional: Use the All comments dropdown to filter by comment type
Optional: Select the Filter icon to filter comments by status
Resolve comments
Select the Check icon at the top of the comment
Version history
The Version History tab shows all previous edit versions of the item.
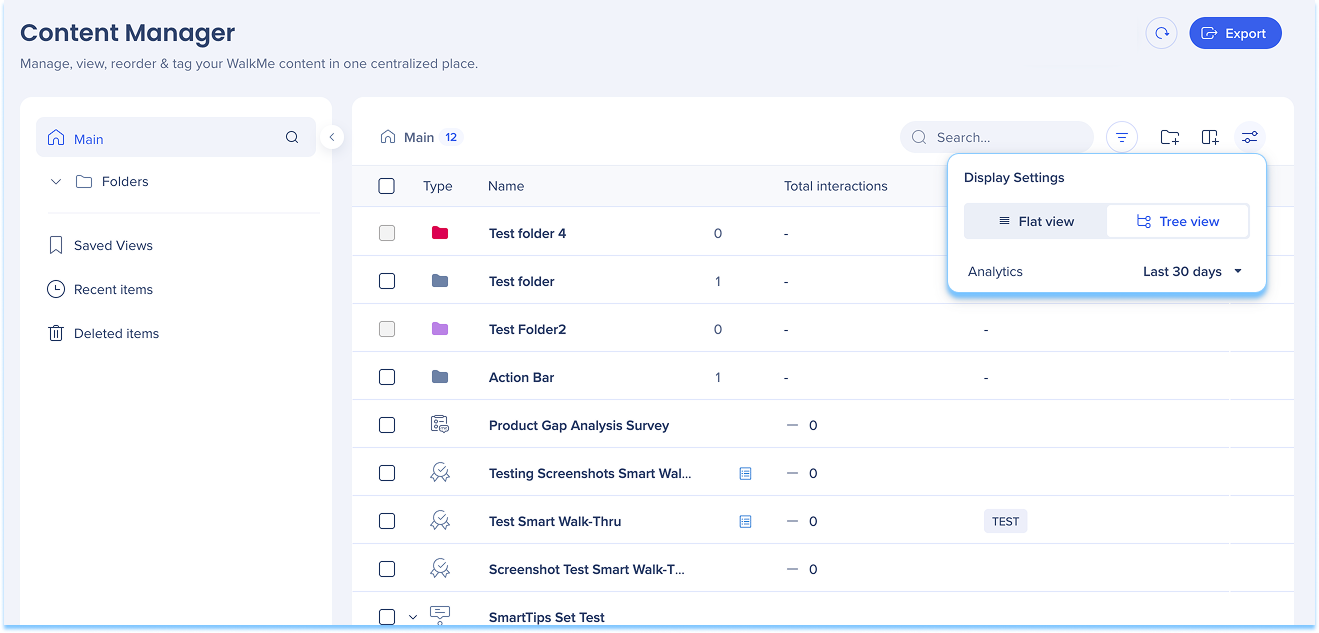
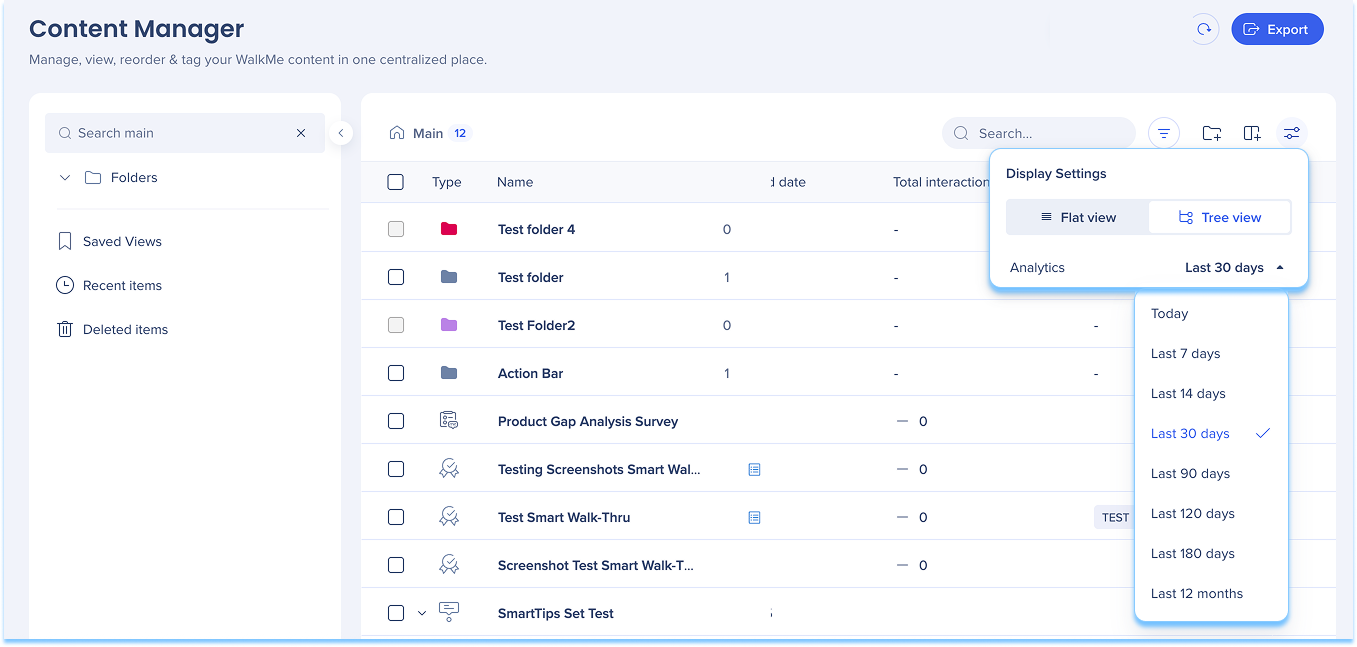
Display settings
Use display settings to switch between:
Flat view: Displays content in a single list without hierarchy
Tree view: Displays content in a hierarchical structure with categories and subcategories
Analyze Engagement and Performance
Inline trend indicators
Inline trend indicators show performance changes directly in the table and item drawer, without switching to Insights.
Trend indicators appear next to:
Unique users
Interactions
Goal completions
Each metric includes a visual indicator:
Green arrow indicates an increase
Red arrow indicates a decrease
No arrow indicates no trend when the previous period value was zero
Trend calculations are based on the selected date range and update dynamically.
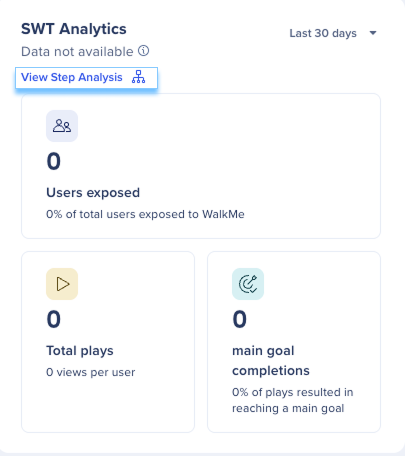
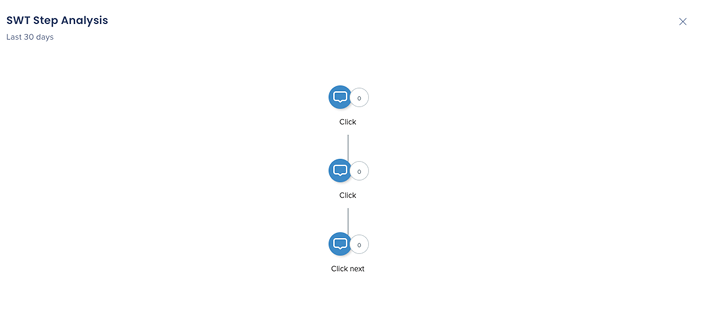
Smart Walk-Thru step analysis
View drop-offs, user paths, and step-level performance directly within the Smart Walk-Thru drawer.
Open the step analysis map
Select View Step Analysis
Review the Smart Walk-Thru analysis map
Interaction data date filter
Use the interaction data date filter to view analytics for a specific time range. You can access the date range filter in two ways:
From Display settings
Select the Display Settings icon
Select the dropdown next to the analytics label
Choose a time range
From an individual item
Select an item to open its detail panel
In Preview & Insights, select the dropdown next to the analytics label
Choose a time range
Analytics filters require at least one analytics column, such as unique users, total interactions, or goals reached.
Use Views to Monitor Content
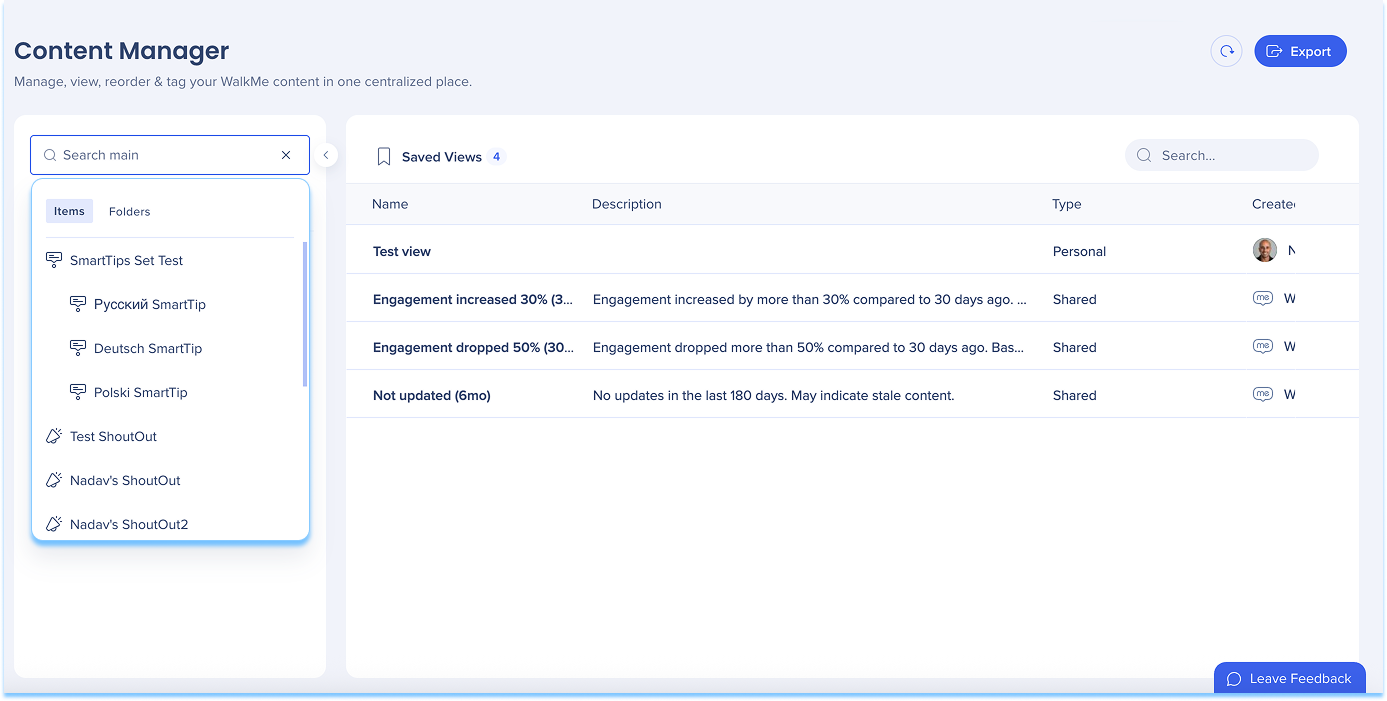
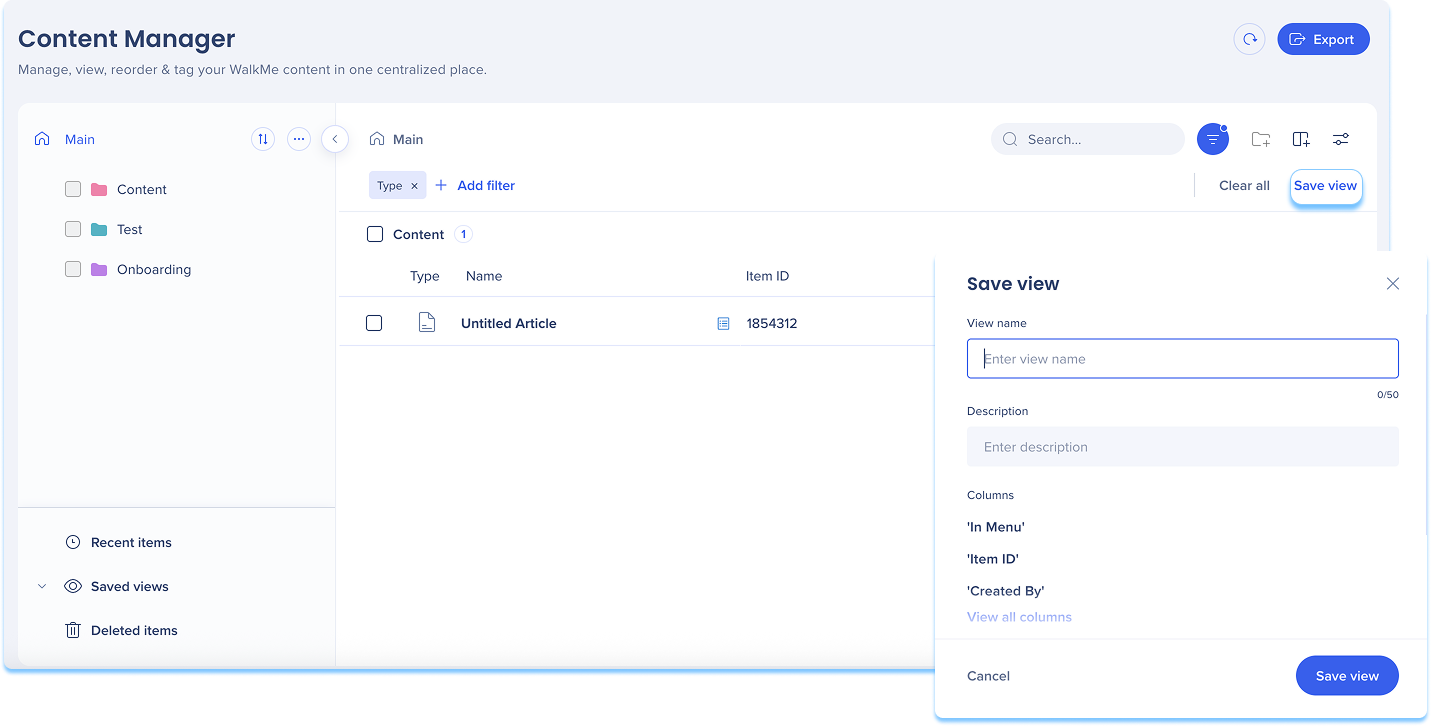
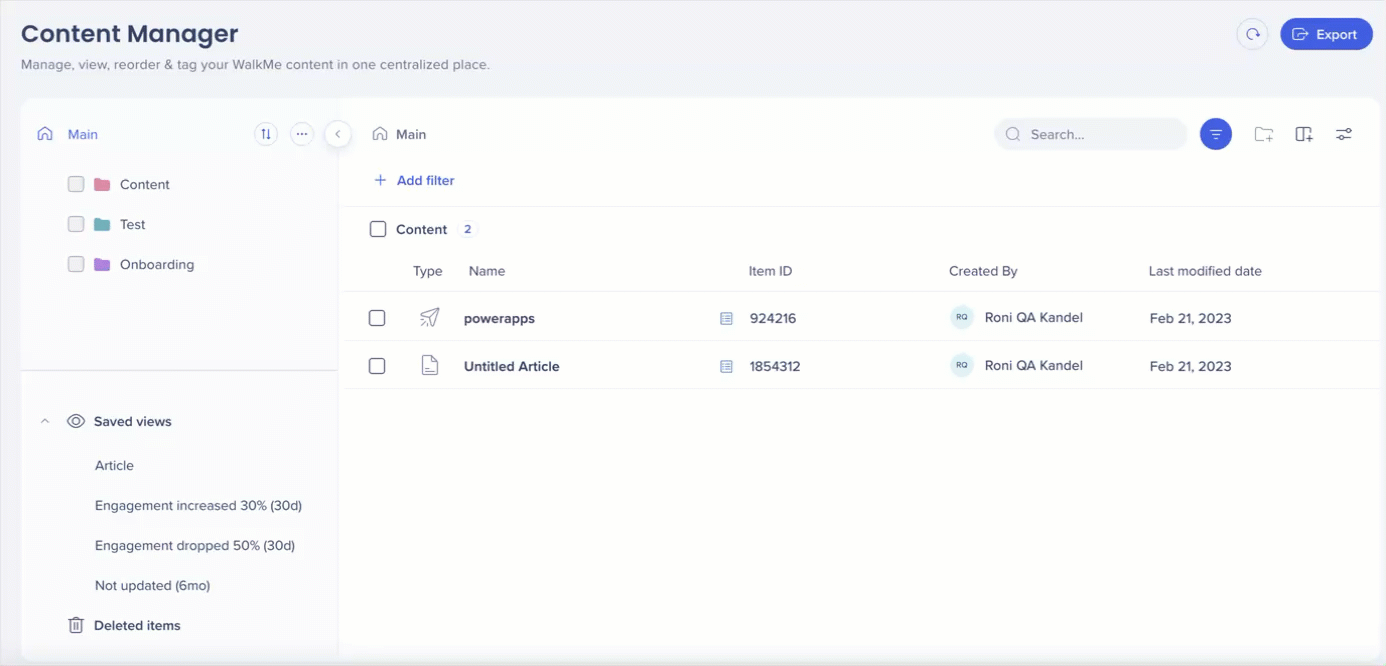
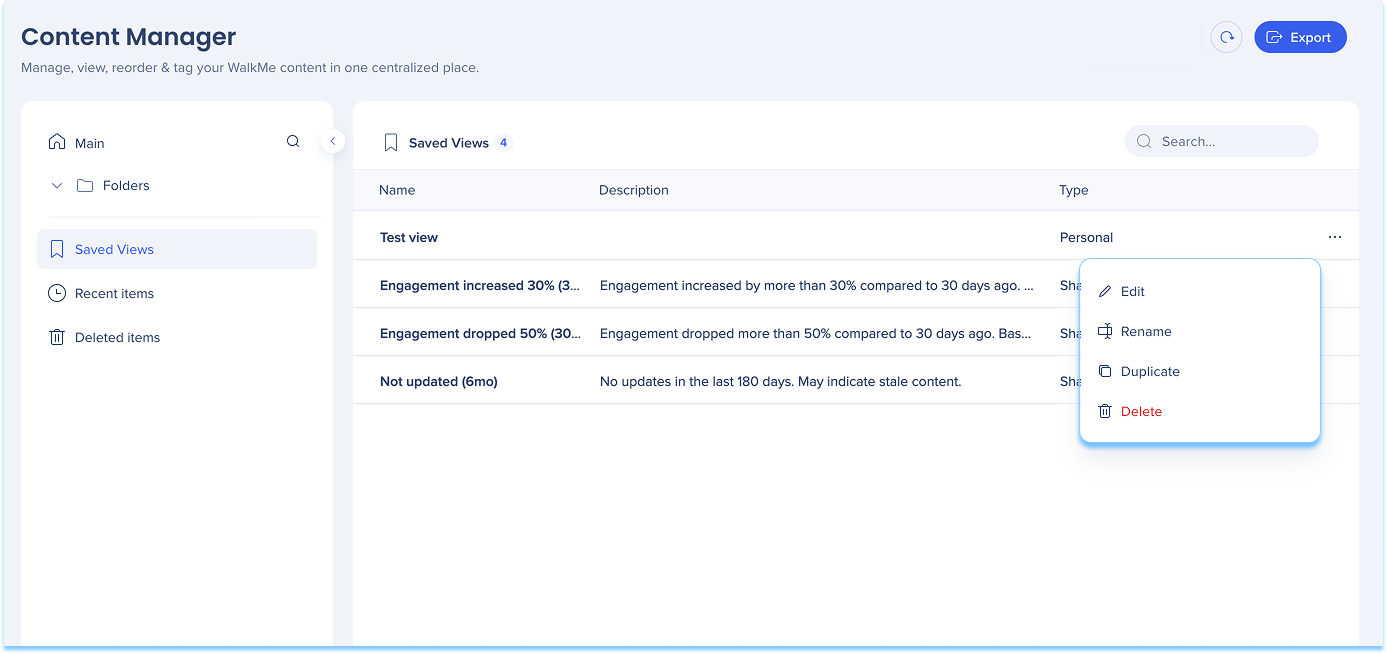
Saved views
Saved views let you save and reuse table configurations to monitor content more efficiently. Saved views can include:
Column selections
Filters
Sorting preferences
Saved views appear in the left panel and update automatically as items change.
Create and manage views
Create a view
Apply filters to the table
Select Save View
Enter a view name and description
Select Save View
Saved views are dynamic, so new items that match the filters appear automatically, and archived items are removed.
Add items to a view
To add a single item, open the item Options menu and select Create or add to view
Choose a new or existing view
Select Save
Add multiple items to a view
To add multiple items, select items using the checkbox, then select the Eye icon
Choose a new or existing view
Select Save
Remove items from views
Remove a single item
Open the Saved views dropdown
Open the Options menu for the view
Select Remove from view
Note
Remove from view is not relevant for filters, only items added manually.
Remove multiple items
Open the Saved views dropdown and select a view
Select multiple items
Select the Remove from view icon
Views options
Each saved view includes additional actions:
Rename
Duplicate
Delete
Access these options from the Saved views dropdown.
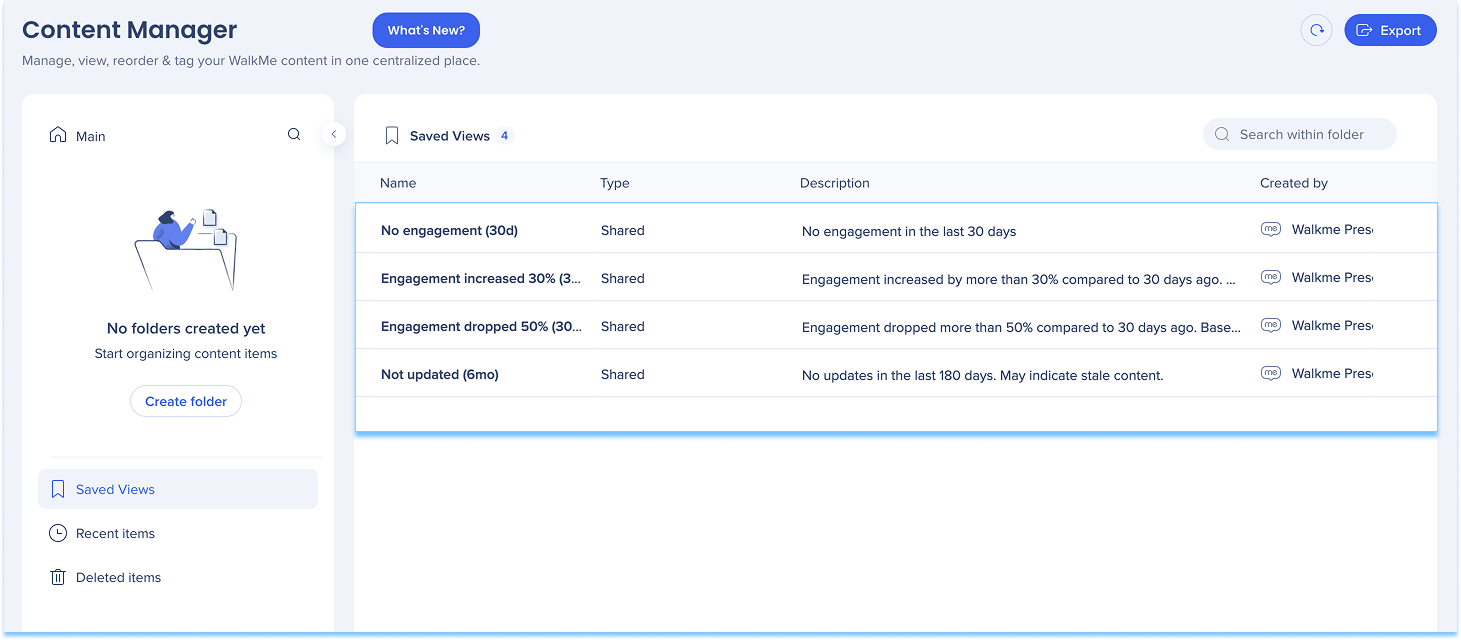
Advanced engagement filters
Advanced engagement filters are predefined, read-only views that help identify content requiring attention.
Engagement increased 30% (30d): Shows content with a significant rise in engagement over the past 30 days
Engagement dropped 50% (30d): Highlights content with a sharp drop in engagement over the past 30 days
Not updated (6mo): Lists items that haven't been updated in the last six months
No engagement (30d): Highlights content with no engagement over the past 30 days
These views can be recreated manually using filters if you need to adjust the criteria.
Recent items
Use Recent items to quickly access content that was recently added to the workspace.
SmartTip set display
Select a SmartTip set to view all SmartTips included in that set.
Work with Metadata and Columns
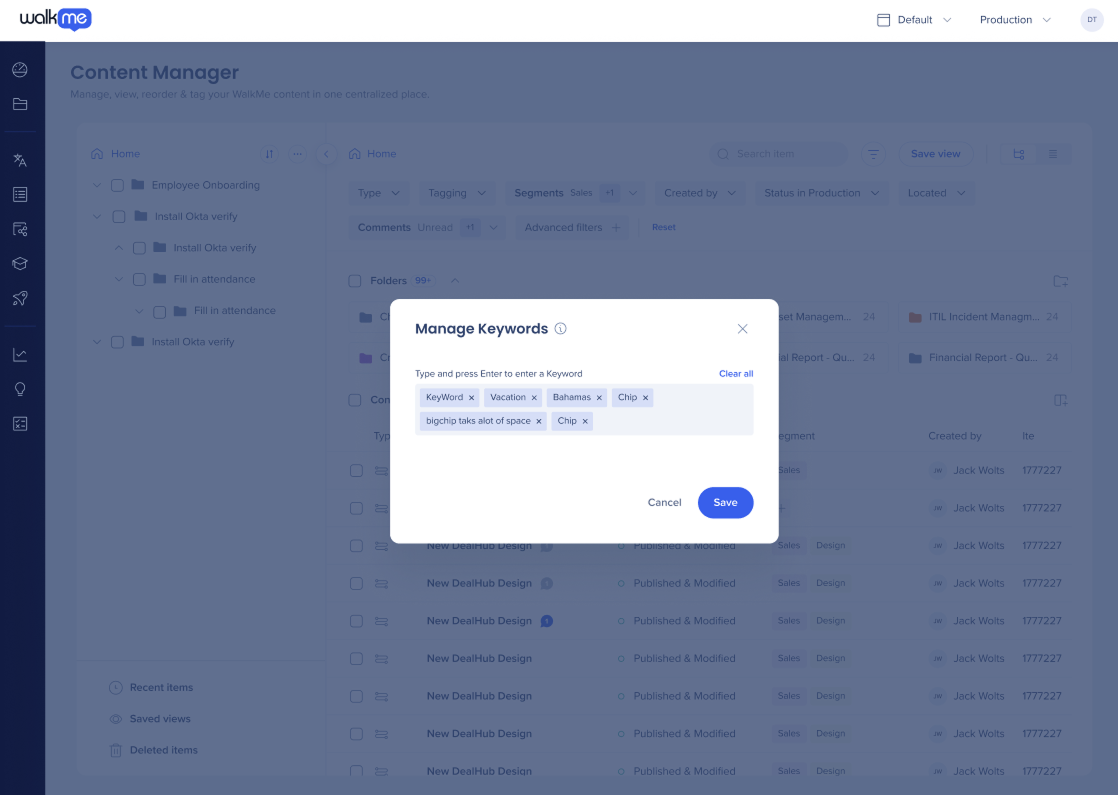
Keywords
Use keywords to help search, filter, and organize content.
Add keywords:
Select Manage Columns to display the keyword column
Select the + icon in the Keyword column for an item
Enter a keyword and press Enter
Select Save
Manage keywords:
Select a keyword in the Keyword column
In the Manage Keywords window:
Select x to remove a keyword
Enter a new keyword and press Enter to add one
Select Save
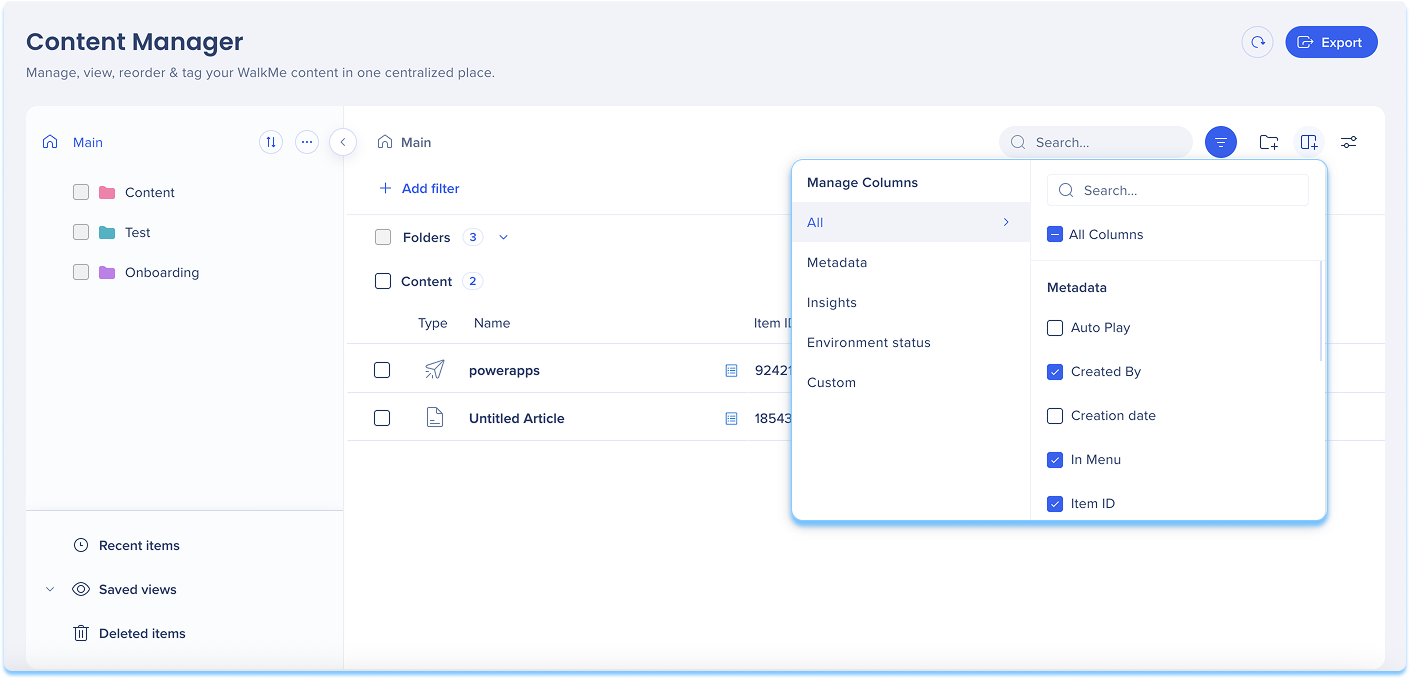
Columns management
Use column management to control which data appears in the table.
Select Manage Columns
Select the columns you want to show or hide
The Type and Name columns are always visible.
Last modified date column
The Last Modified Date column reflects content changes.
It shows past data on all items
It does not include modifications to:
Global CSS
Segment rules connected to the item
Shared assets, such as images
Status changes, such as publishing or archiving
Note
The editor description field is synced with the Content Manager, letting you view, edit, filter, and export descriptions without switching tools
Descriptions for Smart Walk-Thrus are not yet supported in the Content Manager
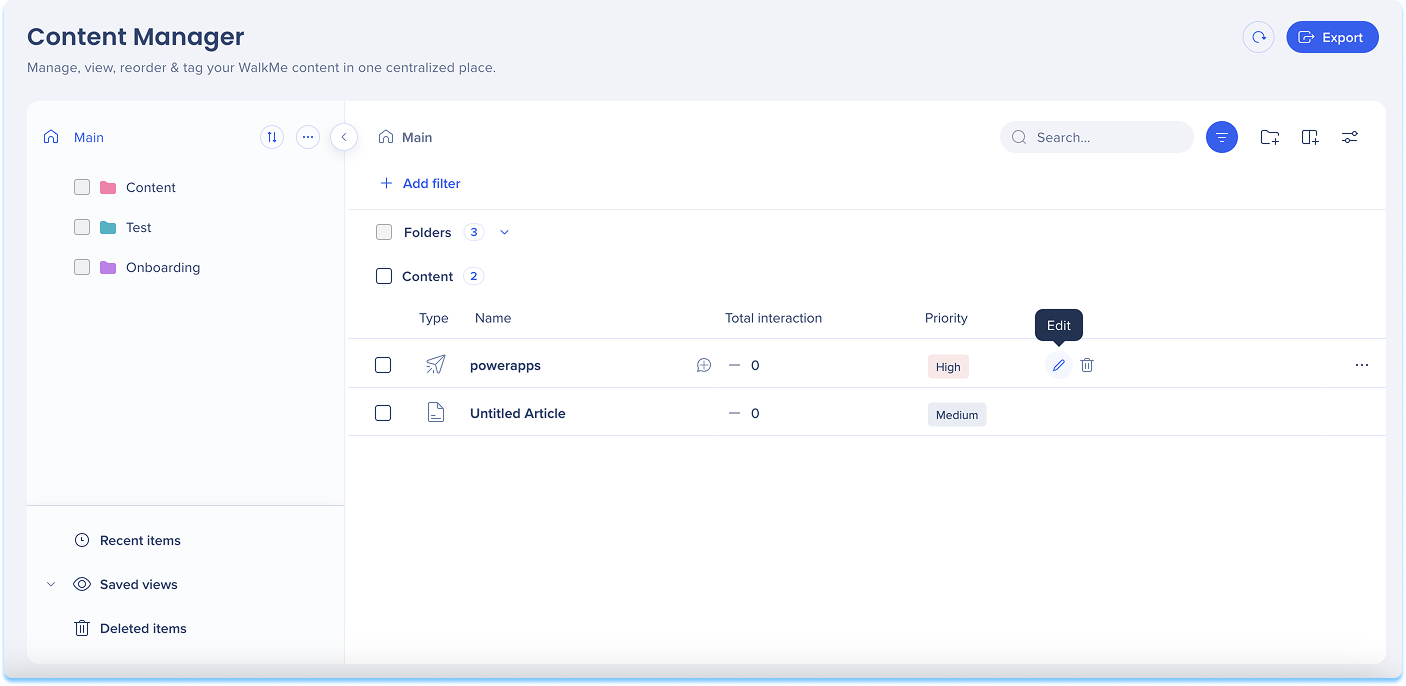
Custom metadata fields
Custom metadata fields let you track and manage additional information for items. Metadata appears in the table and item drawer and can be used for sorting, filtering, and bulk updates.
Create a custom field
Select Manage Columns
Select the + icon in the Manage Columns panel
Enter a column name
Choose a column type:
Free text
Dropdown
Date
Link
Numeric
Optional: Turn on Apply to all systems to make the field visible across environments
Select Create Custom Field
Note
Only admins can create custom metadata fields
Each account can have up to 100 custom metadata fields
Edit metadata values
Edit a single item
Locate the item in the table
Select the metadata field
Enter or select a value
Select Save
Edit multiple items
Select multiple items
Select the Edit custom field icon
Choose a field and enter a value
Select Save
Clear metadata values
Select the items that contain the values you want to remove
Select the Edit custom field icon
Choose the field
Select Clear Field Values
Note
This will remove the data for all selected items. This action cannot be undone.
Show or hide custom fields
Select Manage Columns
Scroll to the Custom section
Select Hide for this system or Show for this system
Note
Hiding a column only removes it from view. It does not delete data or remove values from items.
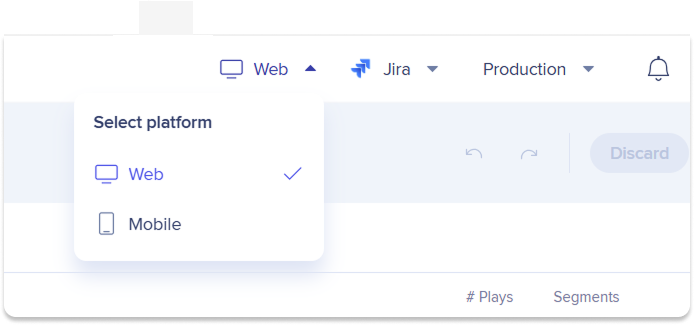
Platform-Specific and Advanced Features
Switch platforms
If your account includes both web and mobile platforms, you can switch between them to manage platform-specific items.
Use the platform selector to:
View items created for a specific platform
Manage content without leaving Content Manager
Surveys
You can open Console Survey items directly in the Surveys console app from Content Manager.
Select Open in Surveys to open the item in the Surveys console