Welcome to the
WalkMe Help Center
Please log in to continue

Please log in to continue

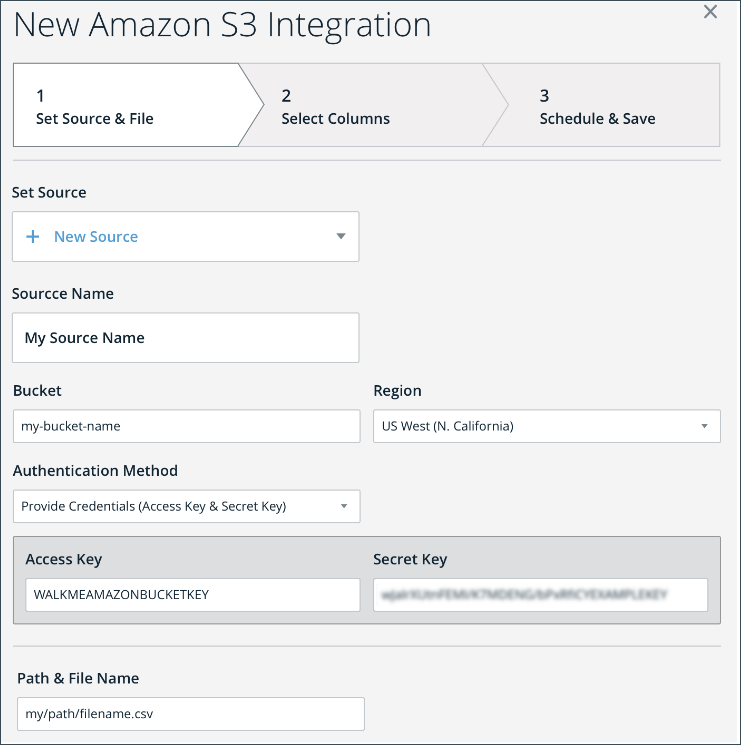
By using WalkMe's Integration Center it is possible to either export Insights reports to an Amazon Simple Cloud Storage (S3) bucket or to pull attributes from an Amazon Simple Cloud Storage (S3) bucket and populate data into WalkMe from for analytics and content segmentation.

This option enables adding an S3 bucket destination by having the client create an IAM role that can access their S3 bucket, and enabling WalkMe to assume that role to access it.
{ "Version": "2012-10-17", "Statement": [ { "Sid": "AllowWalkMeRole0", "Effect": "Allow", "Action": "s3:ListBucket", "Resource": "arn:aws:s3:::<bucket-name>/" }, { "Sid": "AllowWalkMeRole1", "Effect": "Allow", "Action": [ "s3:GetObject", "s3:PutObject", "s3:DeleteObject" ], "Resource": "arn:aws:s3:::<bucket-name>/*" } ]} |
{
  "Version": "2012-10-17",
  "Statement": [
    {
      "Effect": "Allow",
      "Principal": {
        "AWS": [
           "arn:aws:iam::584278441476:role/walkme-s3-integrations-prod" // for US
           "arn:aws:iam::584278441476:role/walkme-s3-integrations-eu-prod" // for EU
        ]
      },
      "Action": "sts:AssumeRole",
      "Condition": {}
    }
  ]
}
This option enables adding an S3 bucket destination by having the customer to configure S3 bucket permissions to allow WalkMe IAM user to access the bucket:
{
    "Version": "2008-10-17",
    "Id": "Policy1234",
    "Statement": [
        {
            "Sid": "AllowWalkMeUser1",
            "Effect": "Allow",
            "Principal": {
                "AWS": "arn:aws:iam::584278441476:role/walkme-s3-integrations-prod"
                "AWS": "arn:aws:iam::584278441476:role/walkme-s3-integrations-eu-prod"
                "AWS": "arn:aws:iam::842147824859:role/walkme-s3-integrations-prod2"
                "AWS": "arn:aws:iam::183129700000:role/walkme-s3-integrations-prod1"
            },
            "Action": "s3:ListBucket",
            "Resource": "arn:aws:s3:::<YOUR_BUCKET_NAME>"
        },
        {
            "Sid": "AllowWalkMeUser2",
            "Effect": "Allow",
            "Principal": {
                "AWS": "arn:aws:iam::584278441476:role/walkme-s3-integrations-prod"
                "AWS": "arn:aws:iam::584278441476:role/walkme-s3-integrations-eu-prod"
                "AWS": "arn:aws:iam::842147824859:role/walkme-s3-integrations-prod2"
                "AWS": "arn:aws:iam::183129700000:role/walkme-s3-integrations-prod1"
            },
            "Action": [
                "s3:PutObject",
                "s3:DeleteObject",
                "s3:GetObject"
            ],
            "Resource": "arn:aws:s3:::<YOUR_BUCKET_NAME>/*"
        }
    ]
}
Note: replace <YOUR_BUCKET_NAME> with your bucket name.
5. Go to the Integrations Center
6. Select AWS S3 to WalkMe
7. Click the Destinations (Sources) button on the top right of the screen
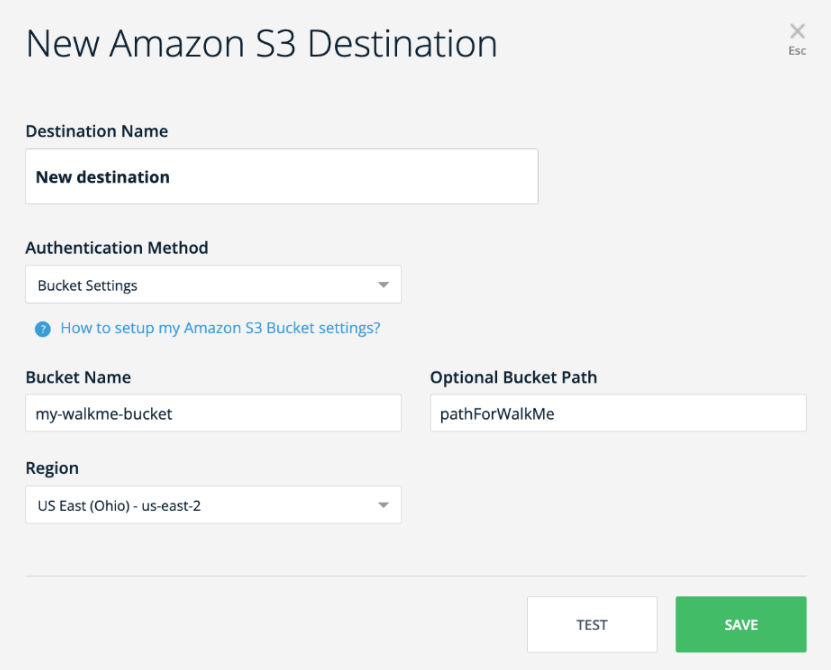
8. Click the green New Destination (Source) button
9. Type a name for the destination (source)
10. Select Bucket Settings from the Authentication Method dropdown
11. Paste your bucket name in the Bucket Name field (exactly same as <YOUR_BUCKET_NAME> on step 4)
12. Select the region of your bucket from the Region dropdown
13. *Optional: Enter a bucket path in the Optional Bucket Path field (WalkMe will access the subfolder)
14. Click Save

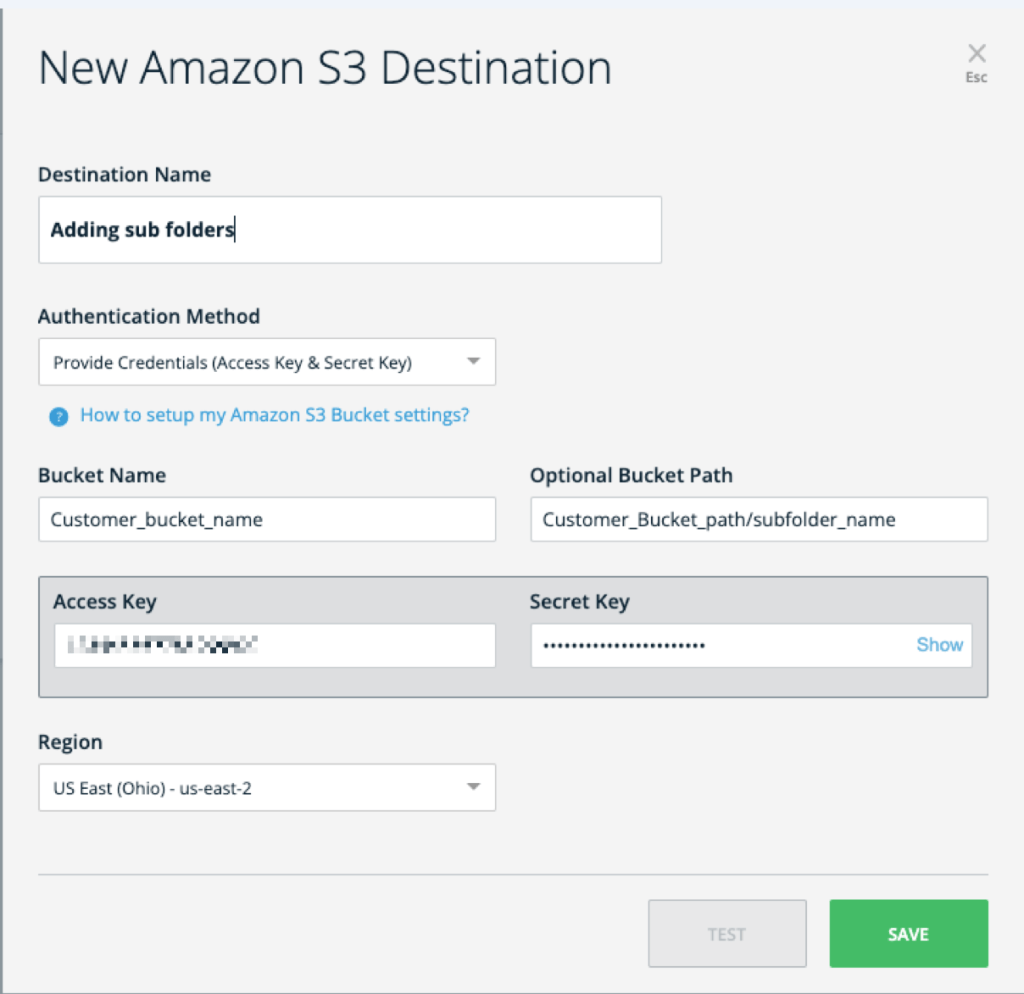
To preserve order within the S3 folder, you can create subfolders inside your S3 destination folder. This can be done both for new destinations or editing existing destinations.
This is especially useful when you are using the S3 destination for more than one system, or for more then one analytic purpose, such as different reports exported for different in-house customer departments.
To add a subfolder, please follow these steps:
