Brief Overview
Tracked Events let you measure meaningful user actions across your application, such as completing a signup, submitting a form, or visiting a specific page.
You can create Tracked Events in the Events page either by defining event rules manually or by capturing elements directly from the application using the WalkMe Editor.
Access
You can create Tracked Events from the Events page in the WalkMe Console.
Insights Events Page
How It Works
Tracked Events use Digital Experience Analytics (DXA) to track specific user actions on your website or application.
They allow you to follow end-user completion of processes with or without WalkMe content present, making them useful for measuring behavior before and after WalkMe is deployed.
Tracked Events can be created either by manually defining tracking rules or by capturing elements directly from the application.
About Insights Tracked Events
Create a Tracked Event Manually
Use manual creation when you need precise control over what data is tracked, such as page visits, specific elements, or WalkMe content actions.
- Select Create Event on the Events page
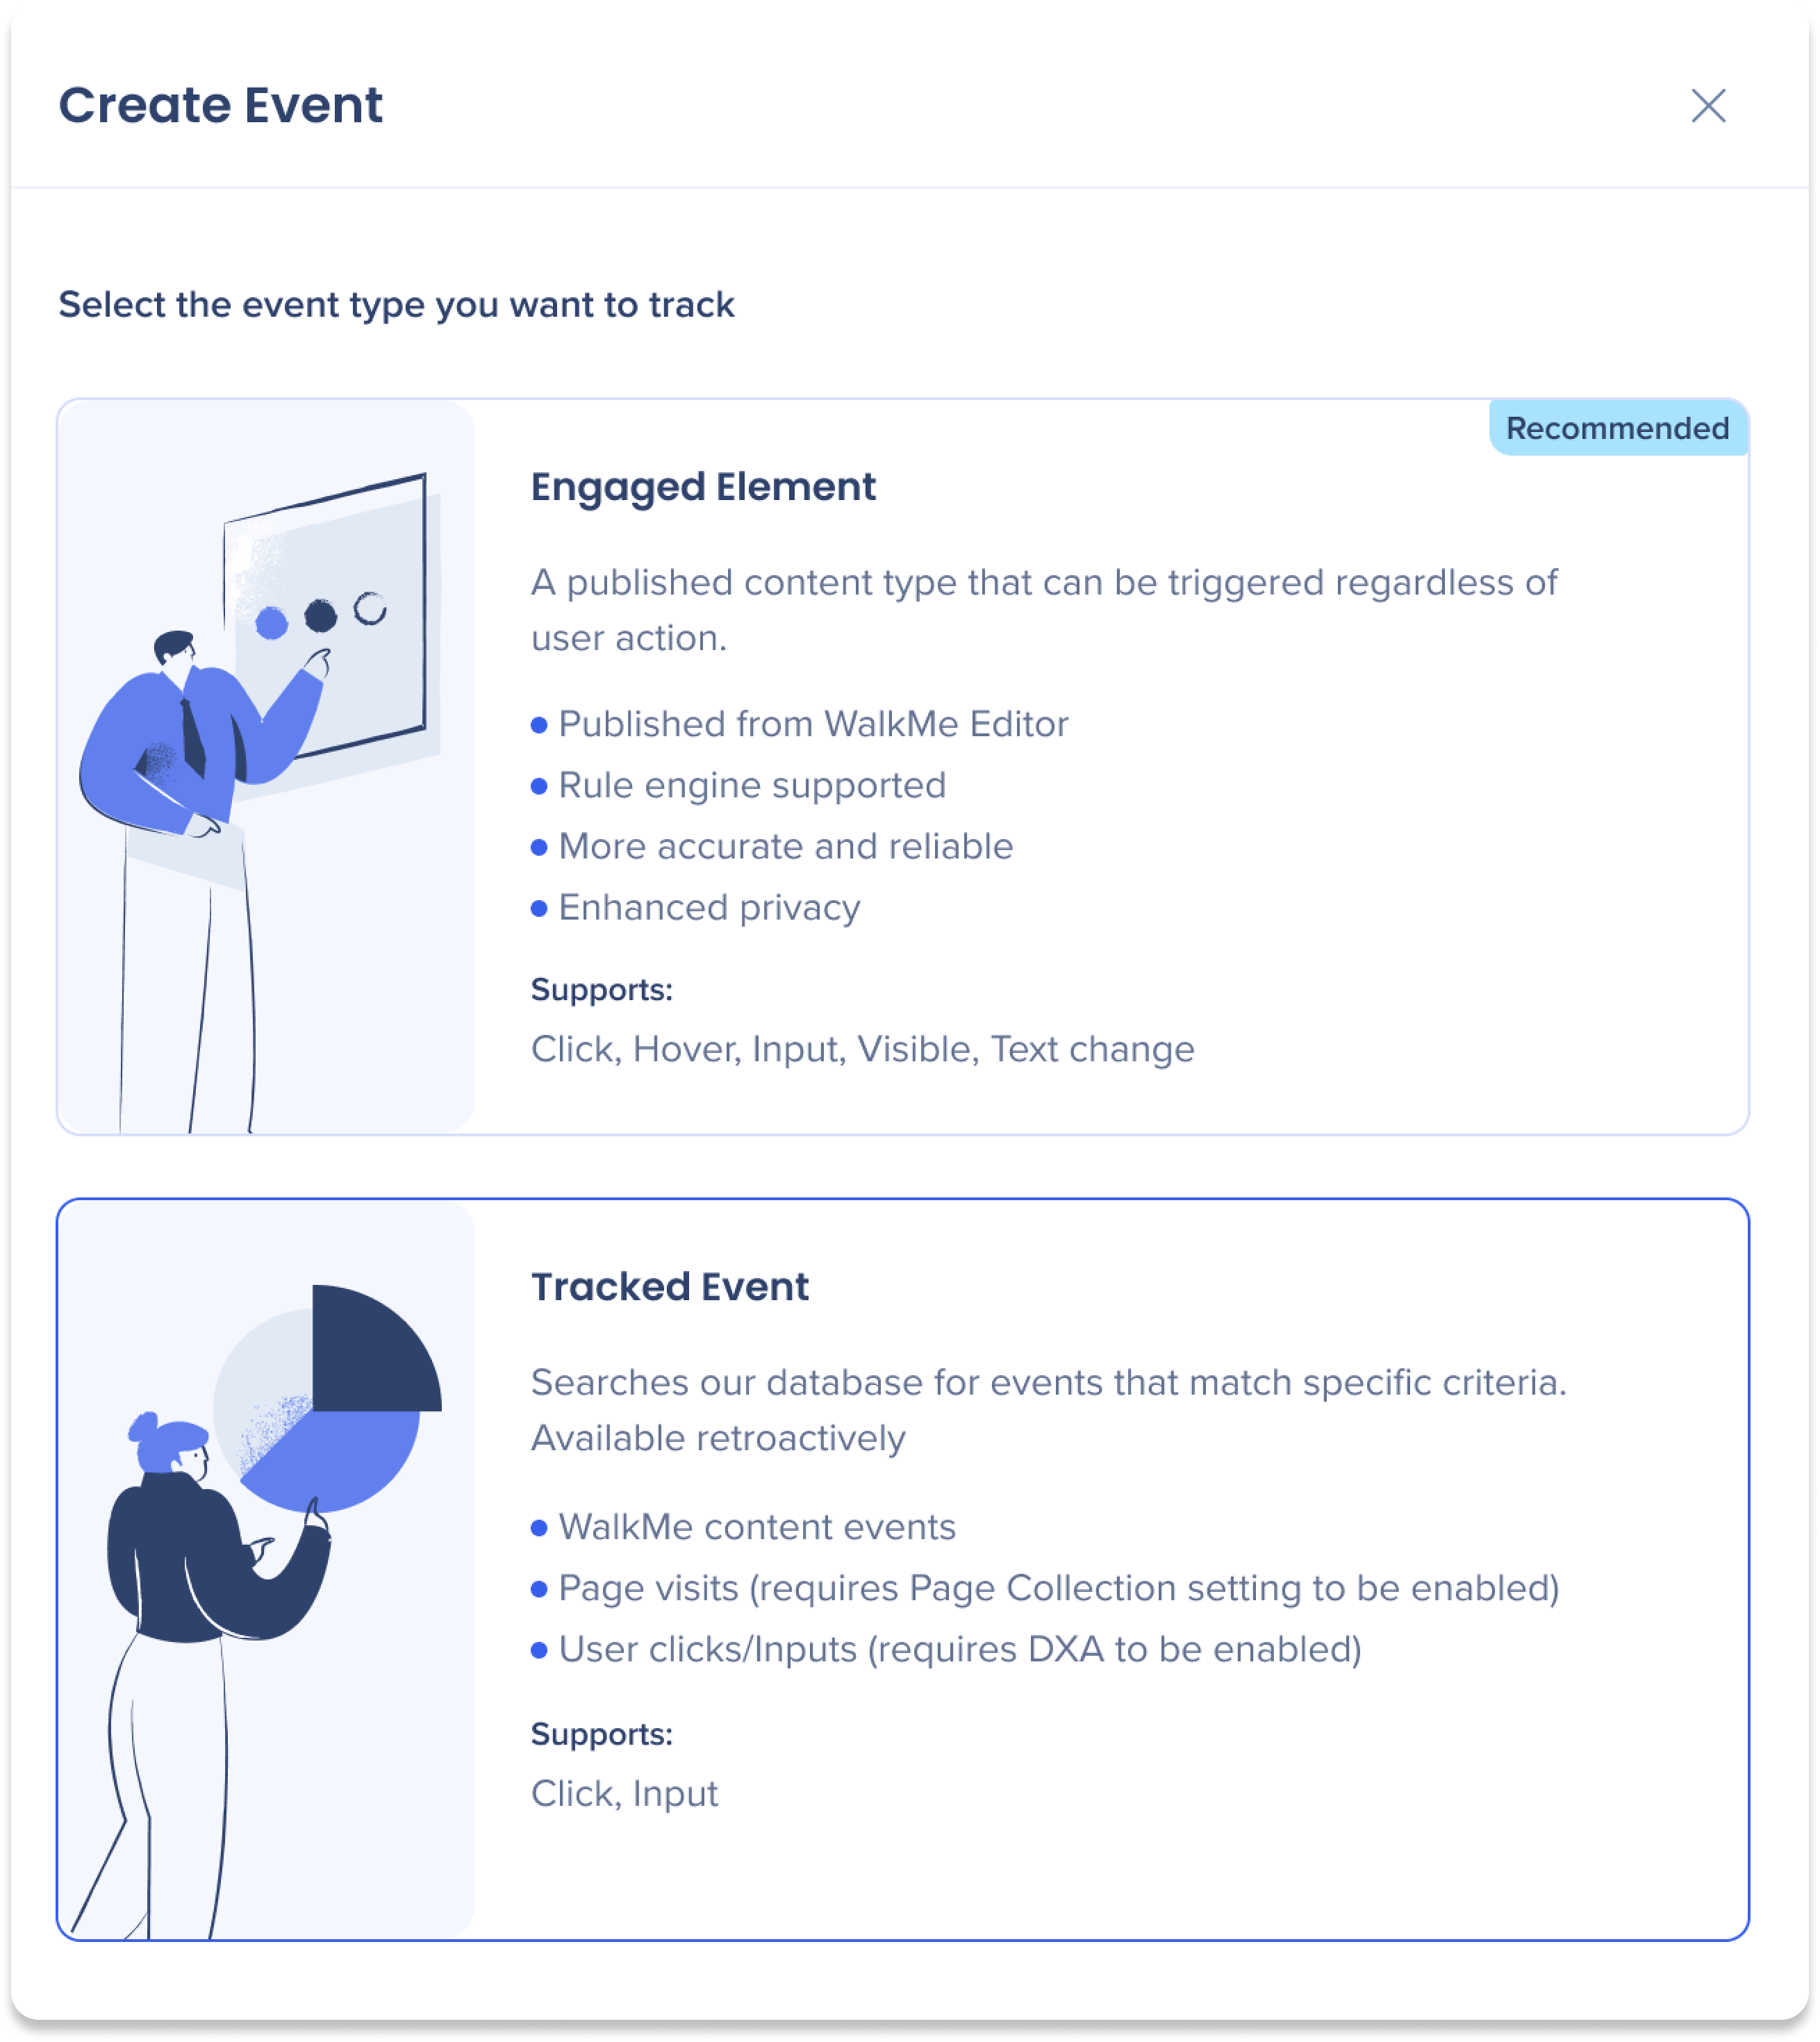
- Select Tracked Event
-
Select Create Manually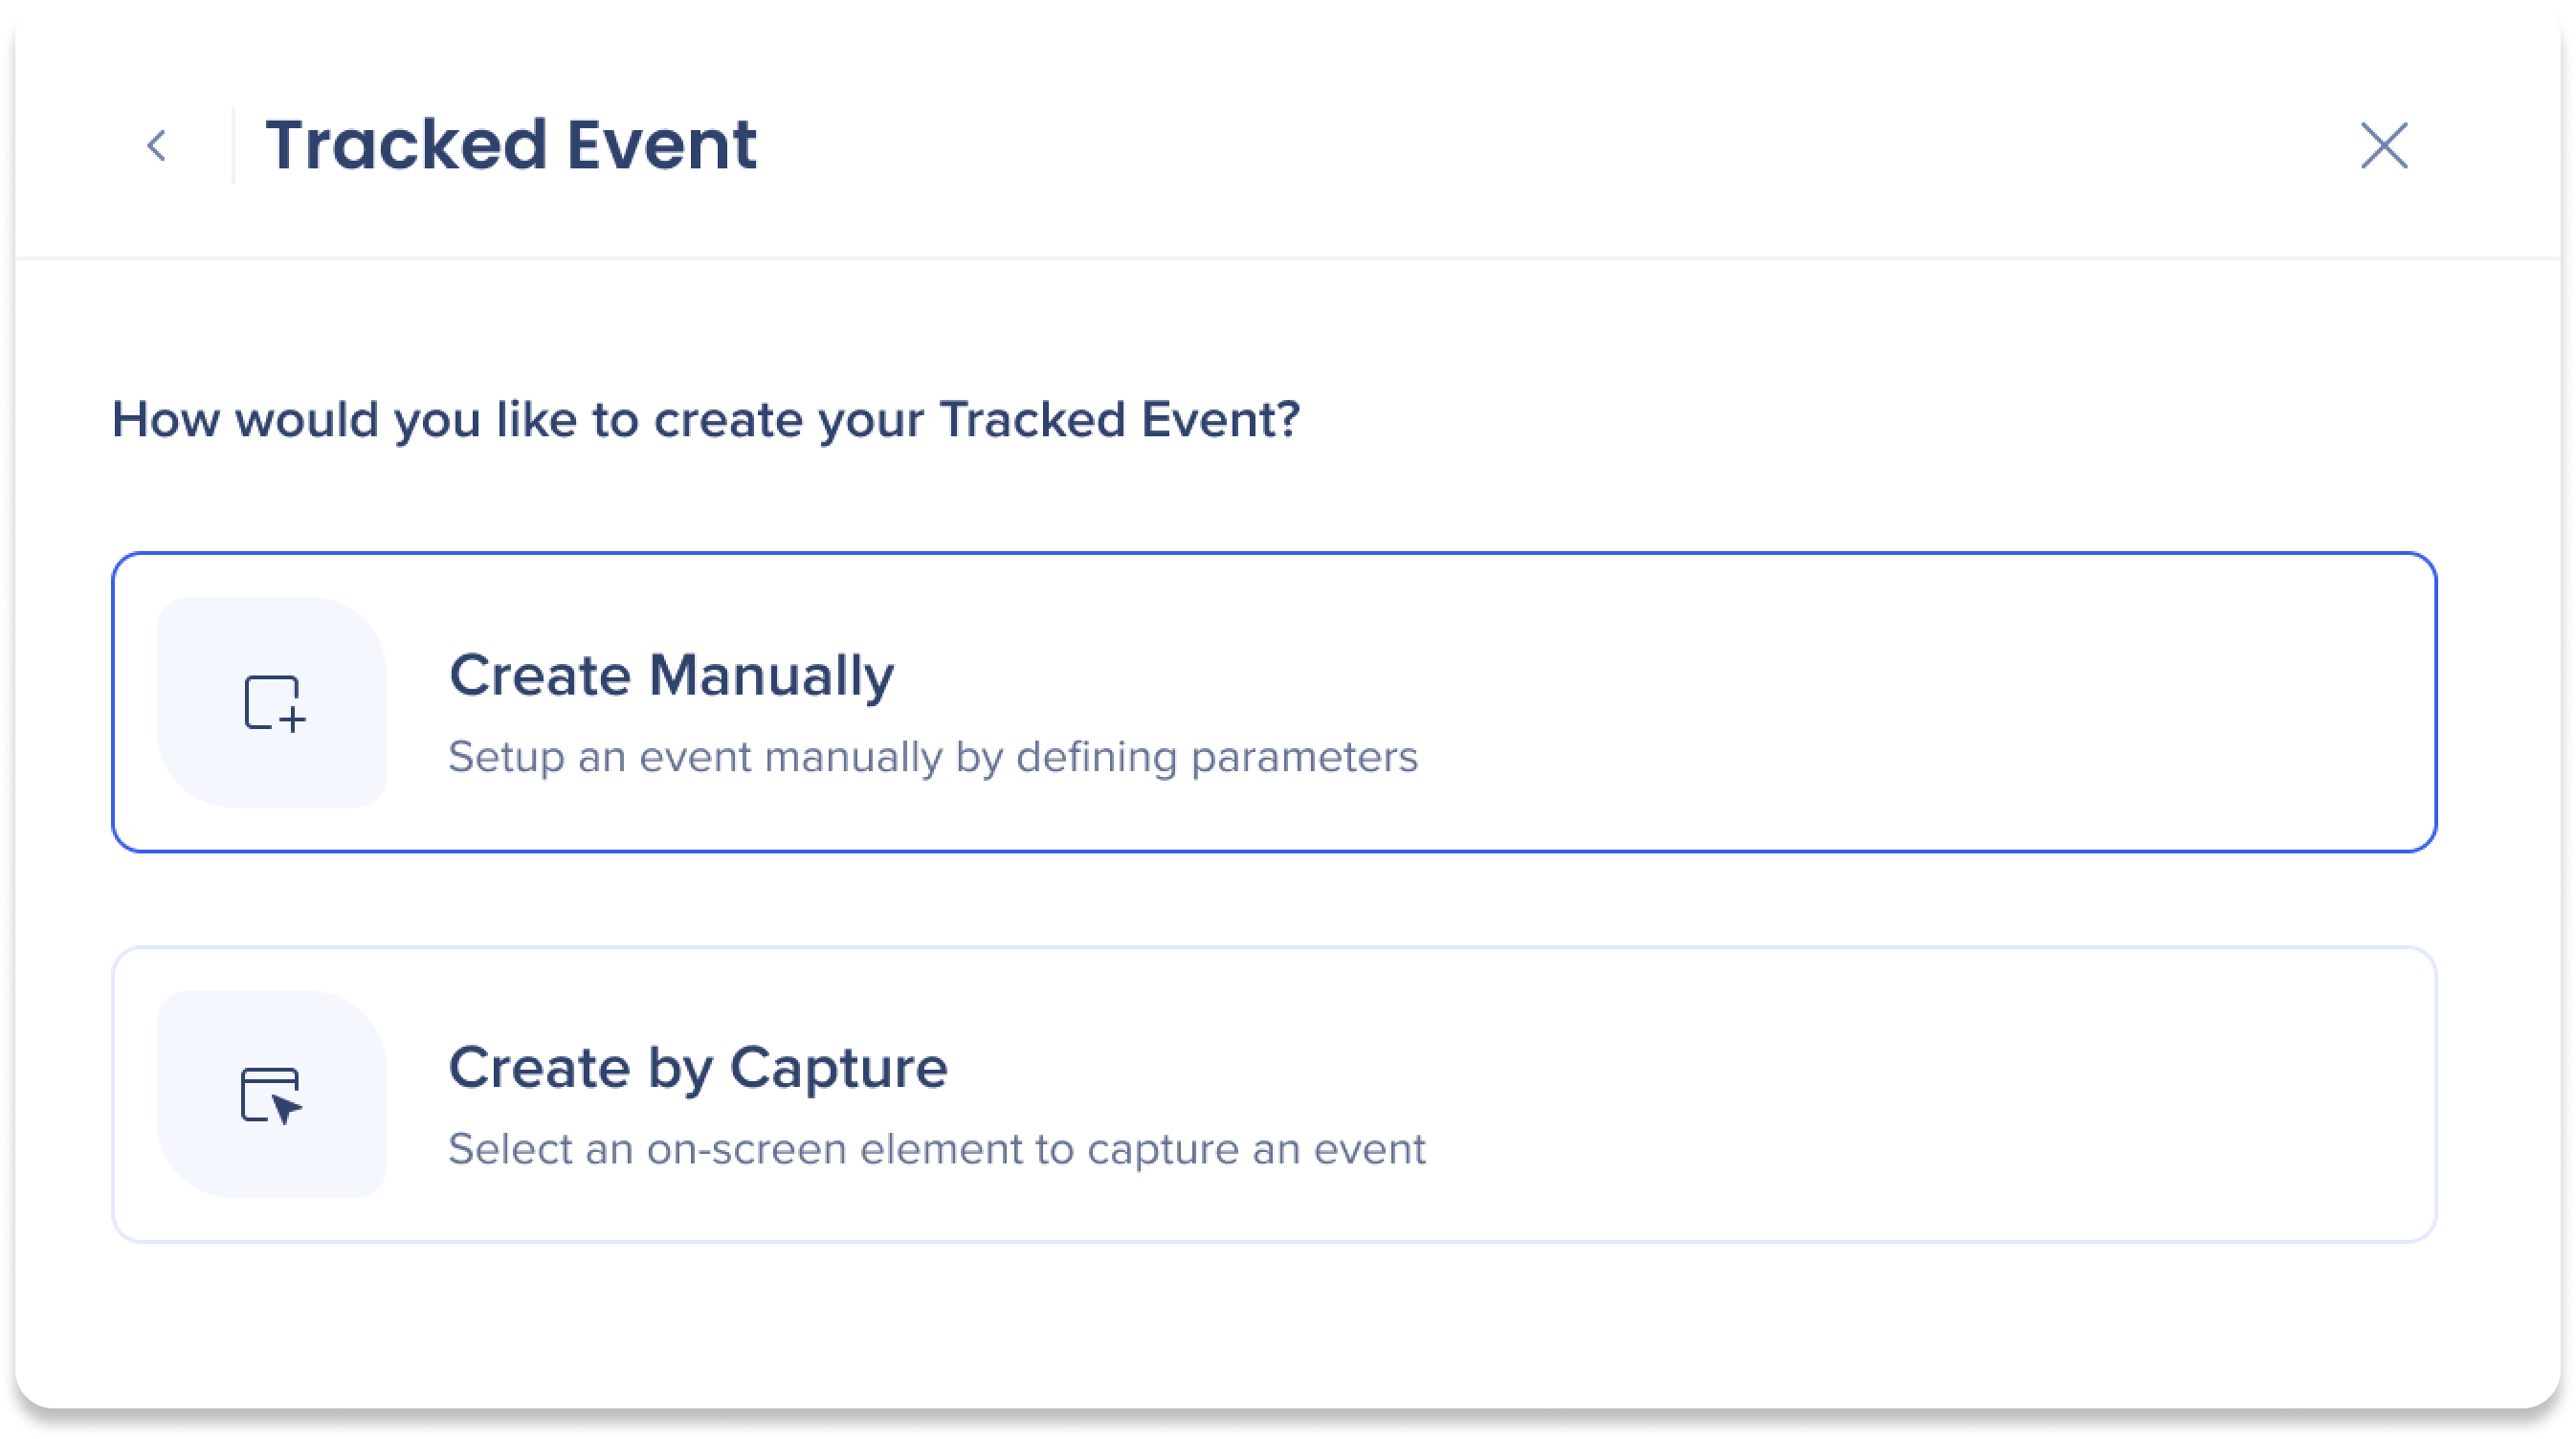
-
Enter a name for the Tracked Event
-
Select a system
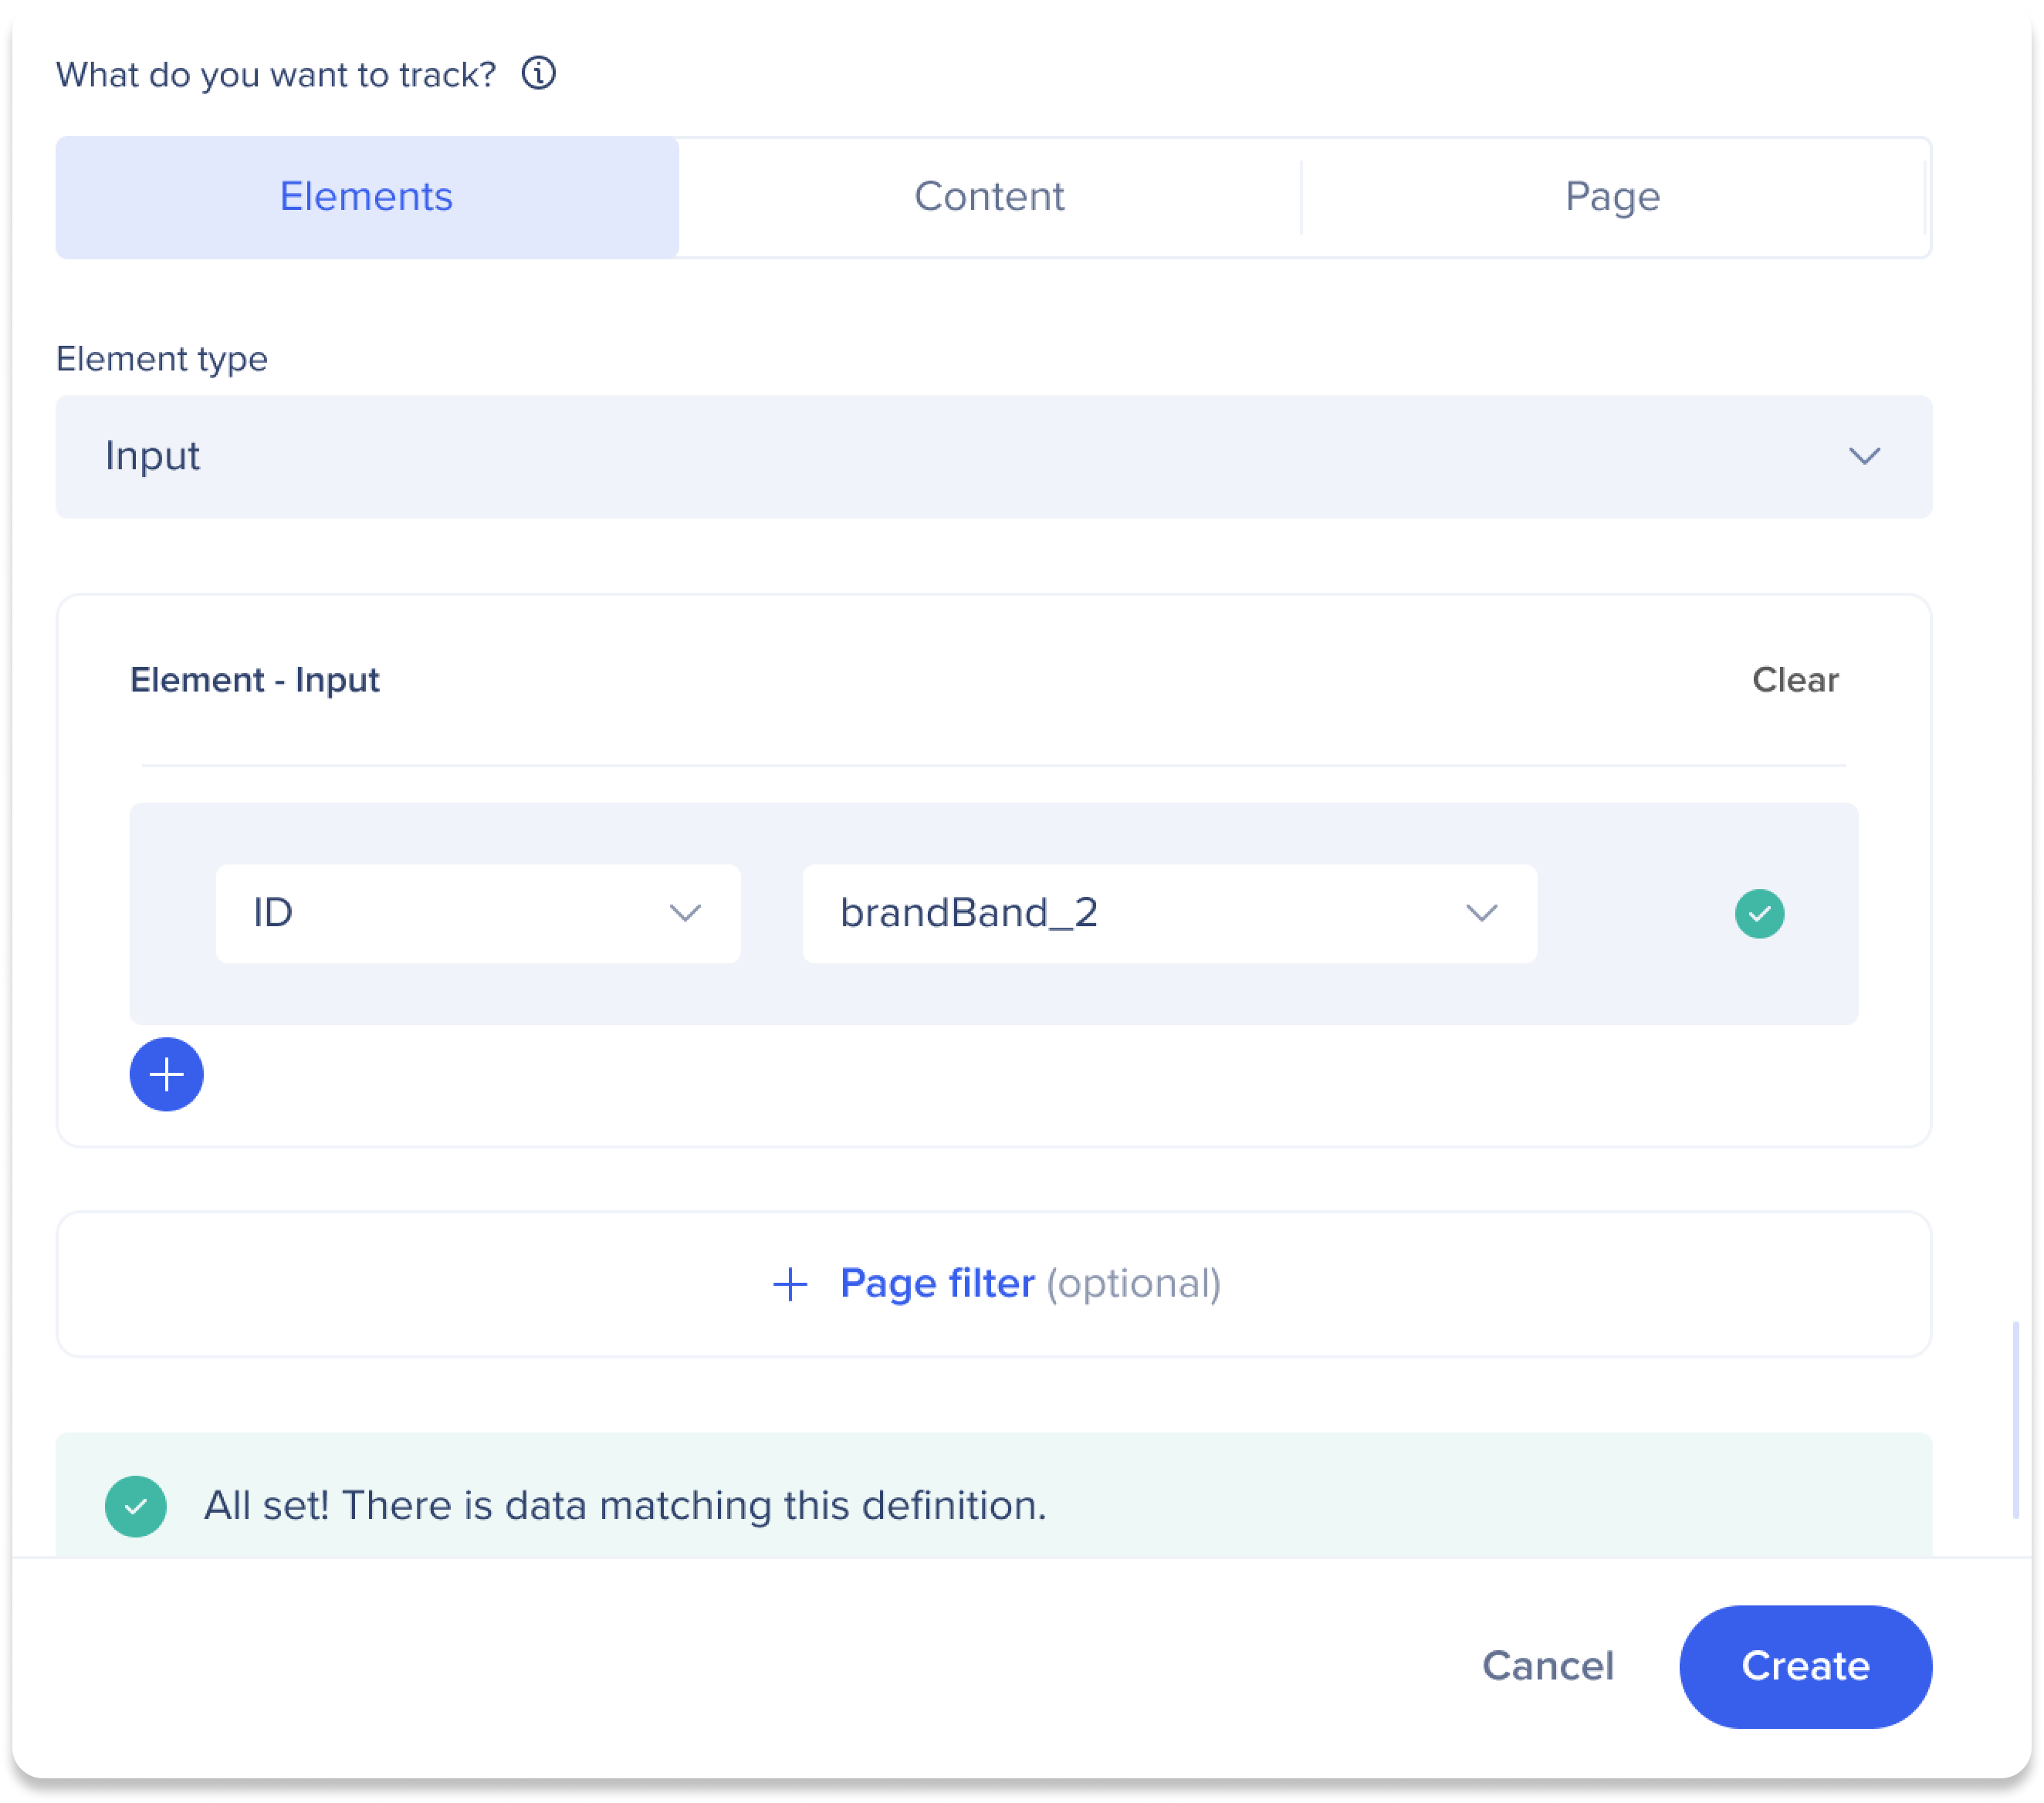
- Select what you want to track:
Track elements (Manual)
Use the Elements data type to track interactions with specific HTML elements.
Note
DXA must be enabled to use the Elements data type.
- Select an element interaction type:
- Use the condition builder to define element rules:
- Label
- Class
- ID
- CSS selector
- Enter or select values for each condition
- Optional: Add page filters to narrow the data set
- Select Create
Best practices
- Select the highest-level element users interact with
- Ensure the definition is unique to avoid aggregating unrelated actions
- Avoid dynamic or randomized classes and IDs
CSS selectors
CSS selectors allow you to precisely define which HTML elements should be tracked.
When to use
- Only when label, class, or ID rules are insufficient
- Requires basic familiarity with CSS
Supported syntax
- ID: #idName
- Class: .className
- Tag: div
- Attribute: [attribute='value']
- Combinations: div.class1.class2 #someId[attribute=value]
Best practices
- Avoid dynamically generated attributes
- Avoid long class names and IDs
- Test selectors using the real-time validation message
Limitations
- Classes longer than 35 characters are not collected
- IDs longer than 40 characters are not collected
- Existing events using deprecated operators remain visible but cannot be edited
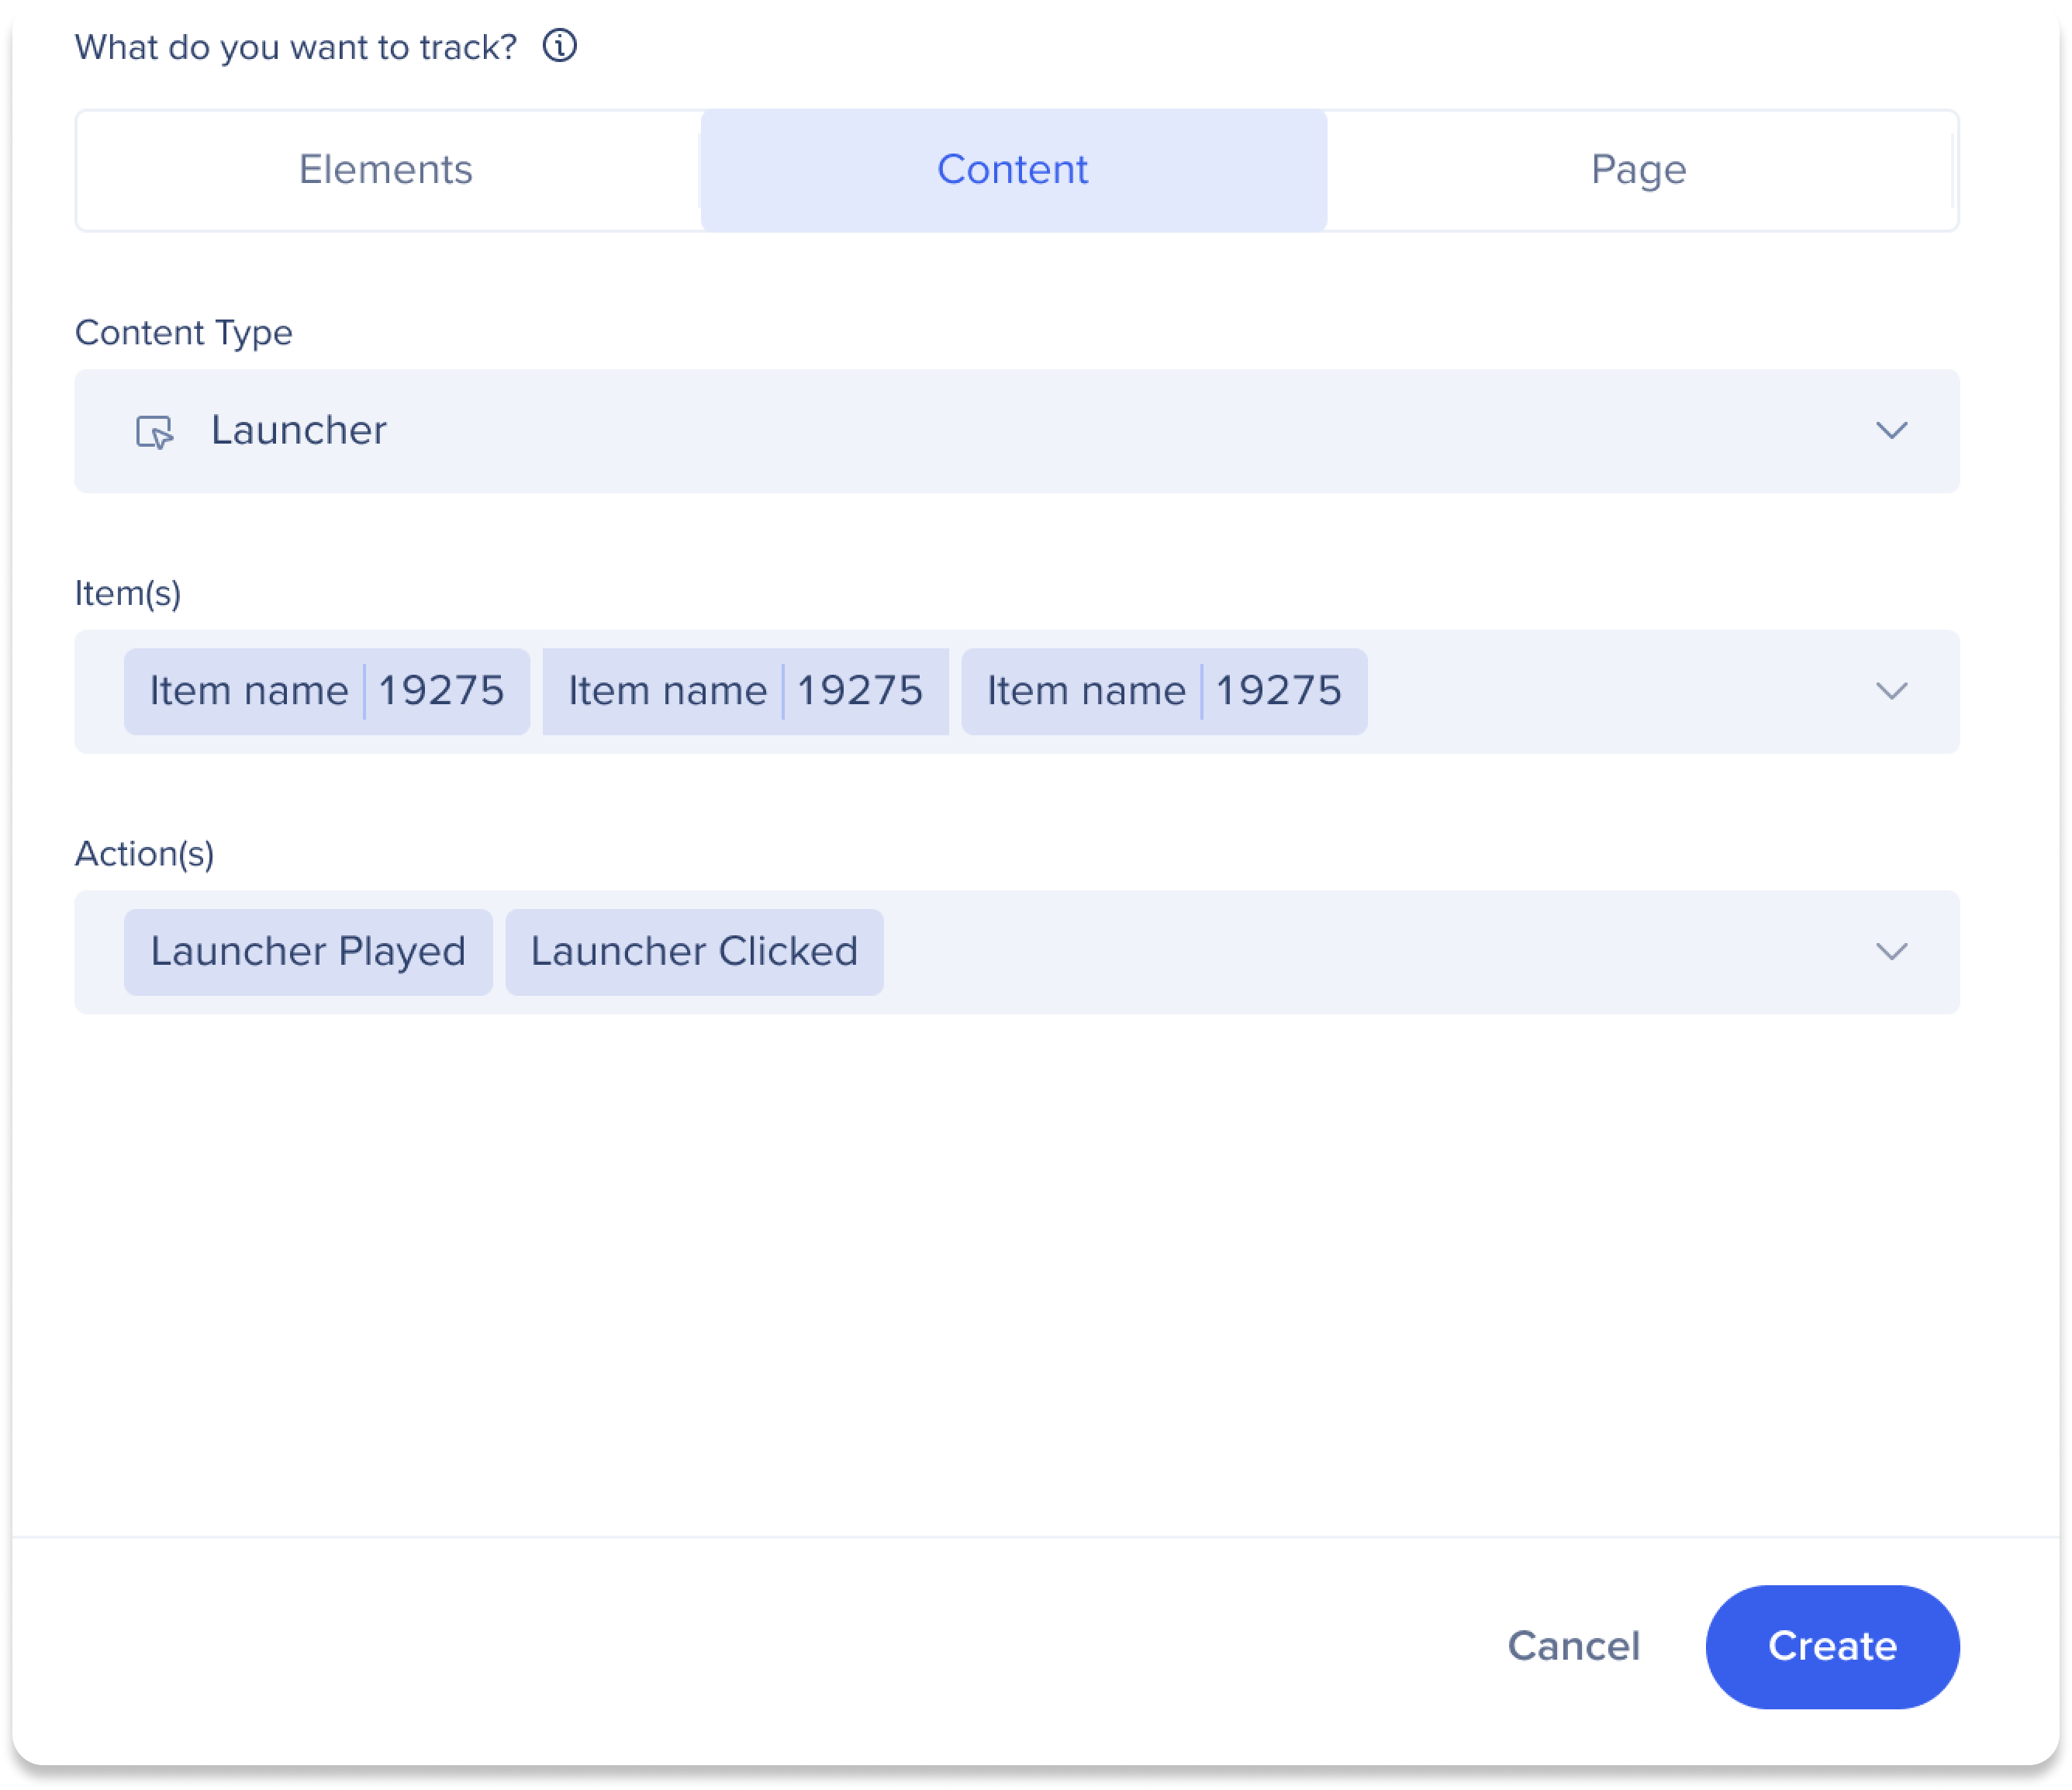
Track WalkMe content (Manual)
Use the Content data type to track interactions with WalkMe items.
- Select a content type (for example, Launcher or ShoutOut)
- Select specific items
- Select one or more actions:
- Select Create
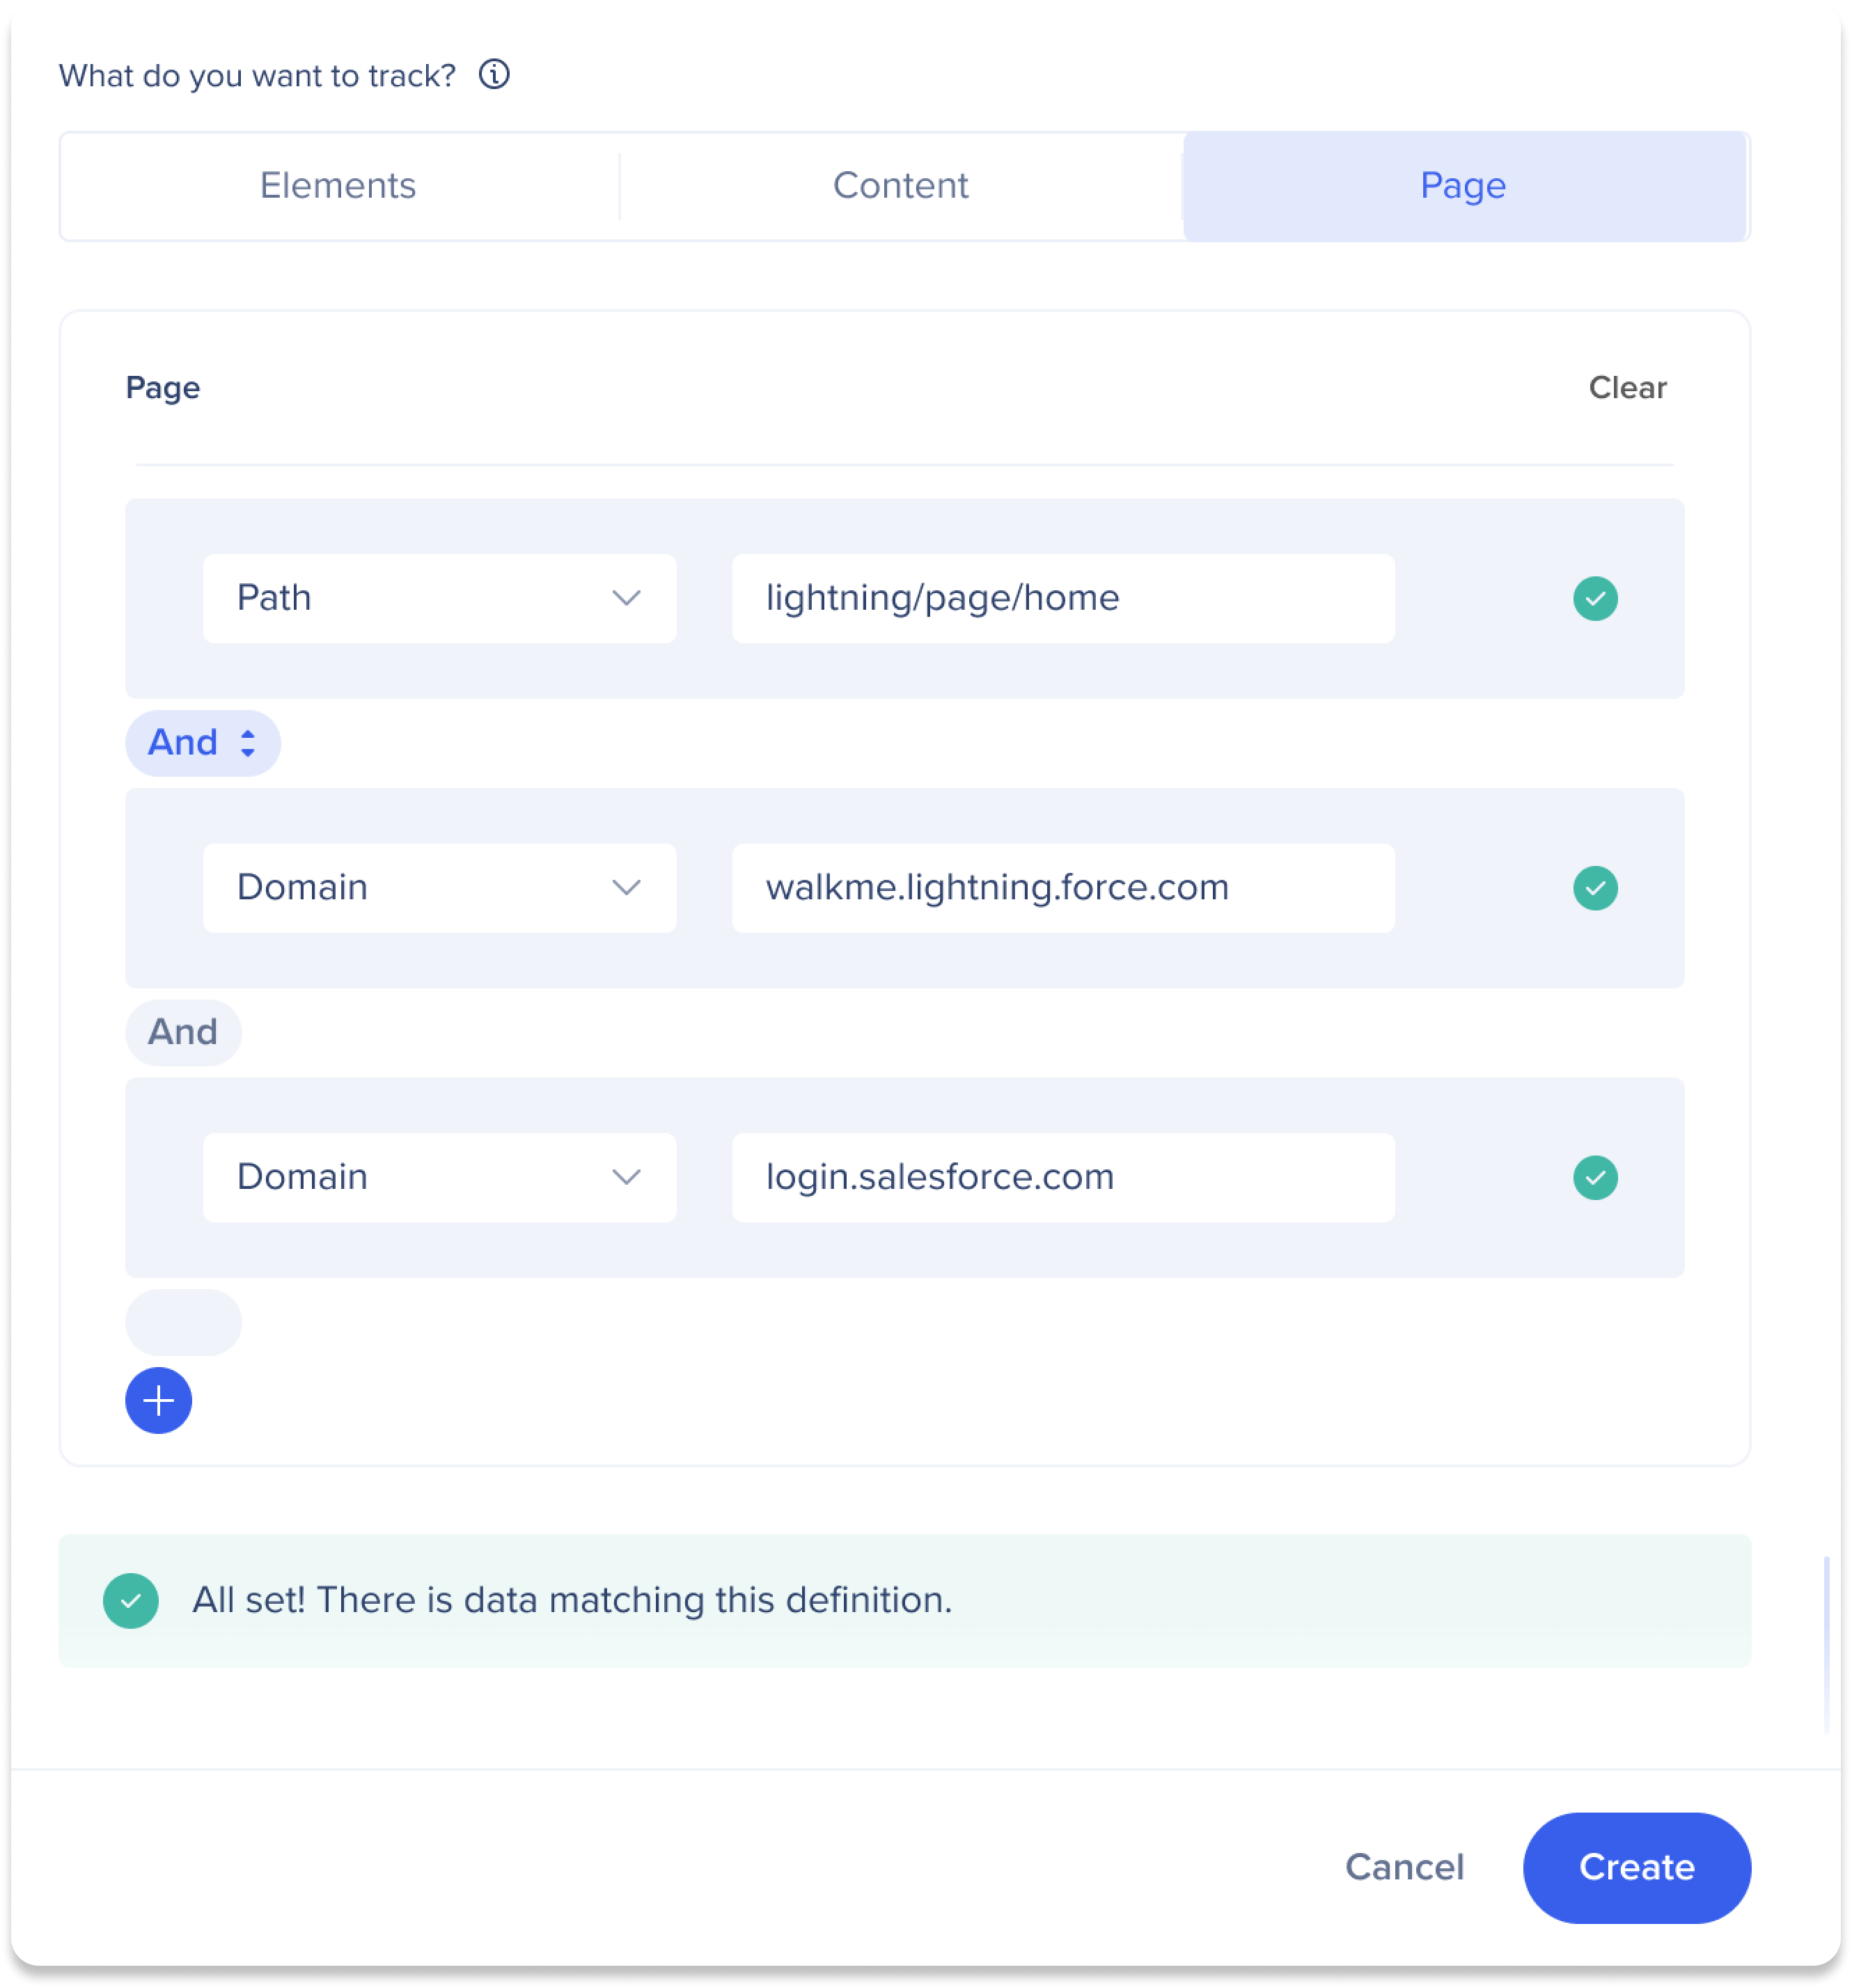
Track page visits (Manual)
Use the Page data type to track visits to specific pages.
Note
Page collection must be enabled.
- Use the condition builder to define page rules:
- URL
- Path
- Hash
- Domain
- Query
- Enter values
- Add additional conditions if needed
- Select Create
Best practices
- Use Path instead of full URLs when query parameters are dynamic
- Use wildcards (*) to ignore changing URL segments
- Use full URLs only when multiple URL components are required
Create a Tracked Event by Capture
Use capture when you want to define a Tracked Event by selecting an on-screen element instead of writing rules manually.
- Select Create Event
- Select Tracked Event
-
Select Create by Capture
-
Select a system
-
Enter a URL Destination
-
Select Start Capture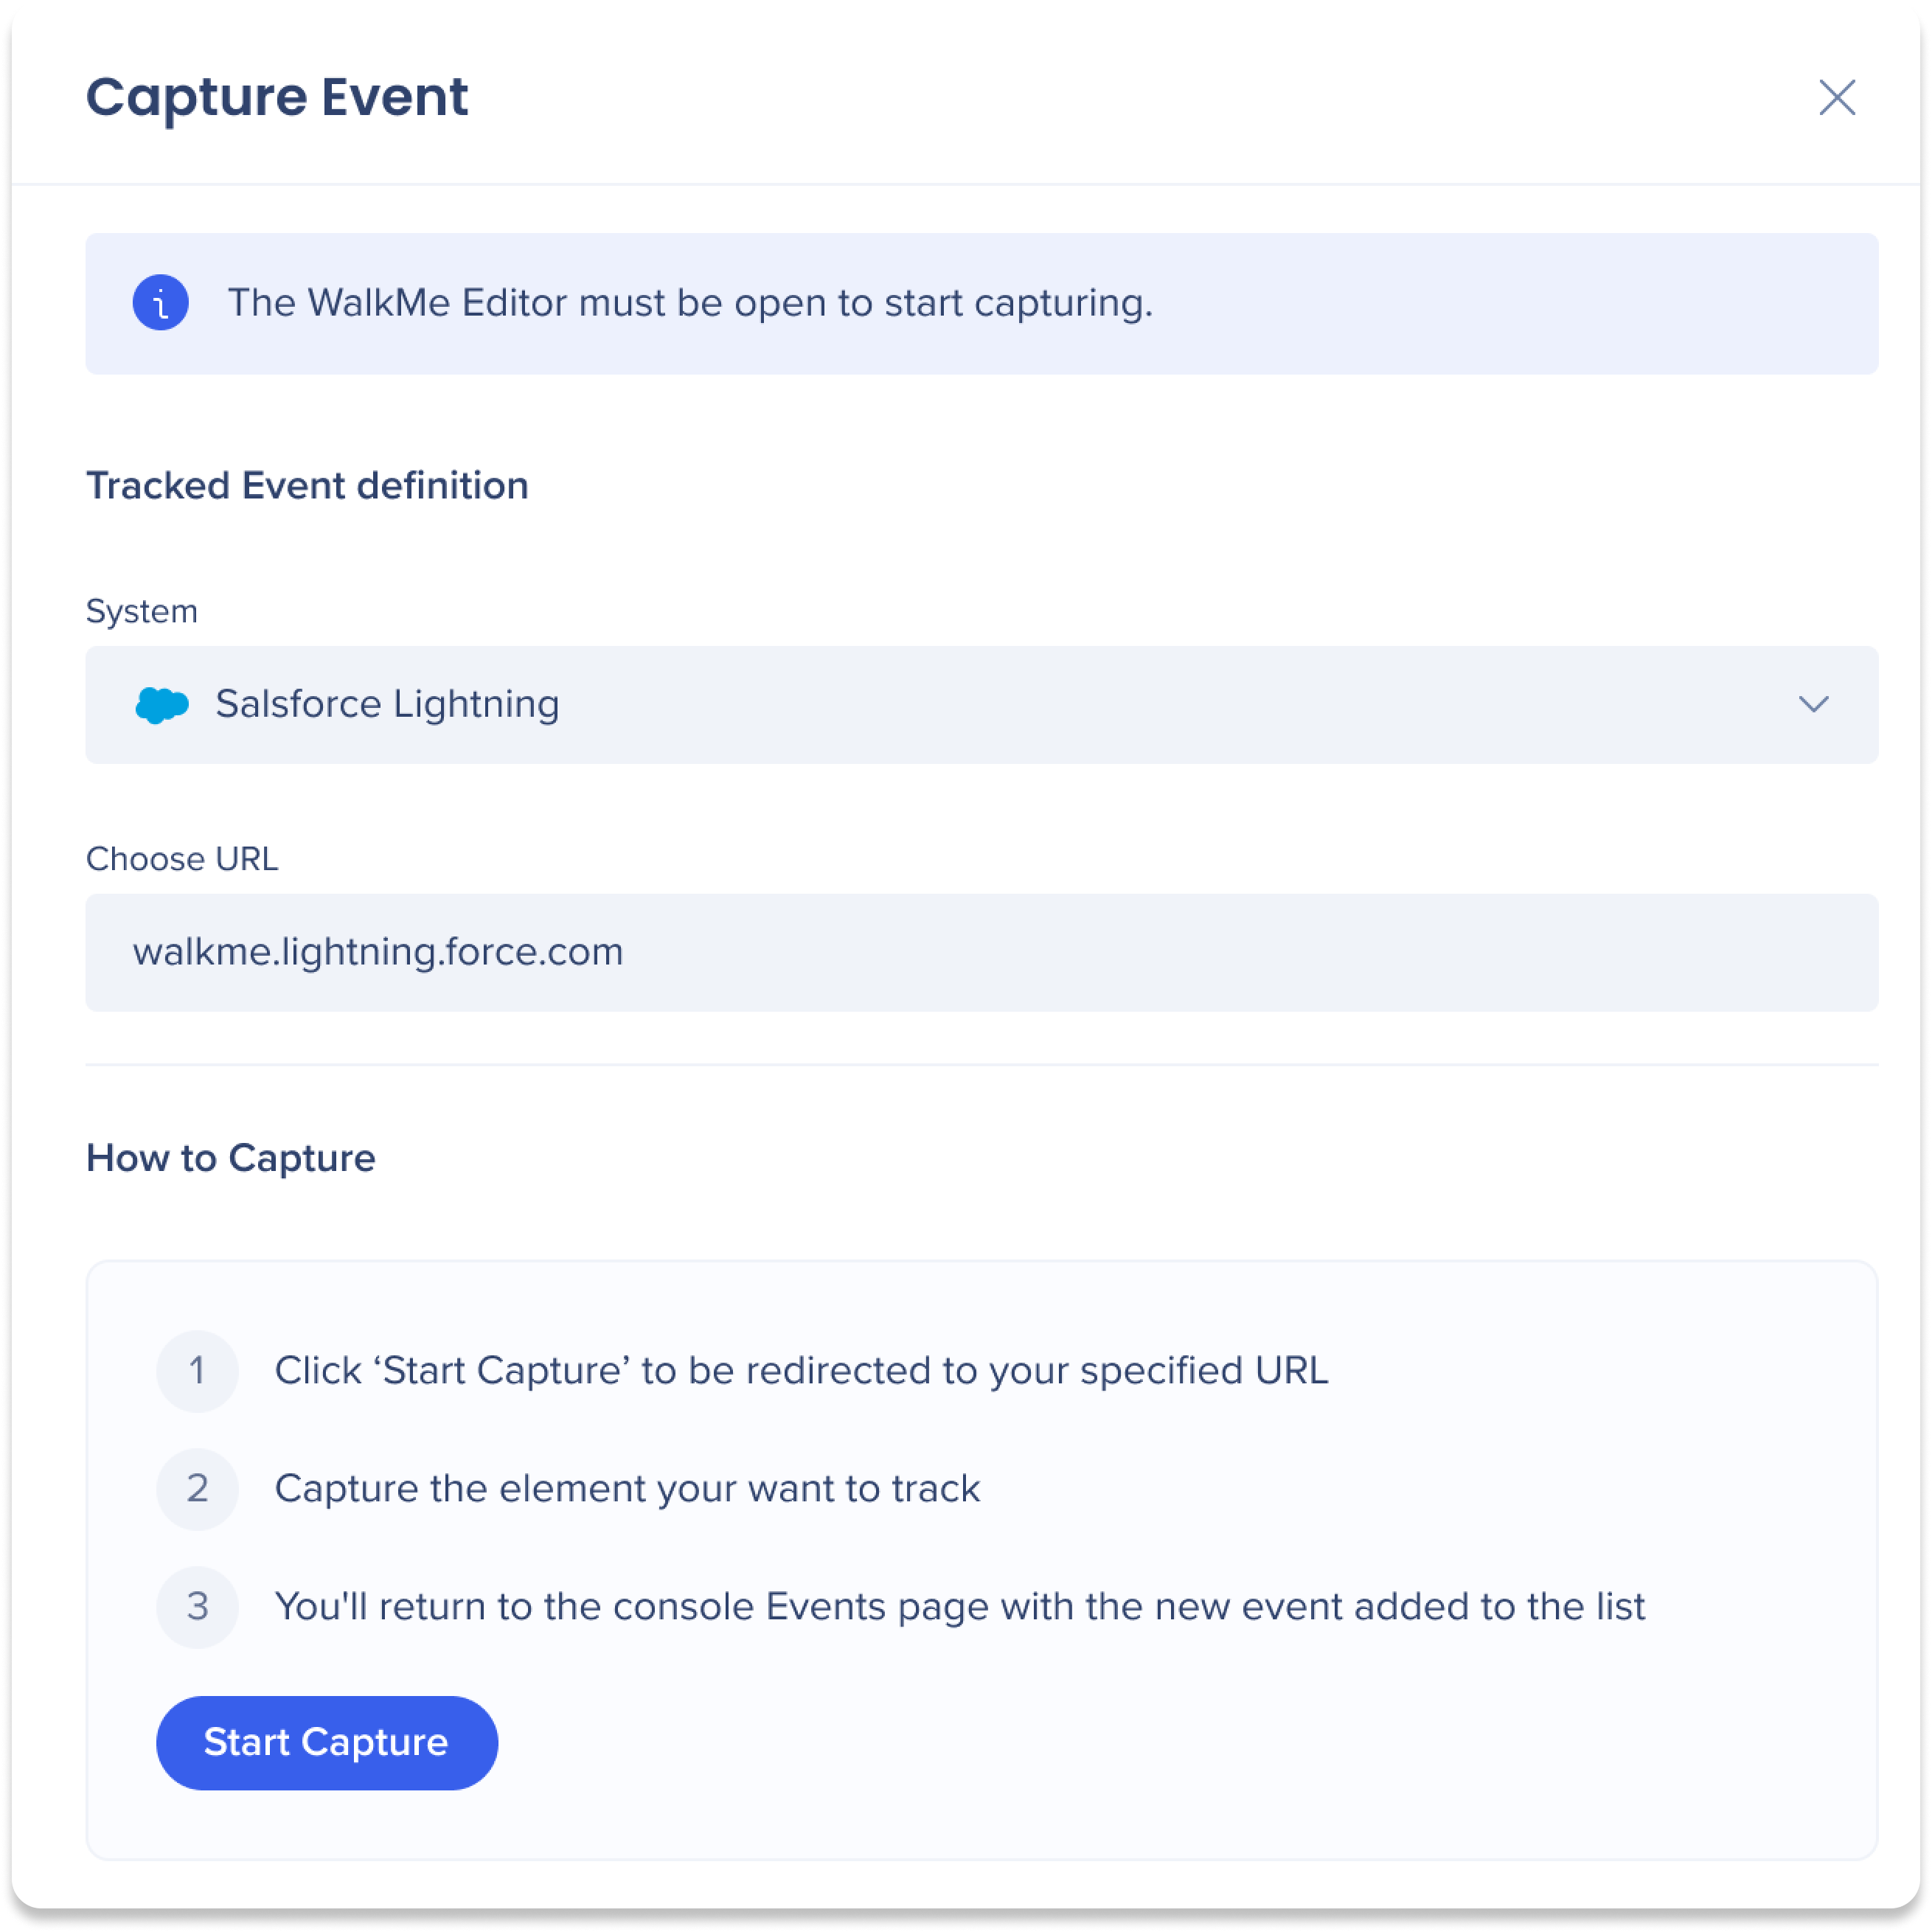
Note
The WalkMe Editor must be open to start capturing.
-
Capture the element
-
Enter an event name
-
Select Done
The Tracked Event appears in the Management tab.
Best Practices
- Validate definitions using real-time data feedback
- Use Tracked Events as building blocks for funnels and advanced Insights reporting
- Review event definitions periodically to ensure continued accuracy
Collect Baseline Data with Engaged Elements or Tracked Events
Technical Notes
Prerequisites
- Full DXA is required for retroactive Click and Input tracking
- Page collection must be enabled for Page tracking
- The latest editor extension is required for capture
- Users must have access to the relevant system
Operator limitations
- Only the is equals operator is supported for new Tracked Events
- Deprecated operators are supported for existing events but cannot be edited
- Wildcards are supported (for example: /insights/*)
- Use the Contains operator only when necessary
- Integration filters apply only when events belong to the same system
- When creating rules manually, use either AND or OR, not both
Support and environment limits
- Only the Production environment is supported
- Desktop and mobile systems are not supported
- Mobile web data is not supported
- Action Bot, Quiz, and TeachMe are not supported
- Insights officially supports Chrome


