Brief Overview
Use the Data Integration Center in the Console to import user data from Salesforce into WalkMe. Once imported, the data can be used to enrich user profiles, segment content, and personalize the user experience. This integration allows you to set up a recurring import from any Salesforce object into WalkMe's end user object, making the data available for segmentation, Insights filtering, and reporting.

Access
You can access the Salesforce Connections page from the Integration Center app in the WalkMe Admin Center.
Action Integration Center
How It Works
How to set up a Salesforce incoming integration
- Navigate to the Data Integrations page in the console
- Select + Create Integration
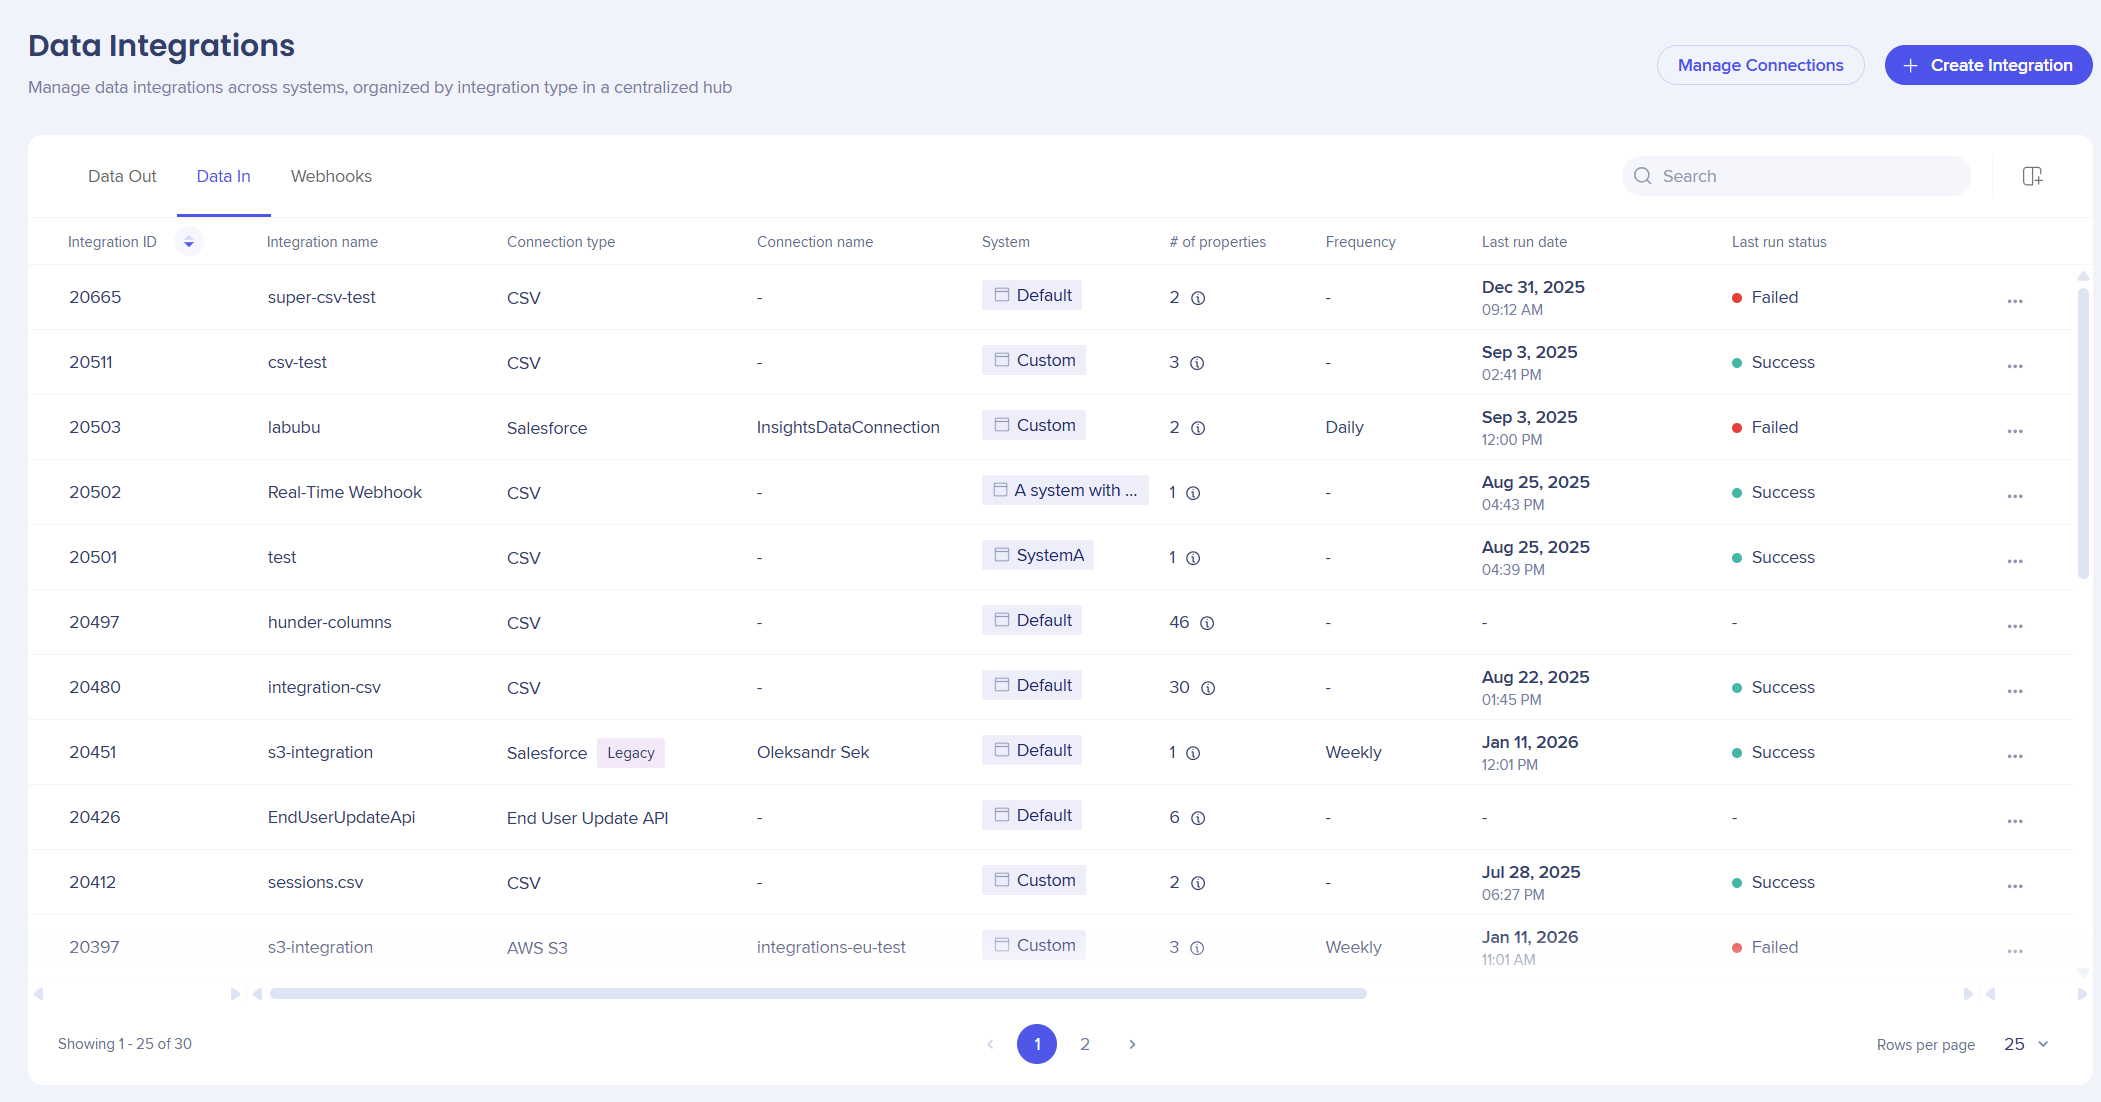
- A modal will open with the option to choose the integration type
-
Choose Data In
-
Select Salesforce from the Connection type from the menu
-
Select Continue to Setup

-
You'll be taken to the Create Incoming Salesforce Integration page, which includes three steps:
-
Set Source
-
Match Object
-
Map Columns
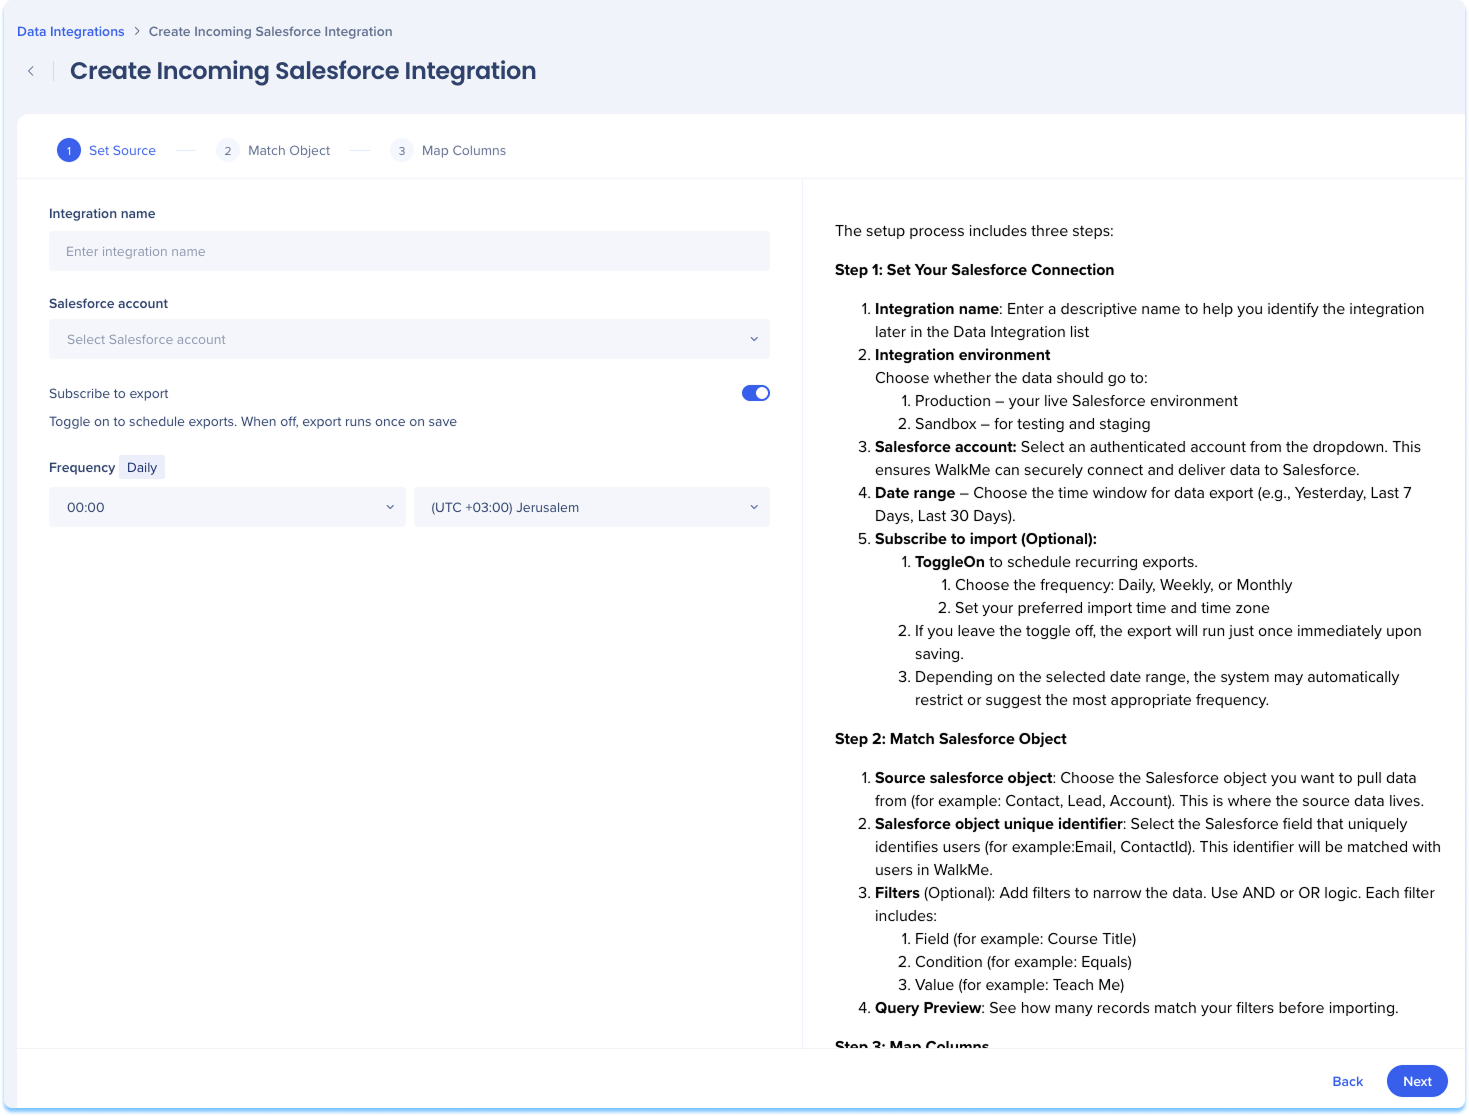
Set Source
-
Enter a descriptive name to help you identify this integration in the Data Integration list
-
Optional: Subscribe to import
-
Toggle on to enable recurring imports
-
Choose the import frequency: Daily, Weekly, or Monthly
-
Set the time of import and time zone
If you leave the toggle off, the import will run once immediately upon saving.
Note
Note: Import frequency is automatically adjusted based on your selected date range. Some ranges may only allow fixed schedules (for example: monthly only).
-
Click Next
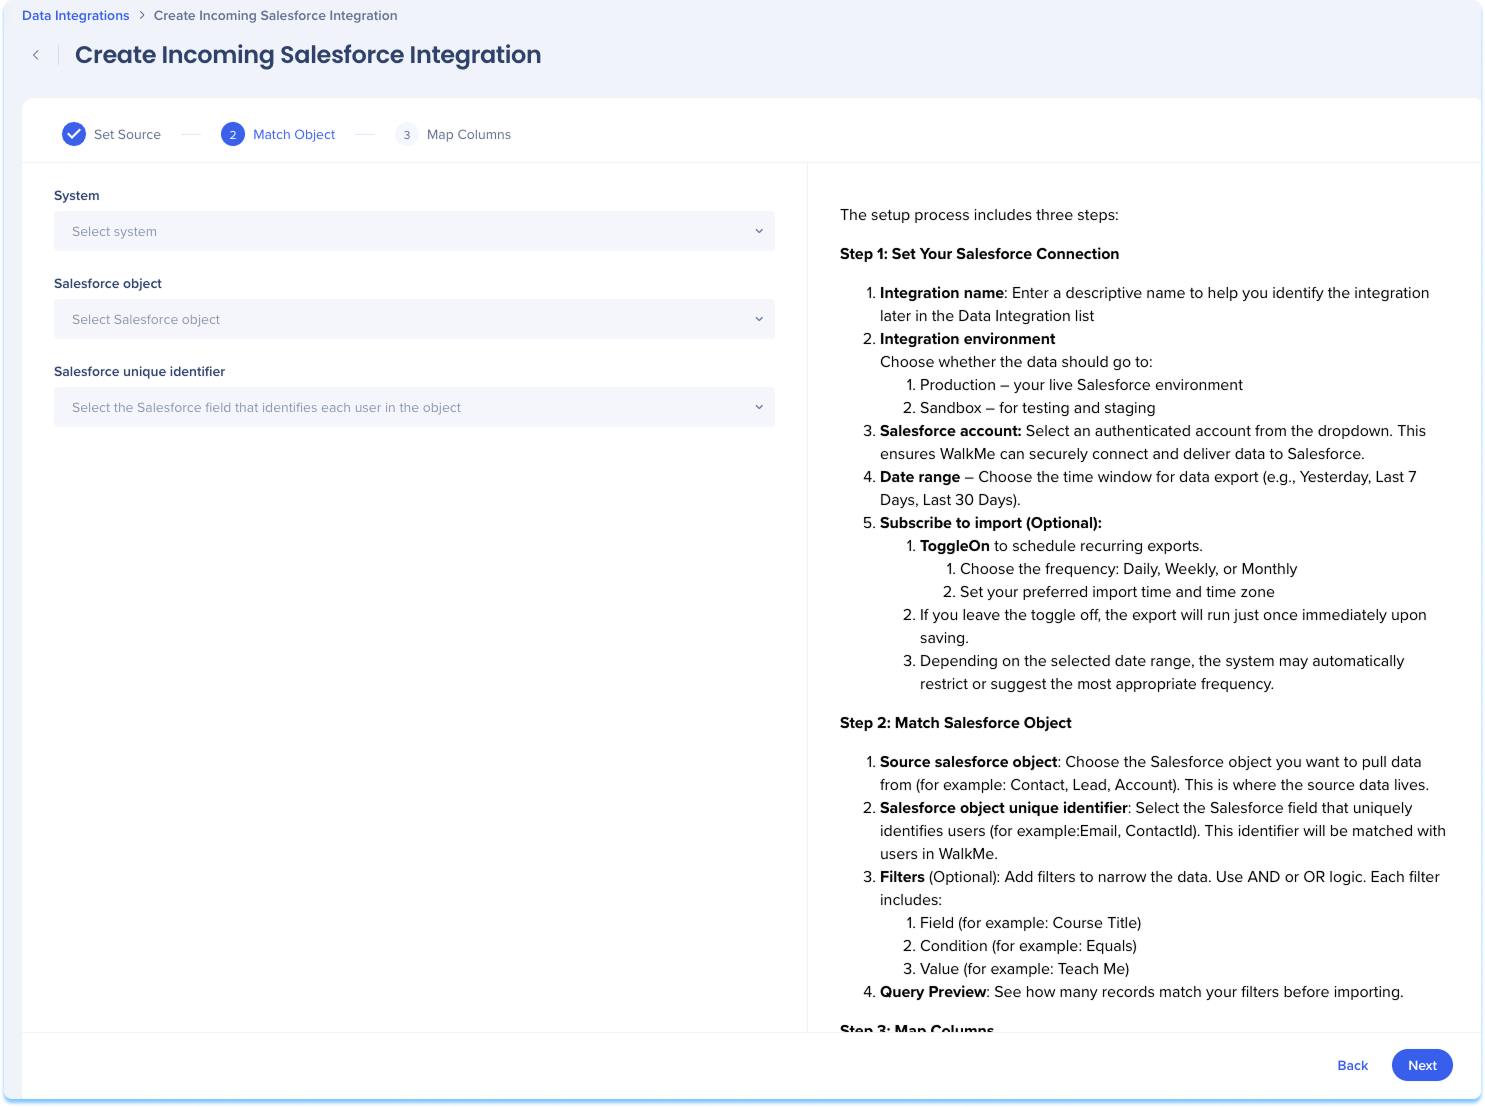
Match Object
-
Select the WalkMe system the imported data will apply to
-
Choose the Salesforce object you want to pull data from
-
This identifier will be matched with users in WalkMe
-
Click Next
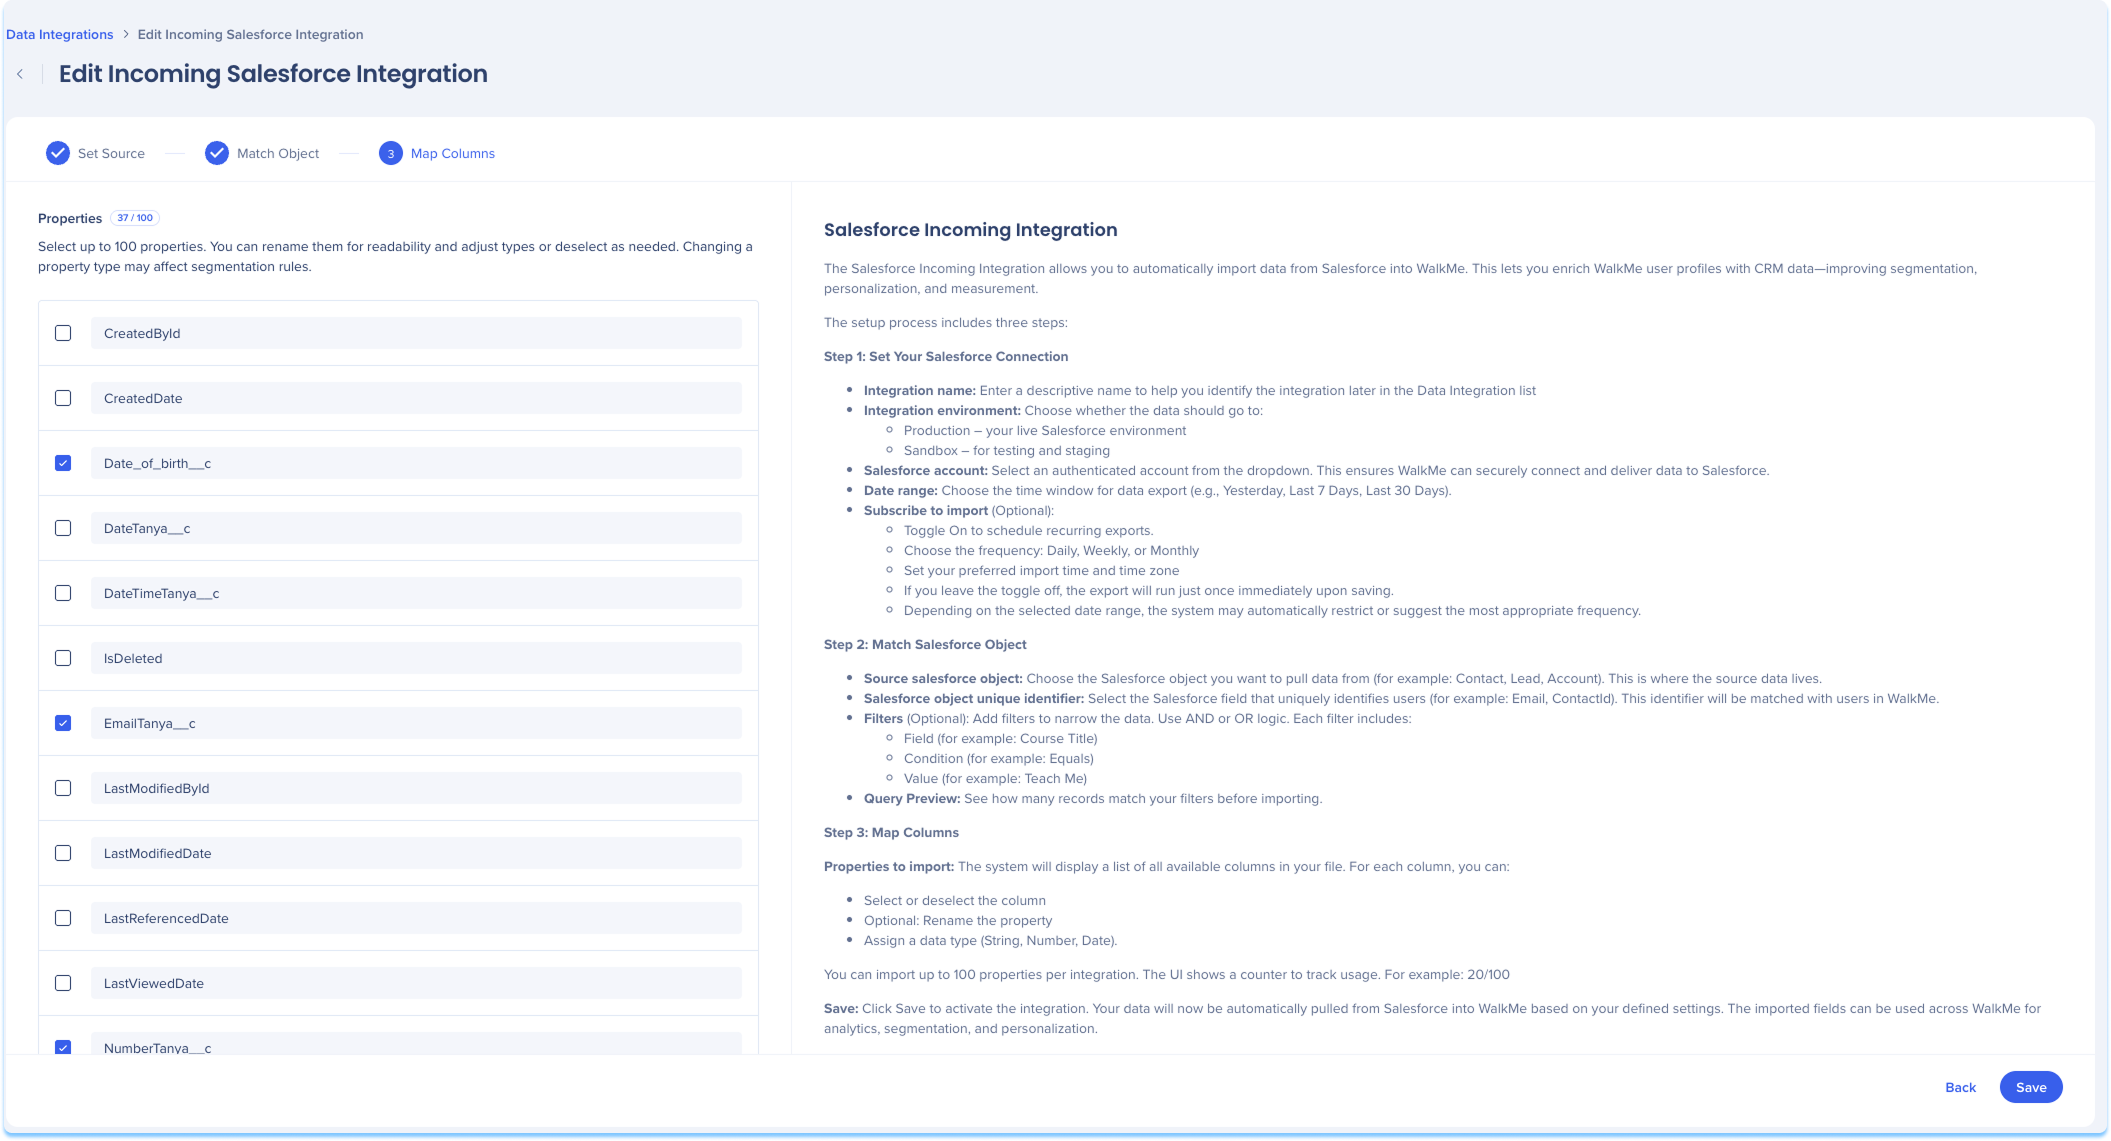
Map Columns
Define how data from your Salesforce file should be imported into WalkMe.
-
The system will display a list of all available columns in your file
-
For each column, you can:
-
Select or deselect the column
-
Rename the property for clarity
-
Assign a data type (String, Number, Date)
-
Click Save
Note
Your integration is now active and will import data from the Salesforce file either on-demand or based on the schedule you defined.