Salesforce Incoming Integration
Last Updated May 13, 2021
Brief Overview
The Salesforce Incoming Integration allows you to set up a periodic import of data from any Salesforce object to WalkMe's End User Object. Once the integration runs successfully, the data imported then becomes available for Segmentation, filtering on Insights, and reporting.
Use Cases
- Target end-users based on their Account Status - Display a ShoutOut only to customers that have gone live.
- Personalize WalkMe content based on the customer type - Personalize WalkThru based on the type of company.
- Analyze data in Insights based on the contact info - Compare Funnel Completion between different Customers ("Accounts").
Creating a new Salesforce Incoming Integration
Step 1 - Connect your Salesforce Account
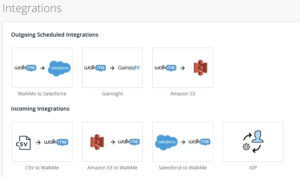
- In WalkMe Insights - Navigate to the Integration Center (Integration tab in the left side menu)

- Click on Salesforce to WalkMe
- Choose on the Salesforce Environment you wish to connect: Sandbox or Production.
- Click on ADD ACCOUNT - you will be redirected to the Salesforce login page in which you will need to enter a Salesforce Admin User and Password.
- Once successfully authenticated with Salesforce, the account is created and you can use it to set up an Integration.
- You can always click on ACCOUNTS to go back to the Accounts list to reconnect to or disconnect from specific accounts.
Step 2 - Set Up an Integration
- In WalkMe Insights - Navigate to the Integration Center (Integration tab in the left side menu)
- Click on Salesforce to WalkMe
- (once a Salesforce account is already set up - see Step 1) - Click on + New Integration - the Integration Wizard will appear
- Define Integration
- Integration Name - As with an Incoming Integration use a meaningful name, this integration name will be available in your Segmentation Center Rule Engine as well as in Insights Filters.
- Choose Environment - Choose the Environment you want to import the data from (the one connected to in Step 1)
- Integration Frequency - Choose the Integration Frequency (Daily/Weekly/Monthly). This will determine when the integration will pull the data from Salesforce to WalkMe.
- Object & Key
- Salesforce Object - select the Salesforce Object you want to pull data from (i.e. "Account")
- Salesforce object unique identifier - select the Salesforce field that holds the End user unique identifier. This will be matched to the End User Unique Identifier in WalkMe.
- Map Fields - Enter the Salesforce fields you want to import into WalkMe, rename them if you wish these fields to appear in WalkMe with a different display name.
- Click on Save.
Using the Salesforce Incoming Integration for Segmentation
- Once the Integration is set up - Perform an empty publish so you can segment based on the imported fields in your Editor.
- In WalkMe's Editor, go to the Manage Segments Menu.
- Create a new segment or edit an existing one
- In the rule engine - select group "user attributes" → select your integration name (given in Step 2.4.a- Set up an Integration: Define Integration: Integration Name) → select the field from the list you wish to segment by.
- Define your condition.
- Click Done.
Using the Salesforce Incoming Integration for Filtering data in Insights
- In Insights - create a new Filter or update an existing one.
- Select USER → Click on the field you imported in your integration set up (in Step 2.6- Set up an Integration: Map Fields). Notice the descriptive text next to each field in the list since you can have multiple fields with the same name coming from several integrations
- Define your condition (notice the operators shown are defined by the type of the field you inserted in Step 2 - Define your Integration)
- Click Save Filter
Best practices
- When completing the integration creation process, before targeting content in the editor - make sure that you have at least one successful integration run under Incoming integrations table
- When modifying an integration, changes will be updated immediately.
- Less is more - Be sensitive with the total number of attributes that you integrate to WalkMe. We allow a total of 100 attributes total across all incoming integrations.
- After a successful integration, you may need to close and reopen to the Editor in order to see the updated fields in the segmentation editor.
- Using the Salesforce Accounts Object: Many customers have information on the Account level that they want to import to WalkMe, this will require connecting a child-object of the Account (for example the Contact object) that can be matched to WalkMe's End User Identifier (with the contact email for example as a matching key).
Was this article helpful?
Yes
No
Thanks for your feedback!
