Brief Overview
WalkMe's IDP Integration can use an authentication protocol called SAML in order to authenticate users with their organizational IDP vendor and to obtain user attributes that can later be used for segmentation and analytics in WalkMe. Every IDP vendor that supports SAML should work with WalkMe. WalkMe supports SP initiated flow.
What is SAML?
SAML, which stands for "Security Assertion Markup Language", is an open standard that allows identity providers (IDP) to pass authorization credentials to service providers (SP). It allows computing clients to verify the identity of an end-user based on the authentication performed by an authorization server, as well as to obtain basic profile information about the end-user.
Use Cases
- End-user IDP authentication as a prerequisite to present WalkMe content.
- Expanding content segmentation capabilities by IDP parameters (for example - groups, region, department, etc).
- Accurate data monitoring across systems.
Pre-requisites
An IDP application needs to be created to serve as the "bridge" between IDP and WalkMe's Integration Center.
An instruction guide is available in the Admin Center on the IDP Integration configuration screen.

These instructions are generic. You will have to locate this information for your specific identity provider (IdP).
- SSO URL (Single Sign-On URL) : URL at the IdP to which SAML authentication requests should be sent. This is often called an SSO URL.
- X509 Signing certificate: Certificate needed by the service provider to validate the signature of the authentication assertions that have been digitally signed by the IdP. There should be a place to download the signing certificate from the IdP. If the certificate is not in .pem or .cer formats, you should convert it to one of these formats. later, you will copy paste this to WalkMe.
The methods for retrieving this certificate vary, so please see your IdP's documentation if you need additional assistance.
Note:
- Before you upload the X.509 signing certificate to WalkMe, you must convert the file to Base64.
- To do this, either use a online tool or run the following command in Bash:
cat cert.crt | base64.
Add information about the service provider to the identity provider so the tenant knows how to receive and respond to SAML authentication requests. The instructions provided here are generic. You will need to find the appropriate screens and fields for the Identity Provider.
- Locate the screens in the Identity Provider that allow you to configure SAML. If the IdP supports uploading a metadata file, you can simply provide the metadata file obtained in the step above. If the IdP does not support uploading a metadata file, you can configure it manually as follows.
- The IdP will need to know where to send the SAML assertions after it has authenticated a user. This is the Assertion Consumer Service URL in WalkMe. The IdP may call this Assertion Consumer Service URL or Application Callback URL.
US: https://papi.walkme.com/ic/idp/p/saml/callback
EU: https://eu-papi.walkme.com/ic/idp/p/saml/callback
SAP US: https://papi-us01.walkme.cloud.sap/ic/idp/p/saml/callback
SAP EU: https://papi-eu01.walkme.cloud.sap/ic/idp/p/saml/callback
Canada: https://papi-ca1.walkmedap.com/ic/idp/p/saml/callback
FedRAMP: https//papi-walkmegov.com/ic/idp/p/saml/callback
- If the IdP has a field called Audience or Entity ID, enter into that field the Entity ID from WalkMe:
US: https://papi.walkme.com
EU: https://eu-papi.walkme.com
SAP US: https://papi-us01.walkme.cloud.sap
SAP EU: https://papi-eu01.walkmecloud.sap
Canada: https://papi-ca1.walkmedap.com
FedRAMP: https//papi.walkme.gov.com
- If the IdP provides a choice for bindings, you should select HTTP-Redirect for Authentication Requests.
Adding an Identity Provider
1. In the IDP Integrations tab of the Admin Center, click on the "+ Add Identity Provider" button
2. Select the SAML protocol type
3. Provide the appropriate configuration settings for the connection
Download the metadata file
- You can upload the WalkMe information into your system via a metadata file rather than having to copy and paste each individual piece
Mandatory Fields:
- IDP Name - Connection name
- Single Sign-On URL - The Identity Provider Single Sign-On URL taken from the provider setup wizard.
- X509 Signing Certificate - Upload the certificate you downloaded from your provider.
Optional - Encryption Settings:
To increase the security of your transactions, you can sign or encrypt both your requests and your responses in the SAML protocol.
First we need to generate and download a certificate that will be unique for your account.
Public key will be shared with you in order to upload it to your IDP provider.
- AuthnRequest - Sign the SAML authentication request using the private key.
- Assertion Encryption - Receive encrypted assertions from an identity provider. To do this, you must provide the public key certificate to the IDP. The IDP encrypts the SAML assertion using the public key and sends it to WalkMe, which decrypts it using the private key.
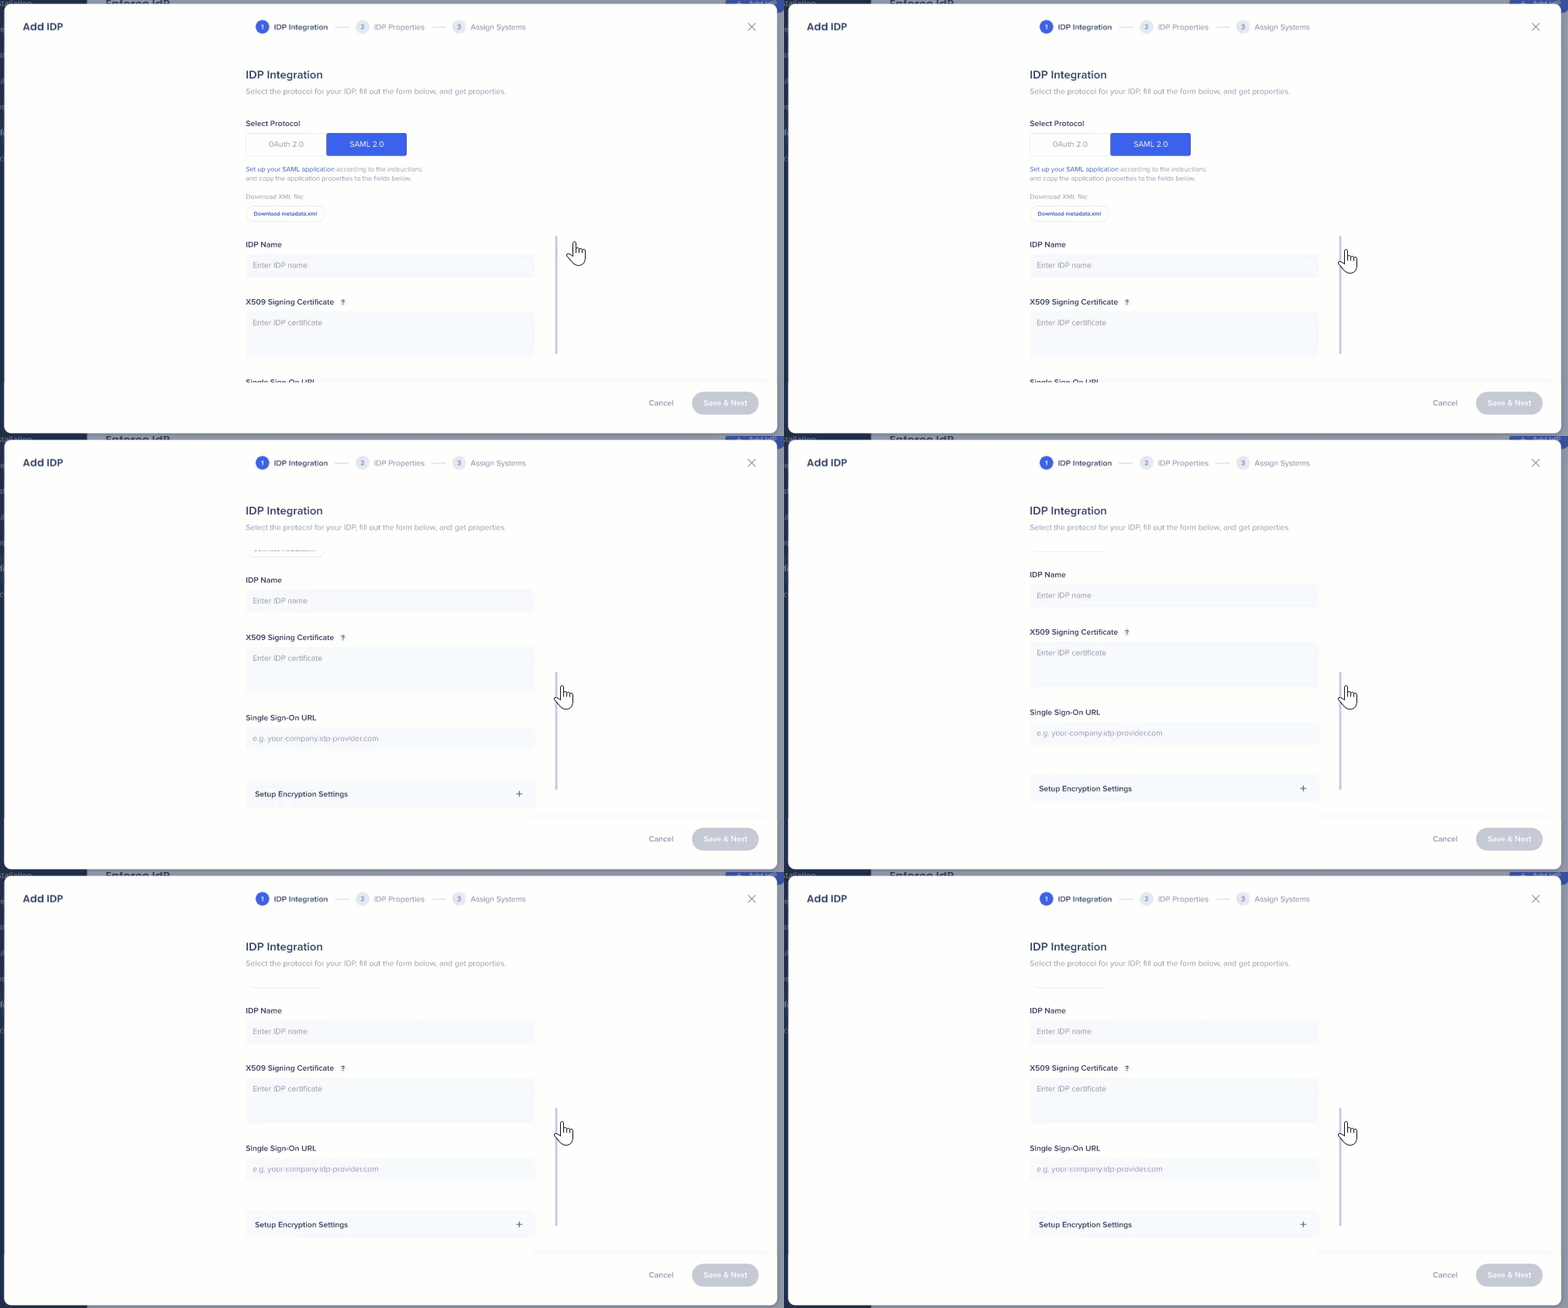
4. Click "Save & Next" once ready
- Note that we do not require a Sign Logout URL
5. Choose a unique end-user identifier to identity users by
- You only need one identifier; we do not require any additional group information or other attributes
6. Select the desired properties and ensure the correct data type was chosen:
-
- String
- Number
- Date
Please note: The User Identifier field will be always converted to type String.
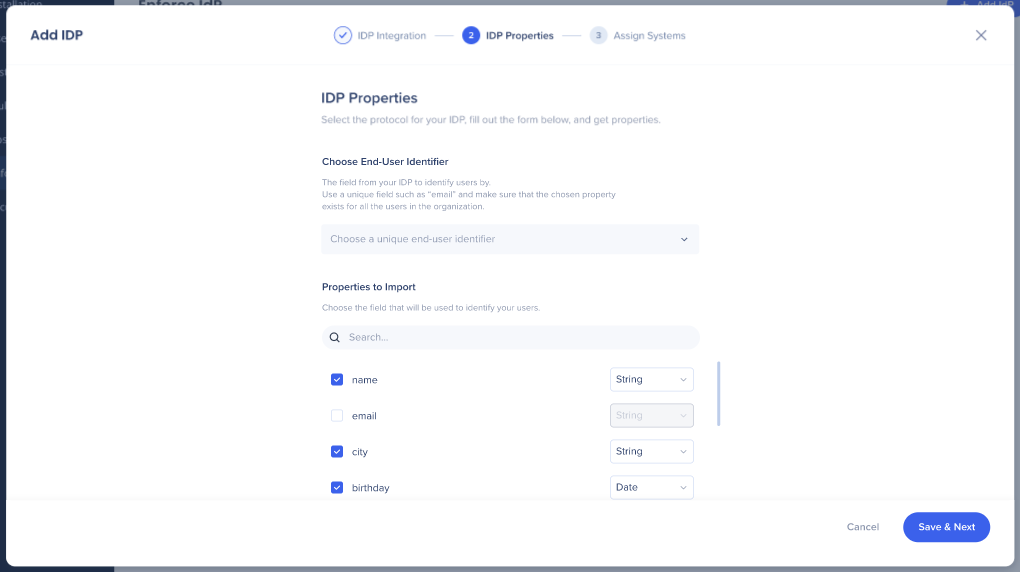
Tip:
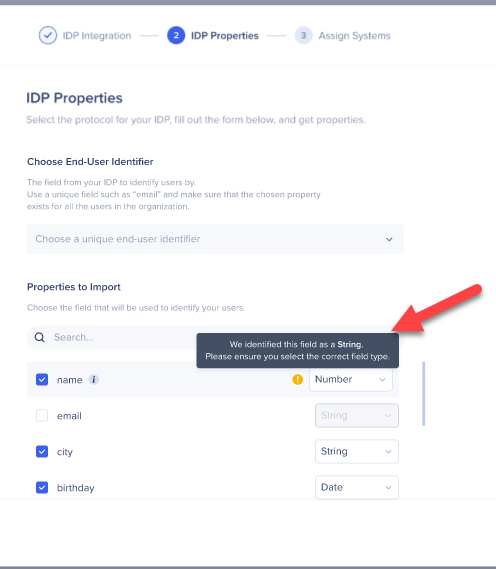
- To make sure the selected data type is suitable, you can hover above the “i” icon and check the value of that property.
- If the selected data type isn't suitable for the property, a orange "!" icon will appear recommending to switch back to the identified data type.
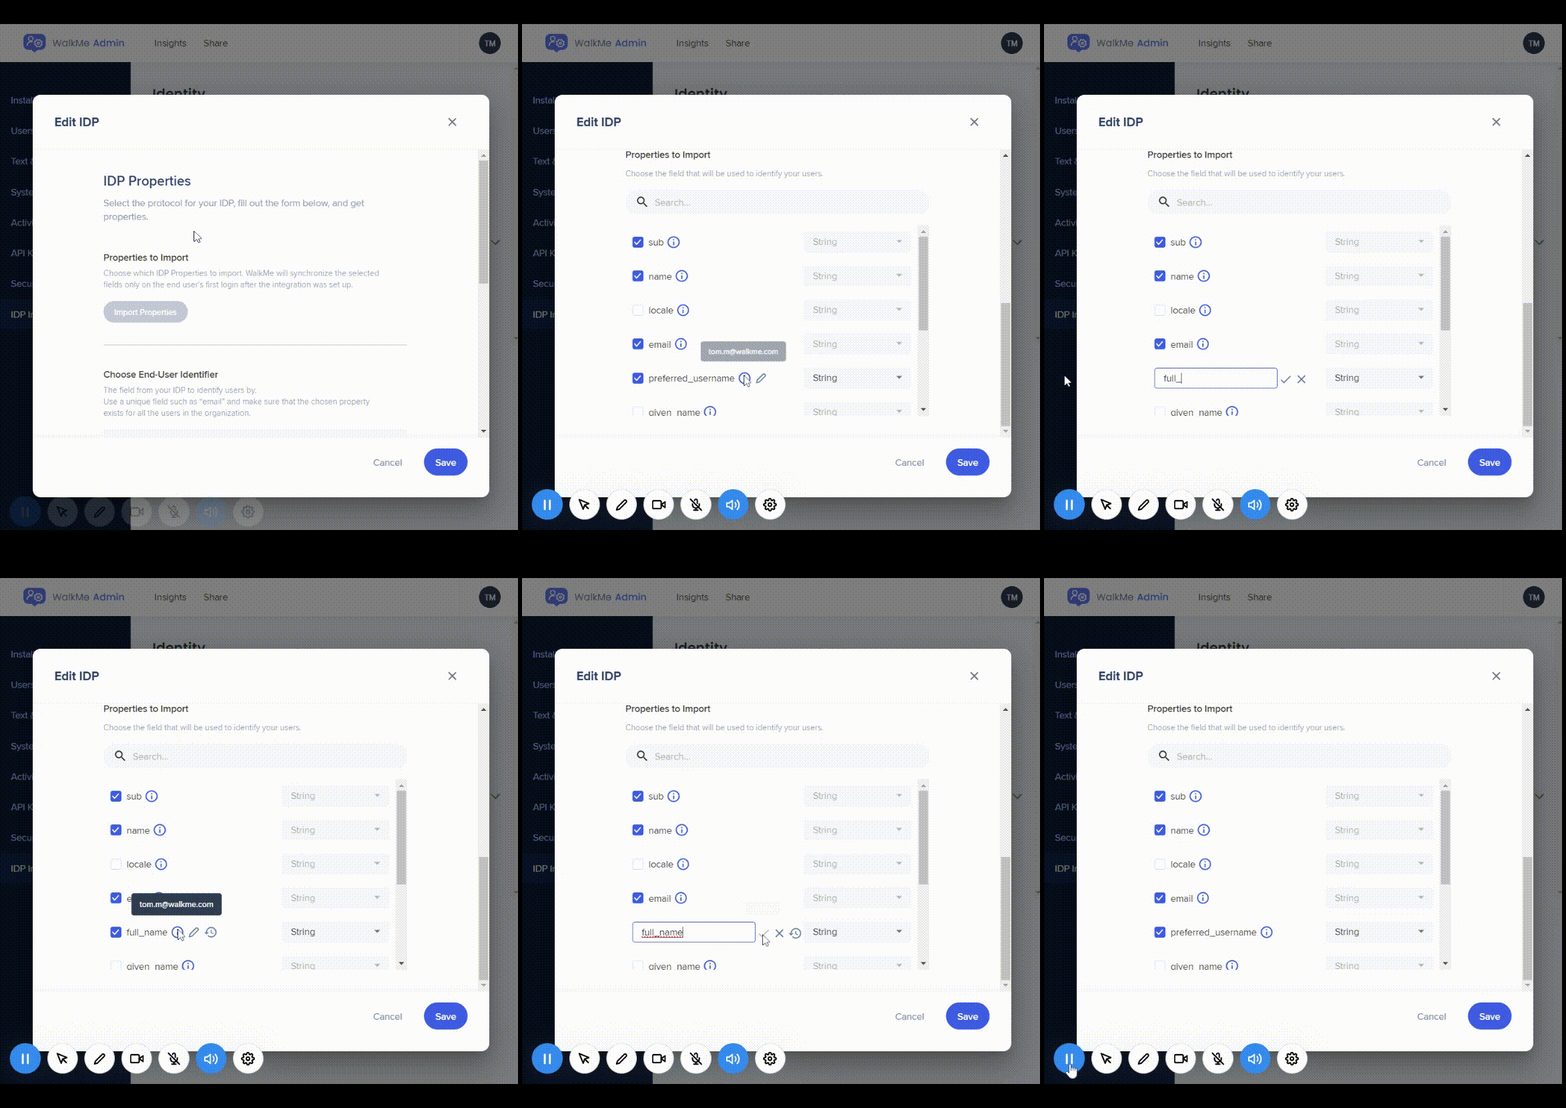
You may also rename any selected property, view its original value and name, and revert back to its original value if it is overridden.
7. Select which systems you want to assign the IDP Integration to
- For each system, you can separately enable IDP Integration on the desired environments
8. Use the toggle to Enforce SSO
Note:
- IDP should provide the most accurate user identification, but the numbers may be not accurate when Enforce SSO is disabled.
- When enforce SSO is disabled, users can use applications without authenticating to their IDP provider, and a WalkMe Id will be generated and used as user identifier.
- Users can "skip" the IDP authentication by either using apps that don't require authentication at all, or by logging into the application directly via user/password, without going through the IDP login flow.
9. Click "Finish"
10. A message will appear telling you whether your IDP was successfully added or not
Note:
- After assigning systems, the UUID setting for the assigned systems is automatically set to IDP and settings are published so no further action is required.
- The only way to change the UUID is by unassigning the system from the vendor (see "Manage System Assignment" section below).
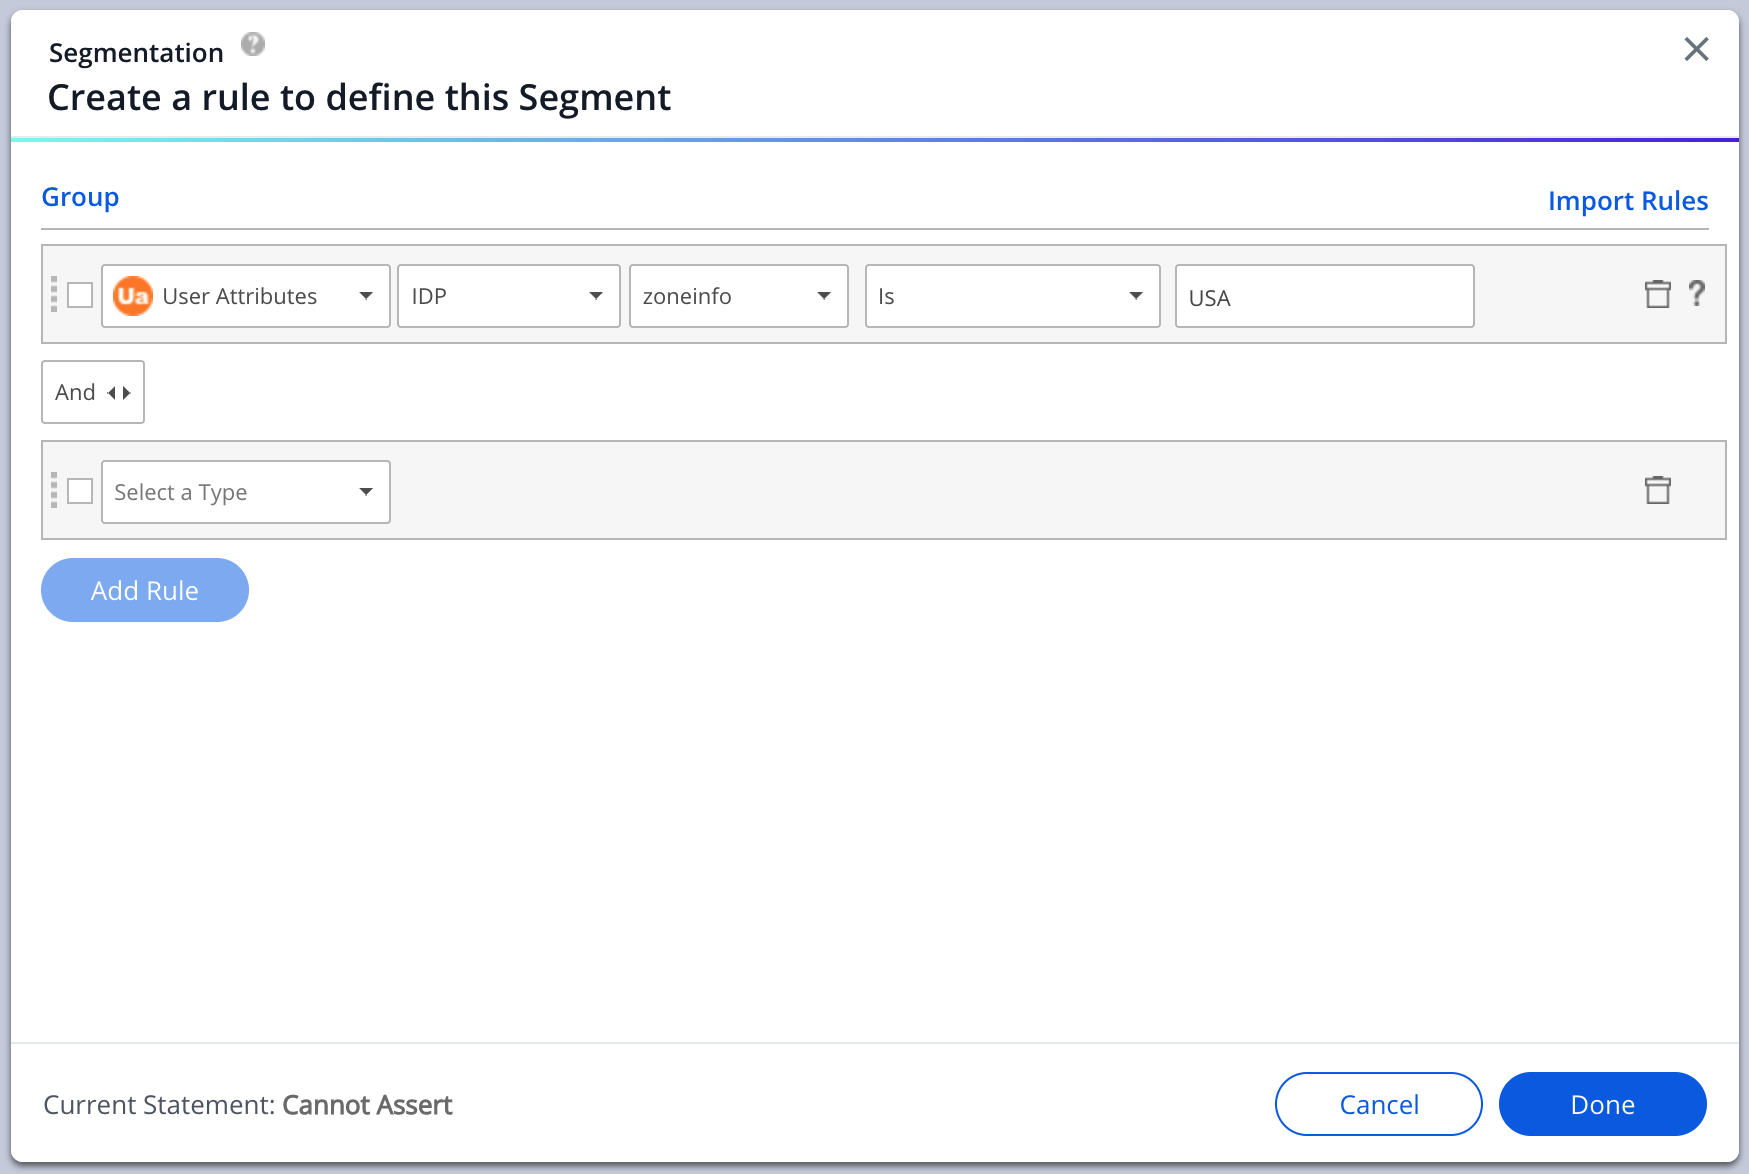
- You can now segment content using the imported attributes in Insights and in the Editor under User Attributes > IDP with the suitable filter conditions according to the set data field type.
- Read more here.
Tip:
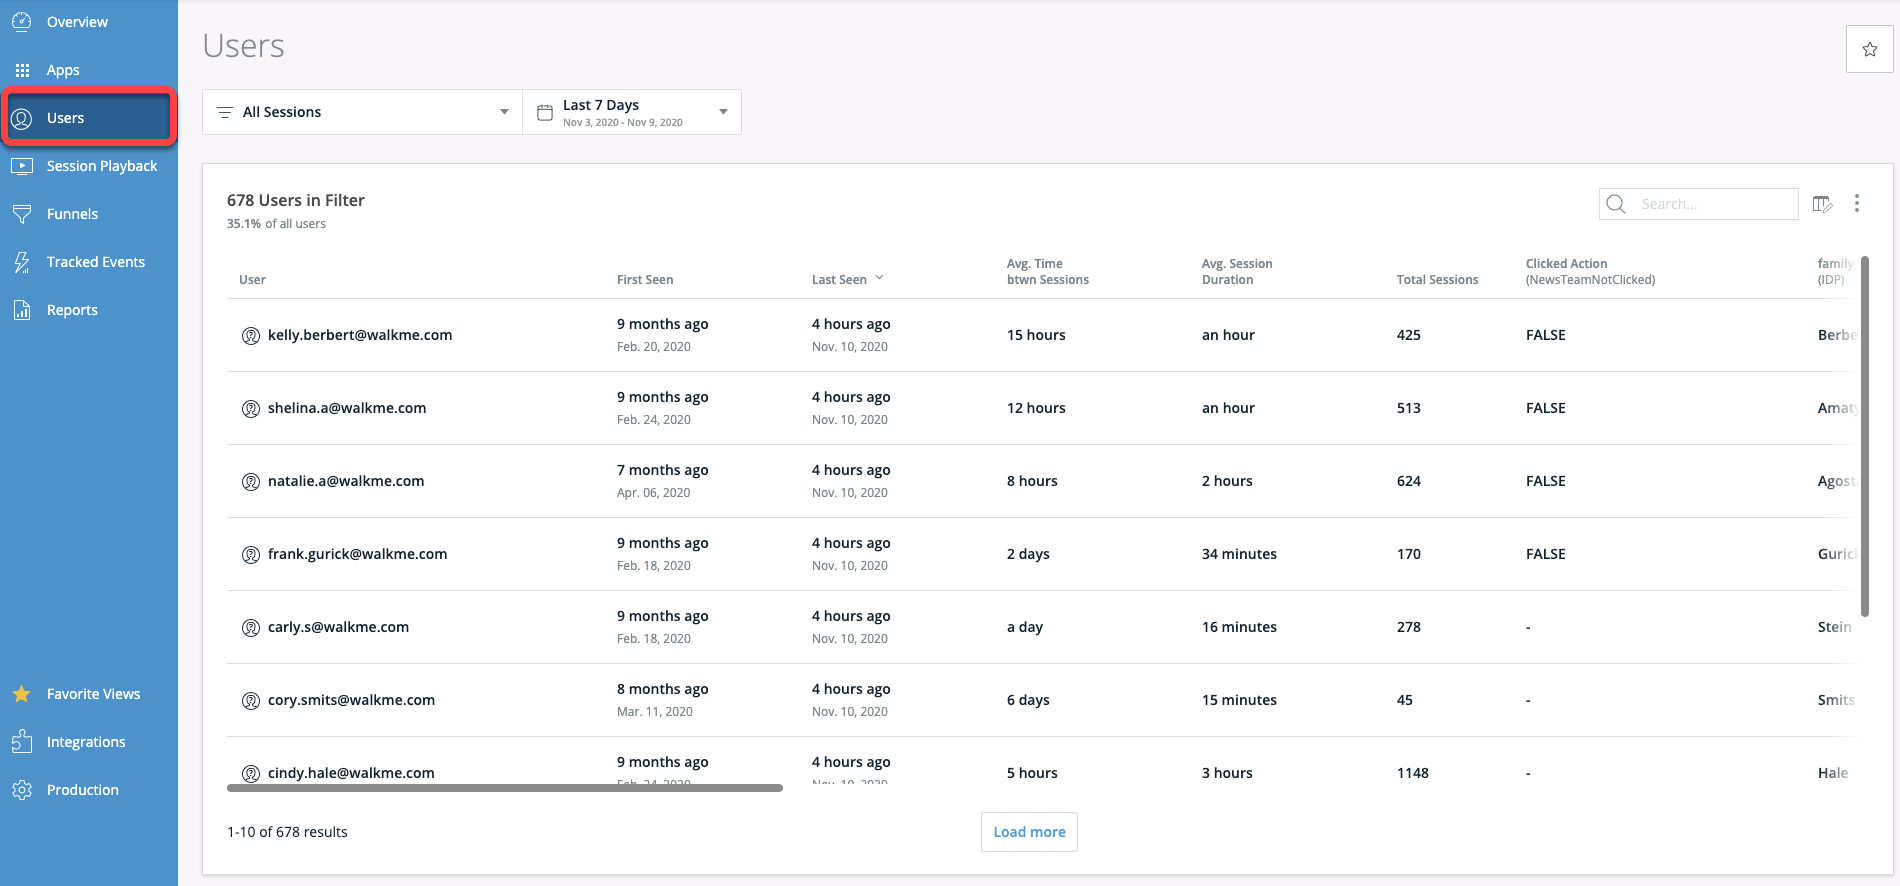
- In order to validate that users are being identified by the integration and that all the requested attributes are collected, it is recommended to view the Users page in Insights at insights.walkme.com, where all user data is displayed.
- Users are added to the table only after their session has ended, so after setting up IDP it will take some time for users to be added.
Managing an Identity Provider
Hovering over the row of an Identity Provider will provide you with several options:
- Delete
- Manage System Assignment
- Import Properties
- Edit
- Expand

Delete
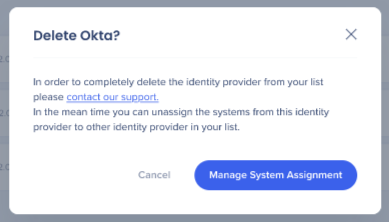
- Click on the trash icon to "delete" an identity provider
Important Note:
- It is not possible to completely delete an identity provider without contacting Support.
- Before deleting is possible the identity provider must be unassigned to any systems using the Manage System Assignment screen.
Manage System Assignment
- Click on the "+" icon to open the Manage System Assignment screen
- Select or deselect the systems you want assigned to the identity provider
- You can also use the toggle to Enforce SSO
- Click on the "Save Changes" button once you are finished
Note:
- Users cannot manage system assignment for vendors that have no imported properties. Properties will have to be imported first.
- After assigning systems, the UUID setting for the assigned systems is automatically set to IDP and settings are published so no further action is required.

Import Properties
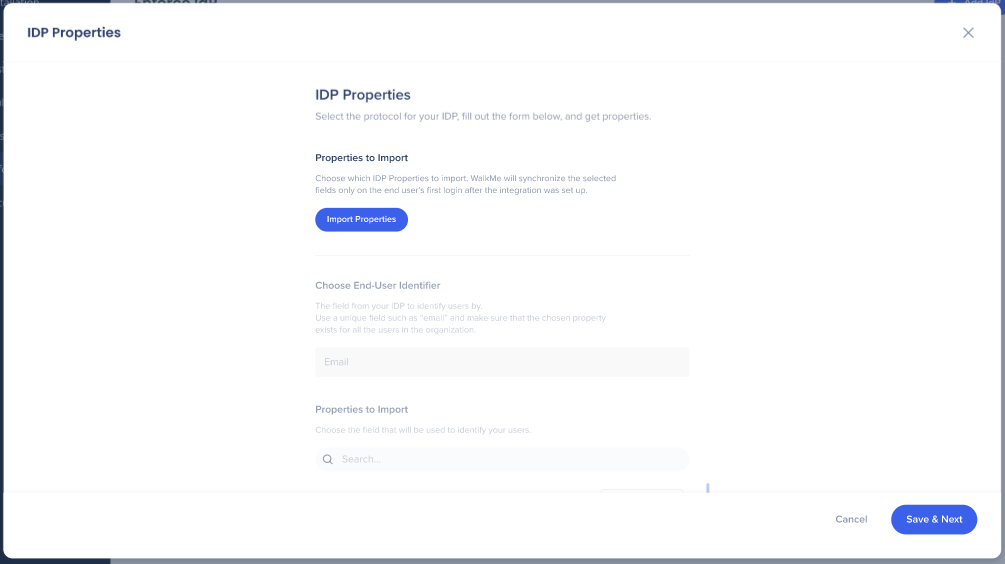
- Click on the list icon and then the "Import Properties" button to edit or add additional imported properties
These attributes will be used for content segmentation and reporting in Insights.
Note:
- In order to do this it is required to authenticate with a user that is assigned to the WalkMe app on the provider side.
Edit
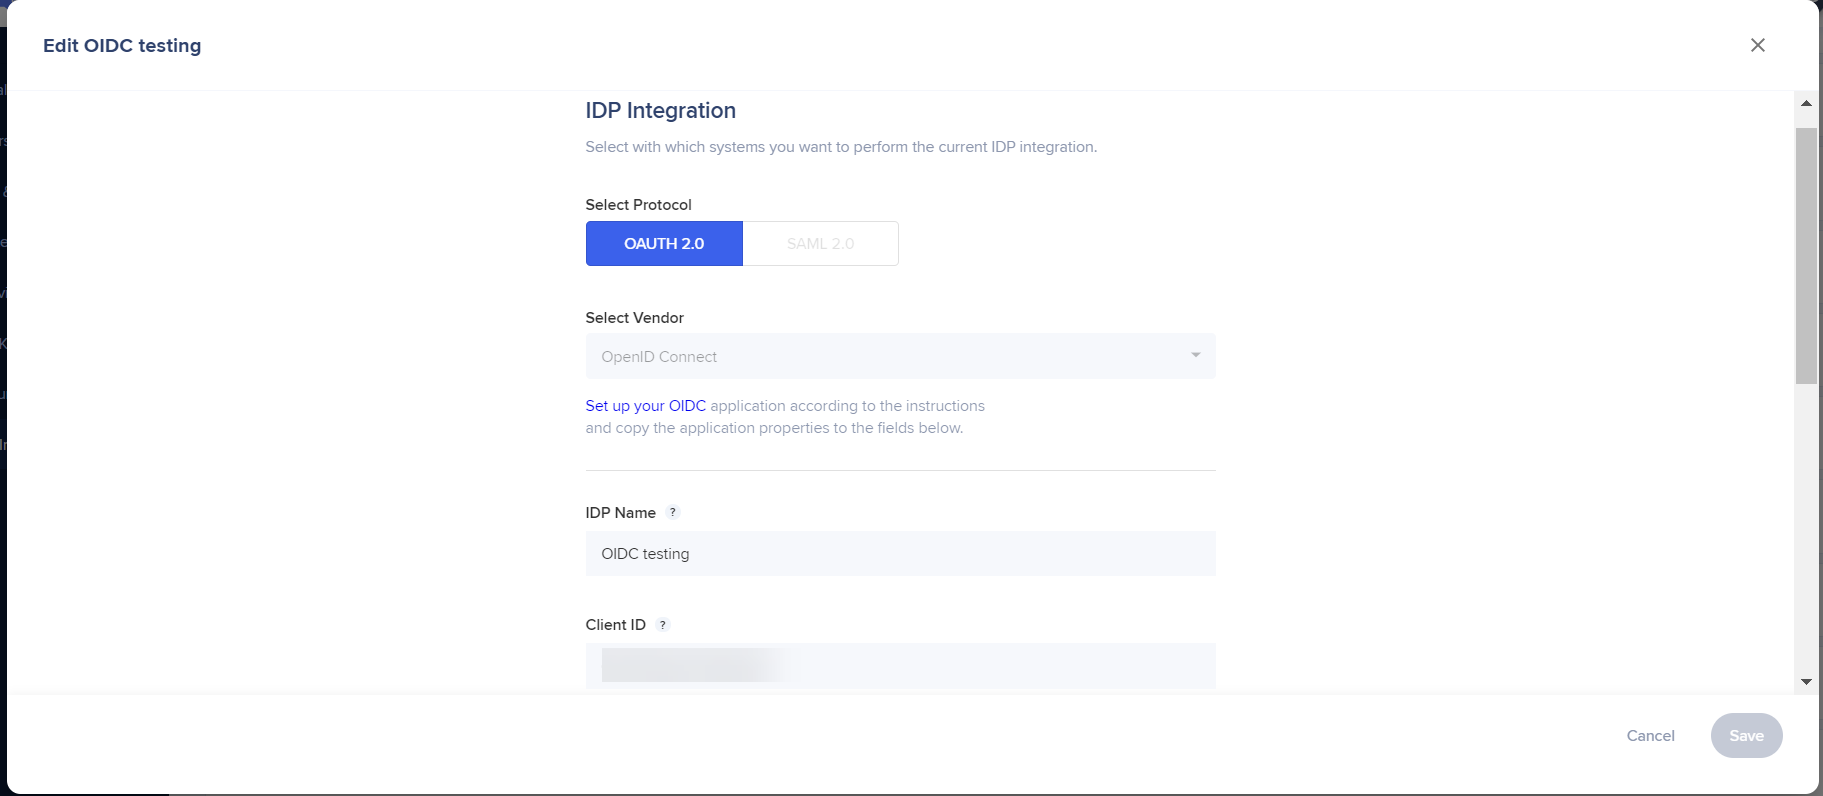
- Click on the pencil icon to edit identity provider settings
- You will be able to be able to edit all of the fields filled out in the initial identity provider configuration
Note:
- Users cannot manage system assignment for vendors that have no imported properties. Properties will have to be imported first.
Expand / Collapse View
- Use the arrow icon to open and collapse the expanded view
- When expanded you will see all of the systems assigned to an identity provider and whether or not Enforce SSO has been enabled

Best Practices
"Enforce SSO" Configuration
- When Enabled - IDP authentication must occur before opening web page to end-user, if IDP token is not recognized then the end-user will be redirected to their IDP login page.
- Each time the end-user fails to authenticate to the IDP due to reasons such as, IDP was down, customer forgot credentials, or end-user was not assigned to the IDP's app, SSO will be disabled for 1 hour and the User Identifier will be automatically downscaled to "WalkMe ID" method as fallback or WalkMe will not load, depending on the customer's configuration.
- After 1 hour - if IDP token is still not recognized then the end-user will be redirected again to their IDP login page, otherwise, login to the IDP will not be needed. It is important to make sure this is absolutely clear to the customer. Otherwise, DO NOT enable this option.
- When Disabled - IDP authentication is attempted upon page load, but if there is no active token for IDP then the end-user won't be redirected to IDP. The User Identifier will be downscaled automatically to "WalkMe ID" method or WalkMe will not load, depending on the customer's configuration.
Limitations
- Important: Changing User Identifier impacts the way WalkMe identifies end-users and may reset "Play once" configurations.
Please be aware that, if your implementation is already live, changing the User Identifier impacts the way WalkMe identifies end-users. This could result in resetting Auto-Play rules (ie. Play Once settings) or users seeing their previously completed Onboarding Tasks marked as uncomplete, due to their unique user identifier (UUID) being changed. There is no way around this limitation, as each user is being recognized as a new user, tied to their new UUID value.
- Safari browser does not support IDP
- User should have Admin permissions for Admin Center
- IDP must be configured on the required system
- End users should be using IDP to authenticate to that system
- If your company has CSP (Content Security Policy) it will block calls to the IDP provider
- In order to overcome this, the right URL should be added in the CSP settings of the extension configuration
- After assigning systems, the UUID setting for the assigned systems is automatically set to IDP and settings are published so no further action is required
- For the IDP changes to take effect, the customer's systems must be updated to the latest WalkMe version (this can achieved by doing a settings publish)
- For Enterprise accounts you must check "Update to the latest WalkMe version" when publishing
Mobile Web:
- Mobile Web will be automatically activated after IDP setup is complete
- If Mobile Web is added after IDP / OneID has already been activated, users will need to deactivate and then reactivate IDP for Mobile Web support


