- Reduce onboarding time
- Enable self served configuration and management
- Replace old proprietary SSO
- Enable Full SSO capabilities
- Enhanced Security and compliance
SSO Glossary
- Authentication statements assert that the user specified in the assertion actually did authenticate successfully, and what time they did so.
- Attribute statements supply attribute values pertaining to the user. The NameID attribute is required and specifies the username, but other attributes can be manually configured as well.
- Authorization decision statements declare that a request to allow the assertion subject to access the specified resource has been granted or denied
Assertion Consumer Service (ACS)
The service provider's endpoint (URL) that is responsible for receiving and parsing a SAML assertion. Keep in mind that some service providers use a different term for the ACS. In the Okta SAML template, this is entered in the Single Sign On URL field.
Attribute
A set of data about a user, such as username, first name, employee ID, etc
Audience Restriction
A value within the SAML assertion that specifies who (and only who) the assertion is intended for. The "audience" will be the service provider and is typically a URL but can technically be formatted as any string of data. If this value is not provided by the SP, try using the ACS
Default Relay State
The URL that users will be directed to after a successful authentication through SAML.
Endpoint
The URL's that are used when Service Providers and Identity Providers communicate to one another.
Entity ID
A globally unique name for an Identity Provider or a Service Provider. A unique Okta Entity ID is generated for each application, and is referred to as the Identity Provider Issuer in the Okta application's Setup Instructions.
Identity Provider (IdP)
The authority that verifies and asserts a user's identity and access to a requested resource (the "Service Provider")
A set of information supplied by the IdP to the SP, and/or vice versa, in xml format.
- SP supplied metadata will typically provide the ACS, the Audience Restriction, the NameID format, and an x.509 certificate if the assertion needs to be encrypted. At this time, SP-supplied metadata files cannot be imported into Okta.
- IdP supplied metadata will provide the Single Sign On URL, the Entity ID and the x.509 certificate file required by the SP to decrypt the assertion.
NameID
An attribute within the assertion that is used to specify the username
Service Provider (SP)
The hosted resource or service that the user intends to access, such as Box, Workday®, Salesforce, a custom application, etc.
Single Sign On URL
The endpoint that is dedicated to handling SAML transactions. In the Okta SAML template setup screen, the SSO URL refers to the service provider's ACS.
How It Works
- Open the Admin Center at admin.walkme.com
- Go to the Security page and then Single Sign-On

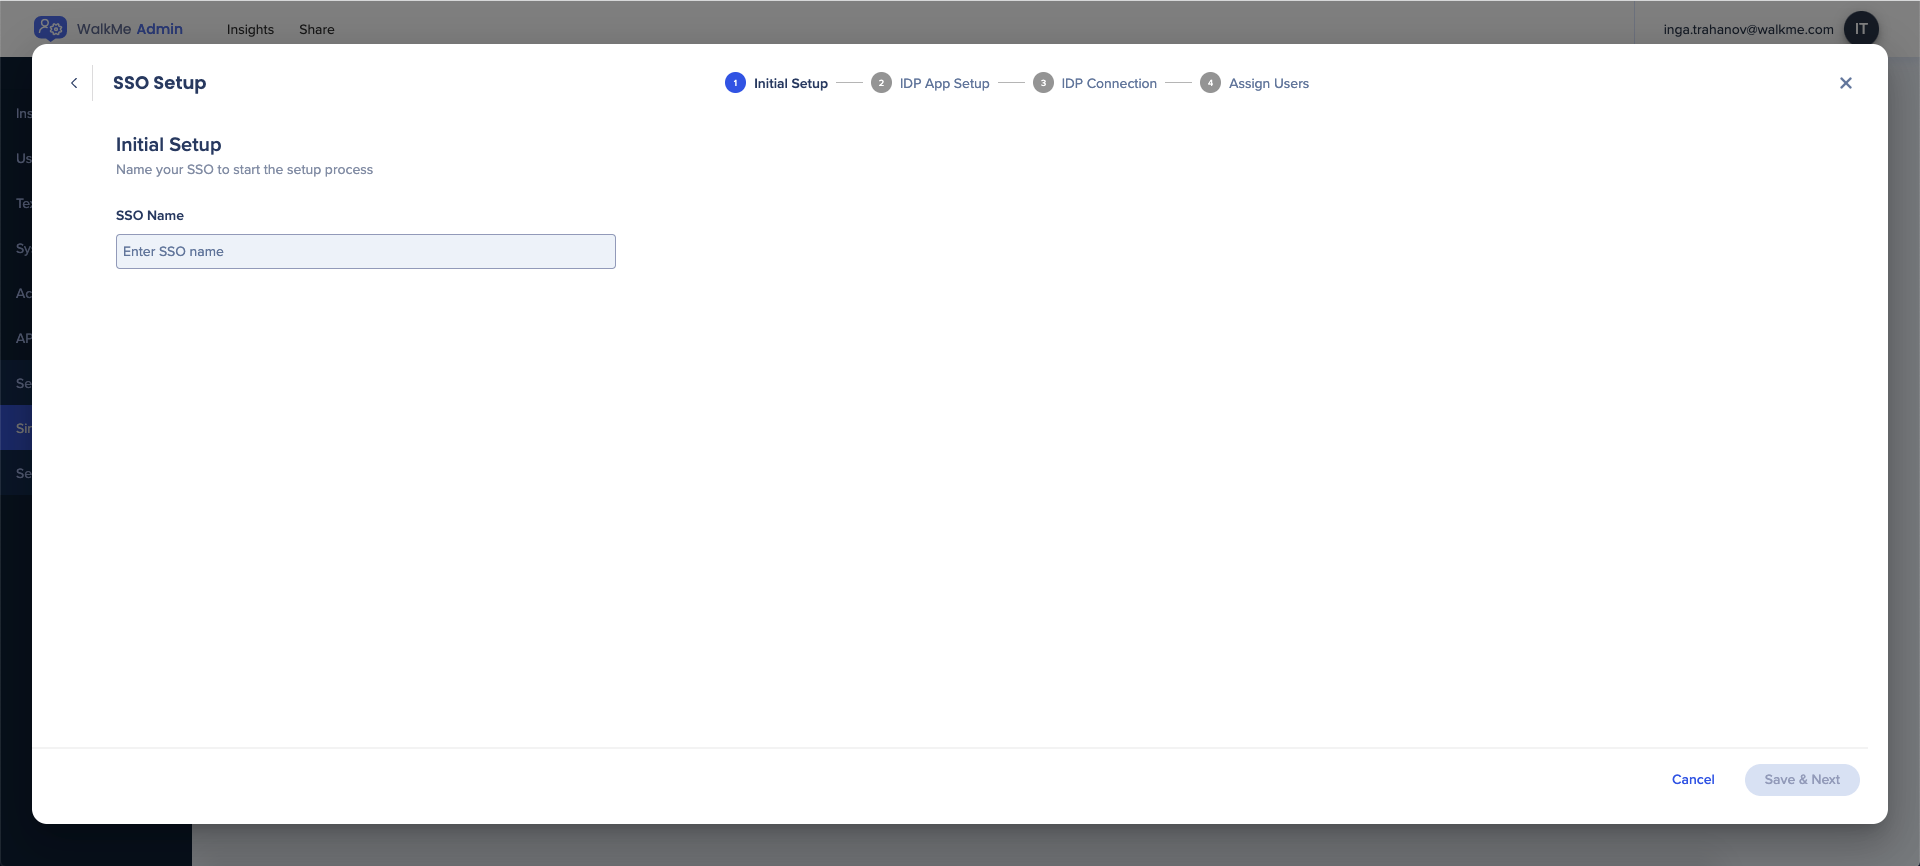
- Click the + SSO Setup

- Enter the name of SSO
- Click Save & Next

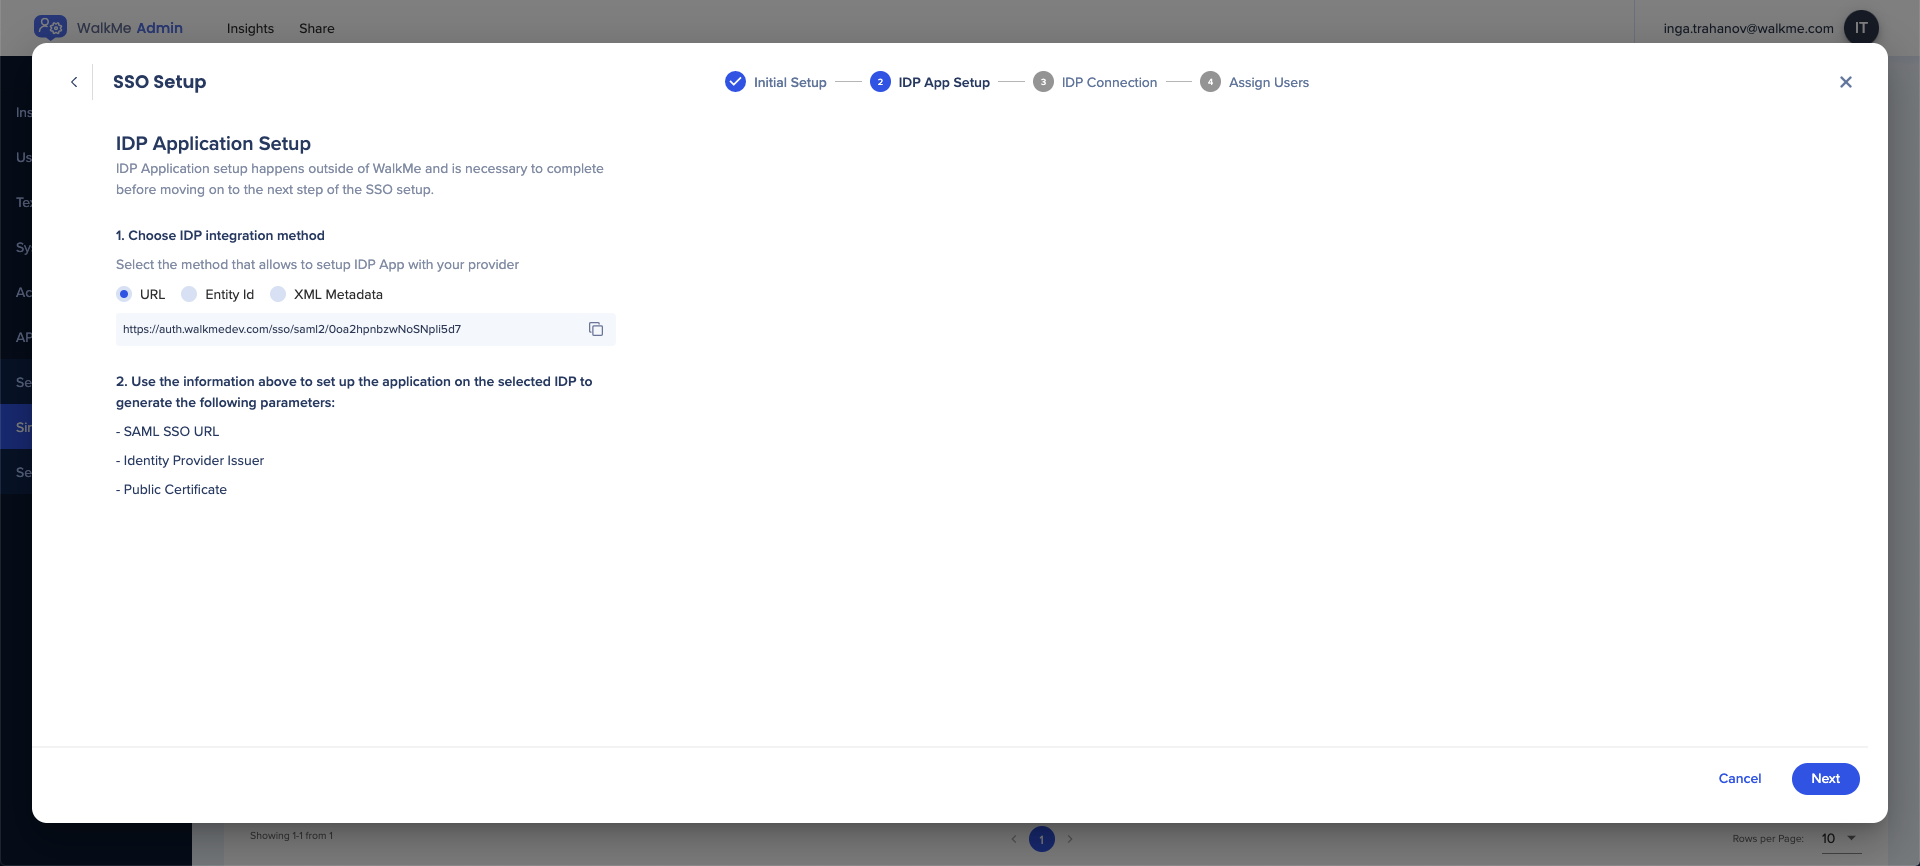
- Choose the IDP Integration method:
- URL
- Entity ID
- XML Metadata - When choosing this method you can download the xml as a file

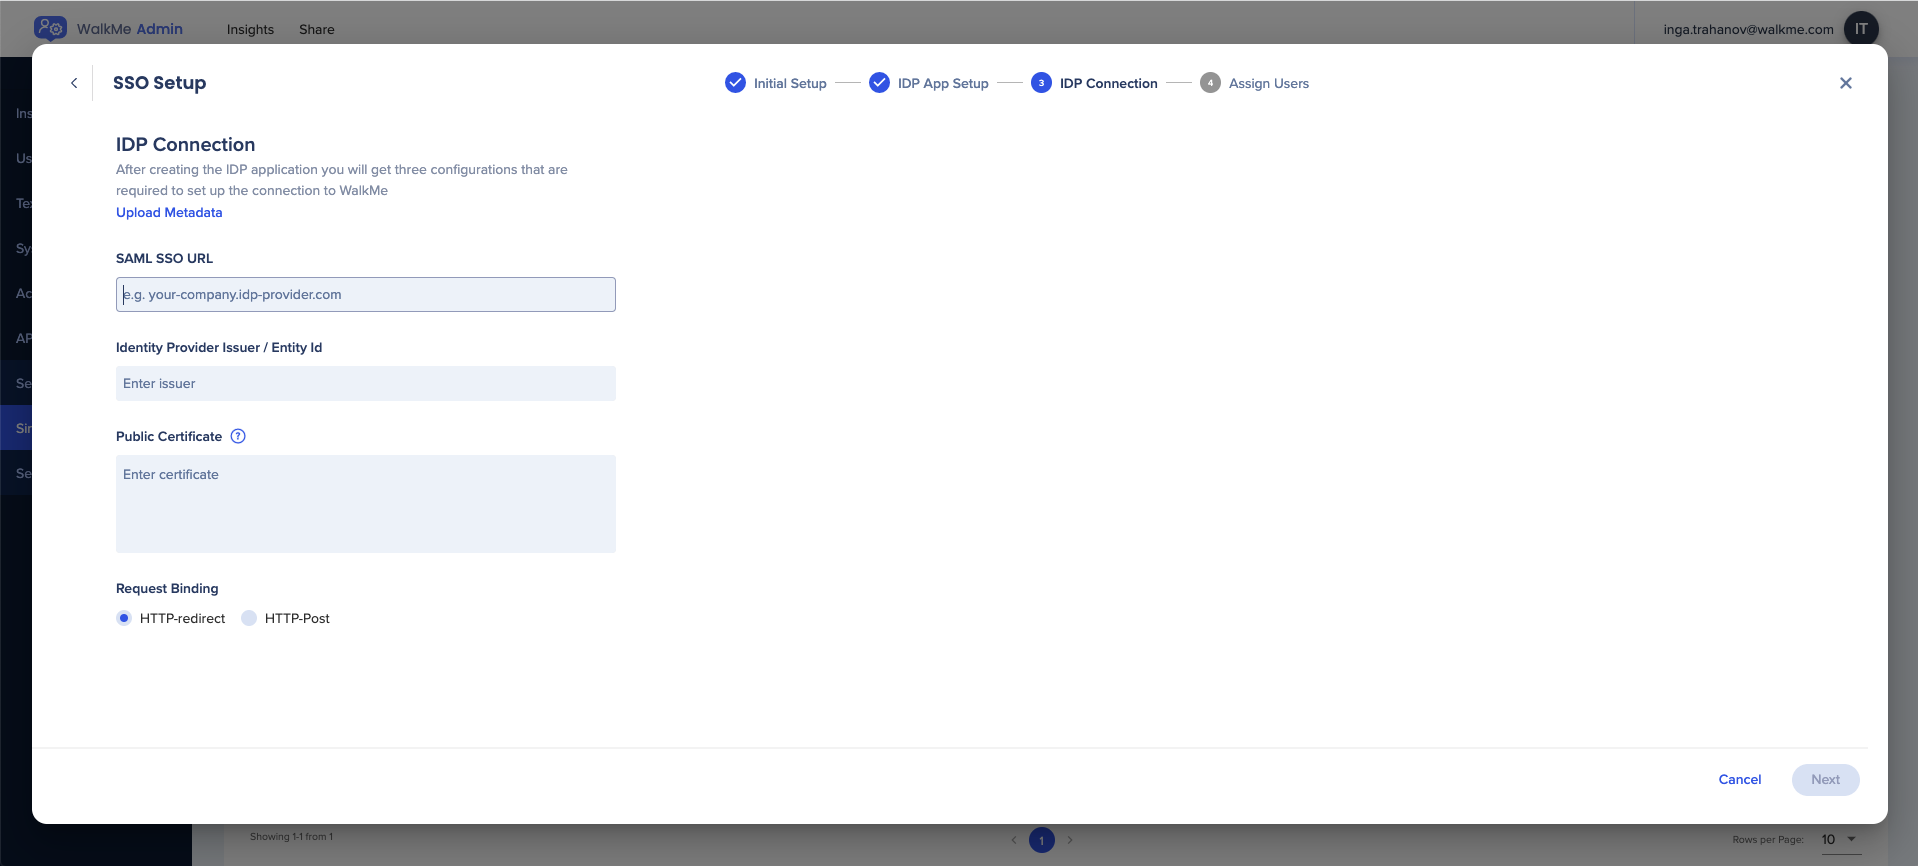
- Enter the required details to complete SSO setup:
- SAML SSO URL
- Identity Provider Issuer / Entity ID
- Public Certificate
- Choose the relevant request binding
- HTTP-redirect
- HTTP-Port

- 💡 Tip: Click Upload Metadata to automatically fill all relevant fields
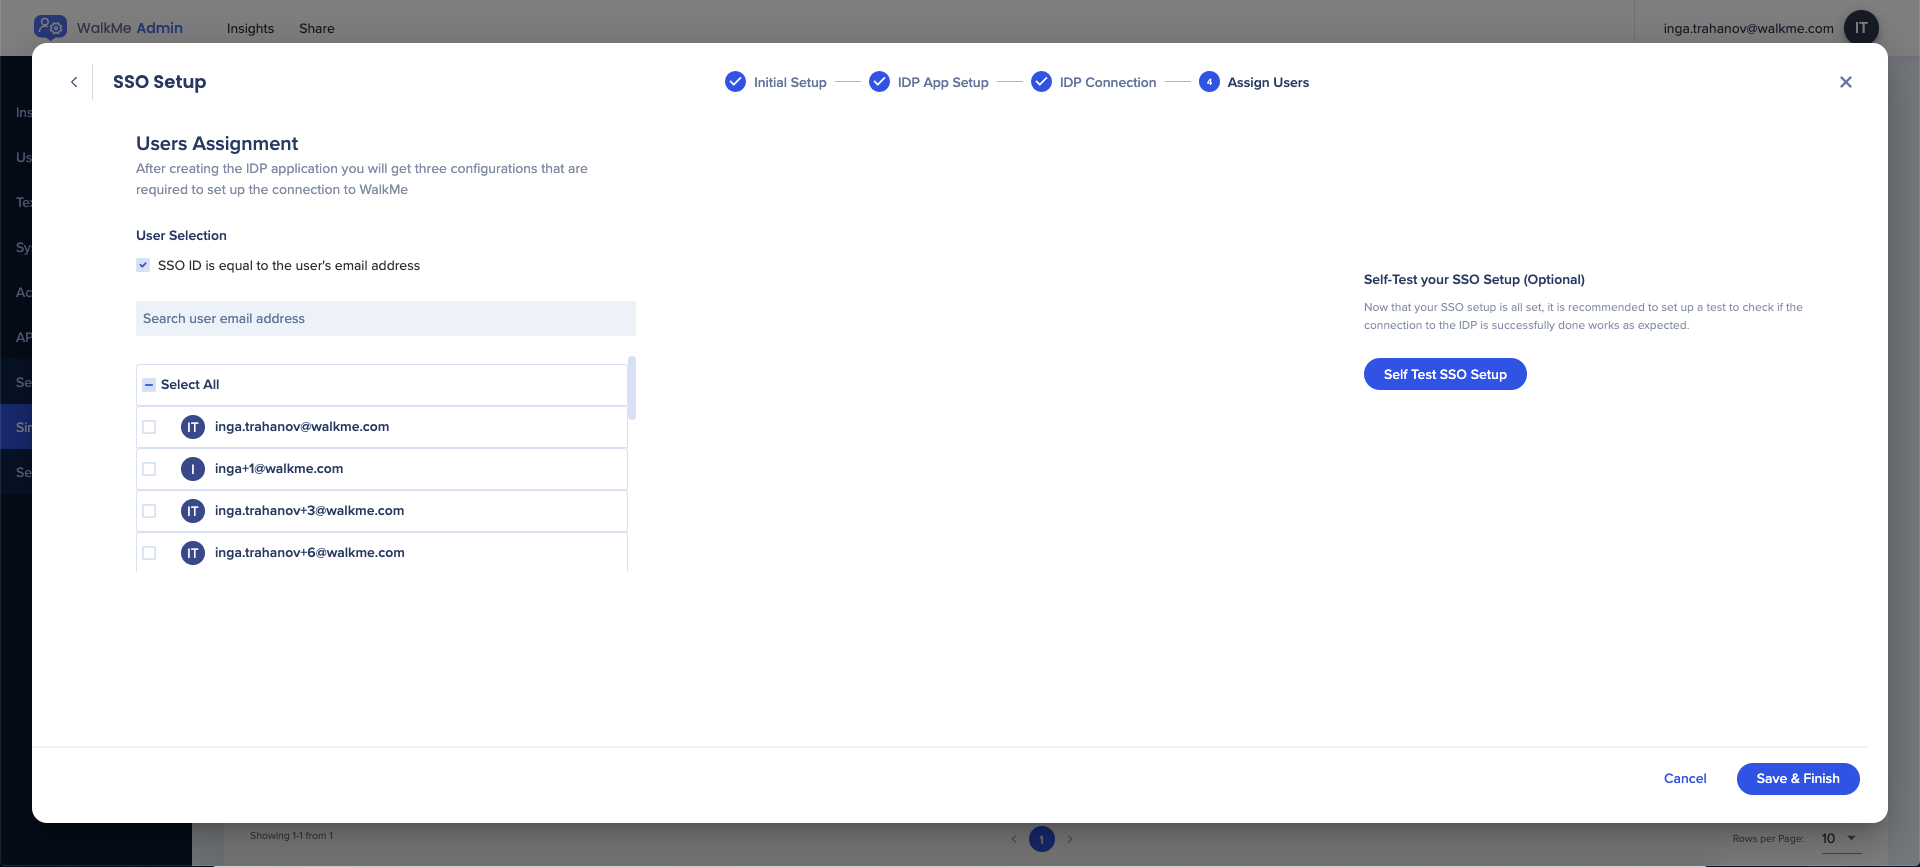
- Select users to assign to the SSO
- You can search for and assign specific users or Select All
- The default SSO ID is email, but this can be modified if desired
- Use the Test SSO Setup button to check the SSO setup
- Click Save & Finish

Once the SSO connection was added successfully you will be able to see it on the Single Sign-On page in the Admin Center.
For more information on configuring SSO for Azure AD, please refer to the following article: Microsoft Tutorial
SSO Certificate
Note
- WalkMe is moving to a new SSO solution provided by the leader in identity management, Okta, that offers higher availability, performance, and better monitoring and logging capabilities.
- If your account is currently registered with WalkMe's legacy SSO, please contact whoever is managing your Single Sign-On internally, usually the Identity and Access Management or IT team, and have them follow the process below.
- They will know the information that needs to be filled out to configure SSO.
- Create a new SSO connection following the steps above
- In the 3rd step, you will be required to upload the new certificate and then finish the setup
- After the creation of the new SSO connection, all relevant links that are using the old SSO should be changed to the new one created in the setup
How to Update SSO Certificate

