Workstation – Salesforce Integration
Brief Overview
Salesforce is a cloud-based software company. It provides a customer relationship management (CRM) service and enterprise applications (“apps”) focused on customer service, marketing automation, analytics, and application development.
The Salesforce integration with Workstation lets you easily find your Salesforce objects within Workstation.
Overall there are 12 apps within Salesforce. Each app has its own menu that is displayed to the user, according to the objects the user will need to work with and the relevant work processes. The main apps are- Service (Cases management), Sales (Sales processes), and Marketing (Marketing automation).
Get to Know
Integrating Salesforce with Workstation adds Salesforce objects to the desktop and mobile Workstation enterprise search so you can easily find what you need without leaving Workstation. Additionally, you can view your Salesforce list from the My CRM View widget on the Workstation homepage.
Use Cases
Enterprise Search
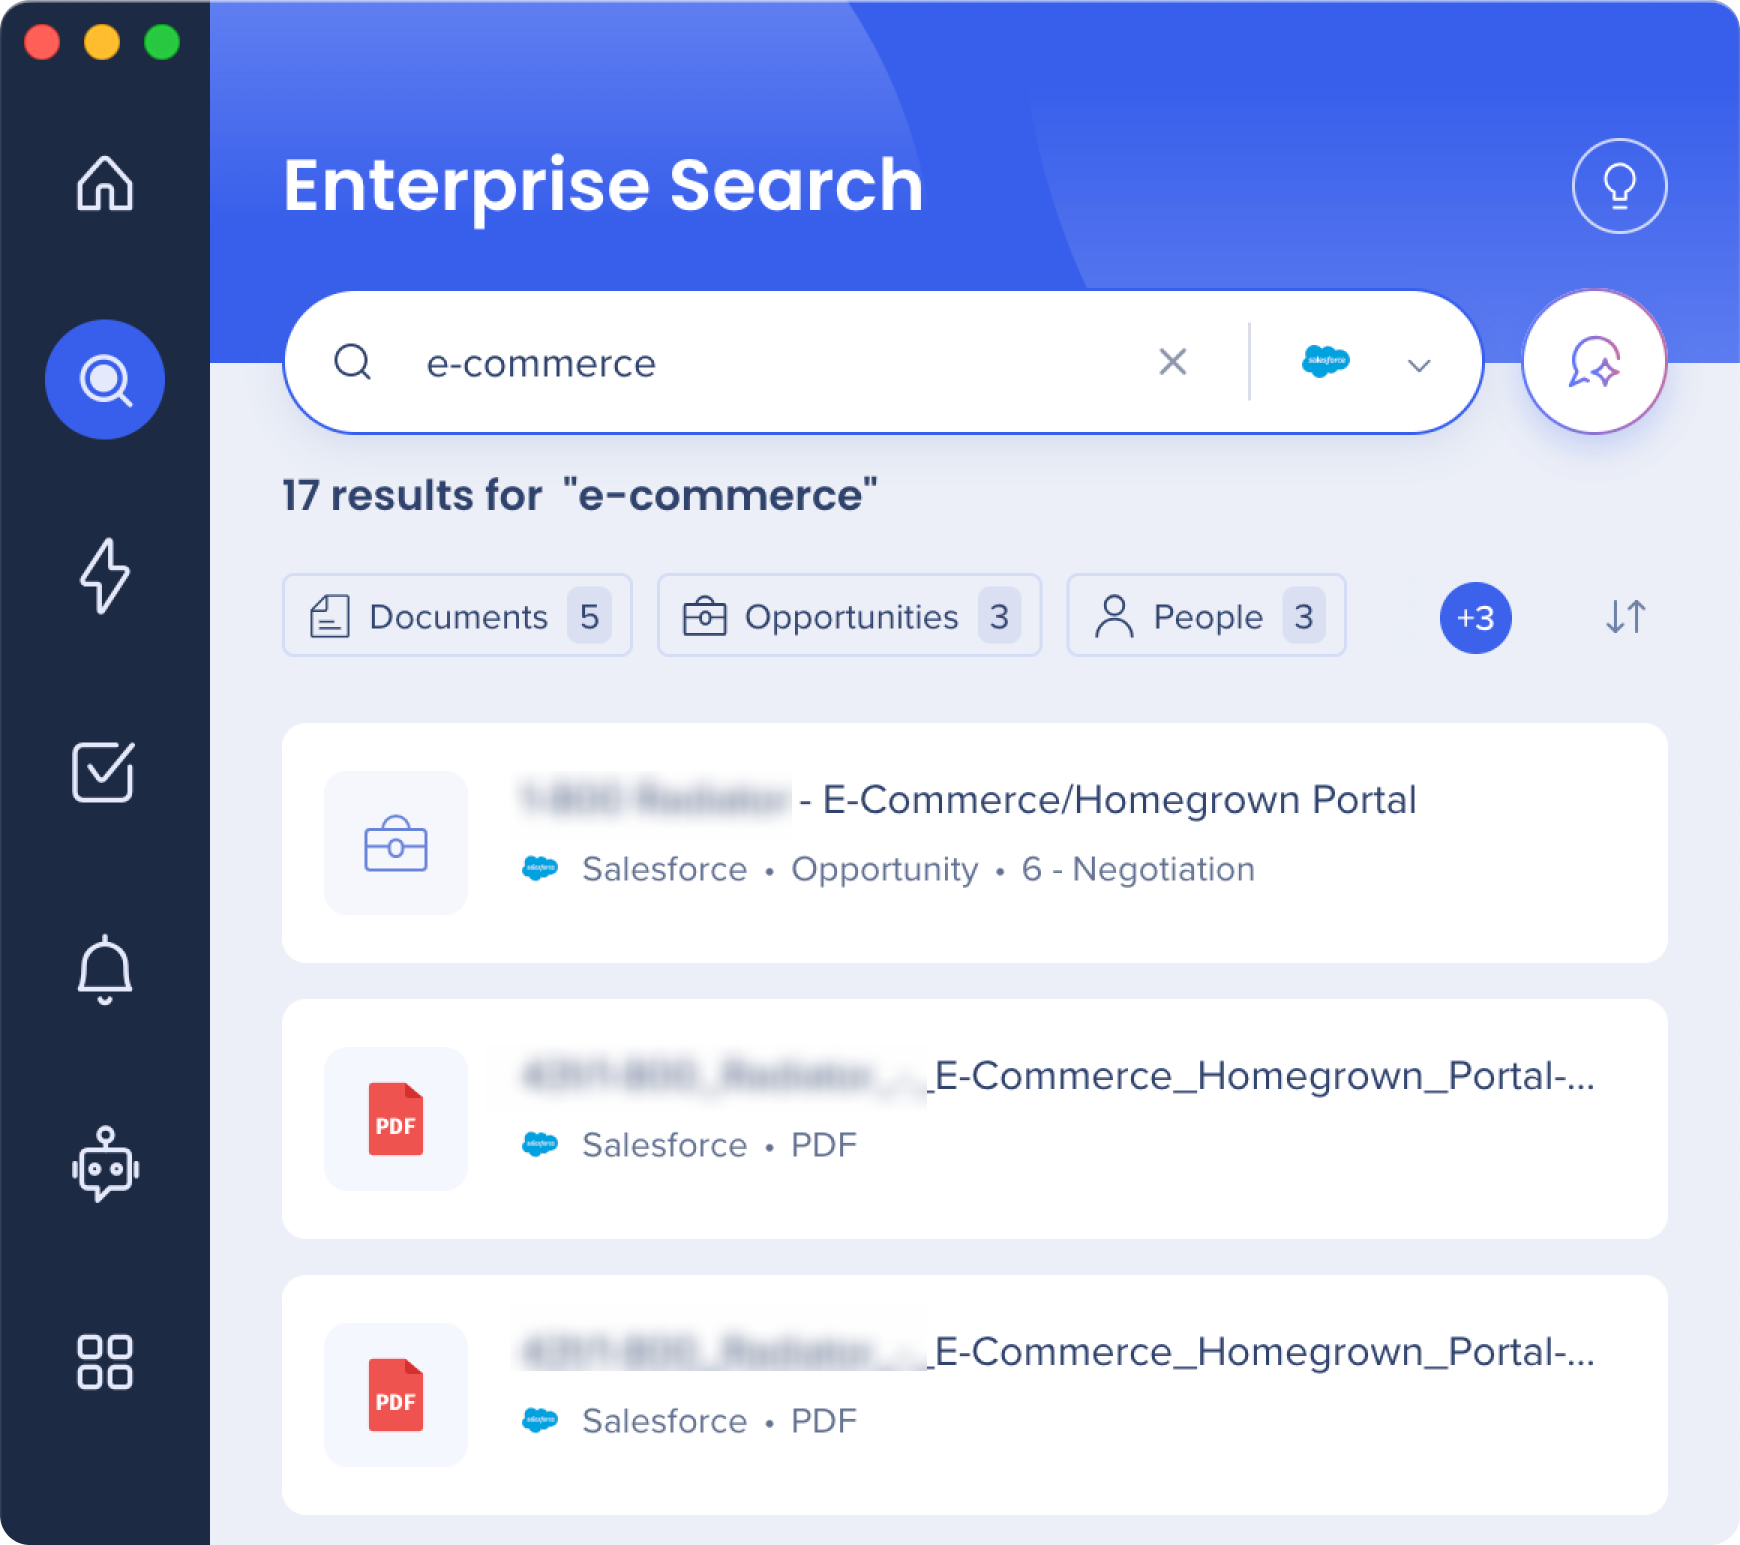
Search for Salesforce objects in the Workstation Enterprise Search:
Search for the following Salesforce objects:
- Lead
- Account
- Contact
- Opportunity
- File
- Dashboard
- Report
- Case
My CRM View Widget
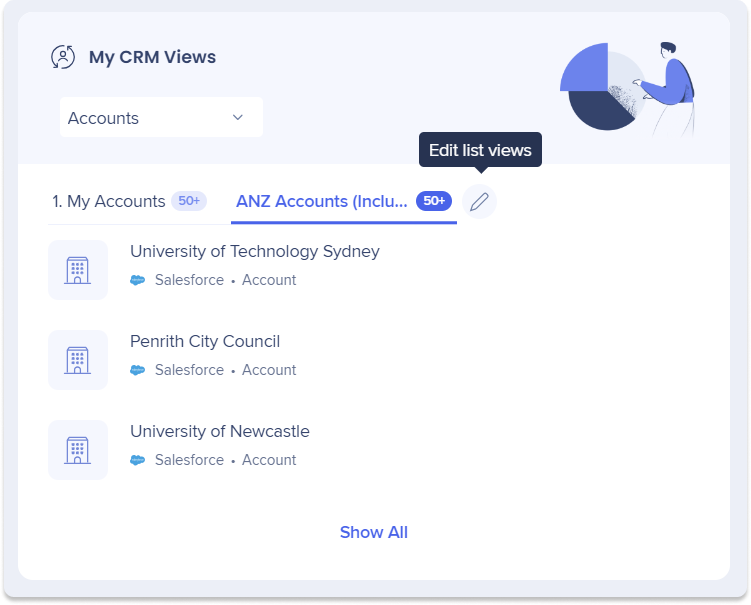
You can see your Salesforce list views directly from Workstation.
-
Click the dropdown to change the object type and see its list views
-
You can edit the list views on the widget by editing the object type settings to choose which types of data should be displayed
-
Open the dropdown
-
Click the Edit
-
Find the object type that you want to edit
-
Click the pencil icon
-
From edit list views, turn on up to two list views
-
You must have at least 1 list view on
-
Limitation: Only 80 list views will appear for you to choose from
-
-
Click Save
Detailed Capabilities
Salesforce objects that can be found in the Workstation Search, and the fields that are displayed in the search results.
Lead
Description & Conditions
A lead is a person, a sales prospect who has expressed interest in the product or company. This prospect has taken the first steps to show interest, but that interest hasn't been fully established.
When a lead is converted (it takes place using a “convert” button)- account, contact, opportunity (optional), and task (optional) records are created.
Fields displayed in the result
- Name- This is the person's name. This field becomes the contact name upon conversion.
- Company- This is the name of the company the individual works for. This field becomes Account name after the lead is converted.
- Lead status- This field tracks the life cycle of the lead, showing where the lead is in the qualification process (e.g., Not Contacted, Attempting Contact, Contacted, Disqualified, etc.).
Account
Description & Conditions
An account is an organization. This can be just about any kind of organization that is somehow involved with the business - current customers, companies that wish to buy goods/services, businesses that are partnered with, competitors, or non-profit entities.
Fields displayed in the result
- Name - the name of the company or organization
- Type- a way to further classify the commercial/non-profit entity (e.g., partner, reseller, customer, and so on)
Contact
Description & Conditions
A person who is associated with an account. For example, an employee would be the contact while the company the employee works for would be the account.
Fields displayed in the result
- Name - contact's name
- Account Name - company name
Opportunity
Description & Conditions
A sale or pending deal. The opportunity is the step after a lead.
Fields displayed in the result
- Opportunity name - e.g. Acme Inc.– 300 Dell LCD Monitors
- Stage - this shows where the potential deal is in the sales process, e.g. Product Demo, Negotiations, or Contract Review
File
Description & Conditions
Users can upload files, preview, share, and collaborate on files, attach files to records, store files privately, manage version updates, and follow files that are important to them.
There are some basic Salesforce requirements and limitations that you'll want to keep in mind while uploading content to Salesforce files tab-
- Files formats supported include .docx, .pdf, .ppt, .pptx, .xls, and .xlsx
- All image files are supported including .gif, .jpg, and .png
- 100 MBs is the maximum supported file upload size
- Files larger than 5MB may not be previewed inside the app and will need to be opened in another program
- The visible area for an Image Formula in the Salesforce for Android and iOS list view is 16 X 16 pixels. Using images larger than 16 X 16 will result in the image being cut off.
Fields displayed in the result
- Title
- File type
Report
Description & Conditions
A report is a list of records that meet the criteria you define. It's displayed in Salesforce in rows and columns, and can be filtered, grouped, or displayed in a graphical chart.
Every report is stored in a folder. Folders can be public, hidden, or shared, and can be set to read-only or read/write. You control who has access to the contents of the folder based on roles and permissions.
Fields displayed in the result
- Report Name
- Folder
Dashboard
Description & Conditions
A dashboard is a visual display of key metrics and trends for records in your organization. The relationship between a dashboard component and report is 1:1; for each dashboard component, there is a single underlying report. However, you can use the same report in multiple dashboard components on a single dashboard (e.g., use the same report in both a bar chart and pie chart). Multiple dashboard components can be shown together on a single dashboard page layout.
Like reports, dashboards are stored in folders, which control who has access.
Fields displayed in the result
- Dashboard Name
- Folder
Case
Description & Conditions
A case is a customer's question, feedback, or issue. Support agents can review cases to see how they can deliver better service. Sales reps can use cases to see how they affect the sales process.
Fields displayed in the result
- Case Number
- Subject
- Status (e.g. New)
Security Overview
Read more about Workstation's integration security and Workstation's Enterprise Search.
Configure an App in Salesforce
1. Sign in to Salesforce
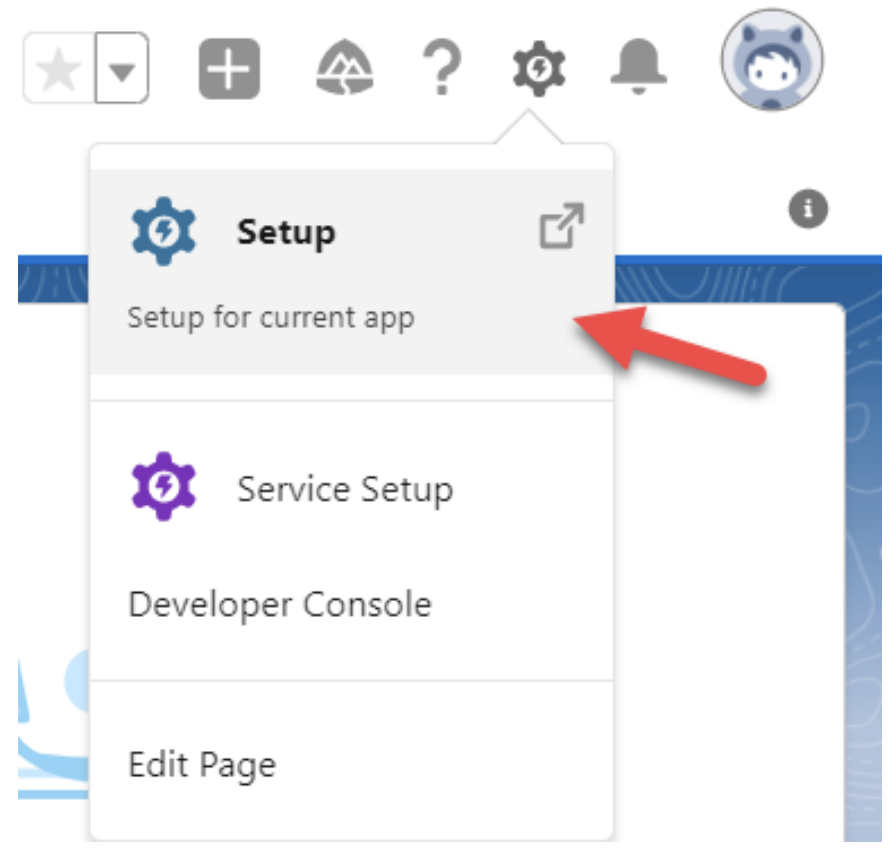
2. Click on Setup for current app
3. Navigate to the App Manager using the search
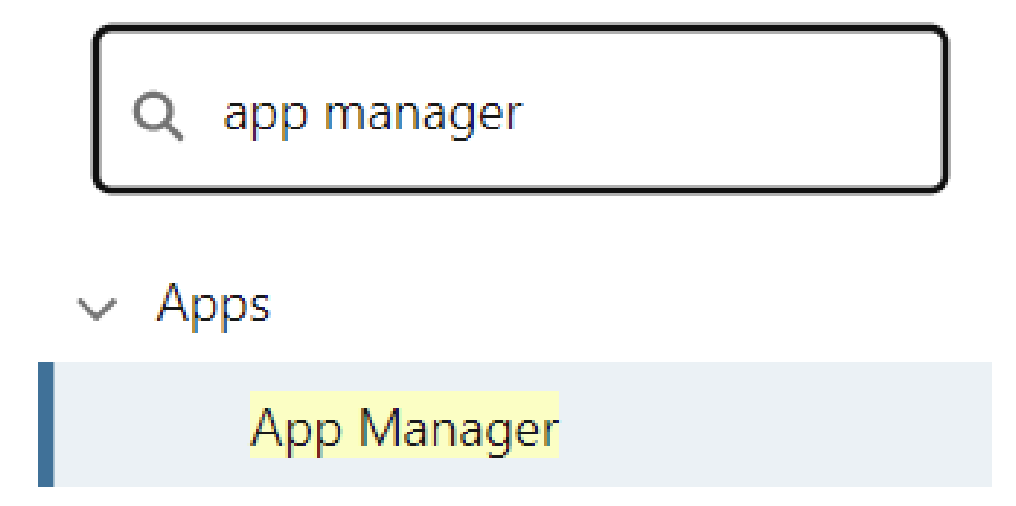
4. Create a New Connected App

5. Fill in this data in the relevant fields
- Connected App Name: Workstation
- API Name: Workstation
- Contact Email: Your email address
- Enable OAuth Settings: Yes, click the check mark
- Enable for Device Flow: Yes, click the check mark
- Callback URL (also known as Redirect URL): Copy and paste these in this order:
- https://workstation.walkme.com/salesforce/connected
- https://eu-workstation.walkme.com/salesforce/connected
- http://localhost:3002/app/dev/authenticator-app/salesforce/connected
- Selected OAuth Scopes: Add 'Full access (full)' from the Available OAuth Scopes to the Selected OAuth Scopes:
- Full access (full)
- Manage user data via APIs (api)
- Perform requests at any time (refresh_token, offline_access)
- Require Secret for Web Server Flow: Yes, click the check mark
- Require Secret for Refresh Token Flow: Yes, click the check mark
- Require Proof Key Code Exchange (PKCE): No, click to unmarked
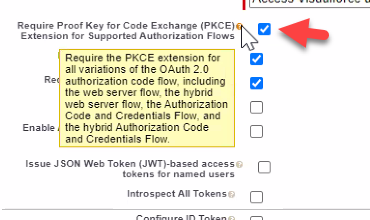
6. Press Save
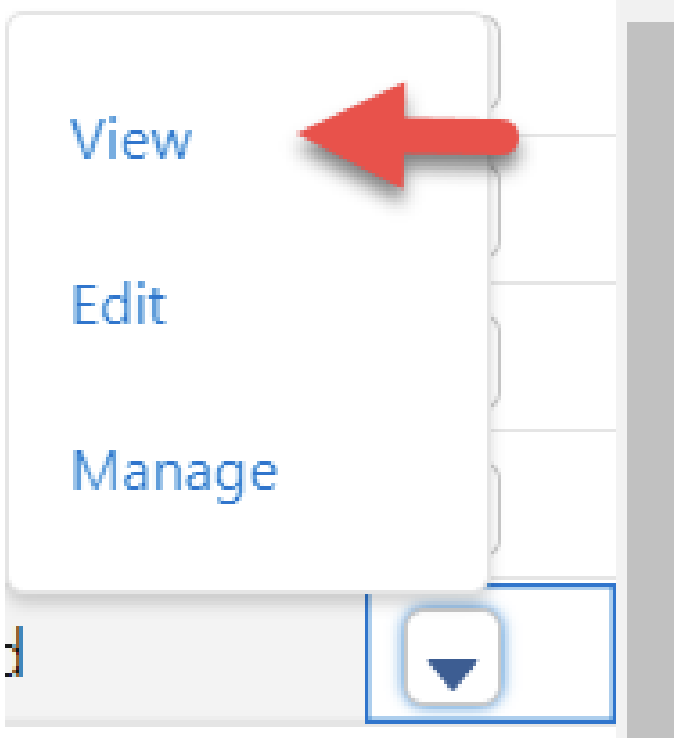
7. Go to the app's menu click on View
8. On this screen, copy “Consumer Key” and “Consumer Secret” and the Salesforce “domain” (URL)
- Domain example: If this if your Salesforce domain https://company-lightning-example.lightning.force.com/ then copy the only the highlighted part: company-lightning-example.lightning.force.com
9. Go to the WalkMe Console > Workstation Integrations
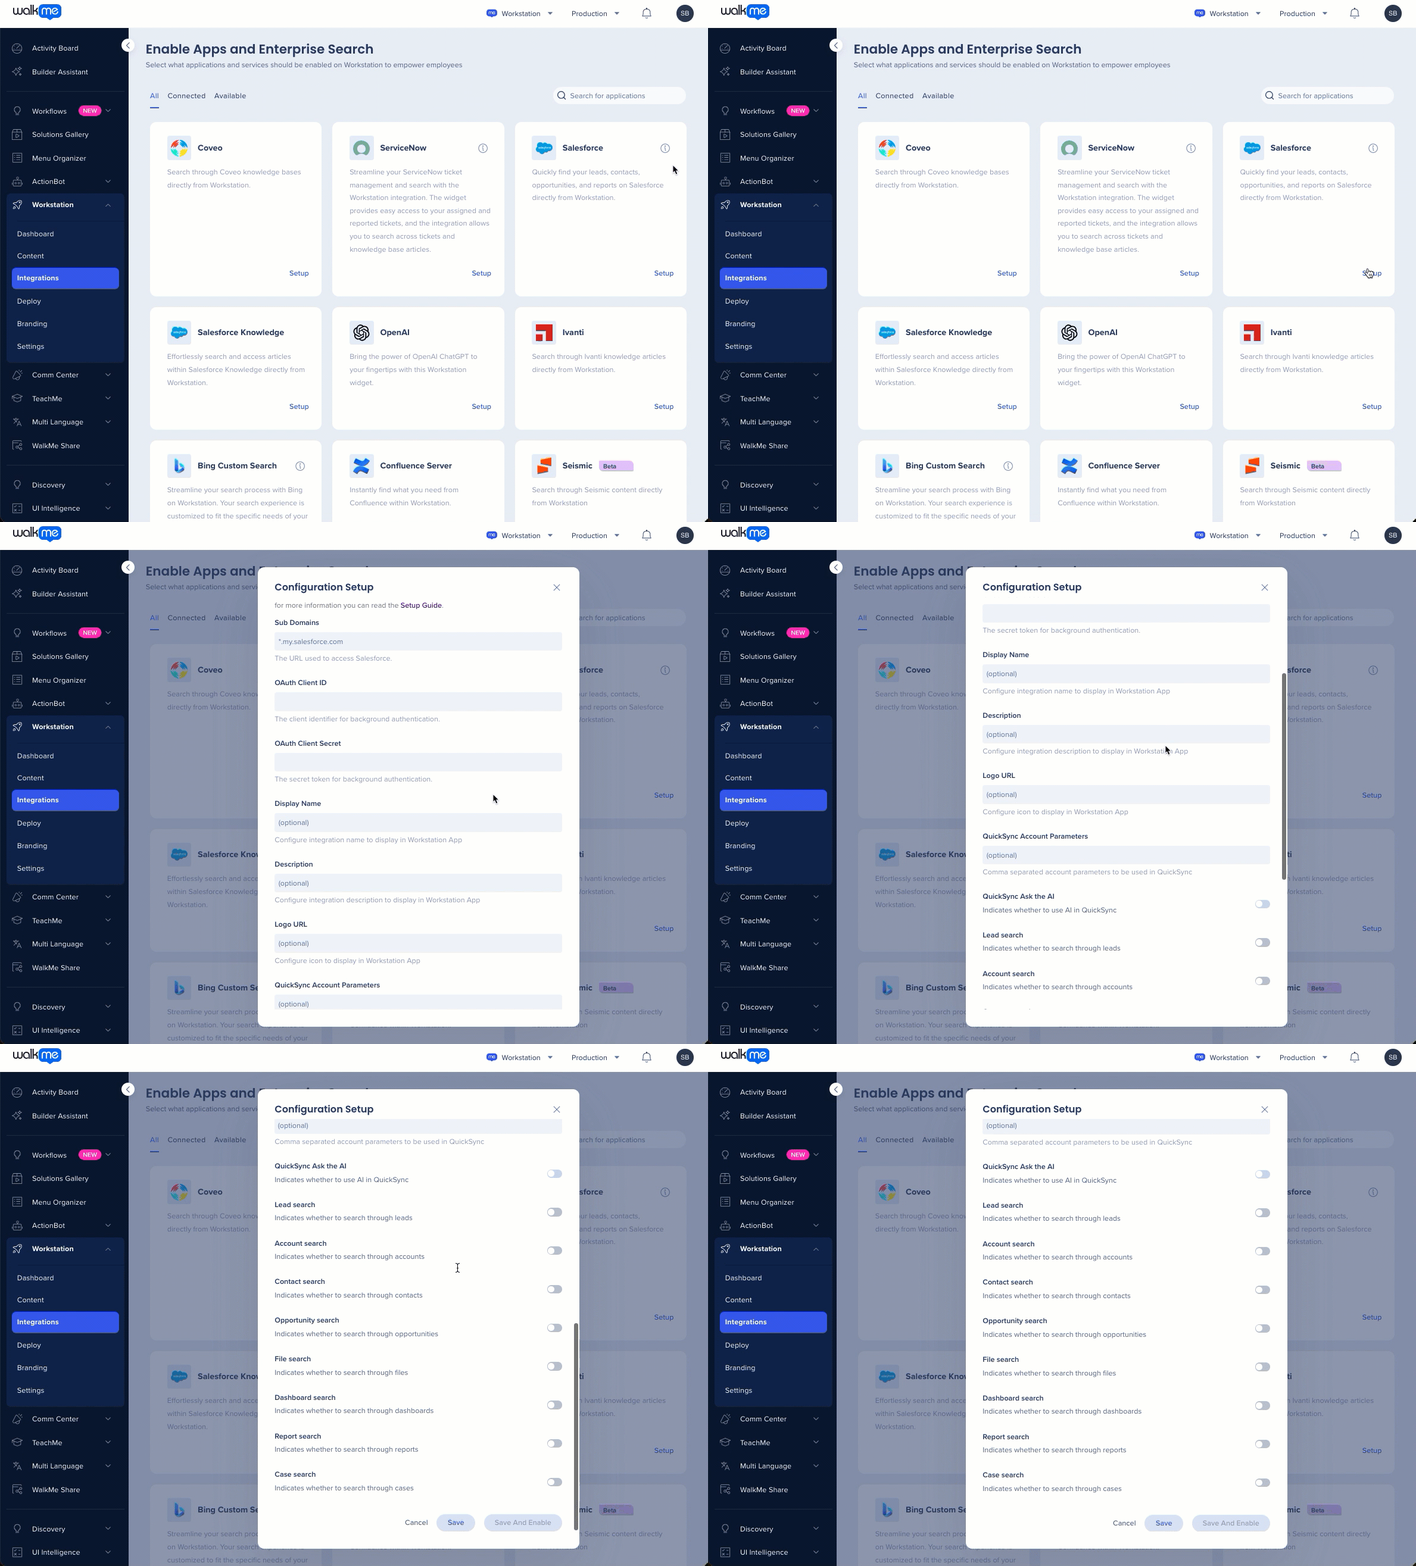
10. Edit the configuration of the Salesforce app with the parameters you've copied
- OAuth Client ID is the "Consumer Key", OAuth Client Secret is the “Consumer Secret”
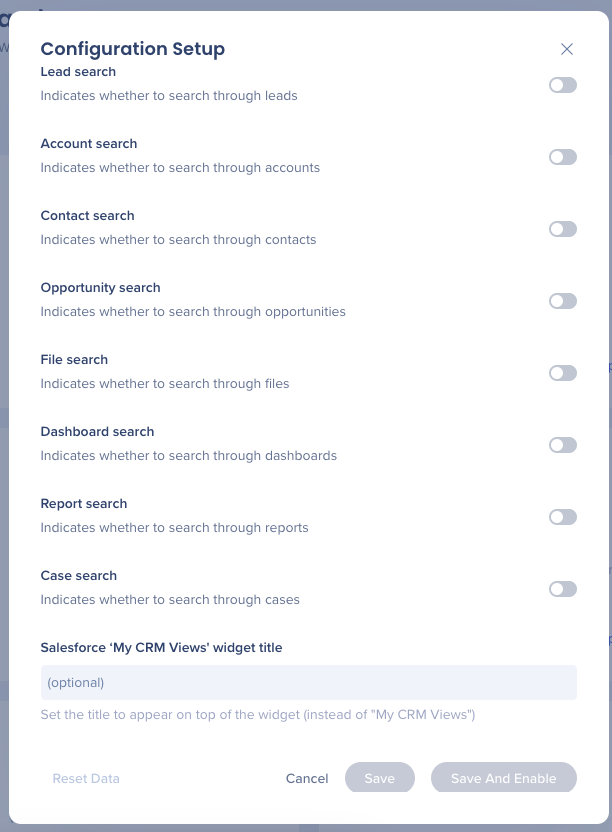
11. Select which objects will appear on the Enterprise Search results
- Click the toggles to enable each selection you want to display
- Additionally, you can customize the Salesforce 'My CRM Views' widget title
- Enter a new title in the field to customize
Connecting Salesforce on Workstation
- In your Workstation, go to Settings -> Integrations
- Find Salesforce and click Connect
- Sign into Salesforce
If the Salesforce card is not available, contact your WalkMe Owner in your organization and ask to enable Salesforce on Workstation.
Segmentation
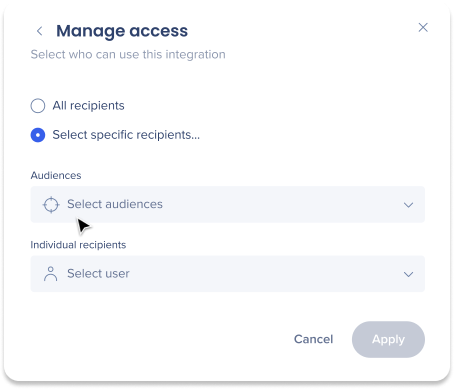
Integrations can be segmented to a sub-set of users and audiences, rather than being enabled for all end-users. This feature streamlines the integration process and helps to ensure that users are only using the integrations that are relevant to their work.
To segment a Workstation integration:
- Navigate to the Workstation Integrations page in the console
- Click the All button on the integration you would like to segment

- Click Select specific recipients in the Manage Access popup
- Select the audiences or individual users from the dropdowns to handpick who can use the integration
- Click Apply
