Workstation – SAP Concur Integration
Brief Overview
Review and quickly access Expense Reports that are either assigned to you or pending your approval.
The app allows you to follow up on the status of your reports, ensuring everything is submitted on time for your payment.
Connecting SAP Concur to Workstation adds a widget, to review and quickly access Expense Reports.
Connecting SAP Concur on Workstation
-
- Open the Workstation Menu by clicking the widget (on Windows) / the WalkMe icon on the Mac Menu bar, or by hitting ctrl/cmd+shift+E
- Go to Settings -> Integrations -> SAPConcur
- Click Connect
If the SAP Concur card is not available, contact the WalkMe admin in your organization and ask to enable SAP Concur on Workstation from the WalkMe Console.
Get to Know
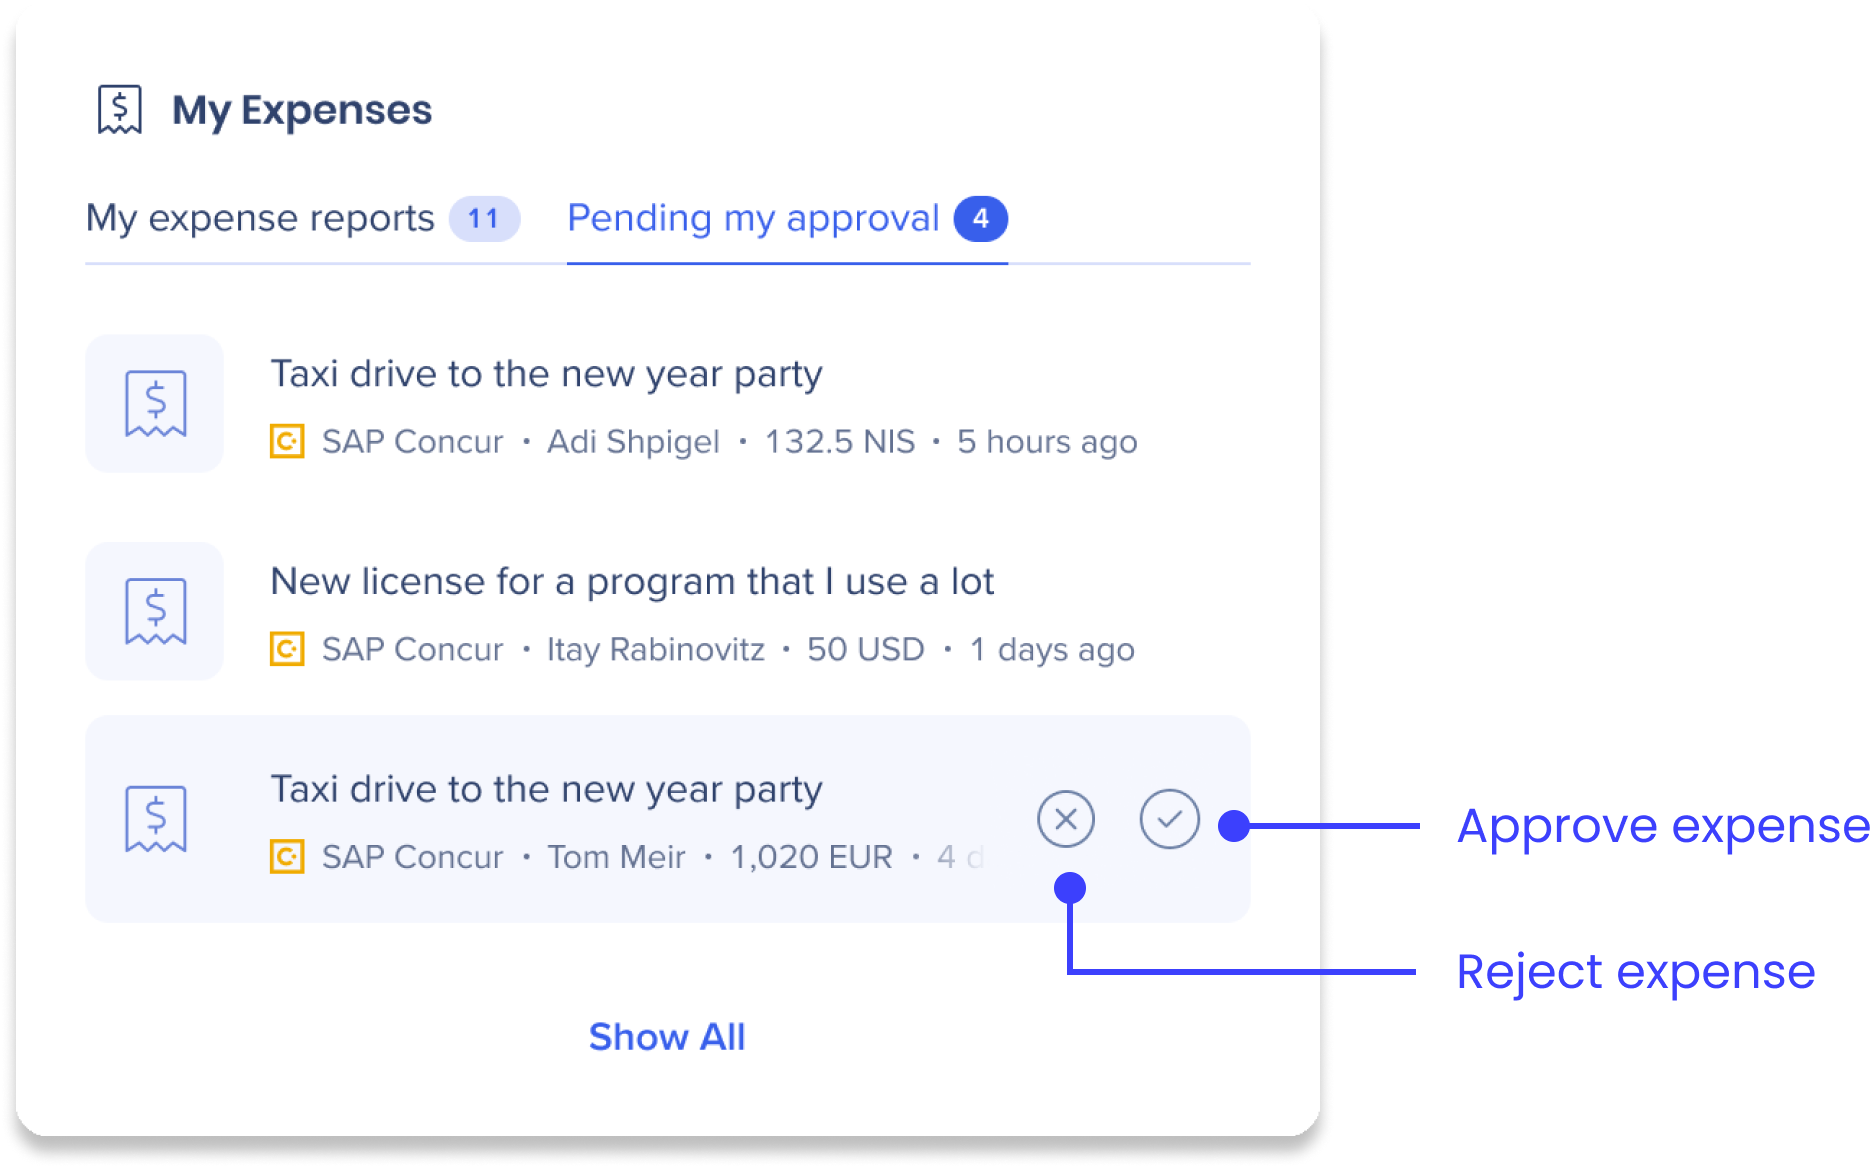
The widget has two tabs:
- My expenses: This tab lists the expenses that you have submitted and are waiting to be reimbursed. The tab displays the following:
- Report name
- Total amount (number + currency)
- Status (not submitted, submitted)
- Modified Date
- Pending my approval: This tab lists the expenses that are awaiting your review. This tab displays the following:
-
- Report name
- Employee name
- Total amount (number + currency)
- Modified Date
Approve or reject an expense
If you have expenses under the Pending my approval tab, you can approve or reject them directly from the widget.
To approve an expense:
- Click the check mark on the expense you want to approve
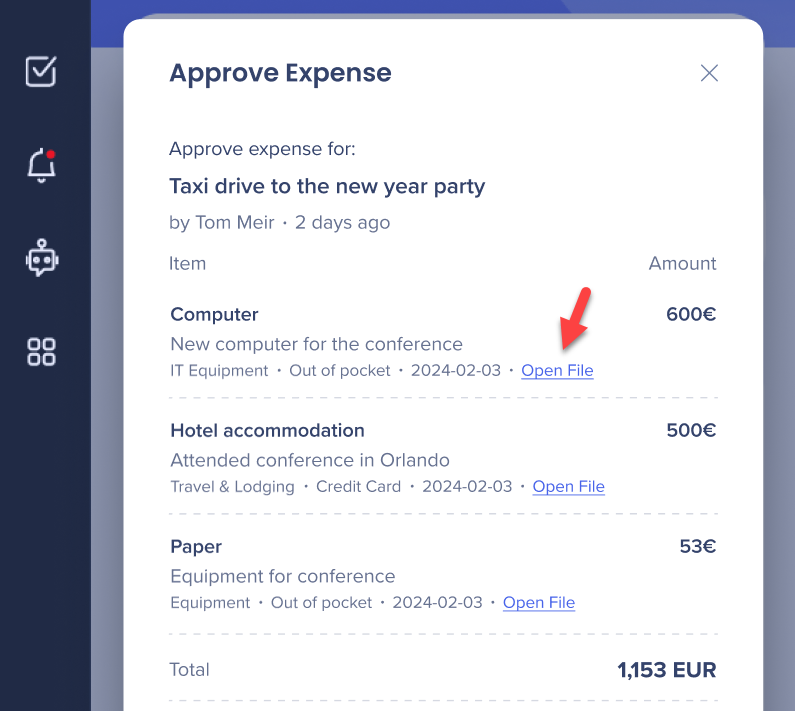
- In the popup that appears, you can review the expense and add a comment (optional)
- When you're ready, click Approve
To reject an expense:
- Click the x icon next to the expense you want to reject
- In the popup that appears, you can review the expense
- Add a comment about why the expense was rejected
- Click Reject
Display expense entries files in a Workstation window
Clicking Open File on an Expense Report will now open the file in a Workstation window (instead of a new browser tab).
Security Overview
Read more about Workstation's integration security and Workstation's Enterprise Search.
Admin Configuration
The SAP Concur integration is configured by an API key by the organization's admin on the Console. Once it's been configured and enabled, it will automatically be added to the Workstations on that system.
Configuration Requirements
Here are the requirements for configuring SAP Concur via the WalkMe Console:
- Admin access to create an App on SAP Concur
- Admin access to the WalkMe Console
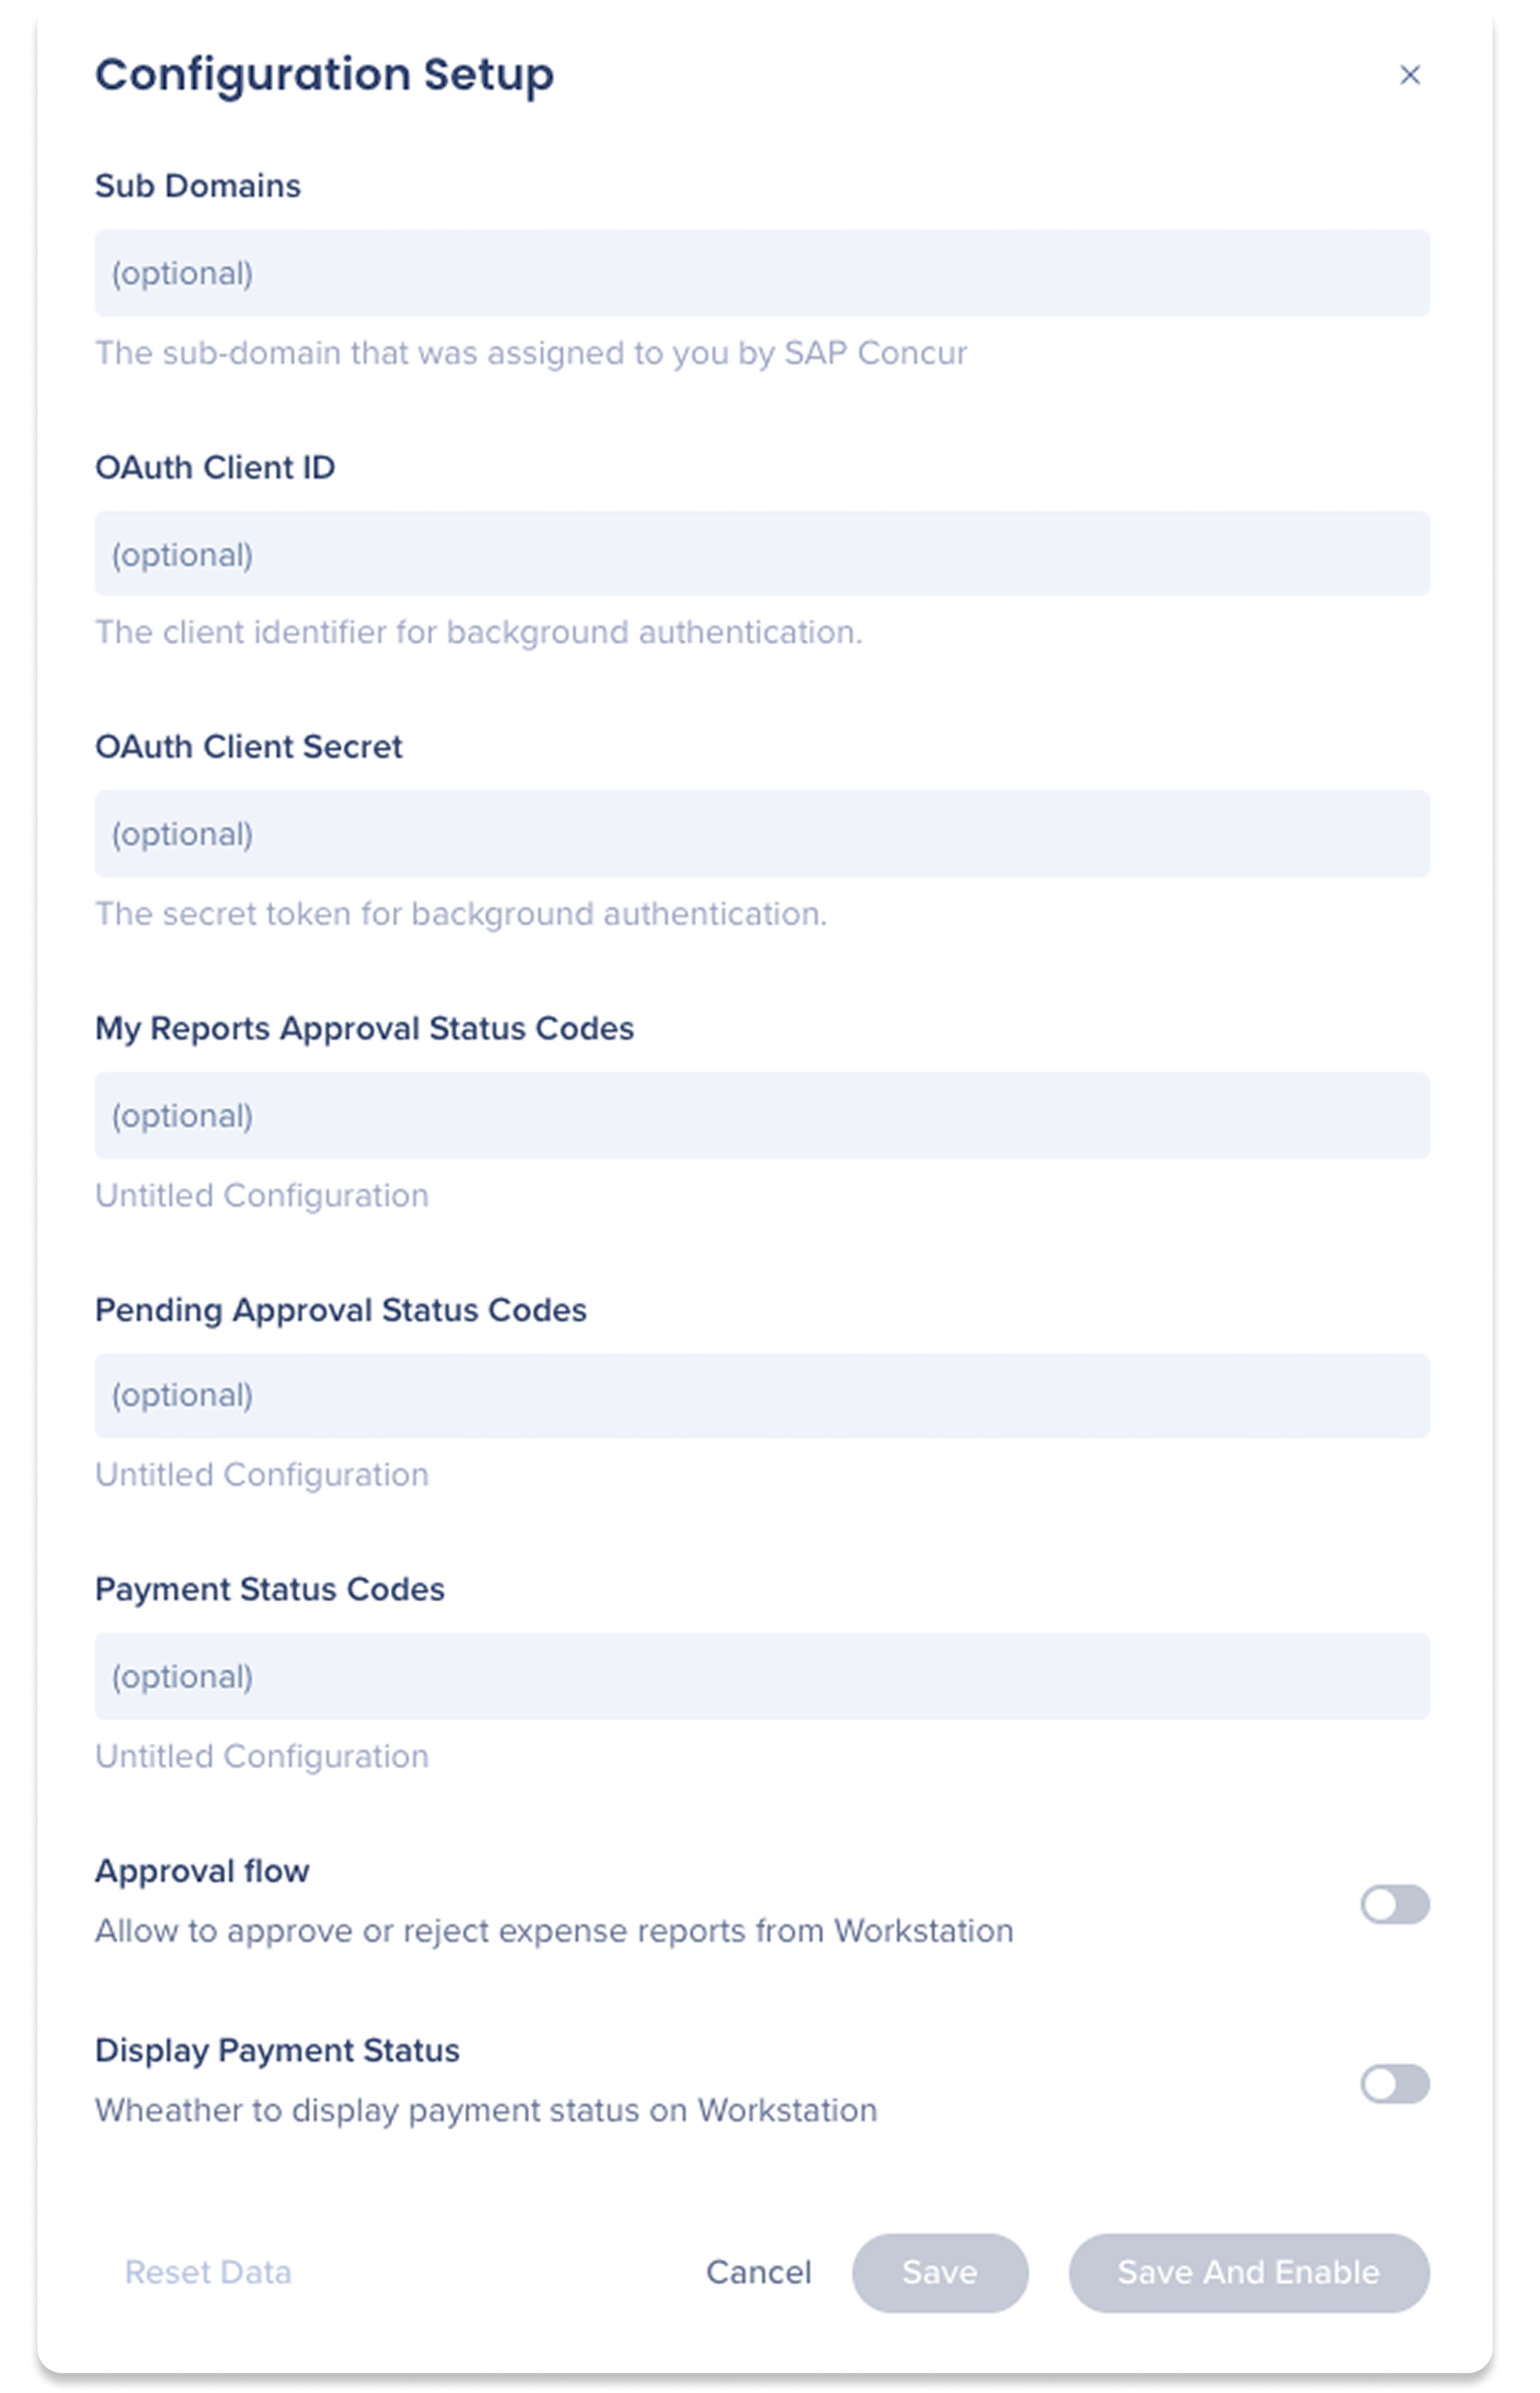
- These are fields that you'll need to fill to enable the integration via the Console:
- Sub Domains
- OAuth Client ID
- OAuth Client Secret
- My Reports Approval Status Codes
- (Optional) If left blank, the default status code will be used
- Pending Approval Status Codes
- (Optional) If left blank, the default status code will be used
-
Payment Status Codes
-
(Optional) if left blank, nothing will be displayed by default
-
- Approval flow
- (Optional) Enable to allow approve / reject buttons on expense reports from Workstation
Continue reading for finding each field's information.
Step 1: Configure an App in SAP Concur
- Log in your SAP Concur and go to Administration > Company > Authentication Admin > OAuth 2.0 Application Management
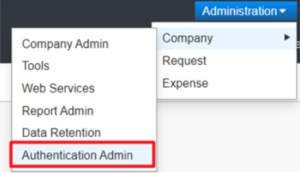
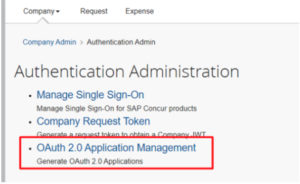
- Accessing this option you will find all the credentials already created in your environment.

- To generate a new set of credentials, click on Create New App.

- Enter required fields: App Name, App Description, Allowed Grants, Allowed Scopes, following the structure:
- App Name: “Workstation”.
- App Type: No changes needed.
- App Description: “Workstation
- Allowed Grants: refresh_token, Password, client_credentials, authorization_code, otp
- Redirect URIs
- https://workstation.walkme.com/sapconcur/connected
- https://eu-workstation.walkme.com/sapconcur/connected
- Allowed Scopes – add the following-
- "openid",
"expense.report.read",
"receipts.read",
"user.read",
"identity.company.core.read",
"company.read",
"purchaserequest.read",
"budgetitem.read",
"user_read",
"profile.user.generalemployee.read",
"travel.itinerary.read",
"identity.user.core.read",
"identity.user.ids.read",
"identity.user.enterprise.read",
"travel.user.general.read",
"travel.user.private.read",
"expense.report.readwrite",
"travelallowance.itinerary.read",
"realtimeingest.location.writeonly",
"travelallowance.configuration.read",
"receipts.write",
"travelallowance.itineraryresult.read",
"receipts.writeonly",
"user.write",
"identity.company.core.writeonly",
"identity.company.adminpolicy.writeonly",
"creditcardaccount.read",
"IMAGE",
"EXPRPT"

- "openid",
- Principals – Do not check this box, this check box it's for the ICS resources only.
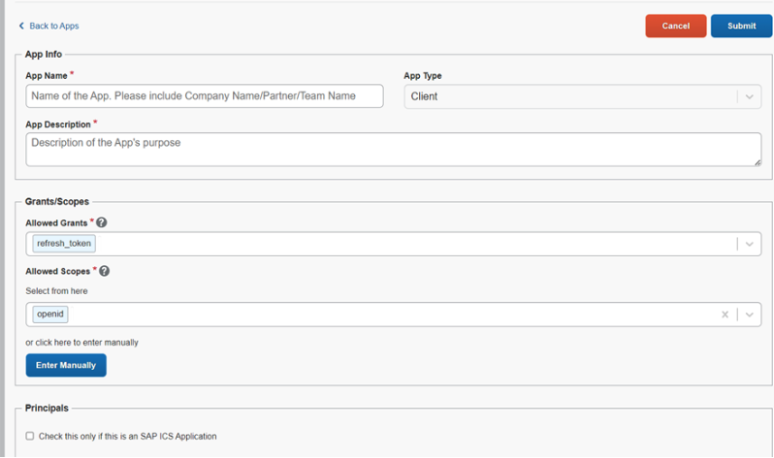
- Click on “Submit” and Client ID and Client Secret are generated - This Secret will be available only at this time to be retrieved.
Step 2: Configure set up on WalkMe Console
- Go to the Workstation Integrations page on WalkMe Console: https://console.walkme.com/workstation/integrations
- Search for SAP Concur
- Click Set Up
- Fill in the information on the popup
- Subdomain examples: eu2 or us2
- Optionally add custom status codes for My Reports Approval and Pending Approval
- Add a comma between status codes to include multiple
- Leave both fields blank to use the default status codes:
- My expense reports: A_ACCO,A_NOTF,A_PEND
- Pending my approval: A_PEND
- Optional: Enable Approval flow
- Enable to allow approve / reject buttons on expense reports from Workstation
- Click Save and Enable
- SAP Concur is now enabled for Workstation
Segmentation
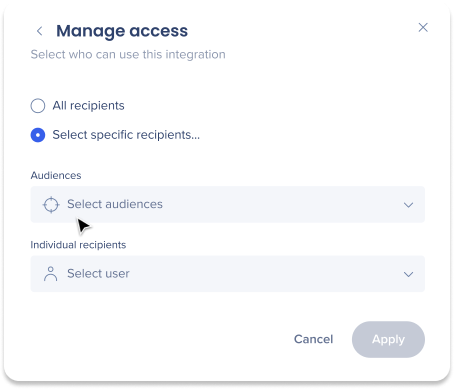
Integrations can be segmented to a sub-set of users and audiences, rather than being enabled for all end-users. This feature streamlines the integration process and helps to ensure that users are only using the integrations that are relevant to their work.
To segment a Workstation integration:
- Navigate to the Workstation Integrations page in the console
- Click the All button on the integration you would like to segment

- Click Select specific recipients in the Manage Access popup
- Select the audiences or individual users from the dropdowns to handpick who can use the integration
- Click Apply
