Brief Overview
WalkMe for Microsoft Teams brings the WalkMe Menu directly into your Teams environment, giving your organization a centralized hub for resources, tasks, and applications — without leaving Teams. Users can access WalkMe content, share resources with teammates, and stay on top of onboarding tasks, all from within the interface they already use every day.
How to Install
Note
Installation should be done by your organization's IT department, not by an individual user.
For full installation guidance, refer to the Microsoft article covering the installation process.
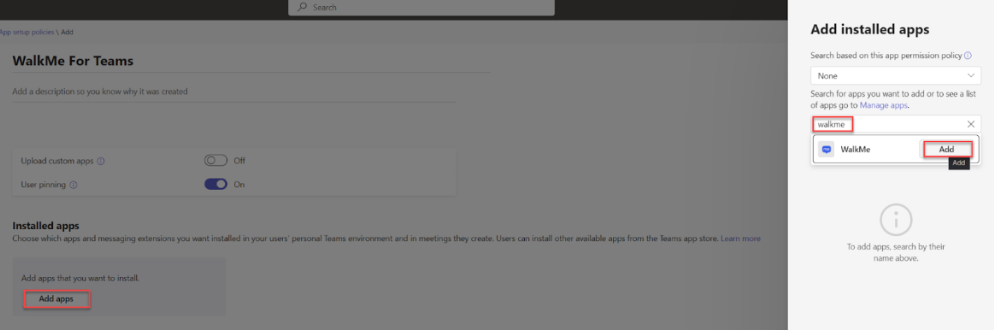
To install the app using an app setup policy:
- Log into the Teams admin center and go to Teams apps and then Setup policies: https://admin.teams.microsoft.com/policies/app-setup
- Select Add

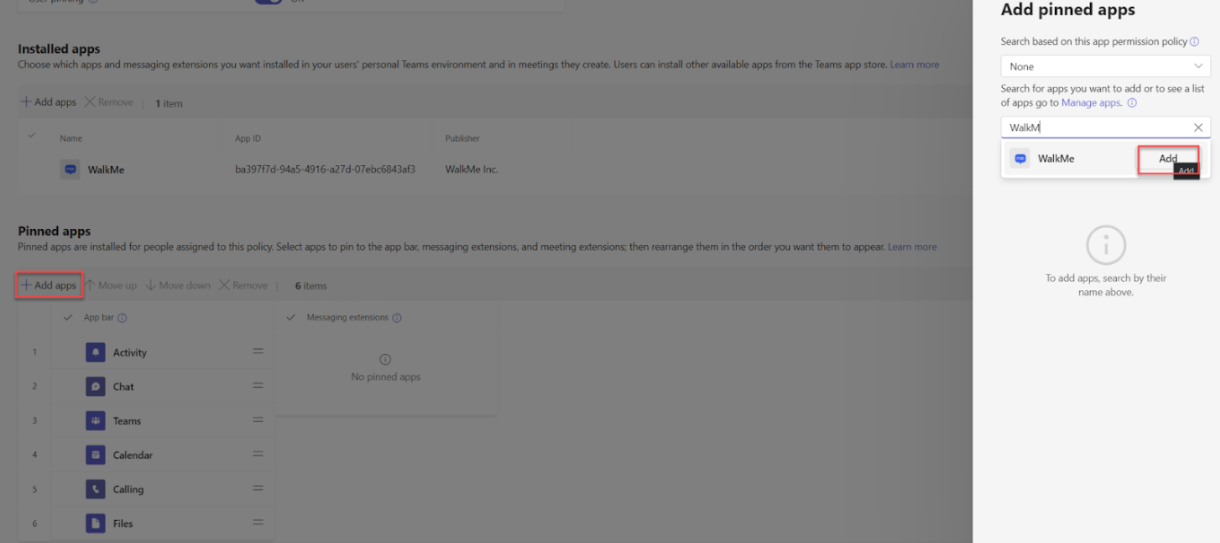
- Type a name and description for the policy. Under Installed apps, select Add apps. In the Add installed apps pane, search for "WalkMe" and select Add
- To pin the app to Teams, scroll down to Pinned apps, select Add apps, search for "WalkMe," and select Add
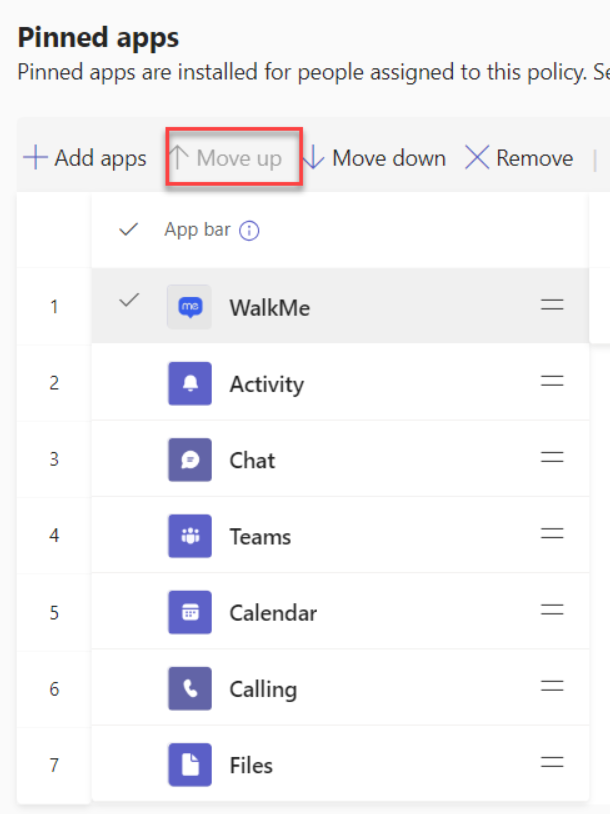
- Move the WalkMe app as high as possible in the list for better visibility
- Go back to the policies page and select Group policy assignment and then Add. Under "Select a group" select the Azure AD group you want to install the WalkMe Teams app for. To install for the entire organization, select a group that includes all users. Under "Select a policy" select the policy you created
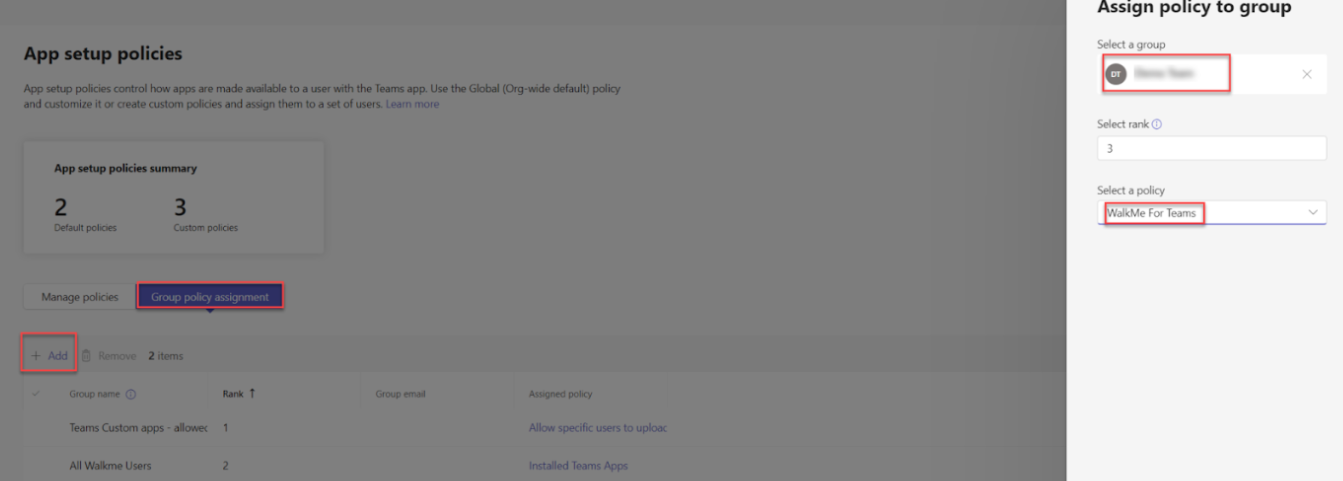
- Select Apply
How to Create an Azure AD Group for All Users
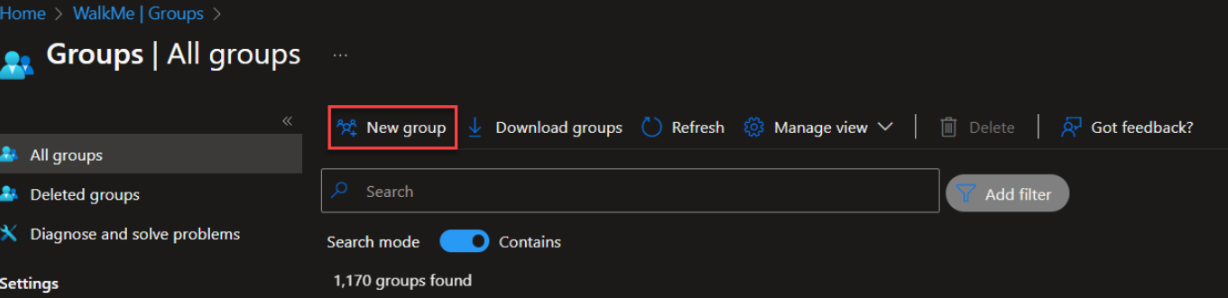
- Log into Azure AD: https://portal.azure.com/
- Select Groups from the left panel and then New Group
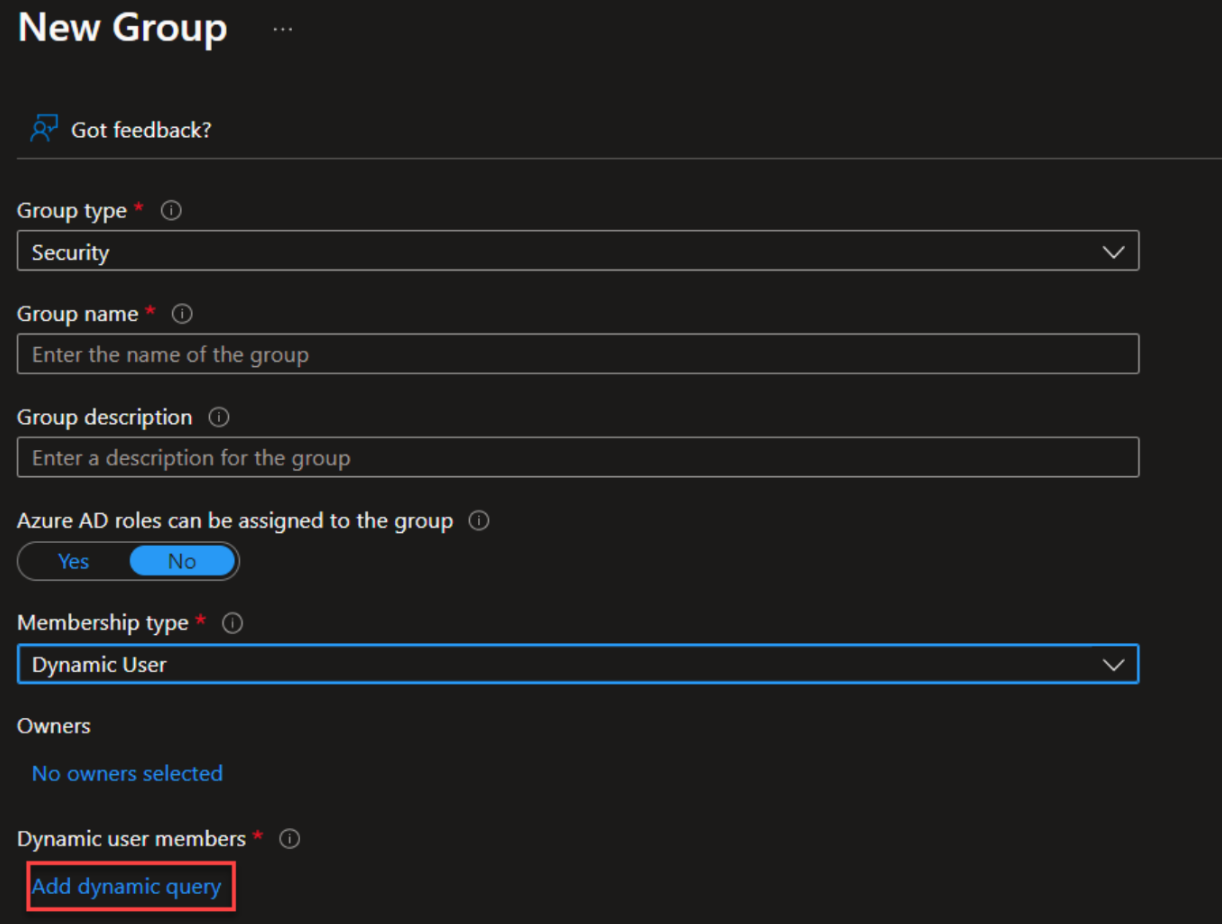
- Fill in the group details:
- Group type: Security
- Group name and description: your choice
- Membership type: Dynamic user
- Under Dynamic user members, select Add dynamic query
- In the query, set the following:
- Property: "userPrincipalName"
- Operator: "Contains"
- Value: "@YOURDOMAIN.COM" (replace with your actual domain, for example "@walkme.com")
- Select Save
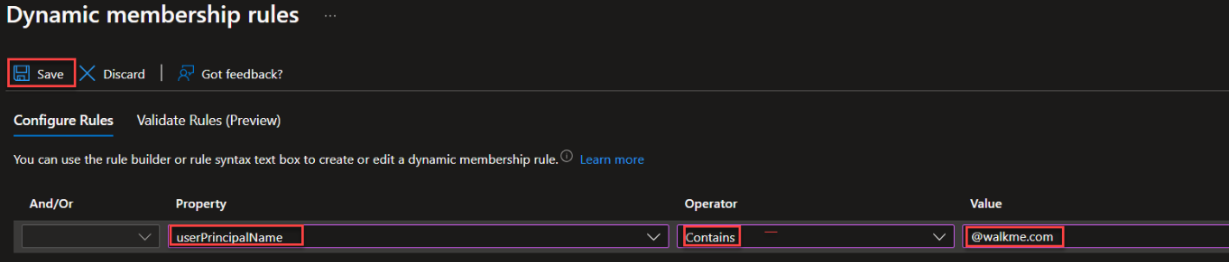
After a few minutes, the group will populate with all users in Azure AD that match the criteria.
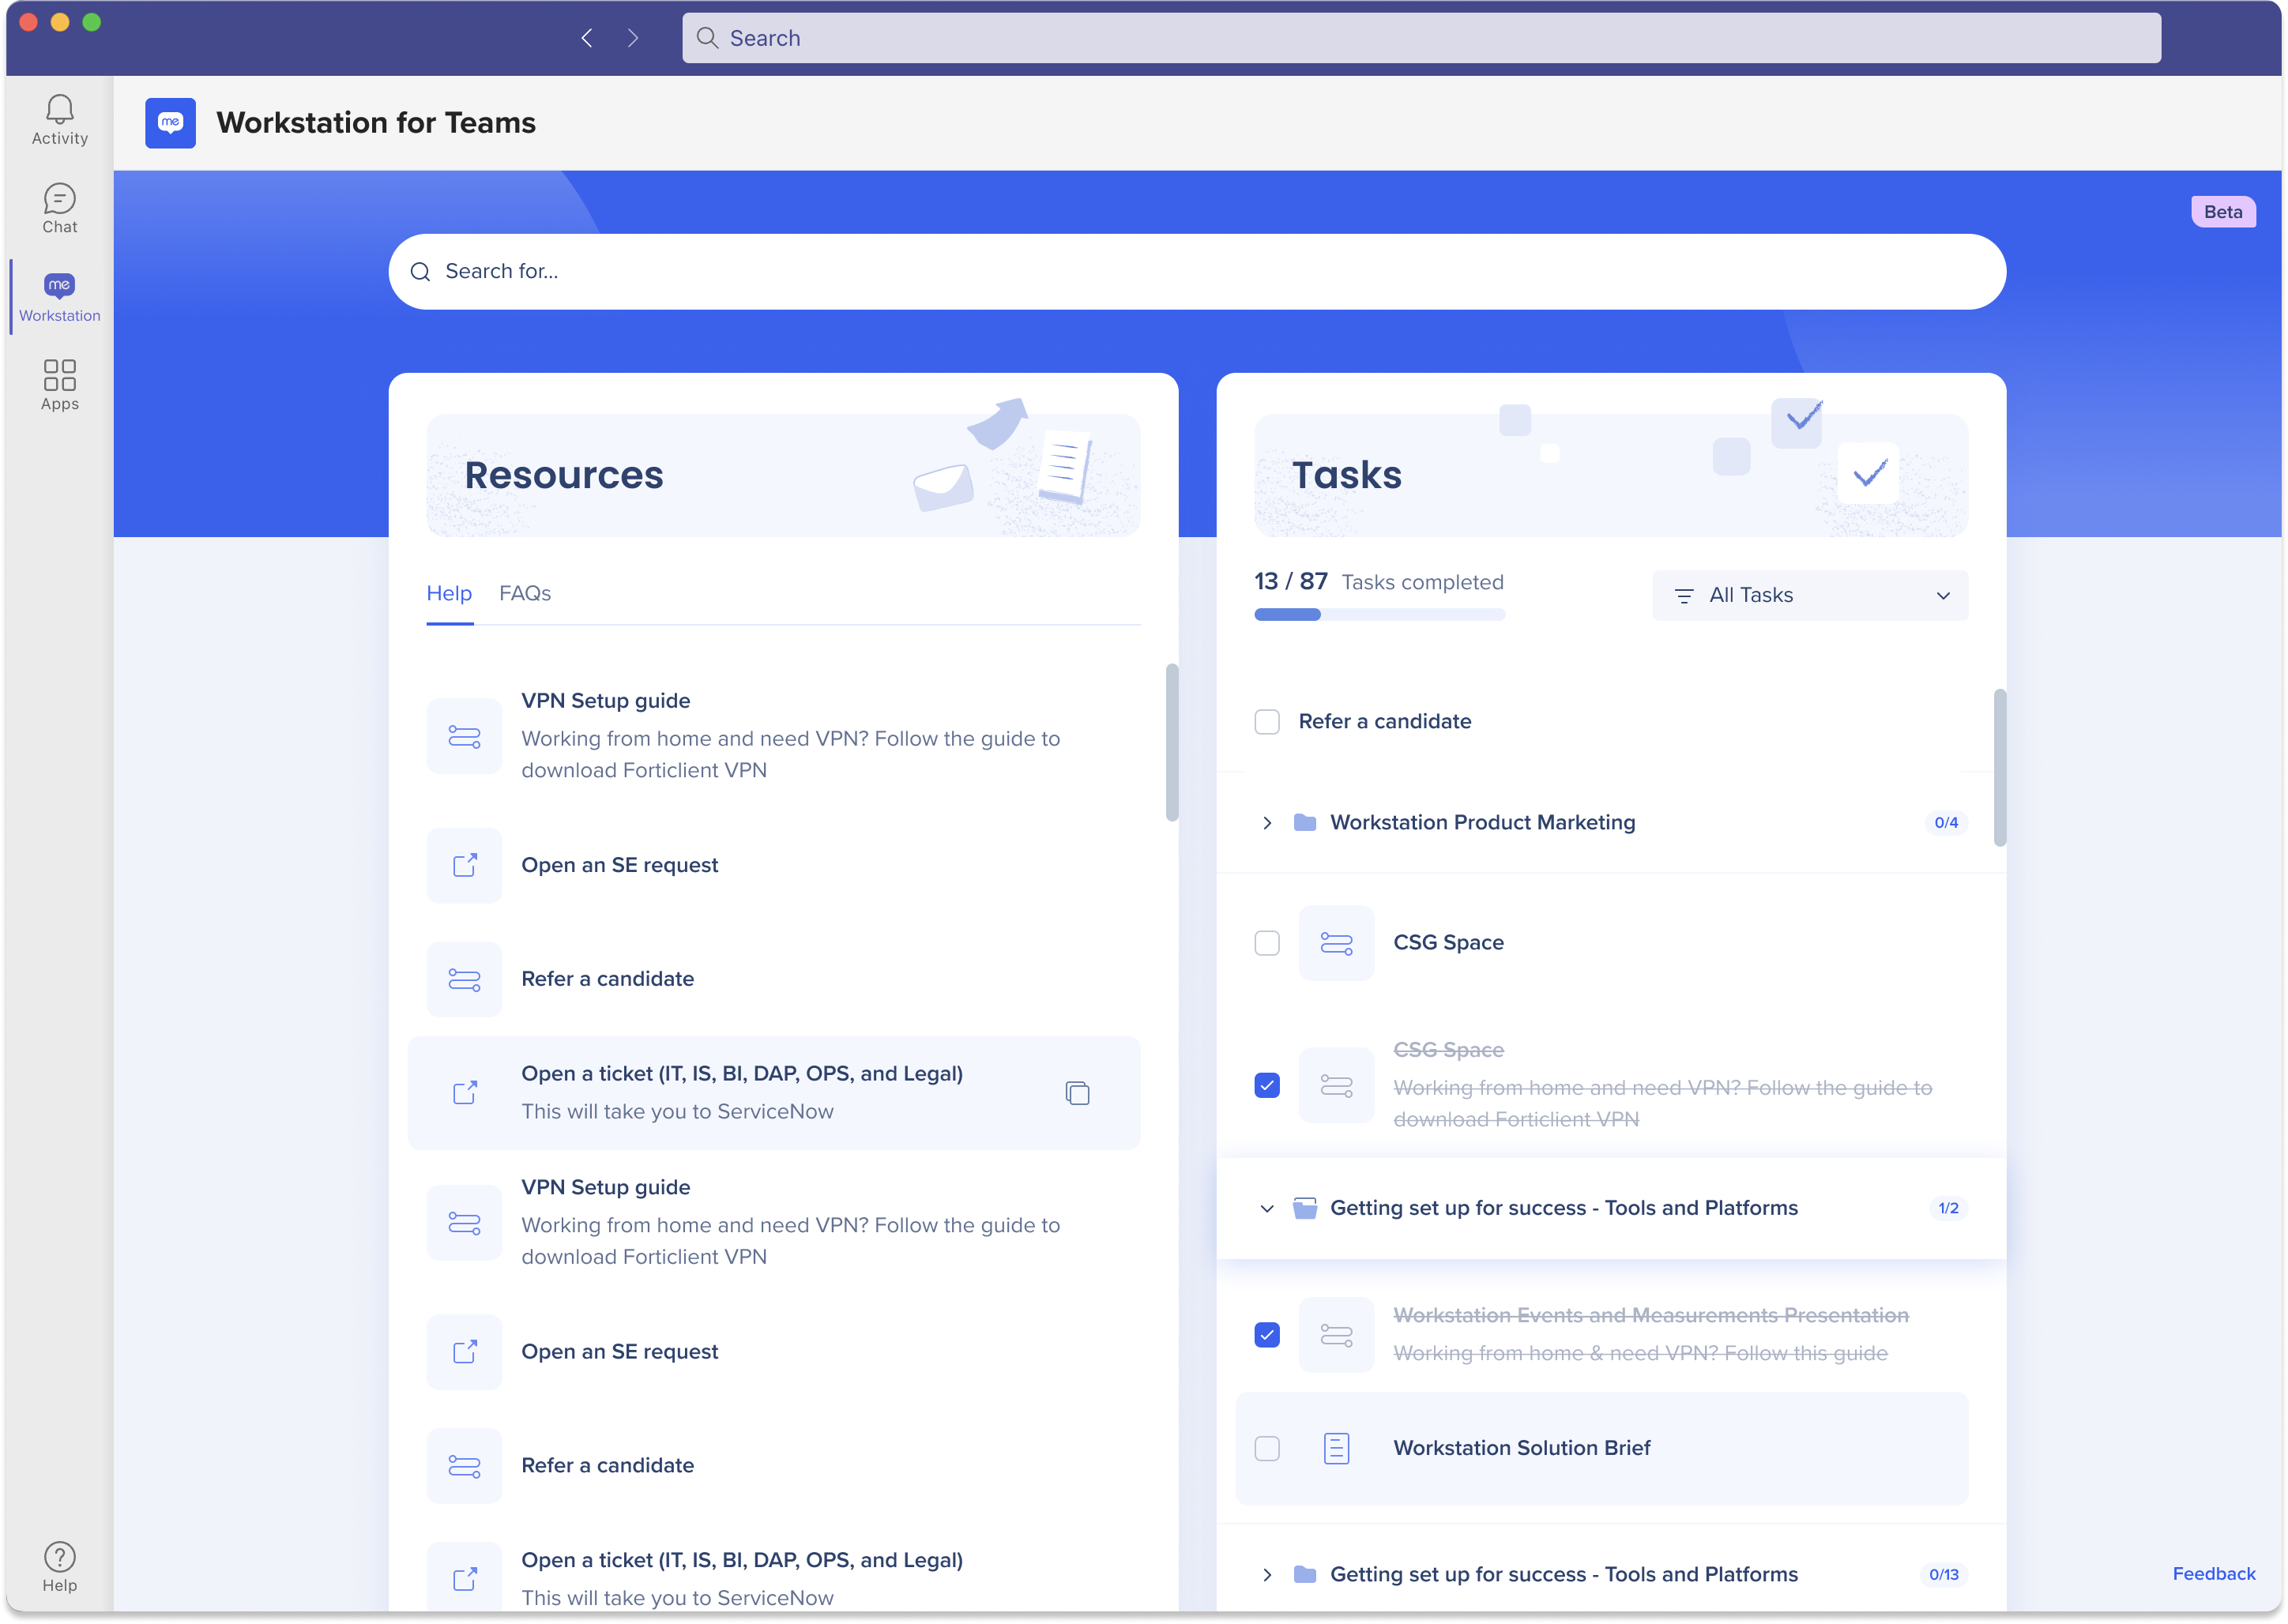
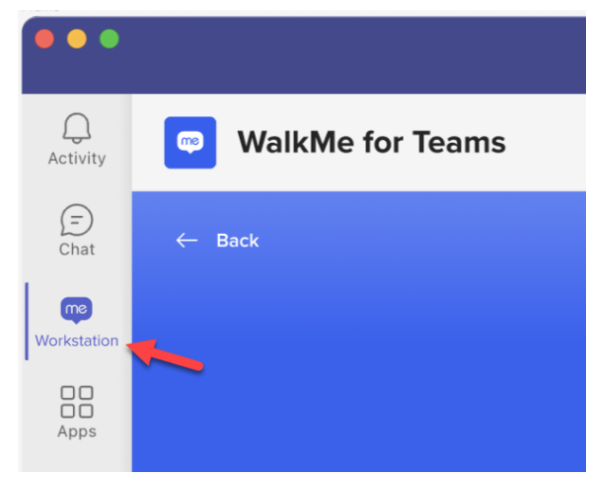
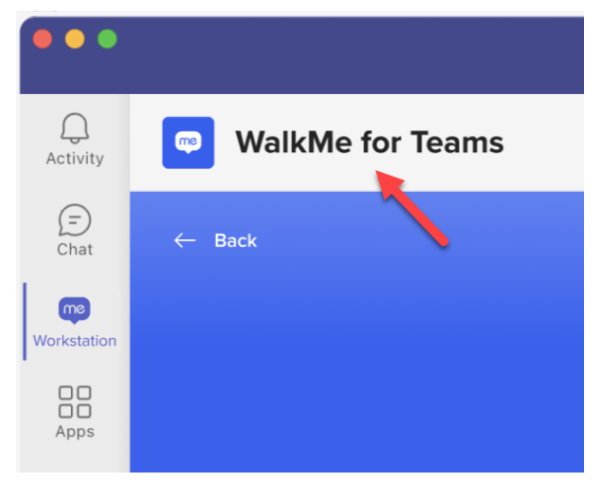
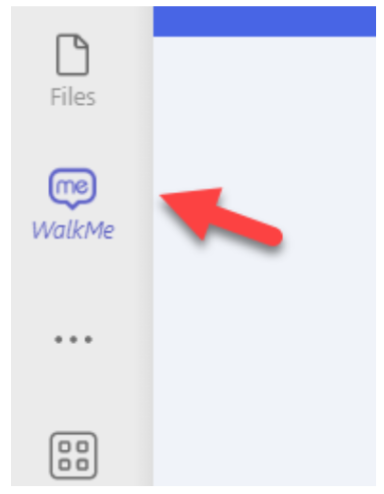
How It Works
WalkMe for Microsoft Teams has two components: a message extension that opens the WalkMe Menu, and a tab with a UI similar to the desktop menu.
WalkMe for MS Teams supports the following WalkMe items:
- Resources
- Shuttles
- Onboarding tasks
Add your WalkMe content from the Menu Organizer in the WalkMe Console.
WalkMe Menu Organizer
Message extension
The message extension lets users interact with WalkMe content directly from the Teams chat toolbar. To learn more, refer to the Teams Message Extensions documentation.
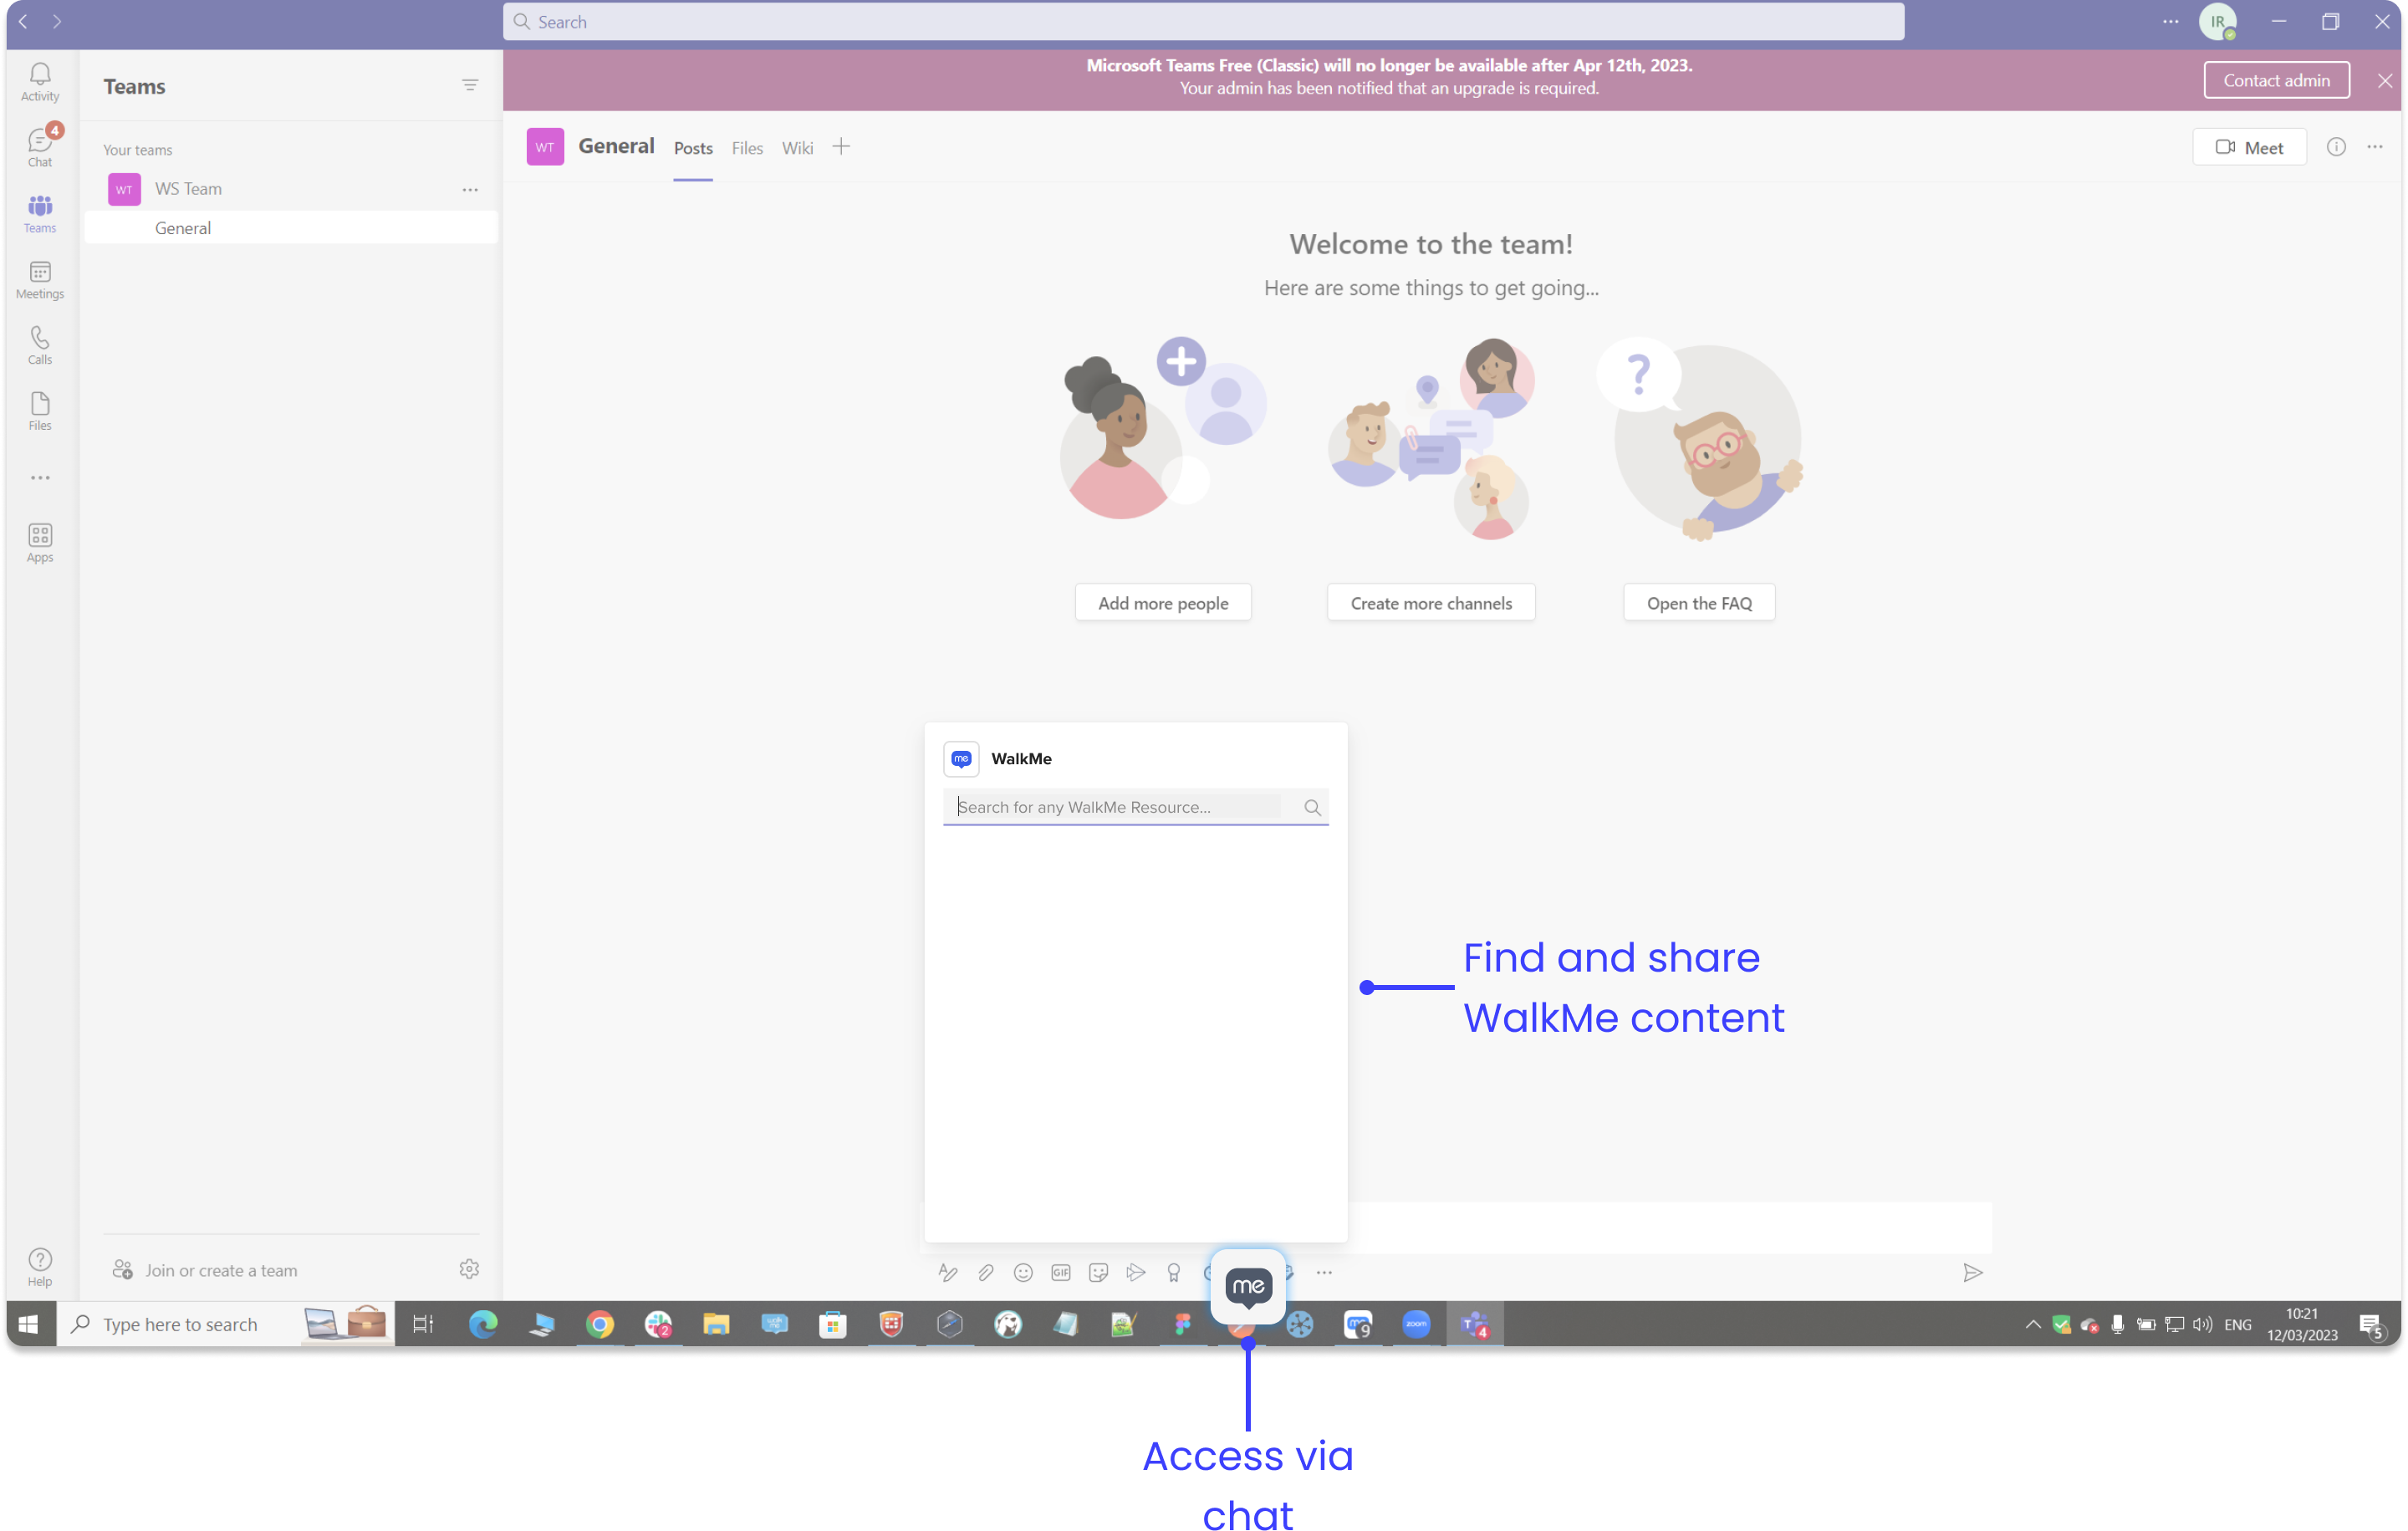
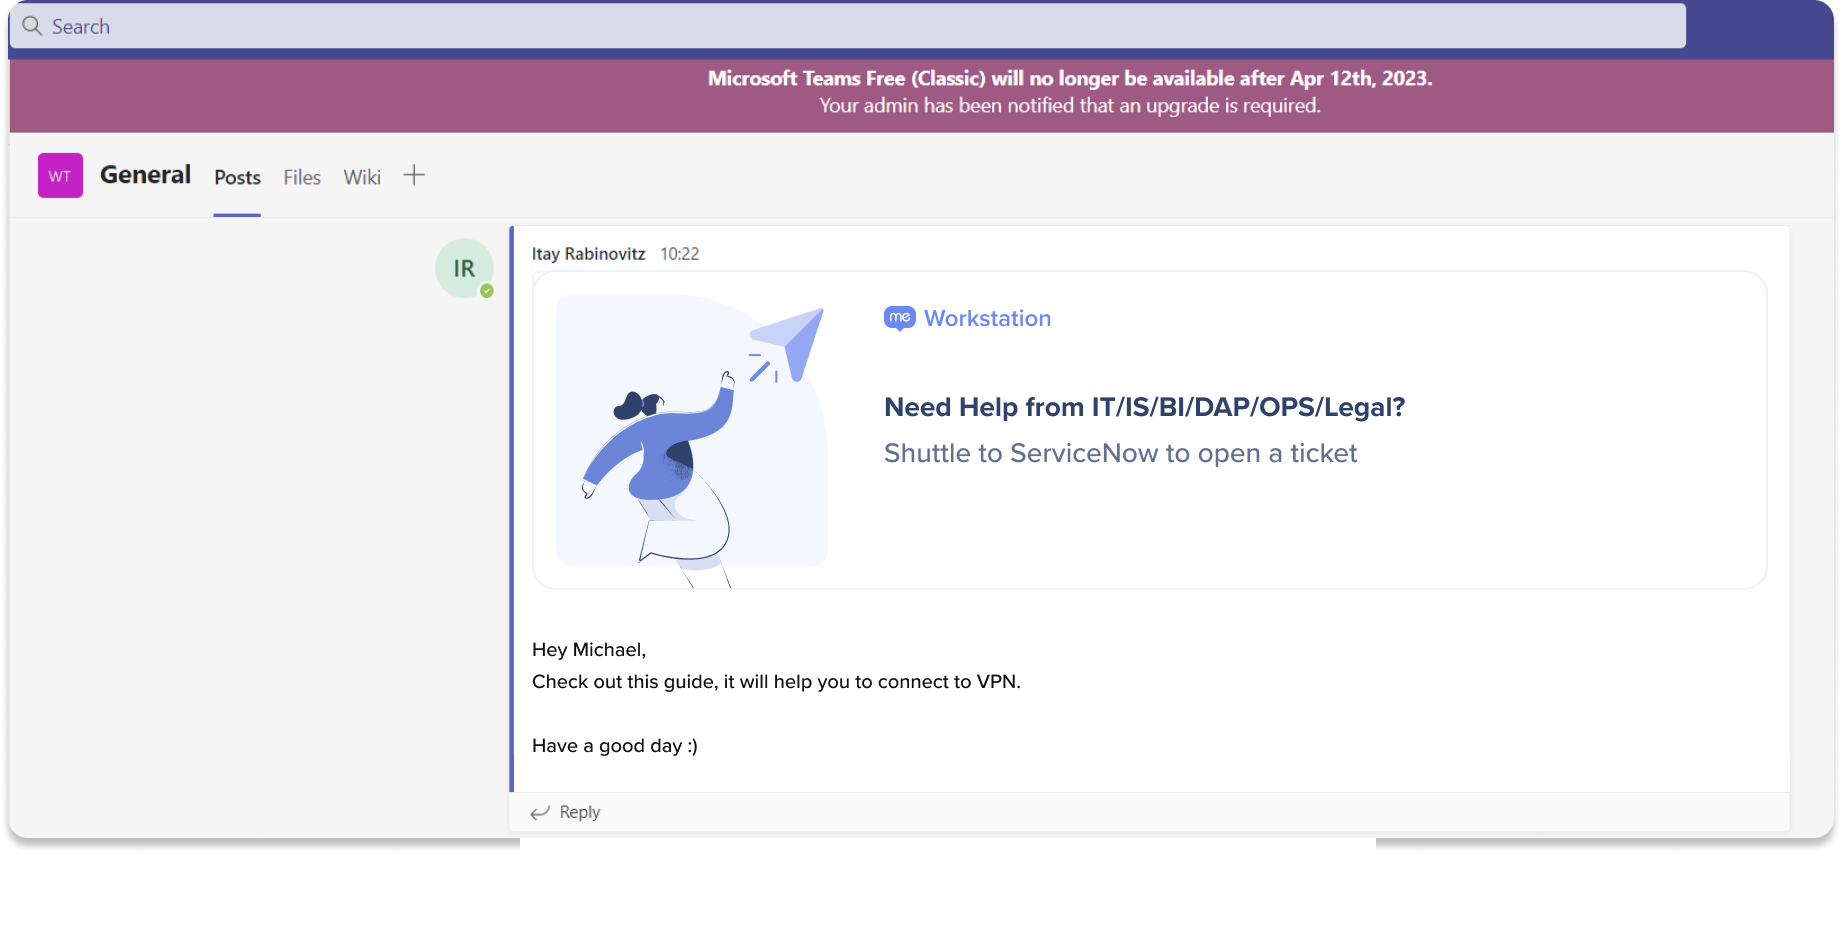
Send resources as cards
The WalkMe Menu message extension lets users share WalkMe content directly from the Teams chat. Selecting a resource from the message extension sends it into the chat as a card. Selecting the card plays the content.
The WalkMe for MS Teams tab is embedded directly into the Teams interface. It has two widgets that work like the Resources and Tasks pages in the desktop menu.
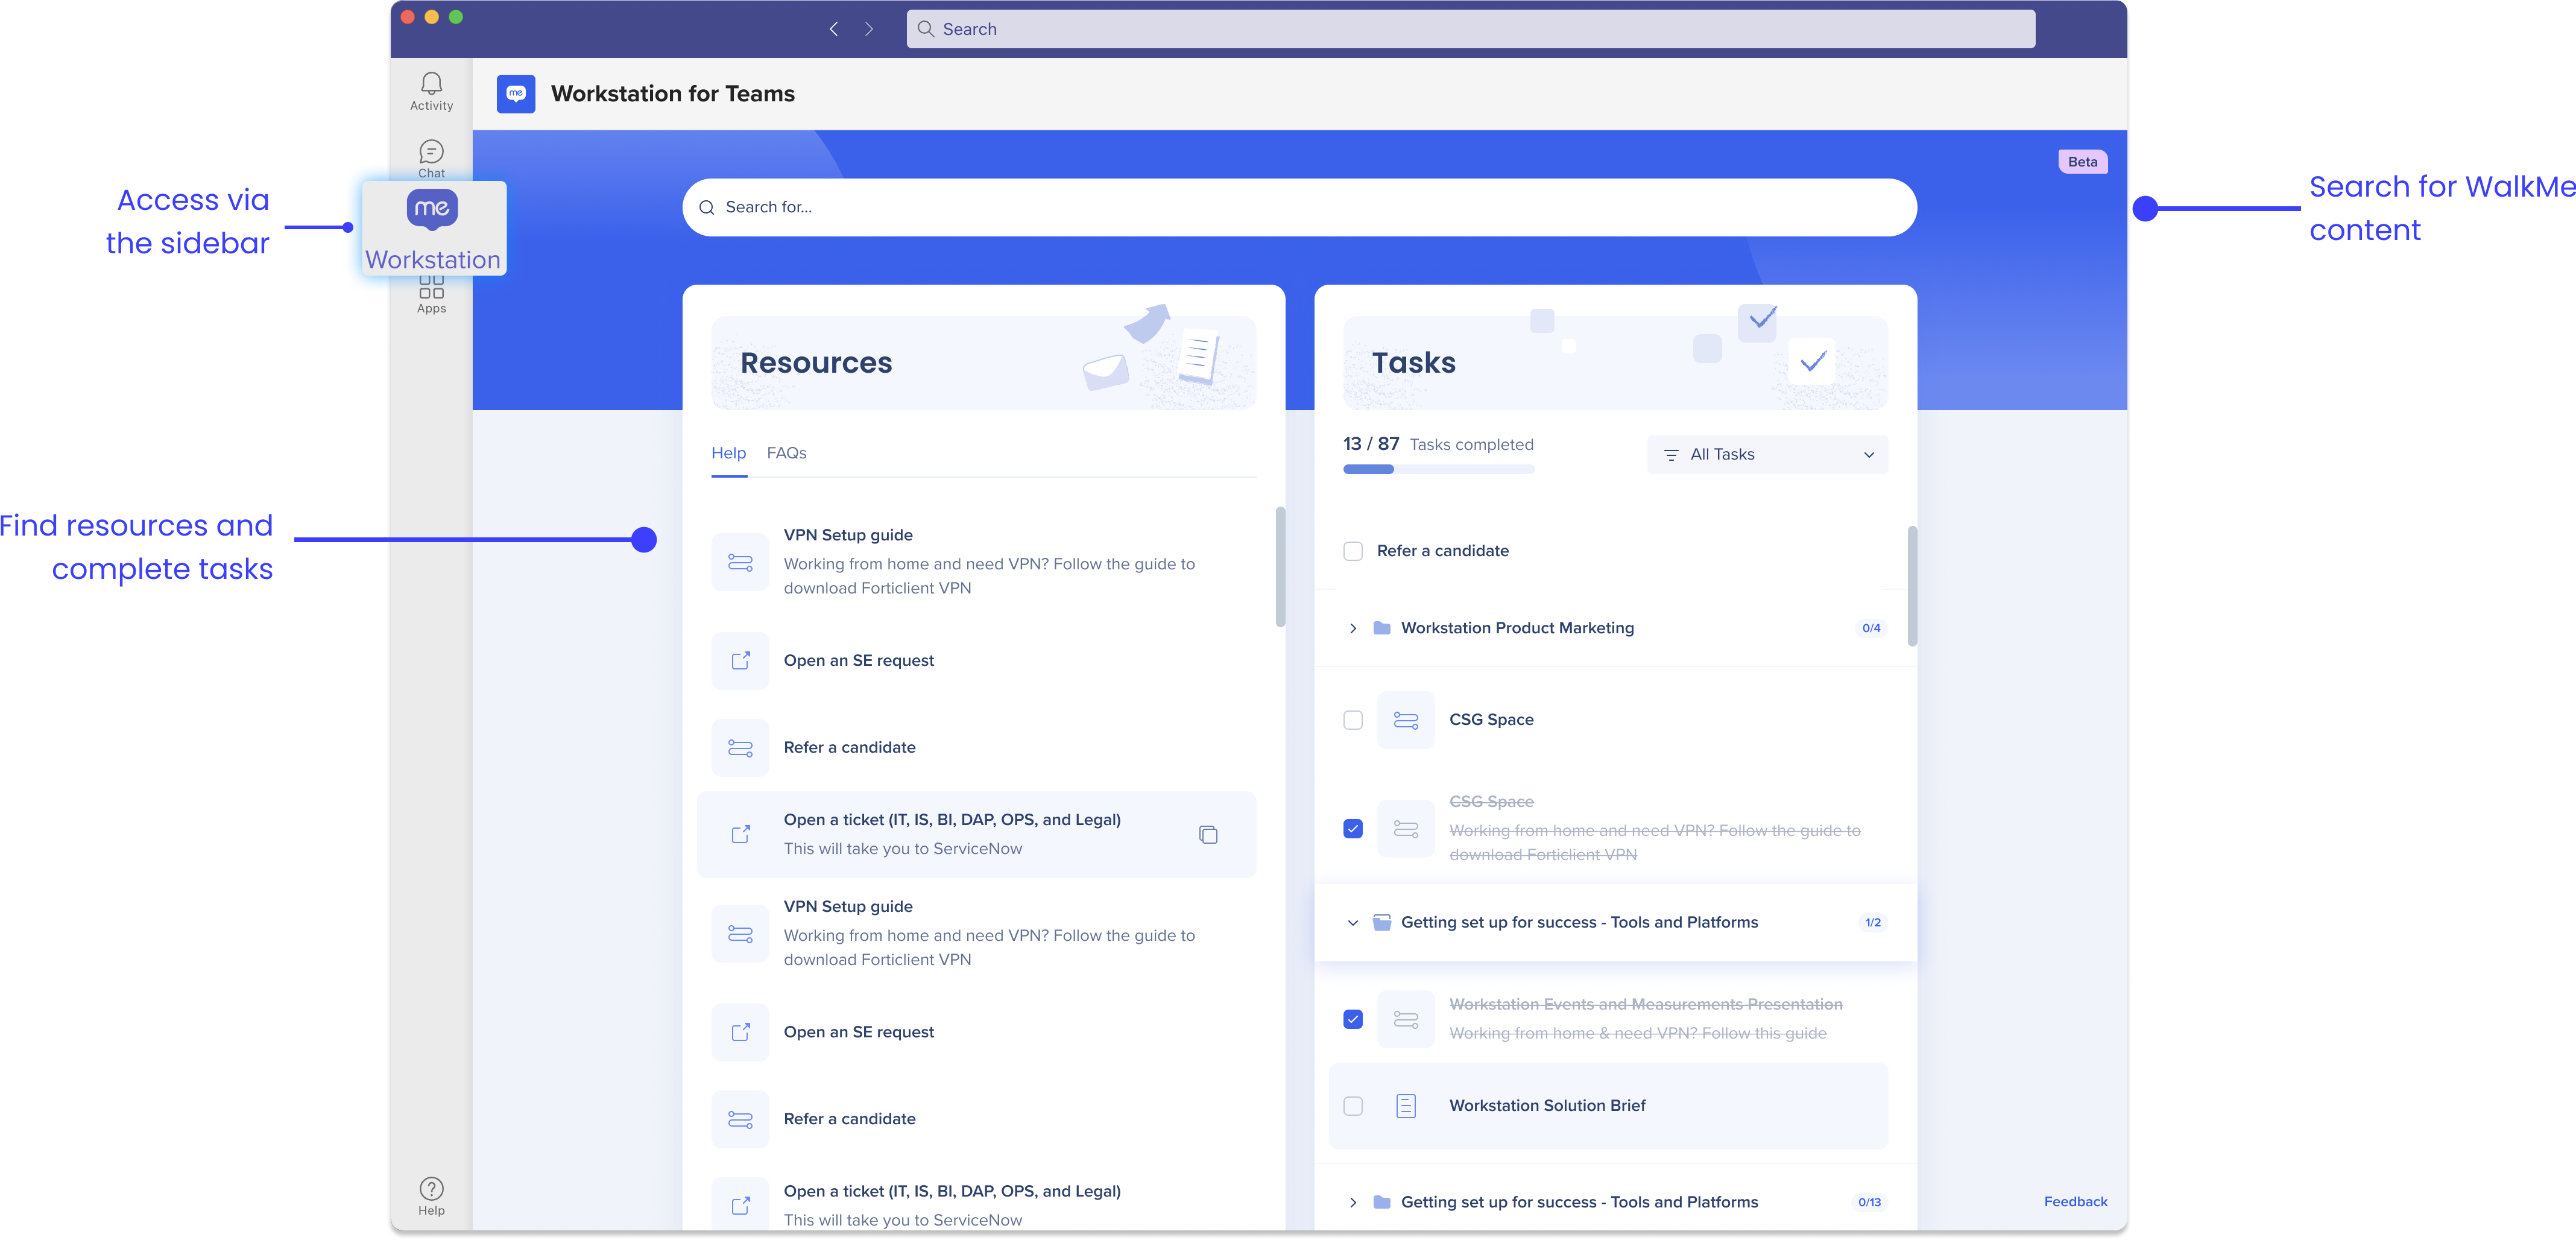
Resources include articles and videos and can be segmented to target specific users based on department, location, or other filters.
Resources
Tasks can also be segmented. Use them to onboard new employees or as a to-do list for organizational, departmental, or team action items.
Onboarding Tasks: Getting Started Guide
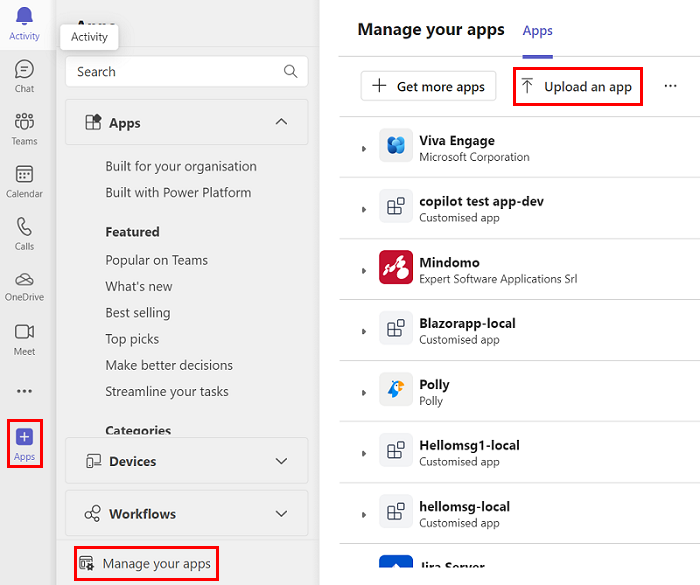
Upload a Custom App
- Log into the Teams client with your Microsoft 365 development account
- Select Apps in the left sidebar
- Go to Apps and then Manage your apps and then Upload an app
- Select Upload a custom app
- Select your app package ZIP file
- Select Add and then Add to a team from the dropdown
Learn more about uploading a custom app.
How to Brand the App
Customize the following elements to brand your app.
Short name
Changes the tab's name.
To update: In the manifest file, change the "short" value:
"name": {
"short": "WalkMe",
"full": "WalkMe for Teams"
}
Full name
Changes the tab's title.
To update: In the manifest file, change the "full" value:
"name": {
"short": "WalkMe",
"full": "WalkMe for Teams"
}
Icon outline
Changes the tab's icon.
To update: Replace "outline" with a different icon.
Guidelines:
Icon color
Changes the app's icon.

To update: Replace "color" with a different icon.
Guidelines:
- Icon dimensions must be 192x192px
- If you have a logo, it must fit within the 120x120px safe area in the center
Learn more about customizing guidelines and branding.
Technical Notes
- MS Teams moved to WebView2 technology. Due to current technical limitations, the WalkMe Teams app isn't compatible with it. We'll keep tracking progress to prioritize compatibility in a future update
- Smart Walk-Thrus aren't supported and won't appear in the extension or tab, even if added to the Content Manager
- Communication Center notifications aren't supported
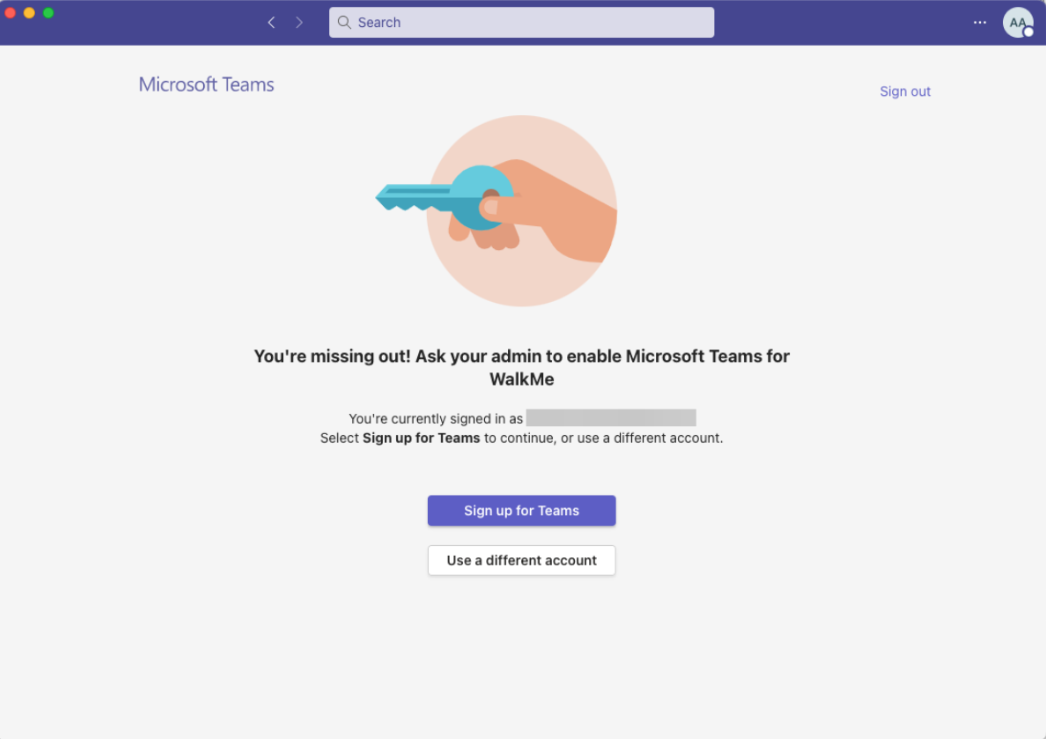
- The WalkMe app can only be used by Microsoft Teams licensed users. If the app is deployed to a non-licensed user, they'll see an error message and need to relaunch Teams to access it again
- The message extension only works in internal conversations within the organization. It won't appear in the toolbar for external users or when a user messages themselves

- Add content in the Menu Organizer using your desktop or mobile system


