Brief Overview
Now that you are familiar with the WalkMe Communication Center, it is time to learn how to create a Notification. This comprehensive guide to the notification process, from creation to publishing! This guide will take you through everything you need to know to create notifications that grab attention and deliver results. So let's get started and make your communication strategy a success!

Create a Notification
Step 1: Select the Template
- From the Communication Center, click New Notification.
- Select a template.
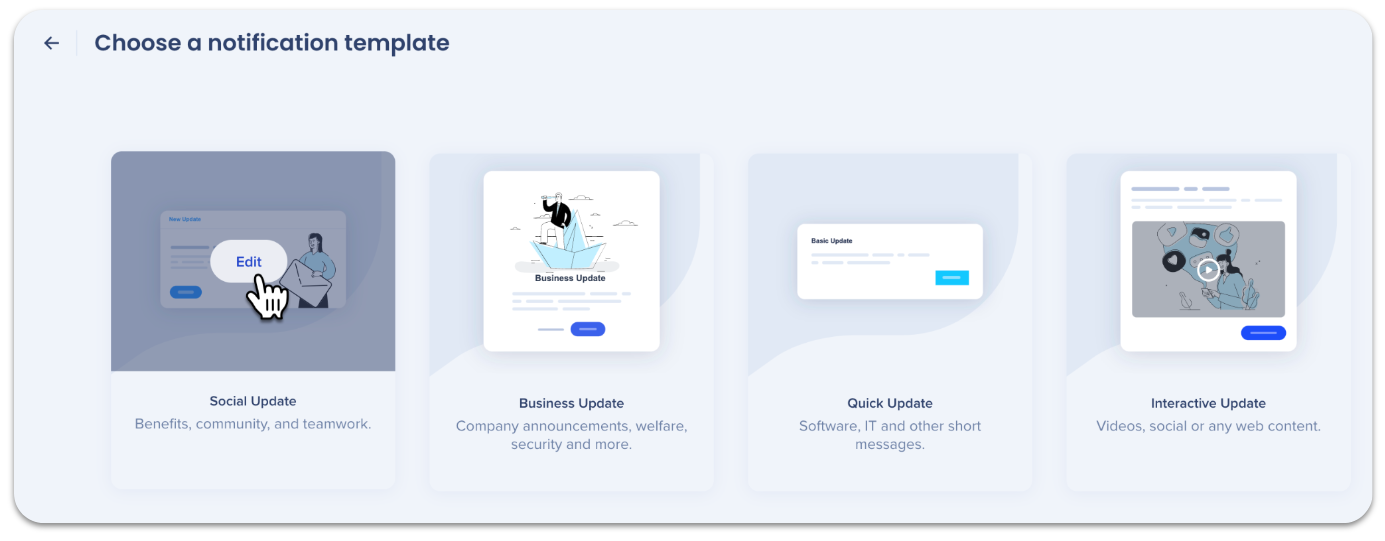
You can change the base template at any point by clicking Template in the designer. All text changes will be saved.
Note
The communication Center now supports the new Visual Designer Dynamic Layout. All new notifications will be created with it. Existing custom templates will continue to utilize the previous version. However, this feature is currently not available for customers who have the mobile menu.
- If you switch between templates, only the title + image will move. Additional objects added will not be moved.
Learn more about templates.
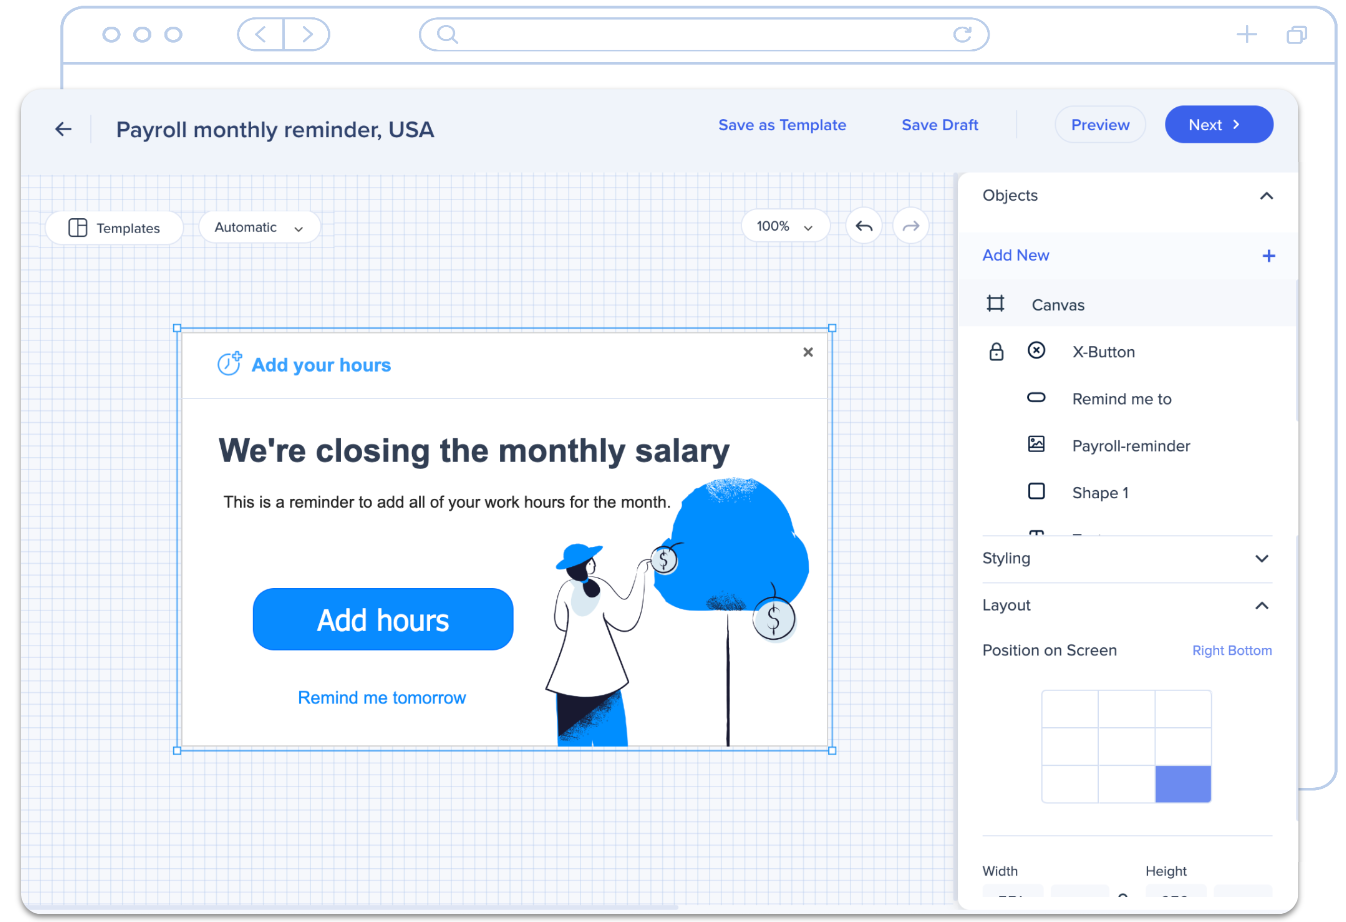
Step 2: Edit the Notification
Edit the notification to your needs. You can add new images, change the button action, and much more in the design panel!
Editing a live notification
You can edit a notification after it has been sent, however the notification's status won't change for the recipient. So if the recipient already read the old version, the new version will remain marked as read and the recipient won't get notified of the change.
Step 3: Add Title and Description
When you're ready, click Next from the Visual Designer to add recipients, audiences and schedule or send the notification!
To begin, add the notification Content (title and description).
Title and Description - Type a notification title and description that will be visible to recipients in the push notification and the desktop/mobile menu notification list.

Step 4: Select Notification Type, Add Audience, Schedule
Next, define the delivery settings, fill out the following:
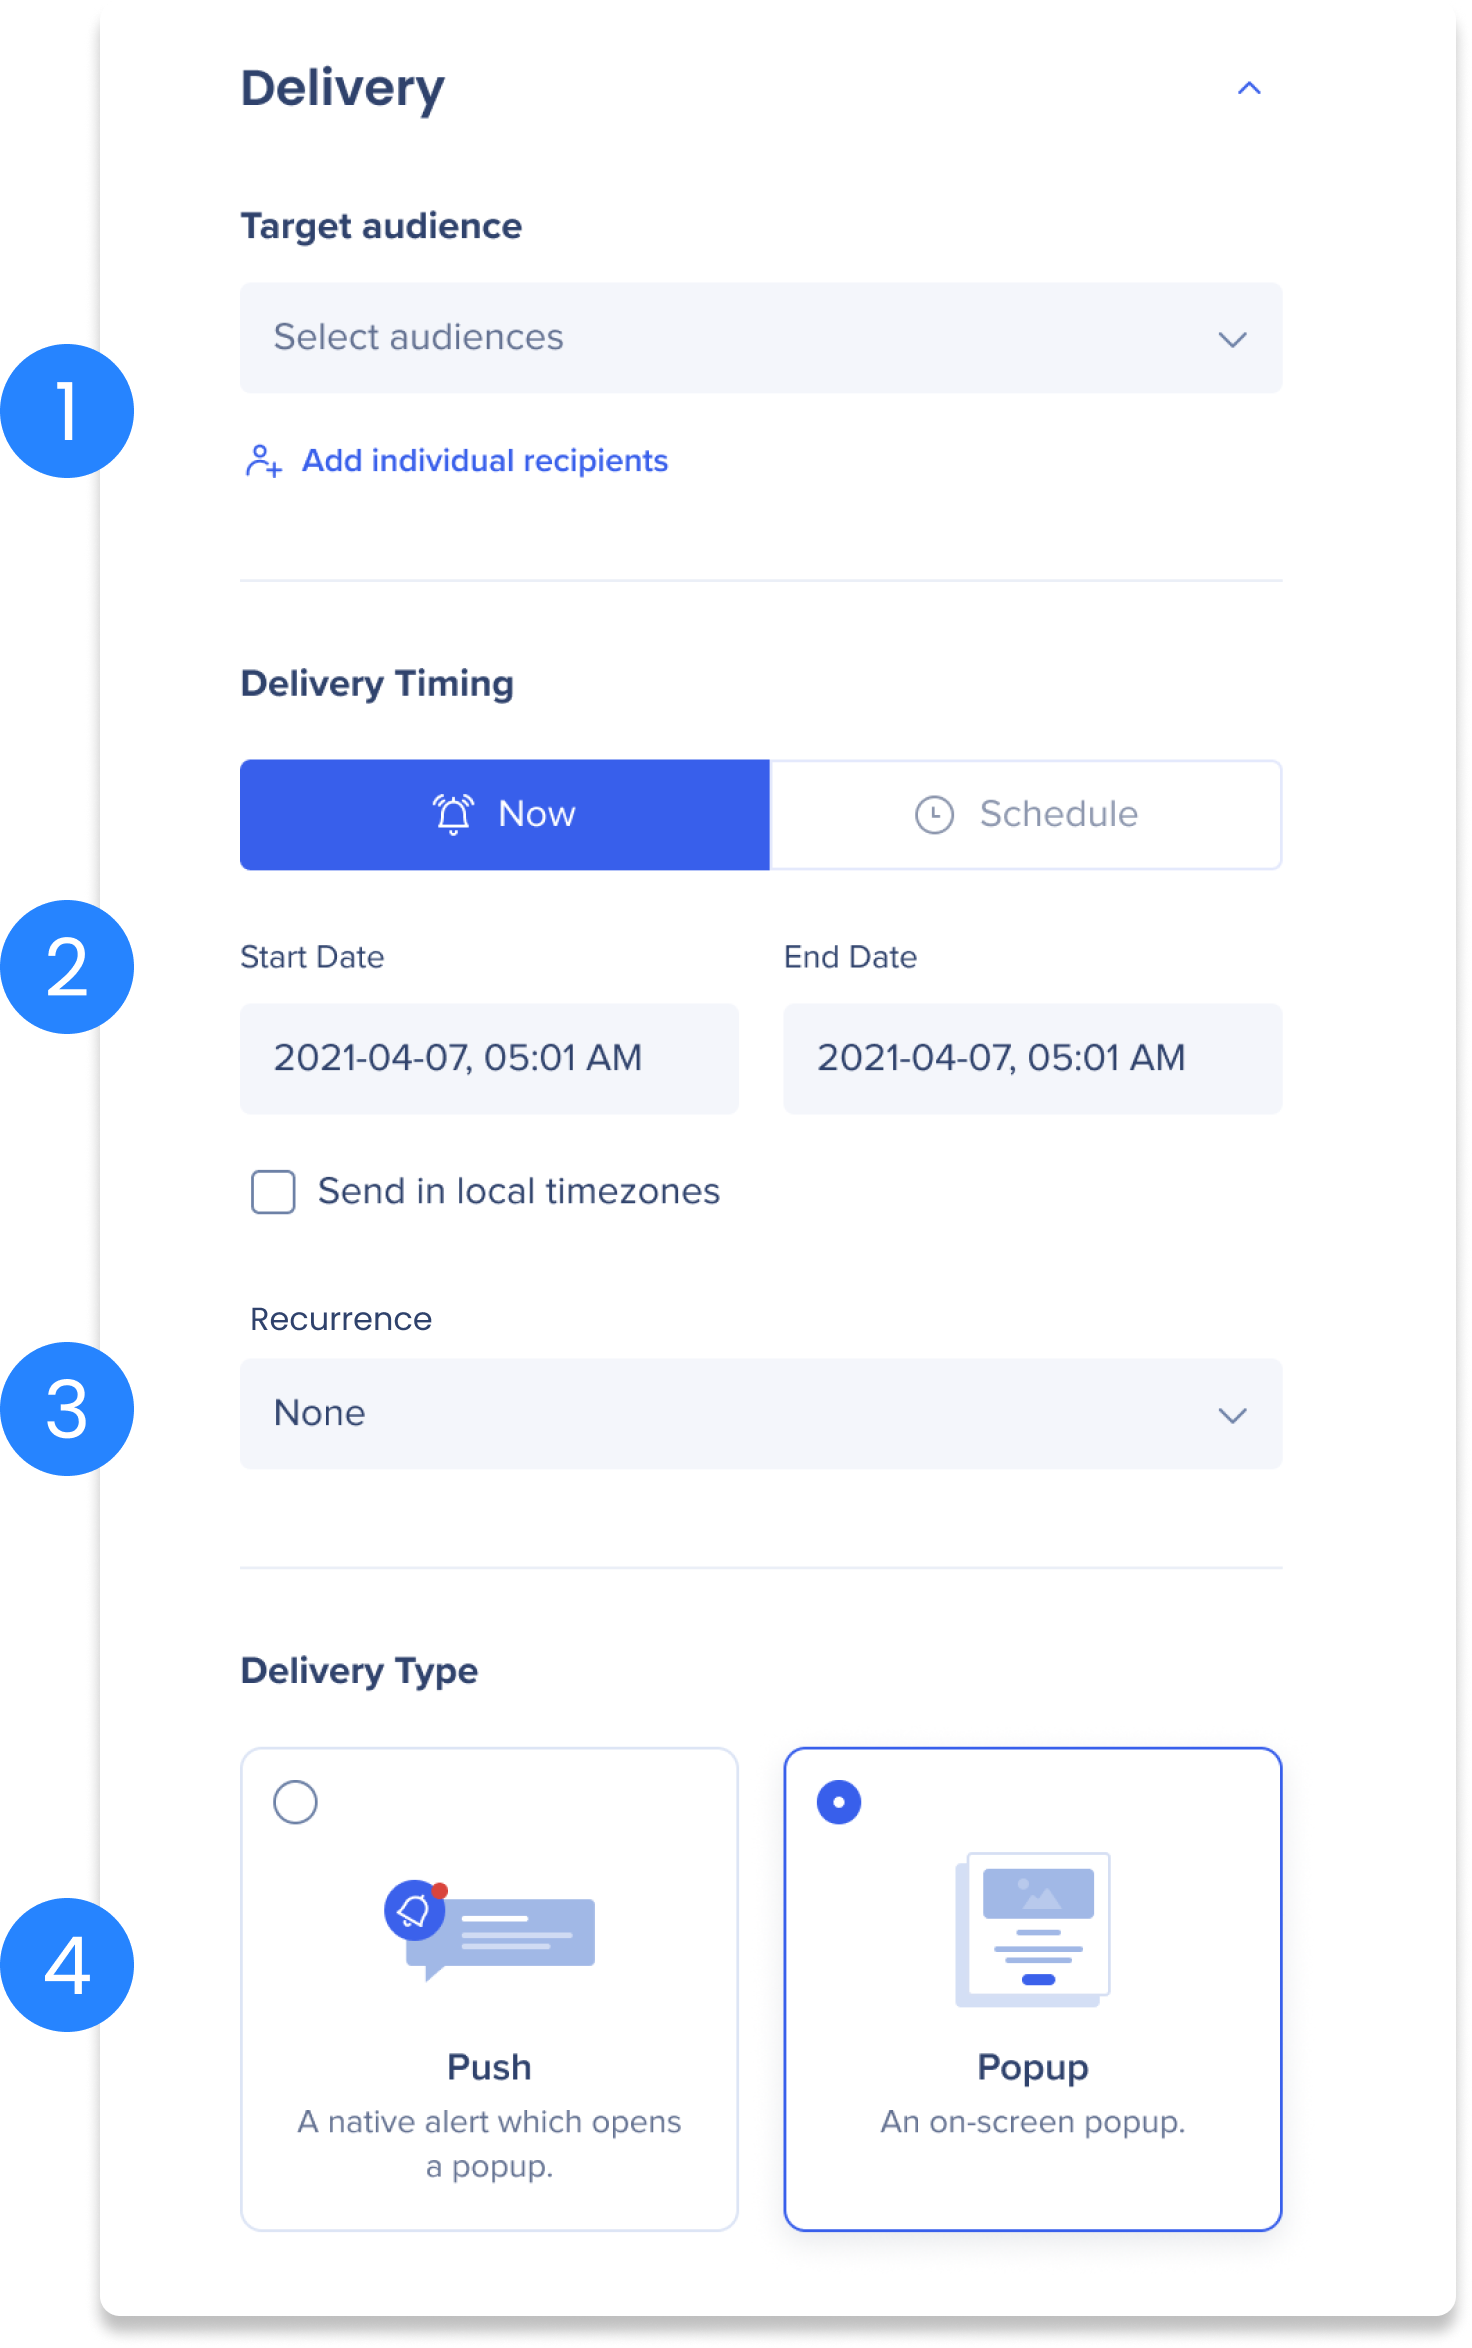
(1) Target Audience - select the audiences you want to send this notification to. Learn more about audiences.
- Select as many audiences as necessary
- Editor Segments without rules won't be visible in the Audiences list
- Add individual recipients: Add up to 100 individual users to send this notification
- Only users that have logged into the desktop/mobile menu at least once appear in the list
(2) Delivery Timing: Send the notification now or schedule it
- Add a start date and an End Date - this is the notification lifecycle. As long as the date falls within this range, the notification will be accessible in the Notification page on the desktop/mobile menu. After the end date passes, the notification is removed from the Notification page and can no longer be read.
- Check Send in local timezones to schedule the notification to send in each recipients local time zone
- Leaving the checkbox unselected means the notification will send during your timezone and play for everyone at that time
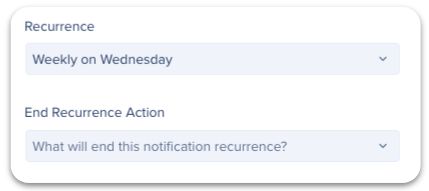
(3) Recurrence
- Recurrence - Select how often this notification will re-play (Daily, Weekly, Custom).
- Custom recurrence enables you to determine how often the notification repeats, how many times it plays, and when it should stop recurring.
- The notification End Date and Recurrence End are different:
- You can have a notification repeating daily for the next 2 weeks, but keep the Notification active until the end of next month.
- Stop notification recurrence based on user action
- You can stop recurrence after a user clicks specific button(s) - determined when creating notification.
(4) Delivery Type - select how you want your recipients to receive the notification:
- Popup - notification appears on the recipients screen.
- Push- a banner notification will appear in the bottom right corner of the employee's screen, letting them know there is a new notification in the desktop/mobile menu notification list.
- Push notifications version requirements:
- Mac desktop version 2.0.0 or above
- Windows desktop version 8.1 or above
- Delivery to the mobile menu: Mobile users will get a native notification with push notifications only. If the delivery type is popup, then the notification will appear in the mobile's notification list, but there won't be an alert on their device.
- Scheduled notifications aren't supported on the mobile menu yet. Even if the delivery type is push, if the notification is scheduled to delivery on a time other than 'now', there won't be a mobile alert.
Recipients with multiple devices
If a recipient is connected to multiple devices using the menu, and both devices are active simultaneously, notifications will appear on both devices. However, if device A is inactive and the recipient views the notification on device B, signing in will mark the notification as read on device B. The notification will not reappear as a pop-up, but it will still be accessible on the Notification page for reference.
Step 5: Save and Preview
Now it's time to Send the notification! You can either:
Save the notification as a draft - Click Save Draft to come back to this task later.

- All of your preferences will be saved too.
- Come back to it by going to the Drafts tab in the ComCenter homepage.
- This option is not available when Editing a notification that is already Active or Scheduled.
Send a test - Click Send Test to see how the notification will appear on your screen.
- Version requirements
- Mac desktop version 1.9 or above
- Windows desktop version 8,1 or above
- Test only works if the installed menu matches the active version in the Communication Center.
- AKA, preview will not work when impersonating customers unless you also have their menu client installed.
Send Now / Schedule the notification - One of these buttons will appear based on the date preferences you added.
- Click Send Now to publish the notification immediately.
- Click Schedule to schedule the notification based on your preferences.
After you notification has been published and sent, review the engagement analytics to track the impact your notification had.
Technical Notes