WalkMe Communication Center
Brief Overview
The WalkMe Communication Center (ComCenter) enables you to send direct notifications to employees via Workstation.
Notifications can be:
- Company, HR, IT, social announcements, and more
- Sent to all employees or segmented by group
- Immediately sent or scheduled for later
- Monitored to get analytics about views, clicks, engagement, and more
Use Cases
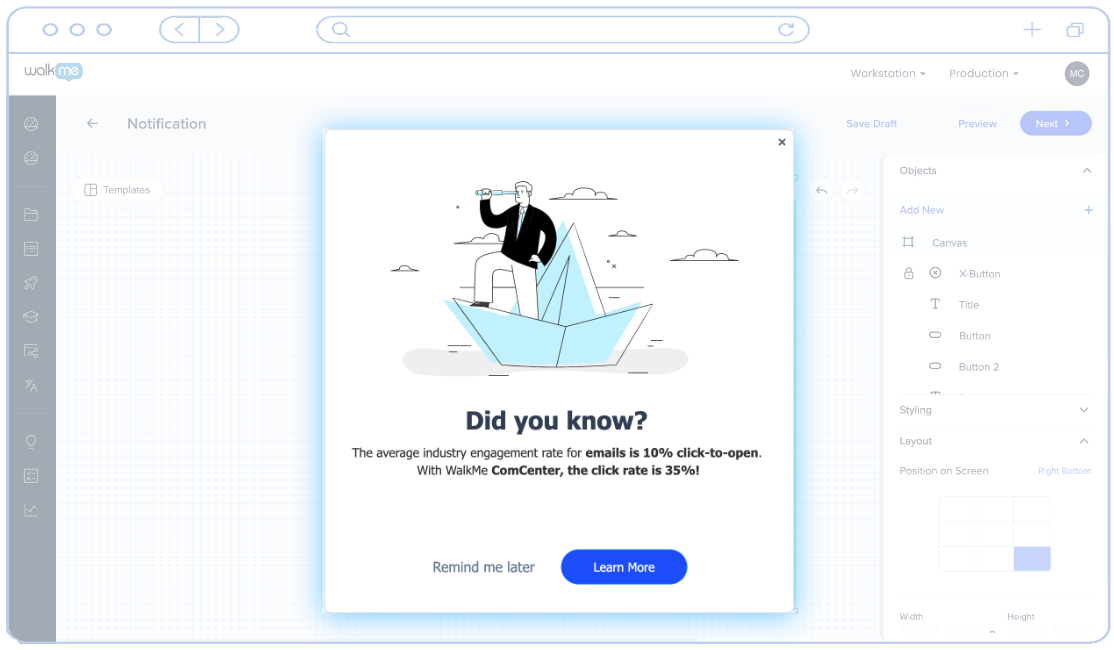
- Share updates within an organization - Product, HR, company achievements, and any other important announcements
- Share urgent announcements or call for actions (e.g - Zoom meeting is full, please join this link instead)
- Share IT announcements, such as scheduled system downtimes
- Share segmented announcements, such as updates to a specific department
- Allow a person not familiar with WalkMe to send out announcements
How to Access
Users that have access to a Workstation account will be able to access the ComCenter using these two options:
Directly through the WalkMe Console
- Navigate to the WalkMe Console
- From the Navigation bar, go to Communications Center > Notifications

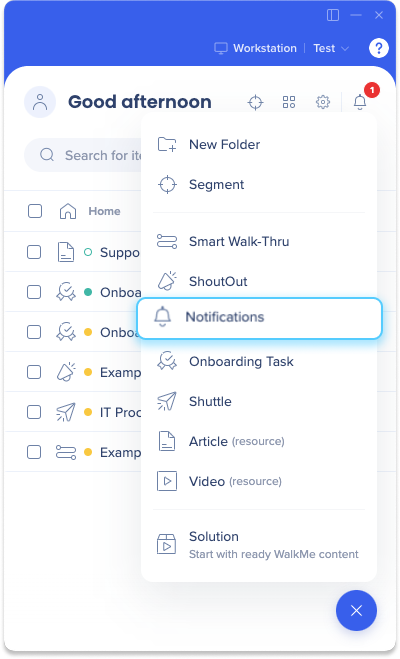
From the WalkMe Editor
- Make sure you're system is set to a Workstation system
- Click the + button to open the menu
- Select Notifications
Main View
The main page is where you can view existing and scheduled notifications, manage notifications, and view statistics.
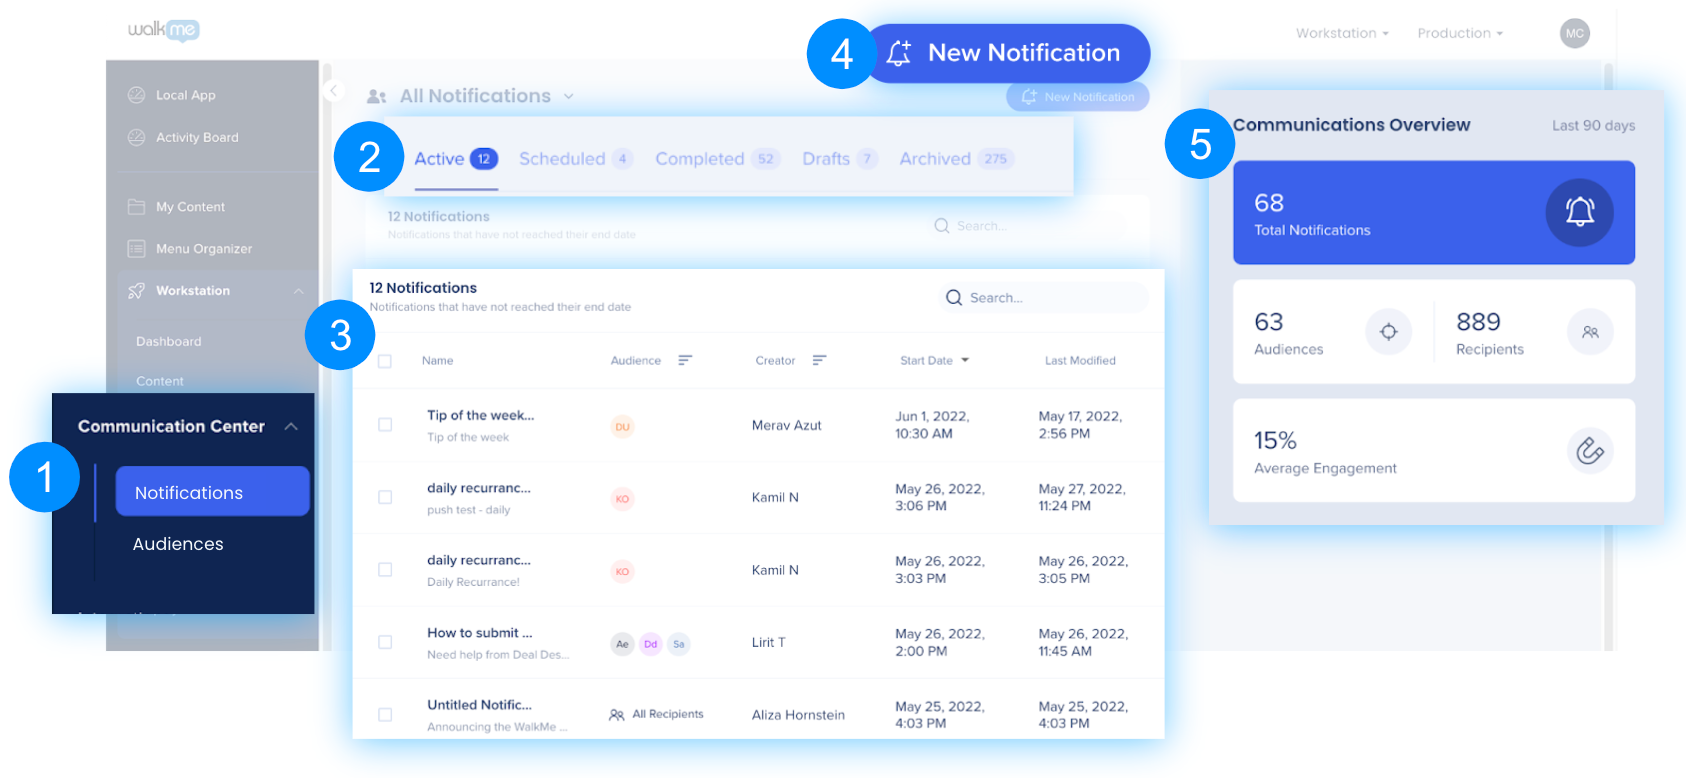
- The Dark Blue Left Navigation Bar
- Notifications - View all notifications and analytics
- Audiences - Control and segment your recipient groups
- Status Tabs
- Active - Notifications currently playing to employees
- Scheduled - Ready to send, waiting for date/time conditions to become valid
- Completed - Finished notifications
Note: Completed notifications remain in the notification menu for 3 months after the End Date - Drafts - Under development or waiting to be sent/scheduled
- Trash - Deleted notifications
Note: Last active tab is saved, even after log out
- Notification List: View, edit, or delete notifications
- New Notification: Create a new notification
- Communication Overview: Get analytics about all of your notifications, or click a notification to get insights into that notification's performance.
Notification Information
There are a few indicators and action options for each notification.
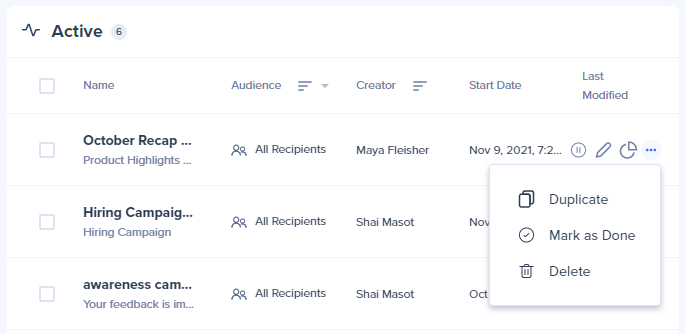
Active
 Pause - Stop notifications from playing to employees & Resume after Pausing
 Edit - Make changes while keeping notifications Live
 Analytics - Opens individual notification analytics on the right. Same as clicking a line
*In the future, this will be used for more options, such as export & user deep dive Duplicate - Make a copy of a notification - will open Edit mode
 Mark as Done - Move to Completed and stop notification from playing
 Delete - move to Trash and stop notification from playing
Scheduled
- You can Edit, Duplicate, Mark as Done, and Delete scheduled notifications
Completed
- You can Duplicate, Delete, and view Analytics of completed notifications
Drafts
- You can Delete or Edit (which allows you to Send or Schedule)
Trash
- You can Restore or Delete Forever
How to Create a Notification
To learn how to create a Notification, please refer to the How to Create a Notification article.
Communication Insights
To learn more about Communication Center Analytics, check out the Communication Center Analytics article.
Workstation App Notifications
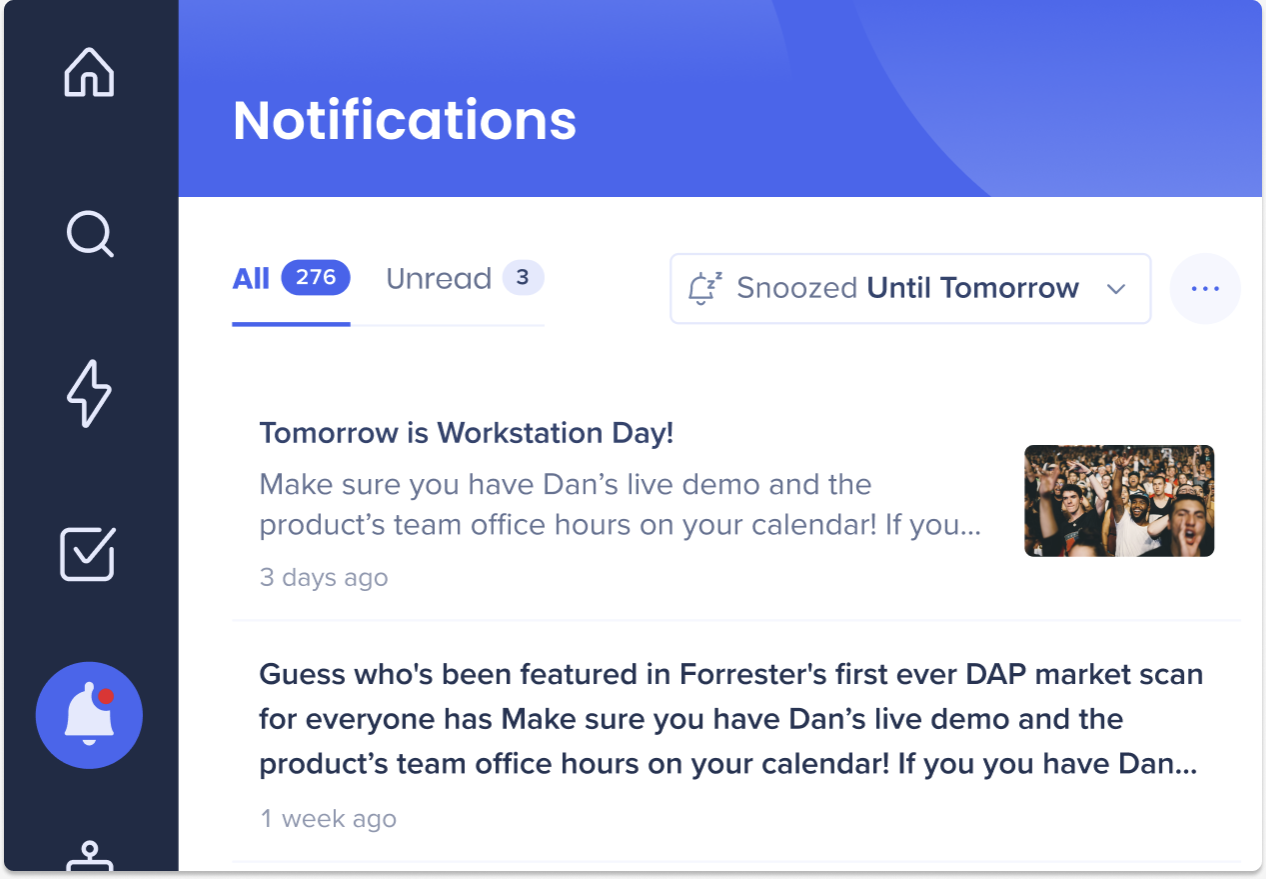
Once your notifications are published through the Communications Center in the console, they will appear in the Notifications App in Workstation. Here's are the app features:
Tabs
- All: Contains all notifications
- Unread: Contains notifications that haven't been opened
Snooze
End users of the Communication Center will have the option to snooze notifications for a period of time.
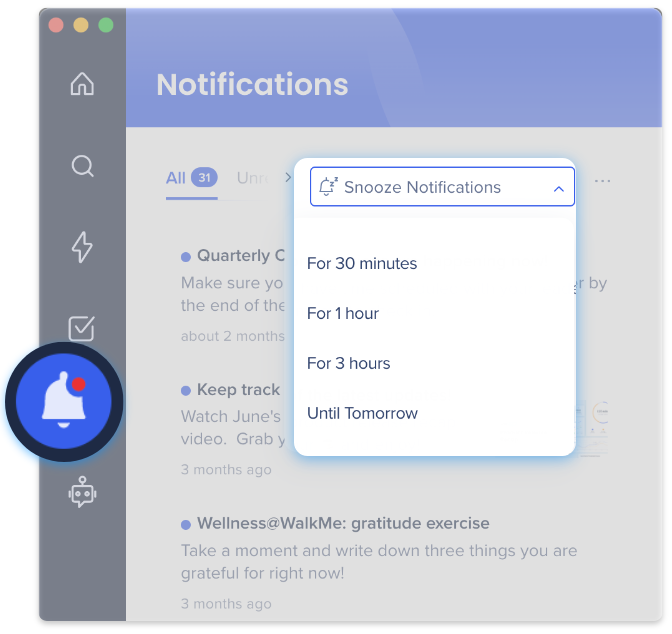
- Click the Notification bell icon.
- Select from the Snooze Notification dropdown the desired duration:
- 30 minutes
- 1 hour
- 3 hours
- Until Tomorrow
- Delays the notification until 00:00 the next day
Technical Notes
-
Do not disturb behavior automatically prevents Workstation notifications from popping up during screen sharing in video meetings, ensuring a distraction-free experience
- Currently only available for Workstation users
- Users must have Workstation versions 6.5.0 or above for Windows and 1.9.2 or above for Mac
- Must have existing segments in WalkMe Editor
- Must have sub-users assigned to the Workstation account - these will be the users who can send notifications out
- Roles & permissions are not available yet
- Multi-Language capabilities are not available yet
- Does not integrate with WalkMe Insights
- Emojis will appear differently on Windows and Mac OS
- 2 or more notifications will never be displayed at the same time
- When sent through the Communication Center, only the first one will be displayed and the following one will appear one minute after closing the previous one
- 2 Notifications will never be opened at the same time, unless the user actively clicks on notifications in the list
- Then they will open, but there will be no automatic popup if another notification is open at that moment
- When sent through the Notification Center, the first one will be displayed, and the second one will pop one minute afterwards, and so on and so forth
- When sent through the Communication Center, only the first one will be displayed and the following one will appear one minute after closing the previous one
- Must have IDP Integration in order to create Segments or Audiences
- Localization: English and Japanese languages are supported

