Brief Overview
The Action Bar console application is an app where builders and other DAP professionals can configure and customize the AI-enabled Action Bar experience for end-users. Here users can determine when and where the Action Bar is available and decide which actions will appear to users based on conditional logic.
The Action Bar offers out-of-the-box launchers and the option to make custom launchers, with user-friendly setup for effortless utilization of our AI features.
Please reach out to your WalkMe Customer Success Manager to get the Action Bar app
Access
 To access the Action Bar page, navigate to it by clicking on the Action Bar page in the console navigation or use a direct link to the page:
Getting Started
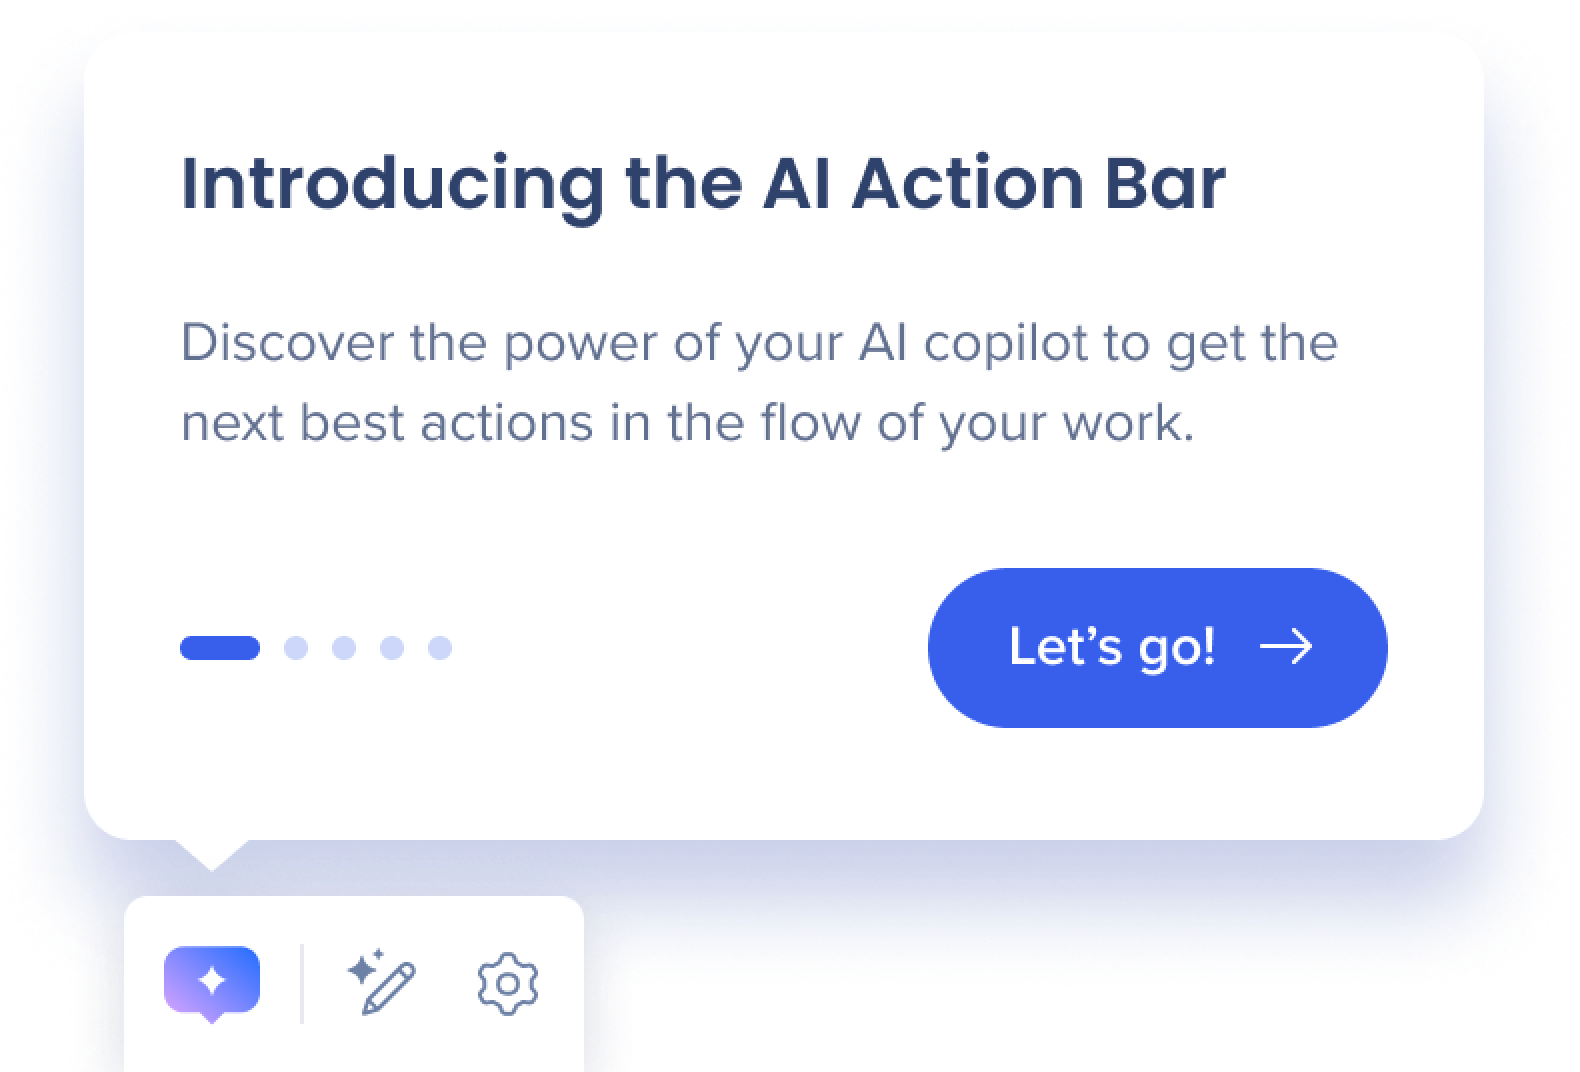
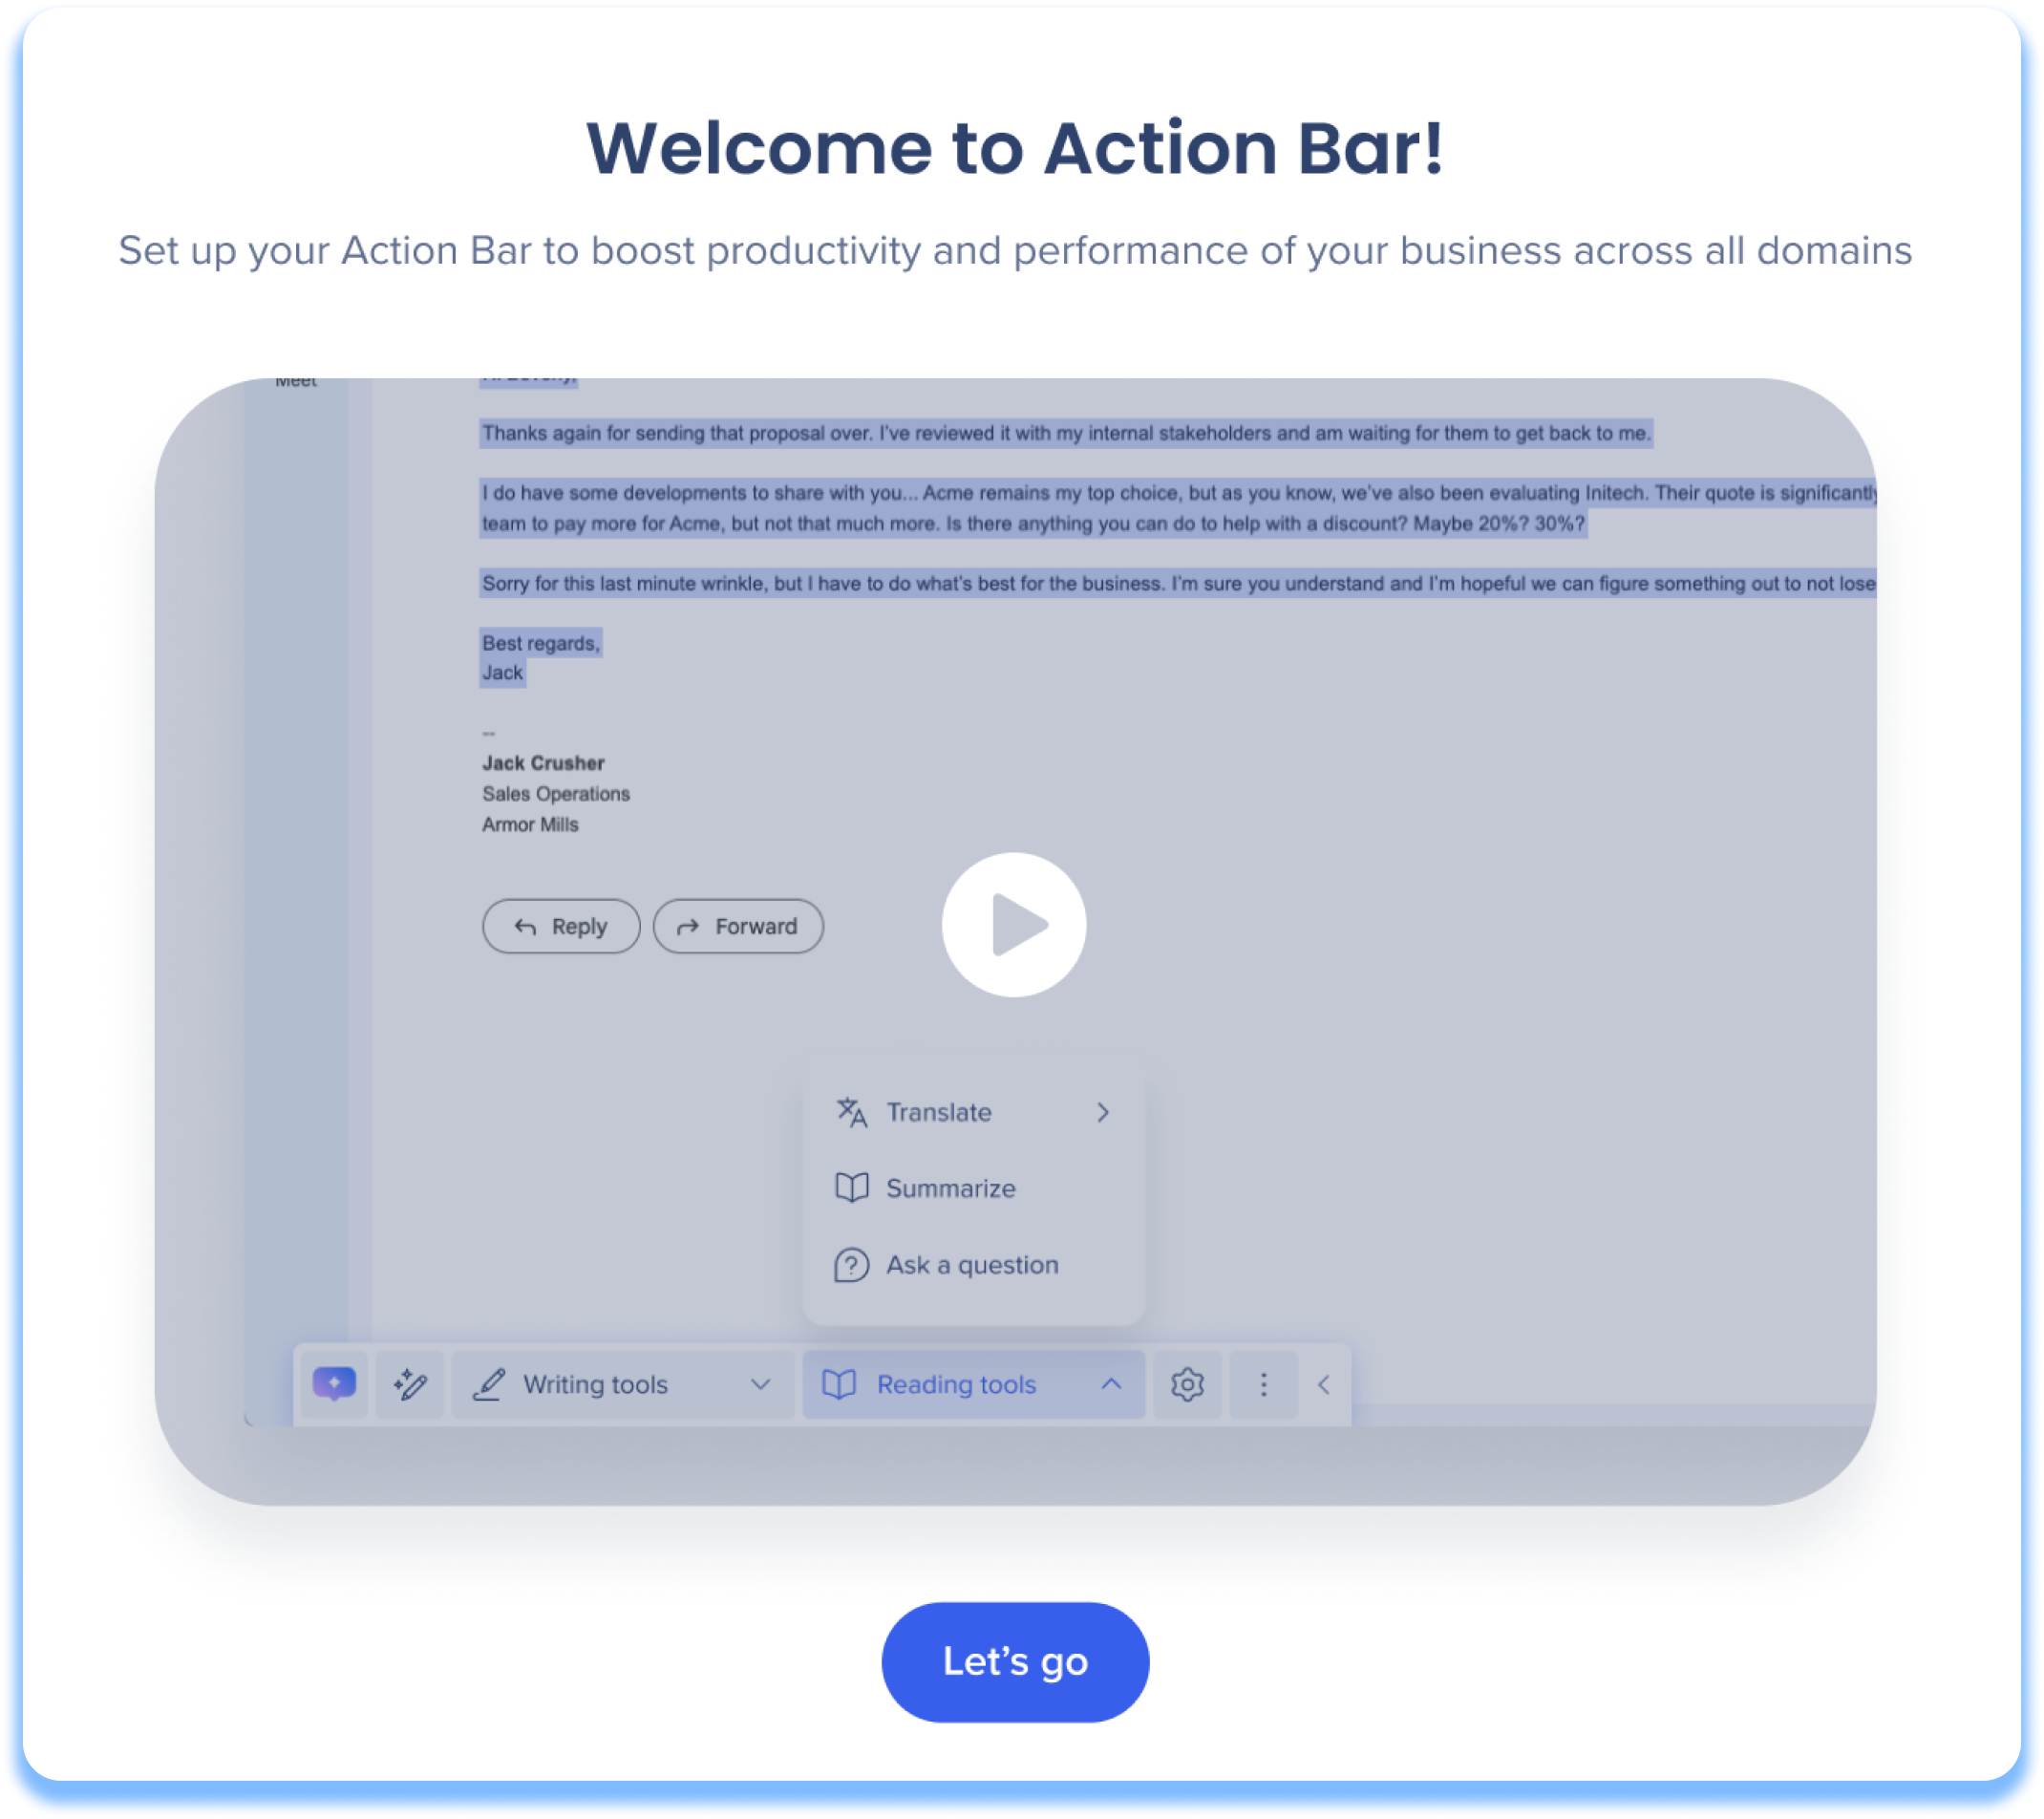
The Action Bar app features a welcome screen upon first opening. This screen includes an informational video about the app and its features.
Click Let's go to continue.
 Action Bar Setup
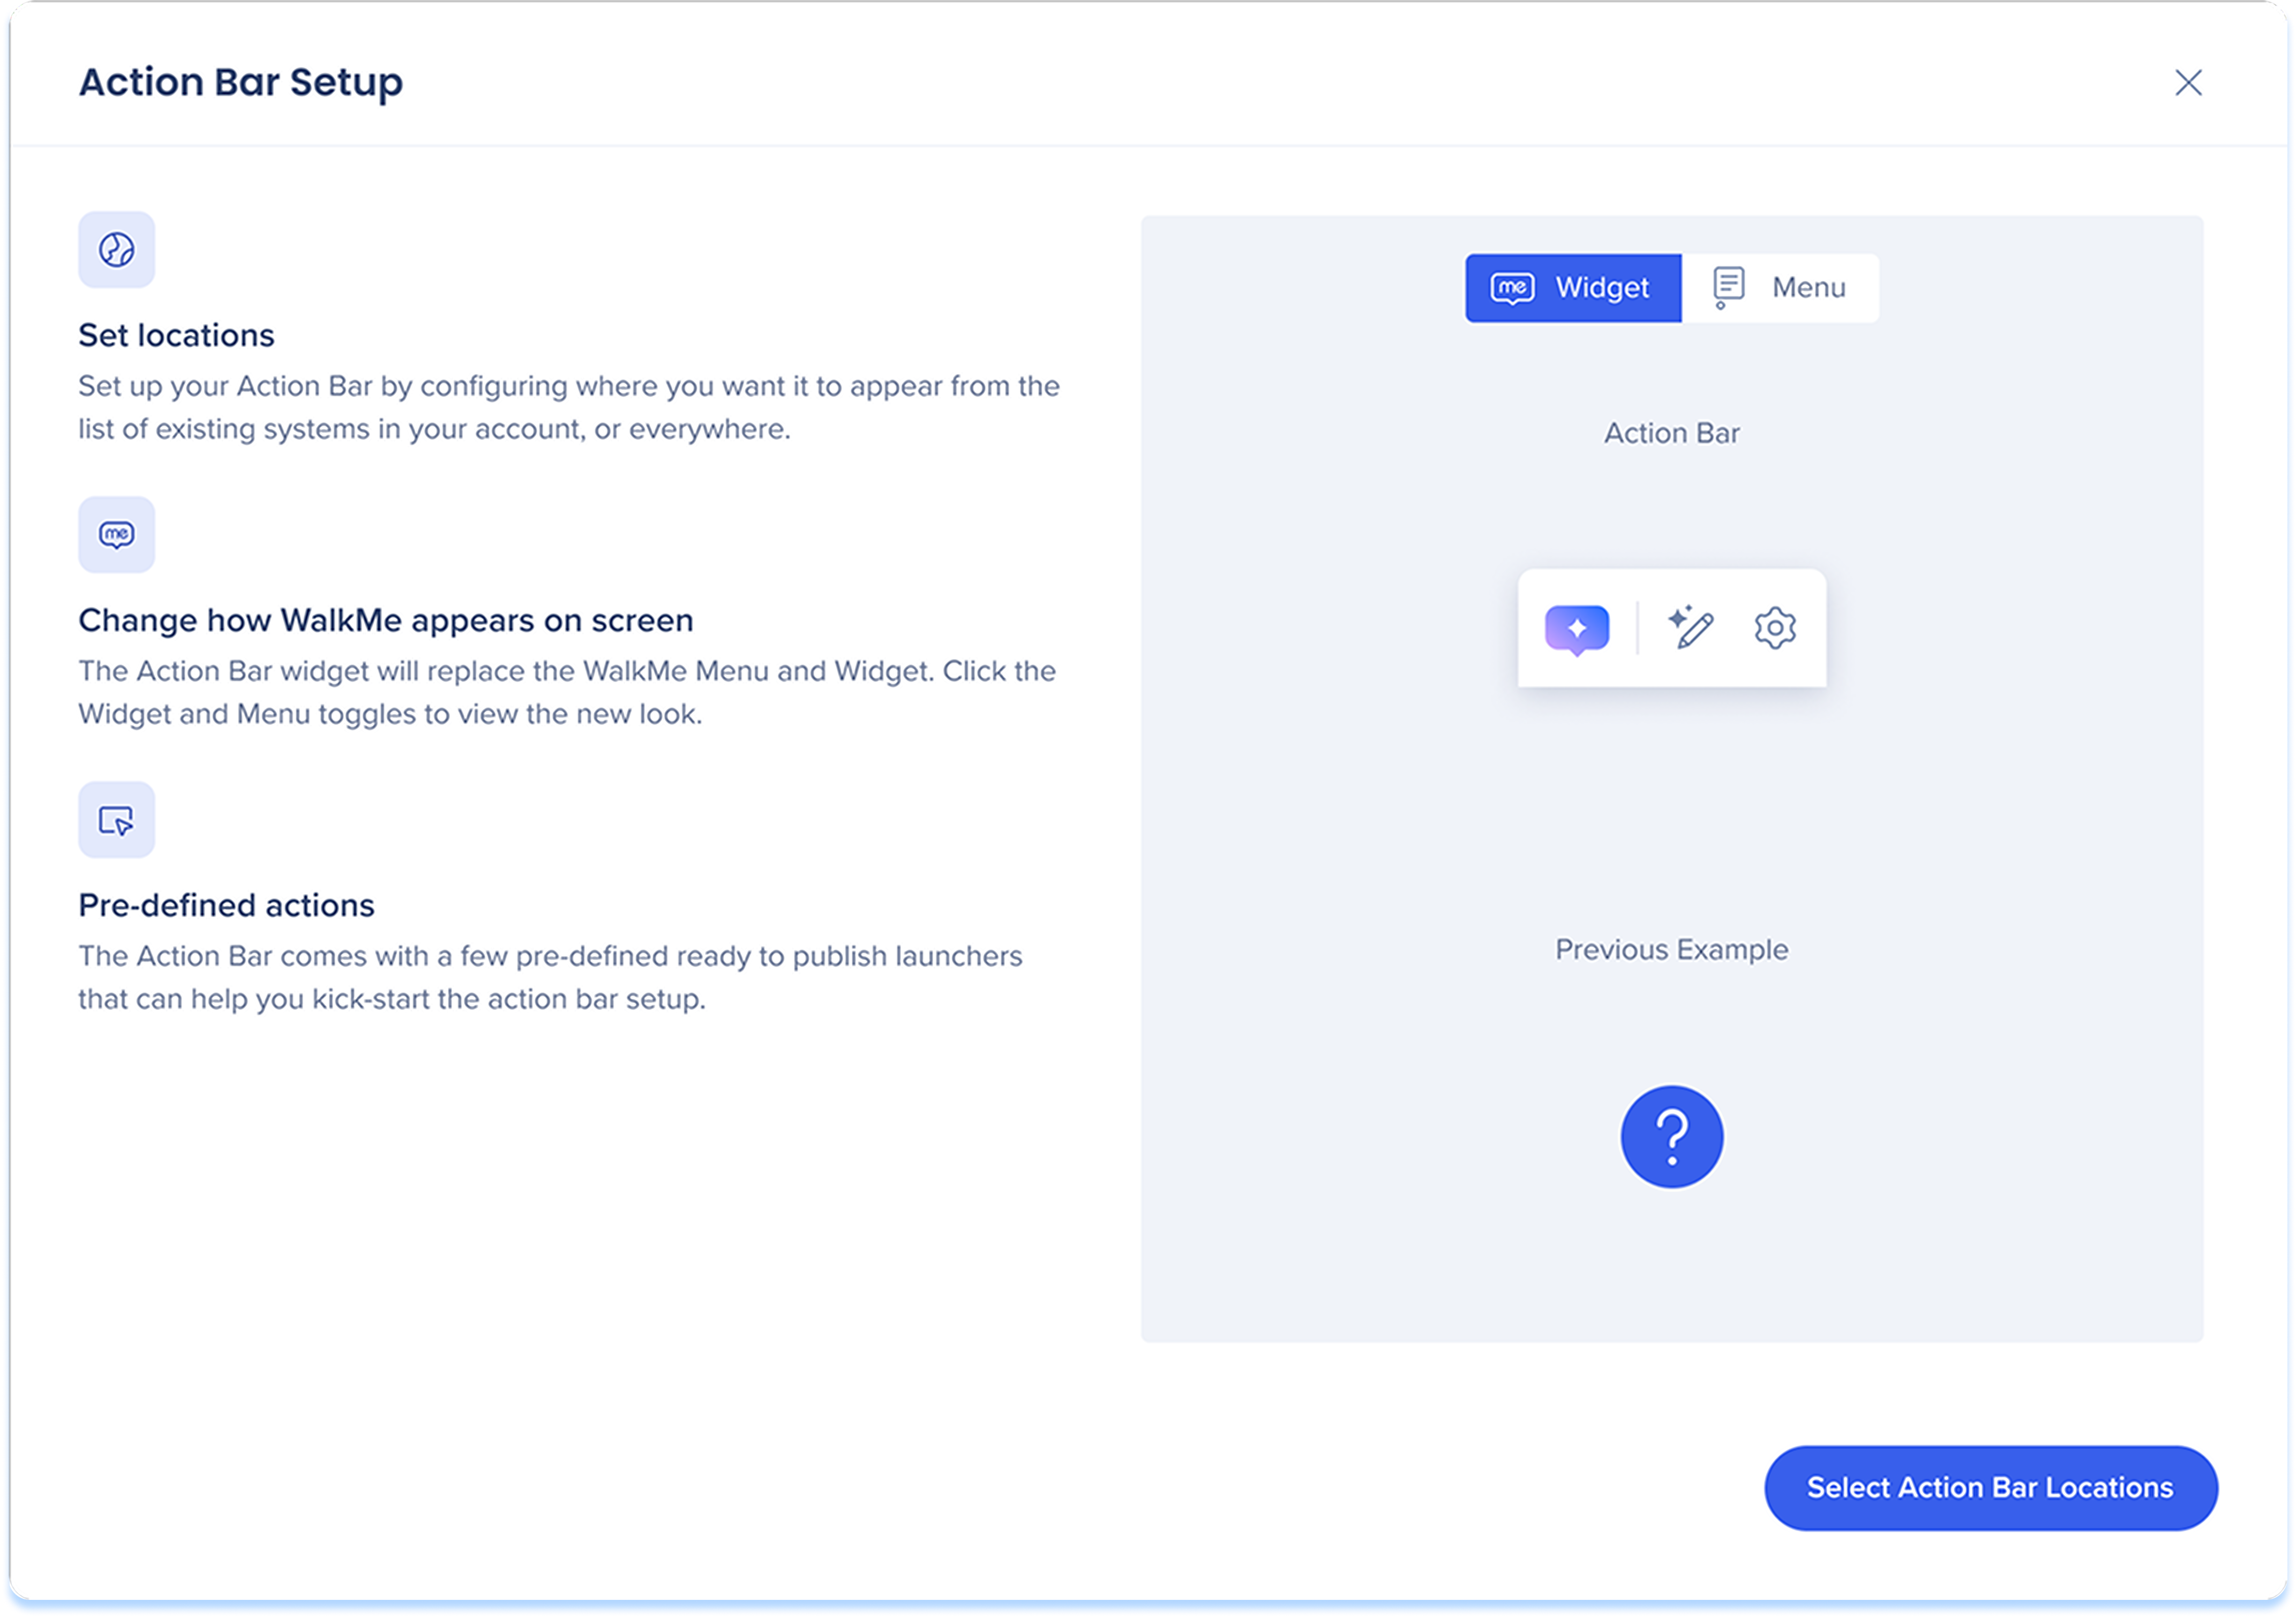
The first setup screen is where you can gather more information about how Action Bar works, how it appears to users, and discover our out-of-the-box features.
- Set locations: Click Select Action Bar Locations to define where you want the Action Bar to appear for your users

- Appearance: The Action Bar widget is replacing the original WalkMe Widget that opened the WalkMe Menu.
- Click the Widget and Menu toggles to view the appearance changes

- Pred-efined actions: Out-of-the-box launchers will be available after you set your locations
List of out-of-the-box-launchers...
Writing tool launchers
-
Improve Writing: Provides alternative text with improved grammar, wording, and structure
-
Change Tone: Adjusts the text tone according to the tone options menu
-
Sound neutral
-
Sound formal
-
Sound casual
-
Sound engaging
-
Make Shorter: Provides an alternative text that make the highlighted/captured text more concise
-
Make Longer: Provides an alternative text that expands on the highlighted/captured text
-
Change Format: Adjusts the text format according to the format options menu
-
Write in bullet list
-
Write in numbered list
-
Write as paragraph
-
Write as email
Reading tool launchers
-
Summarize: Summarizes text into a shorter version retaining key points
-
Translate: Translates text according to the select languages available in the language options menu
-
Translate to English
-
Translate to French
-
Translate to German
-
Translate to Spanish
-
Translate to Japanese
-
Translate to Hebrew
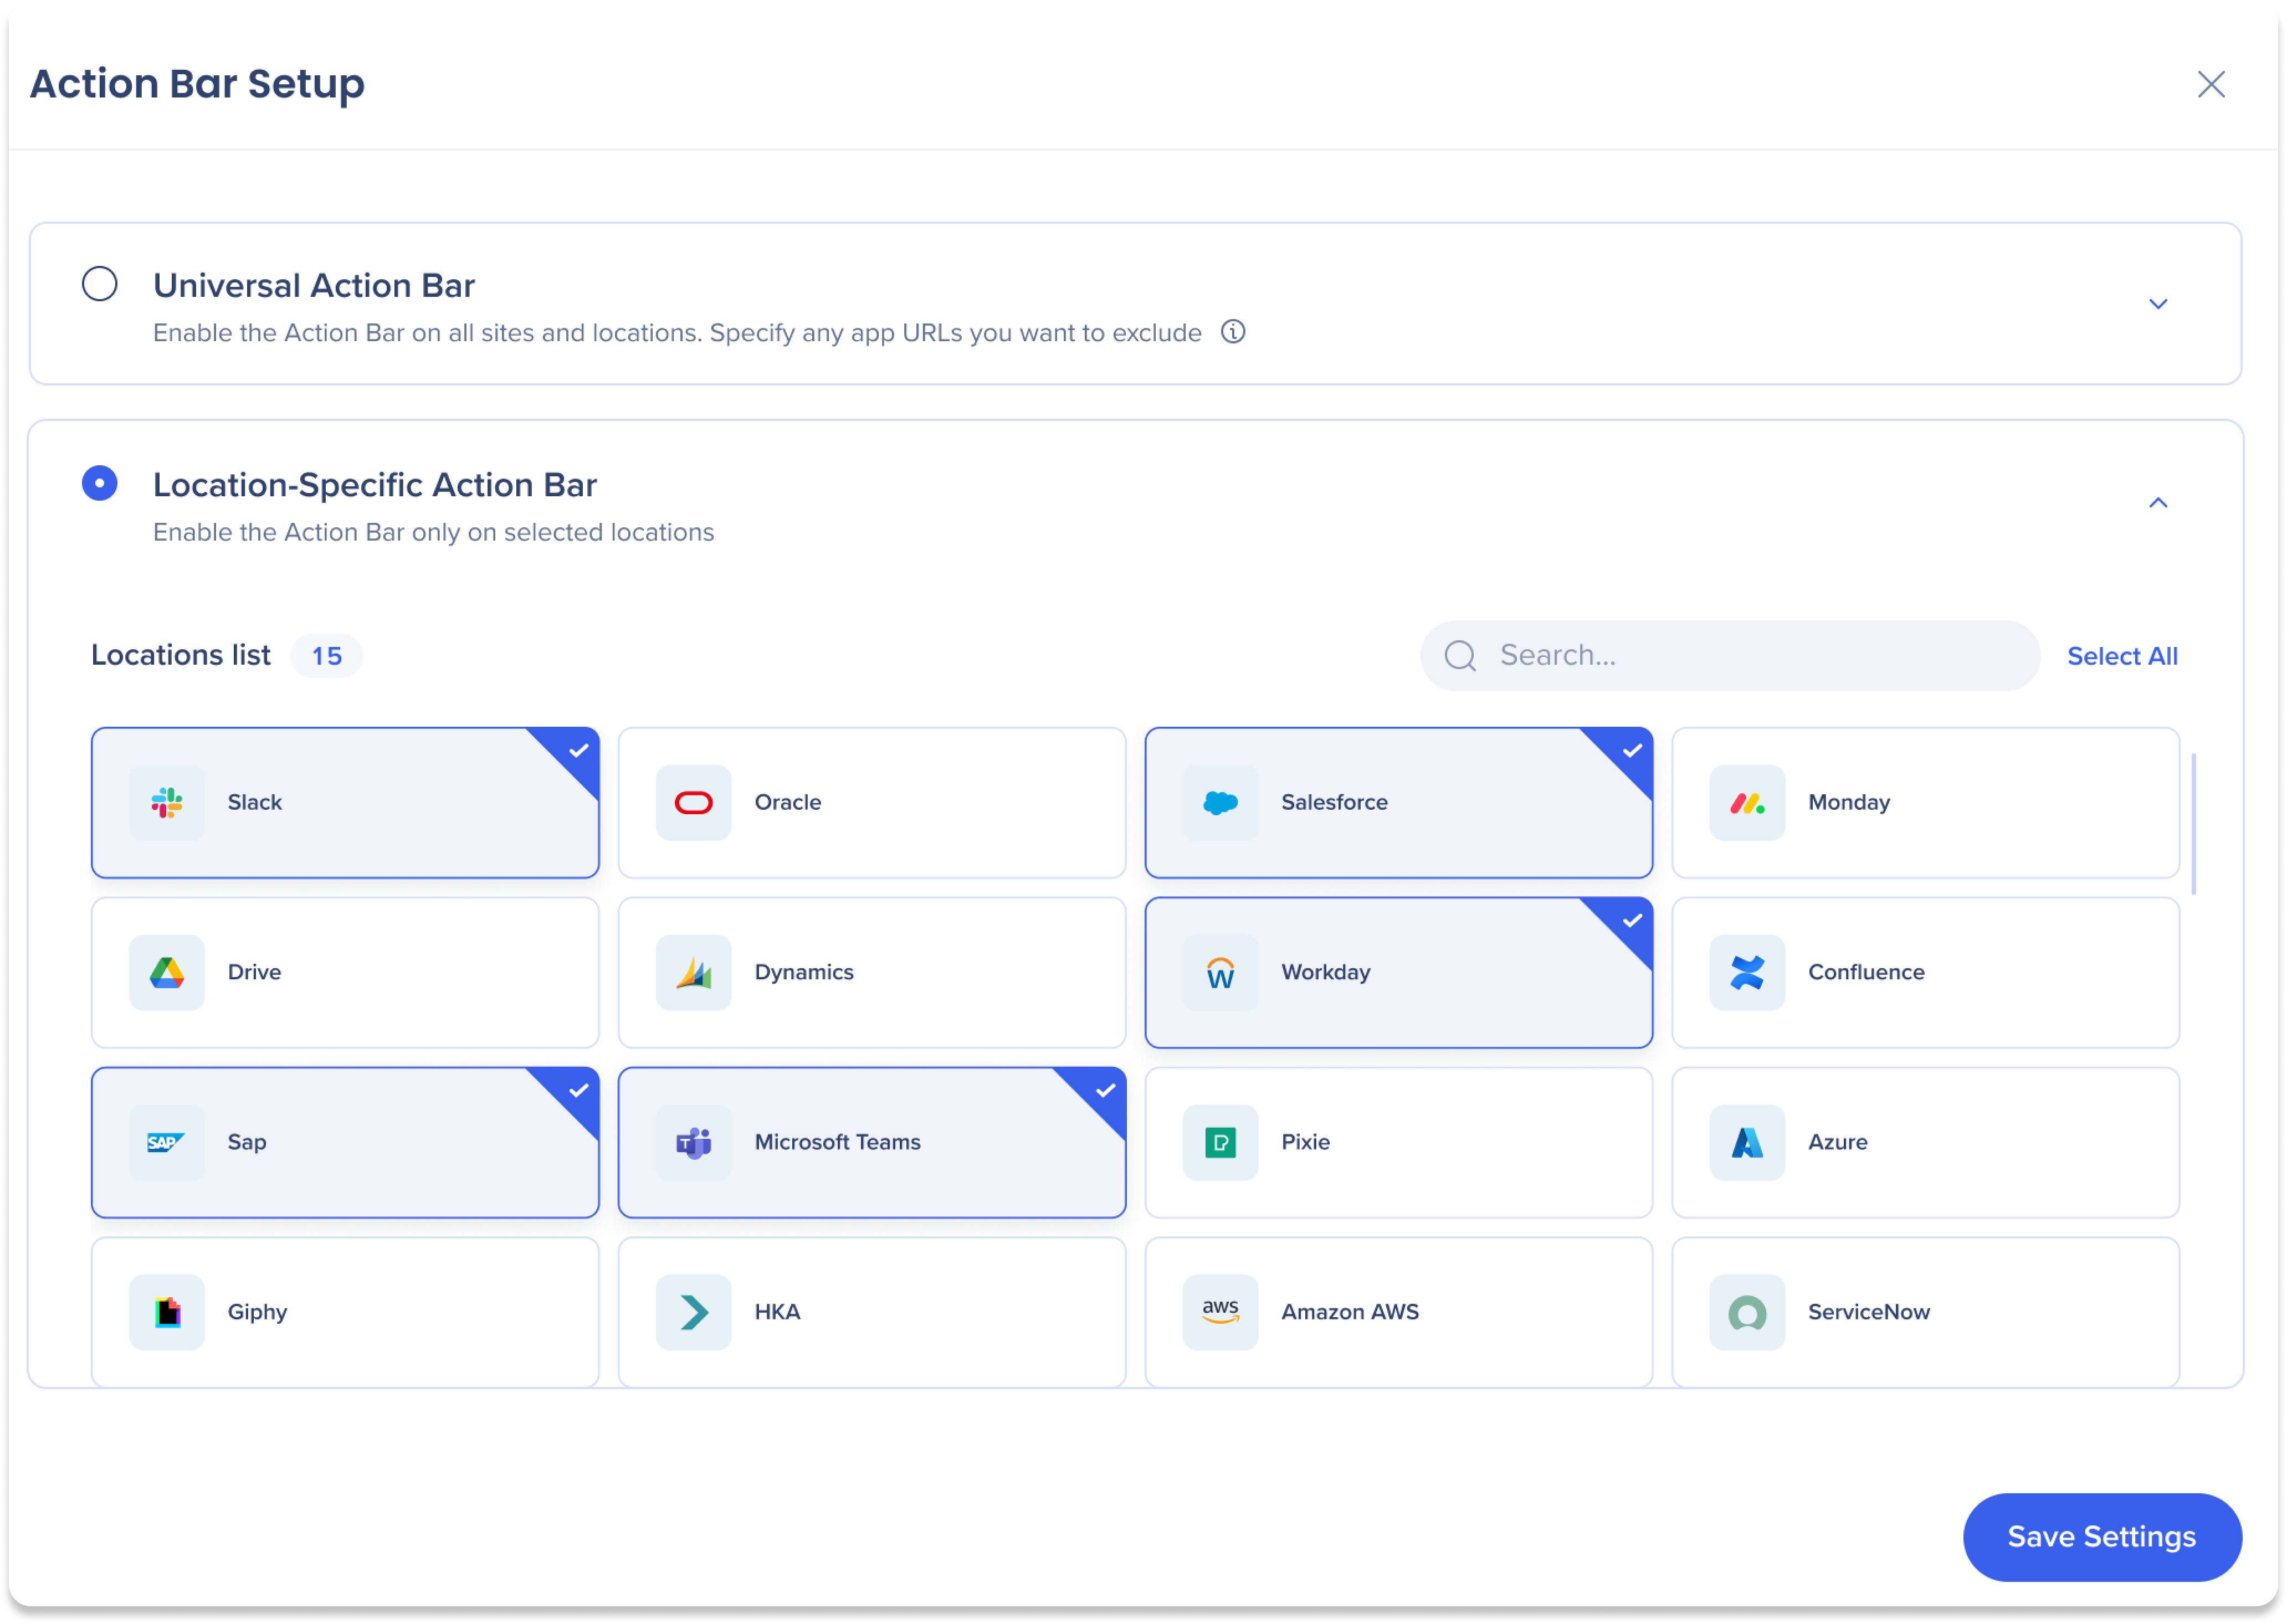
After clicking Select Action Bar Locations, you can choose between two location settings options:
- Universal Action Bar: Action Bar will appear on all sites and locations, and you can specify any app URLs you want to exclude
Note
Customers should contact their WalkMe representative to enable Universal Mode.
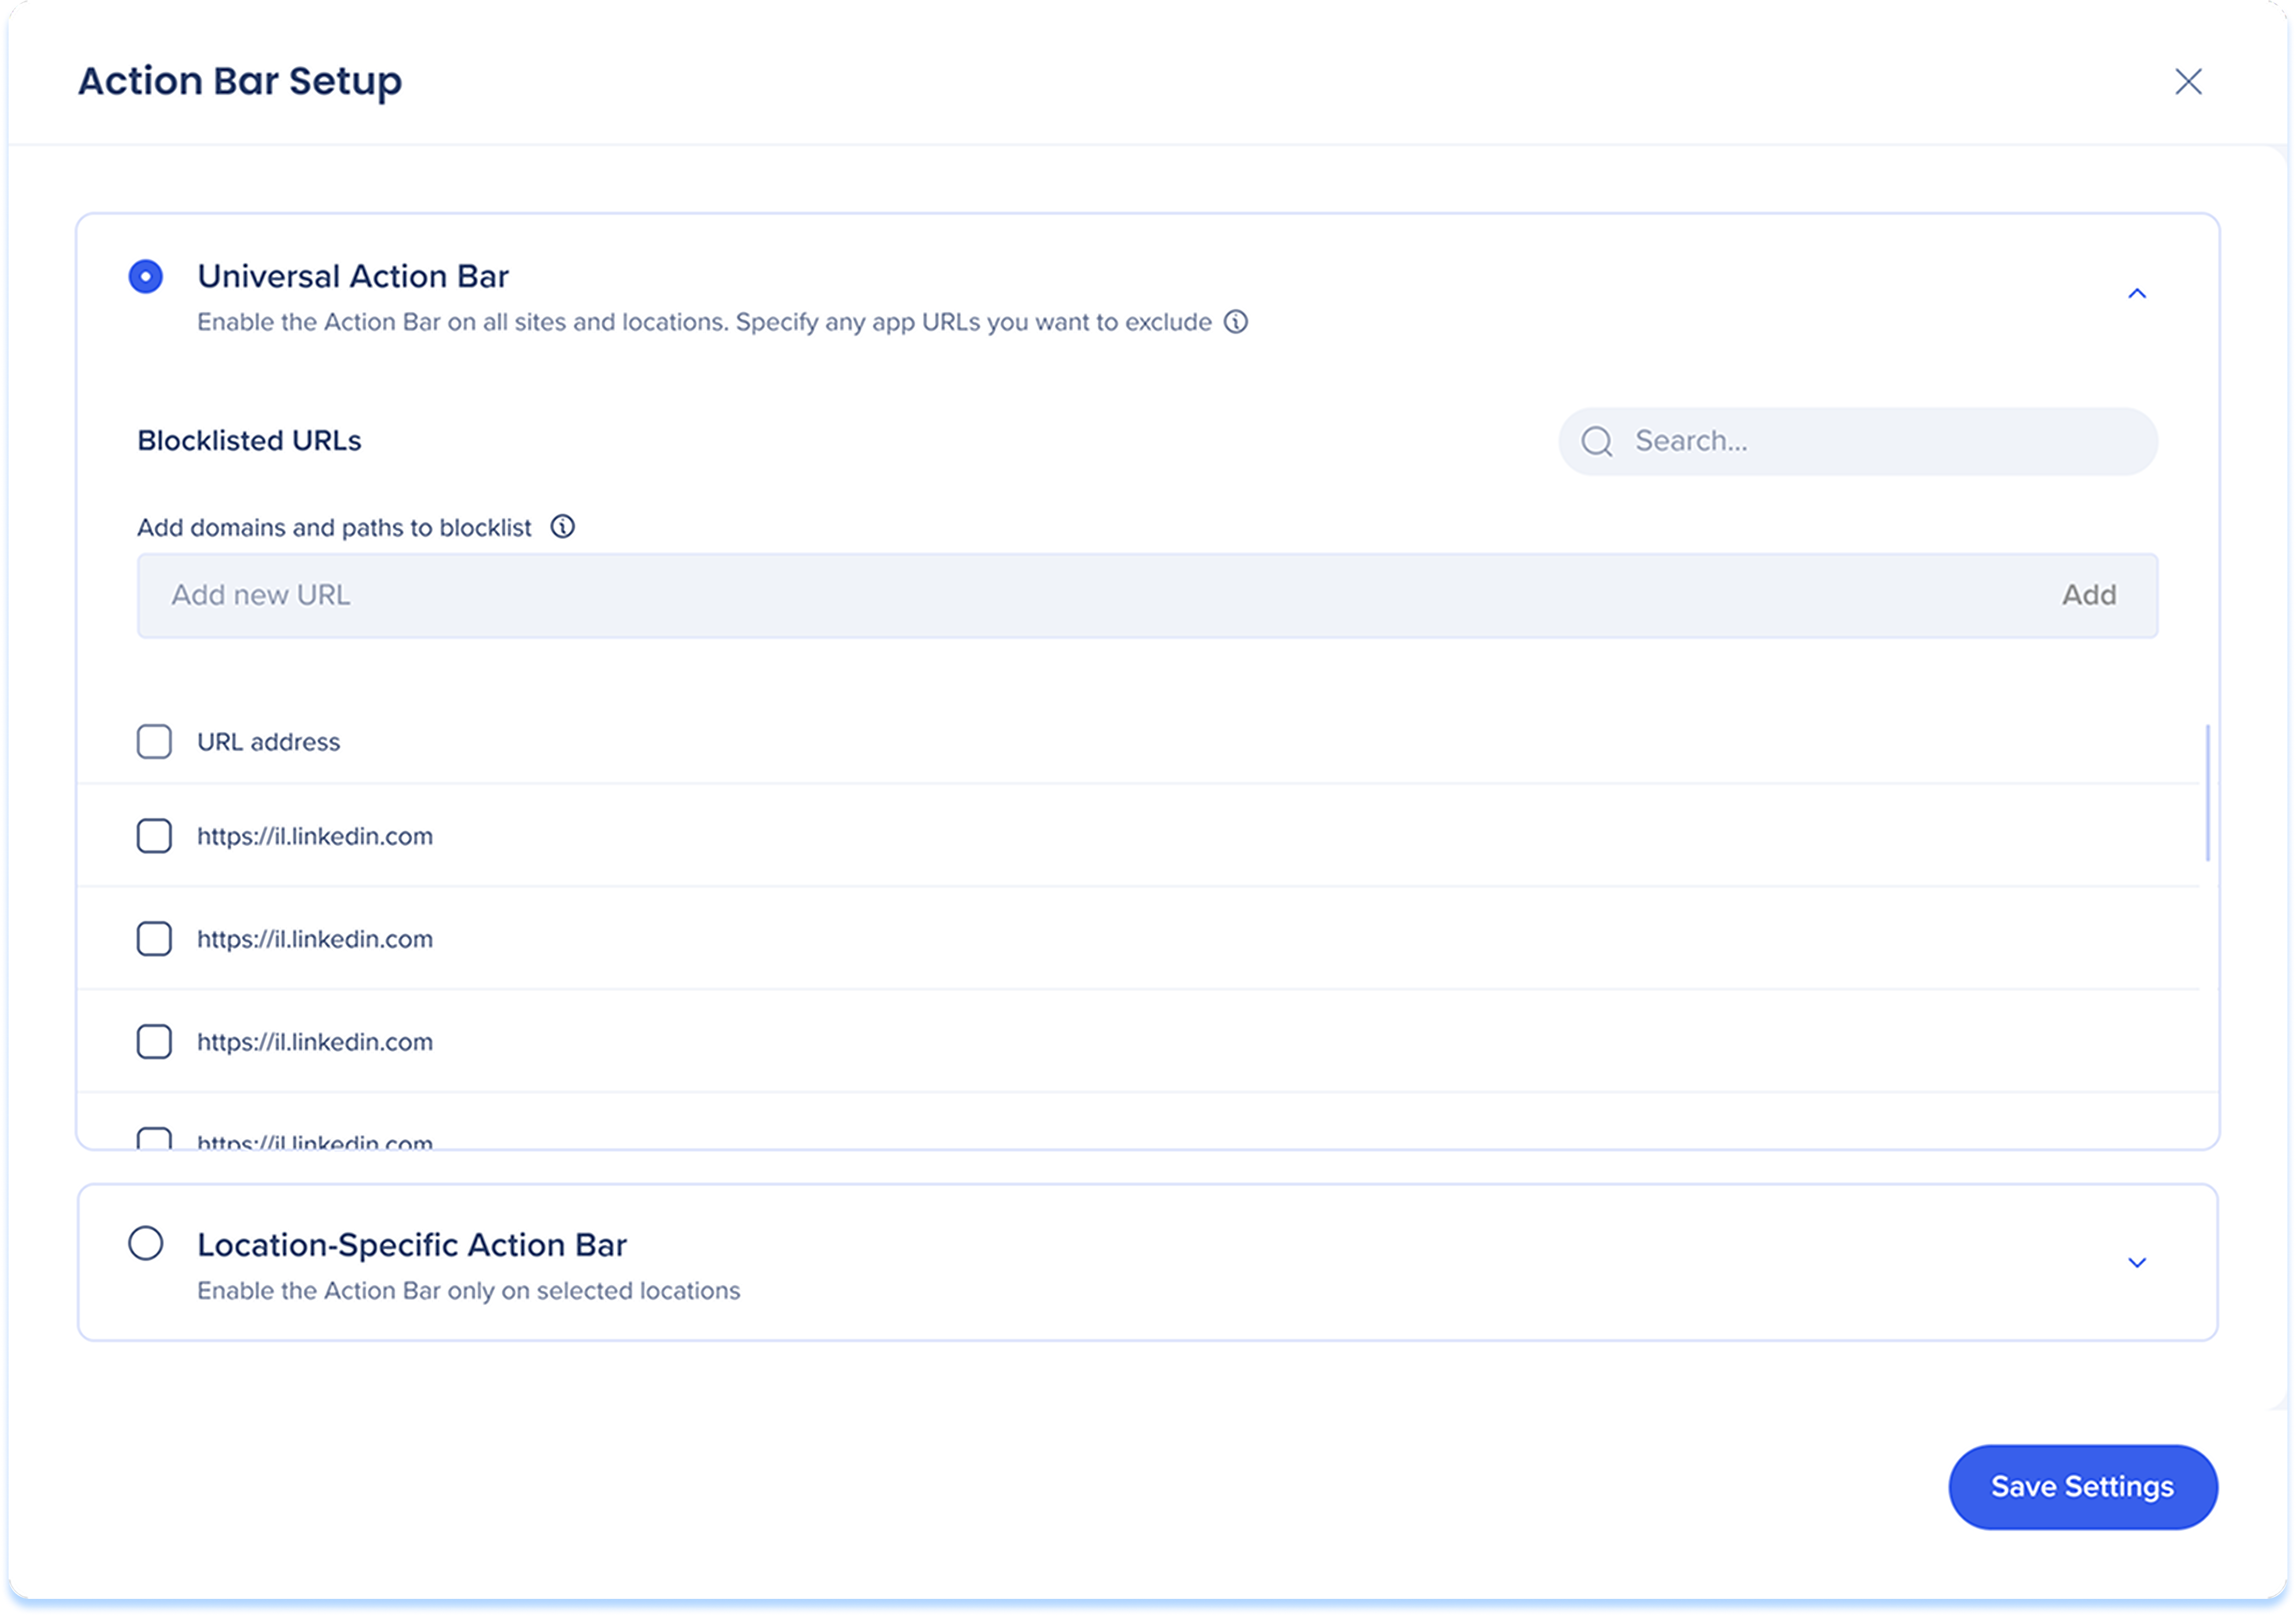
- Location-Specific Action Bar: Action Bar will appear only on selected locations from a list of all your existing systems in your account.
- Select which locations you would like the Action Bar to appear
- Click Select All for Action Bar to appear on all locations
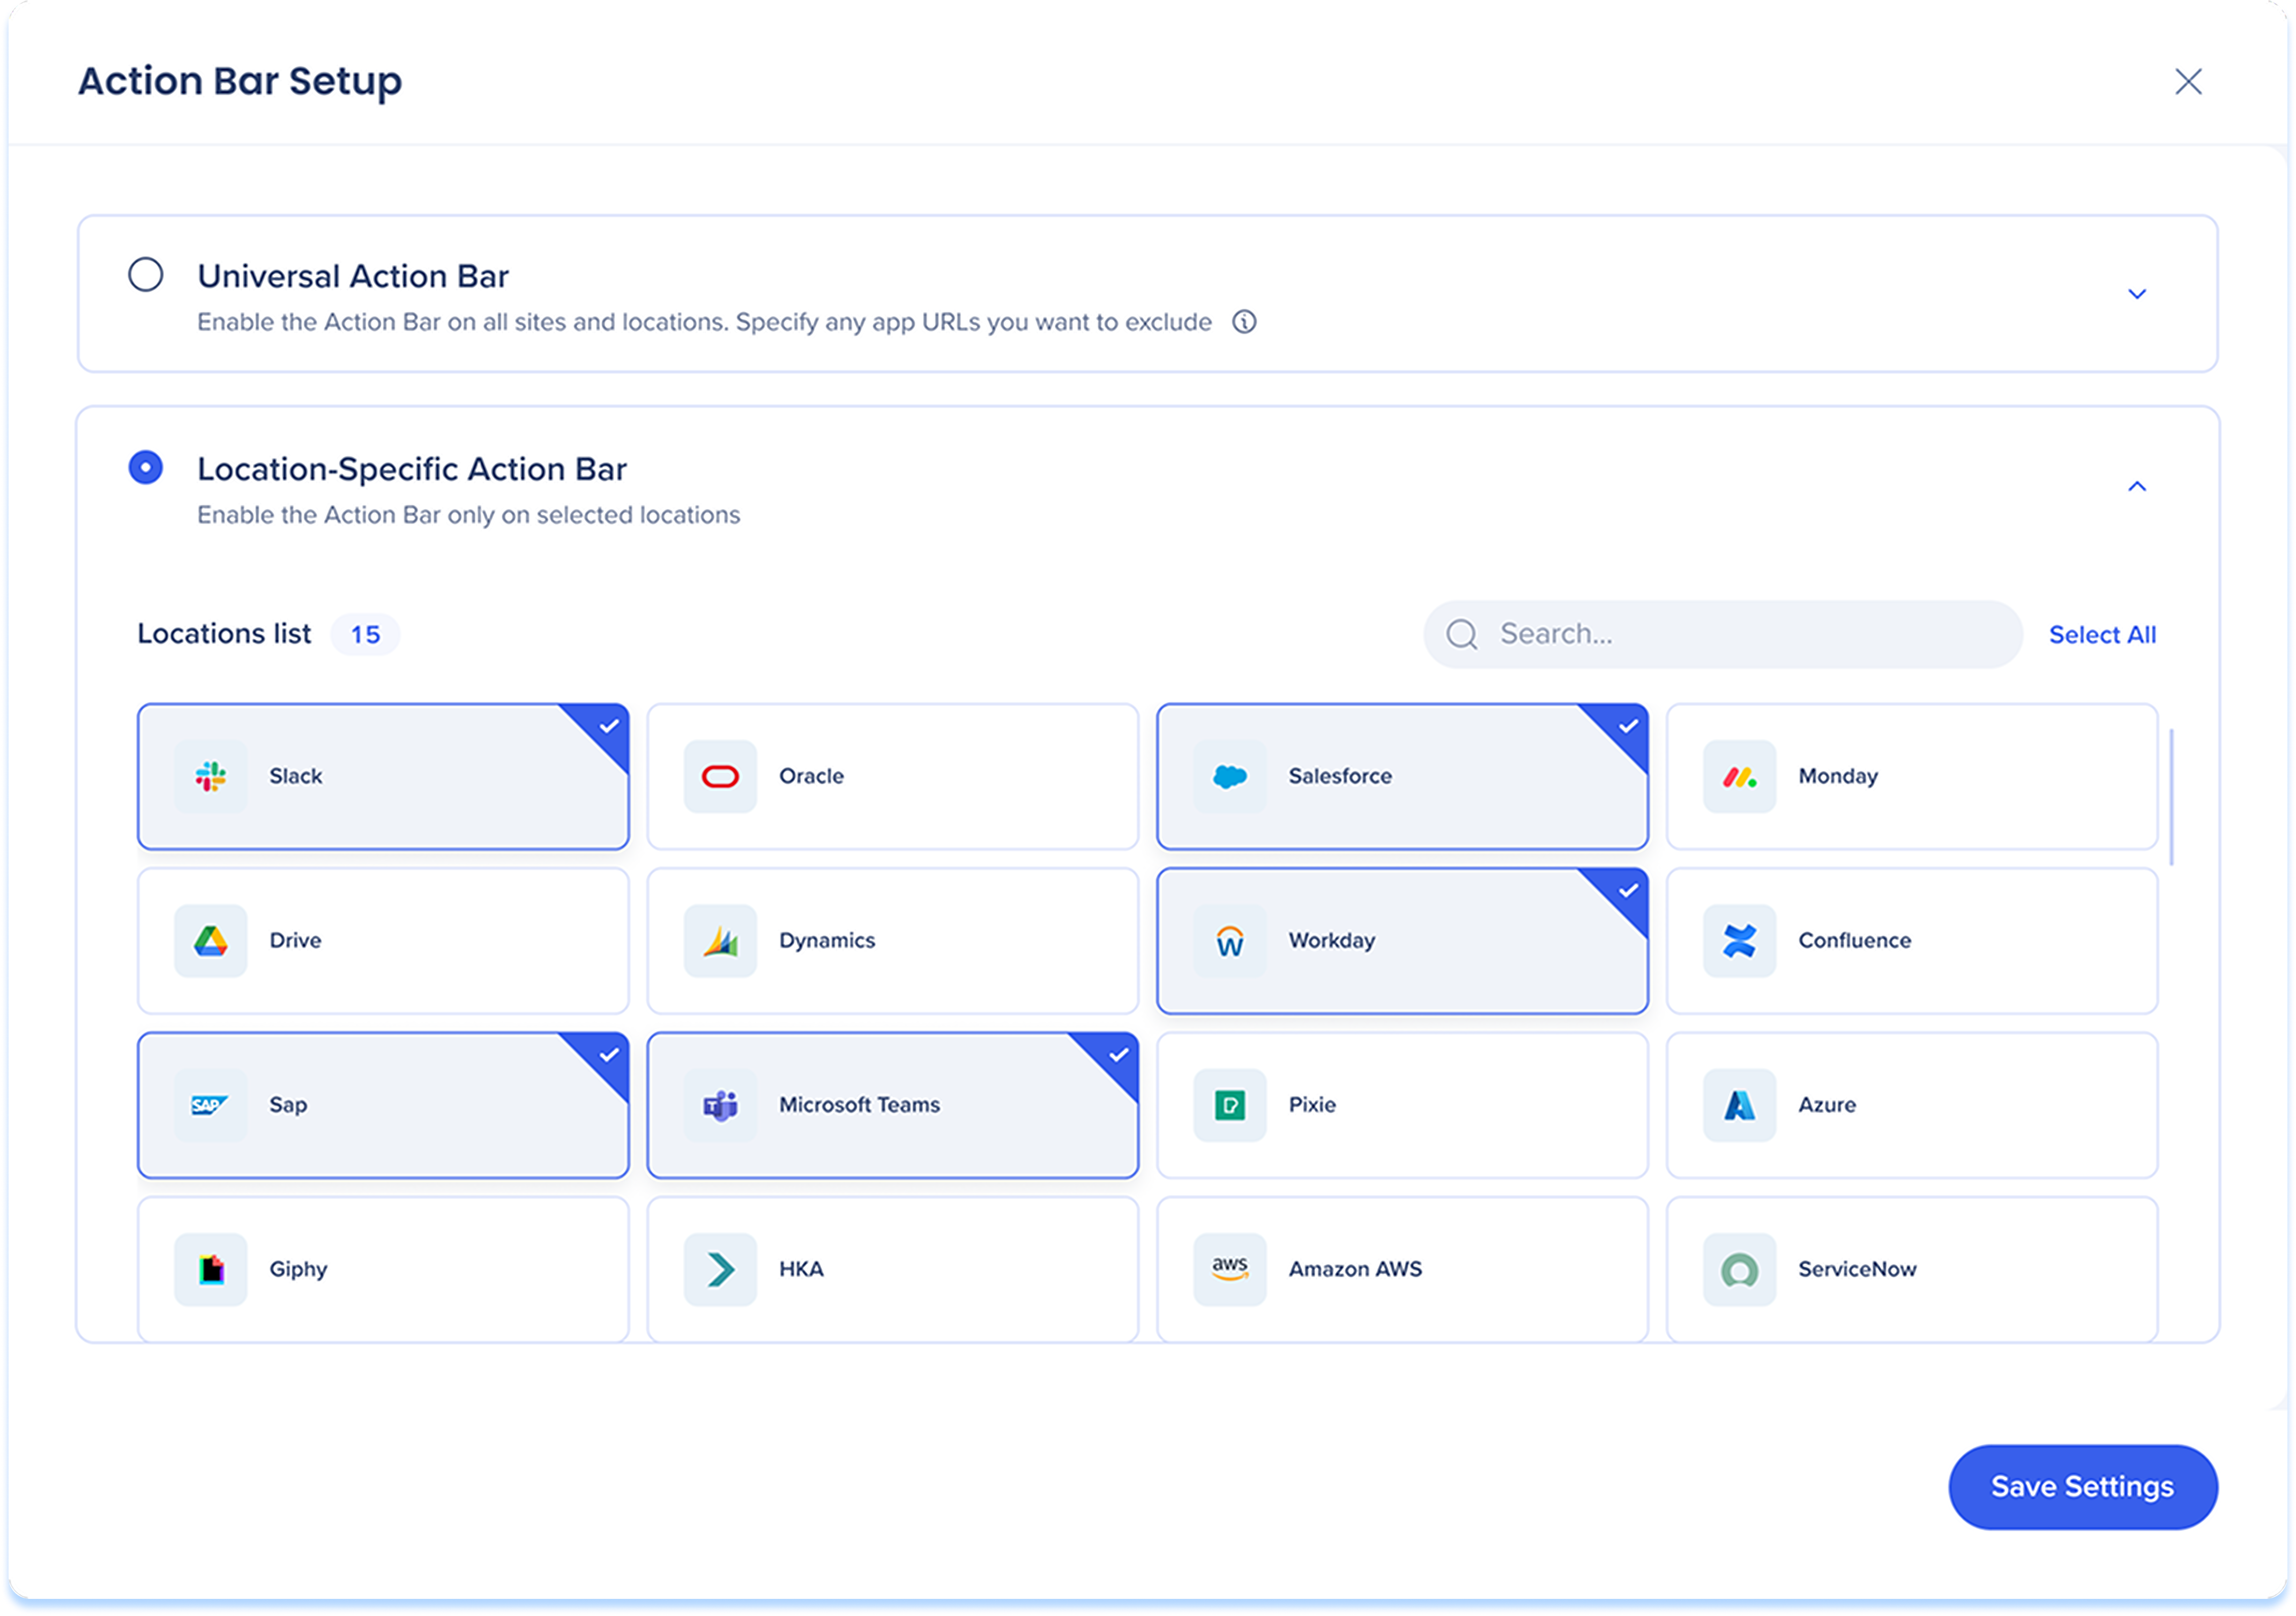
Click Save Settings to complete the Getting Started flow.
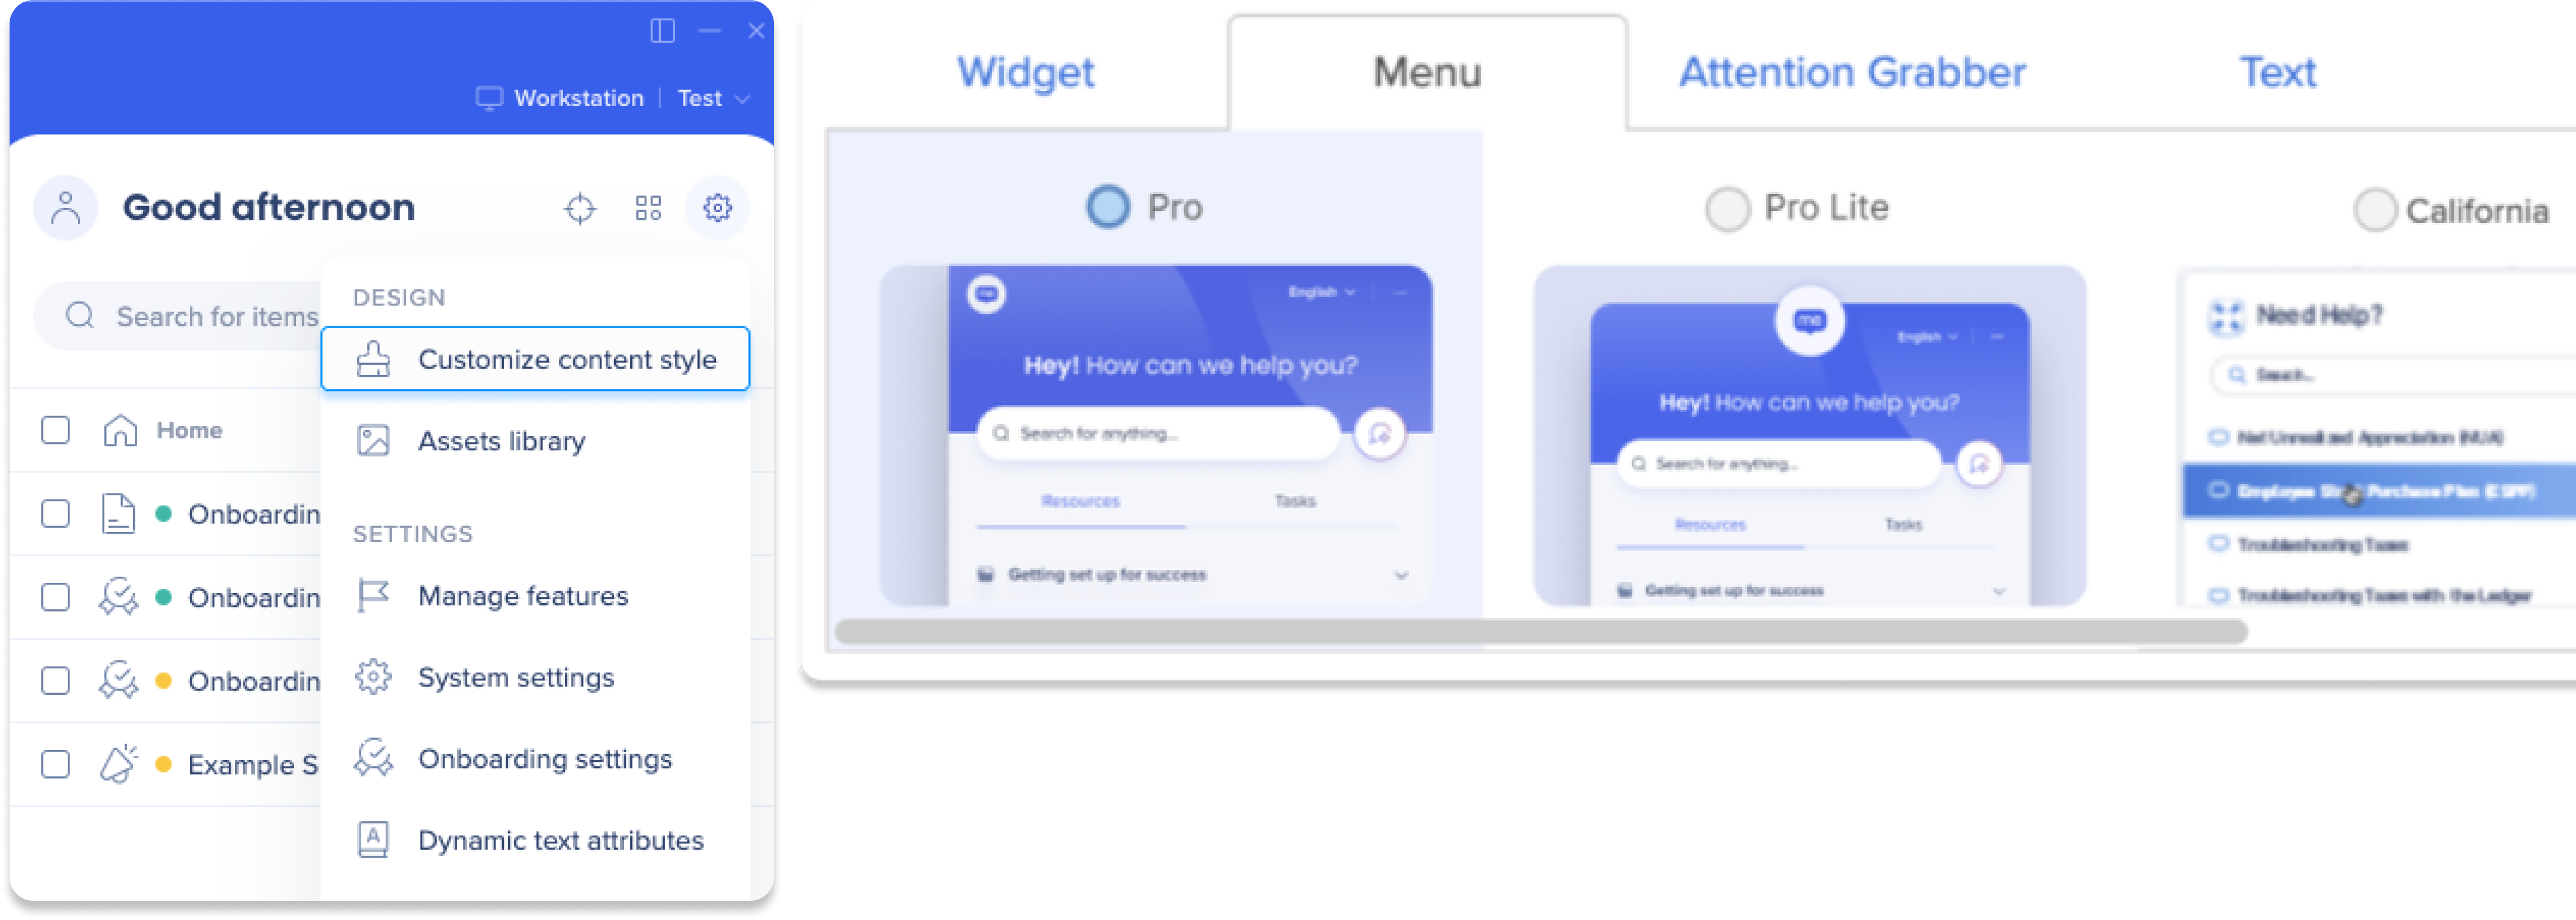
Remove Action Bar from a location
To remove the Action Bar from a location, you'll need to select a different menu for the system in the editor
- Open the WalkMe Editor
- Select the system
- Click Settings
- Click Customize content style
- Select a menu that's not the Pro menu
Action Bar Page Overview
The Action Bar page is a central hub for creating, managing, and previewing all of the launchers that you have created.
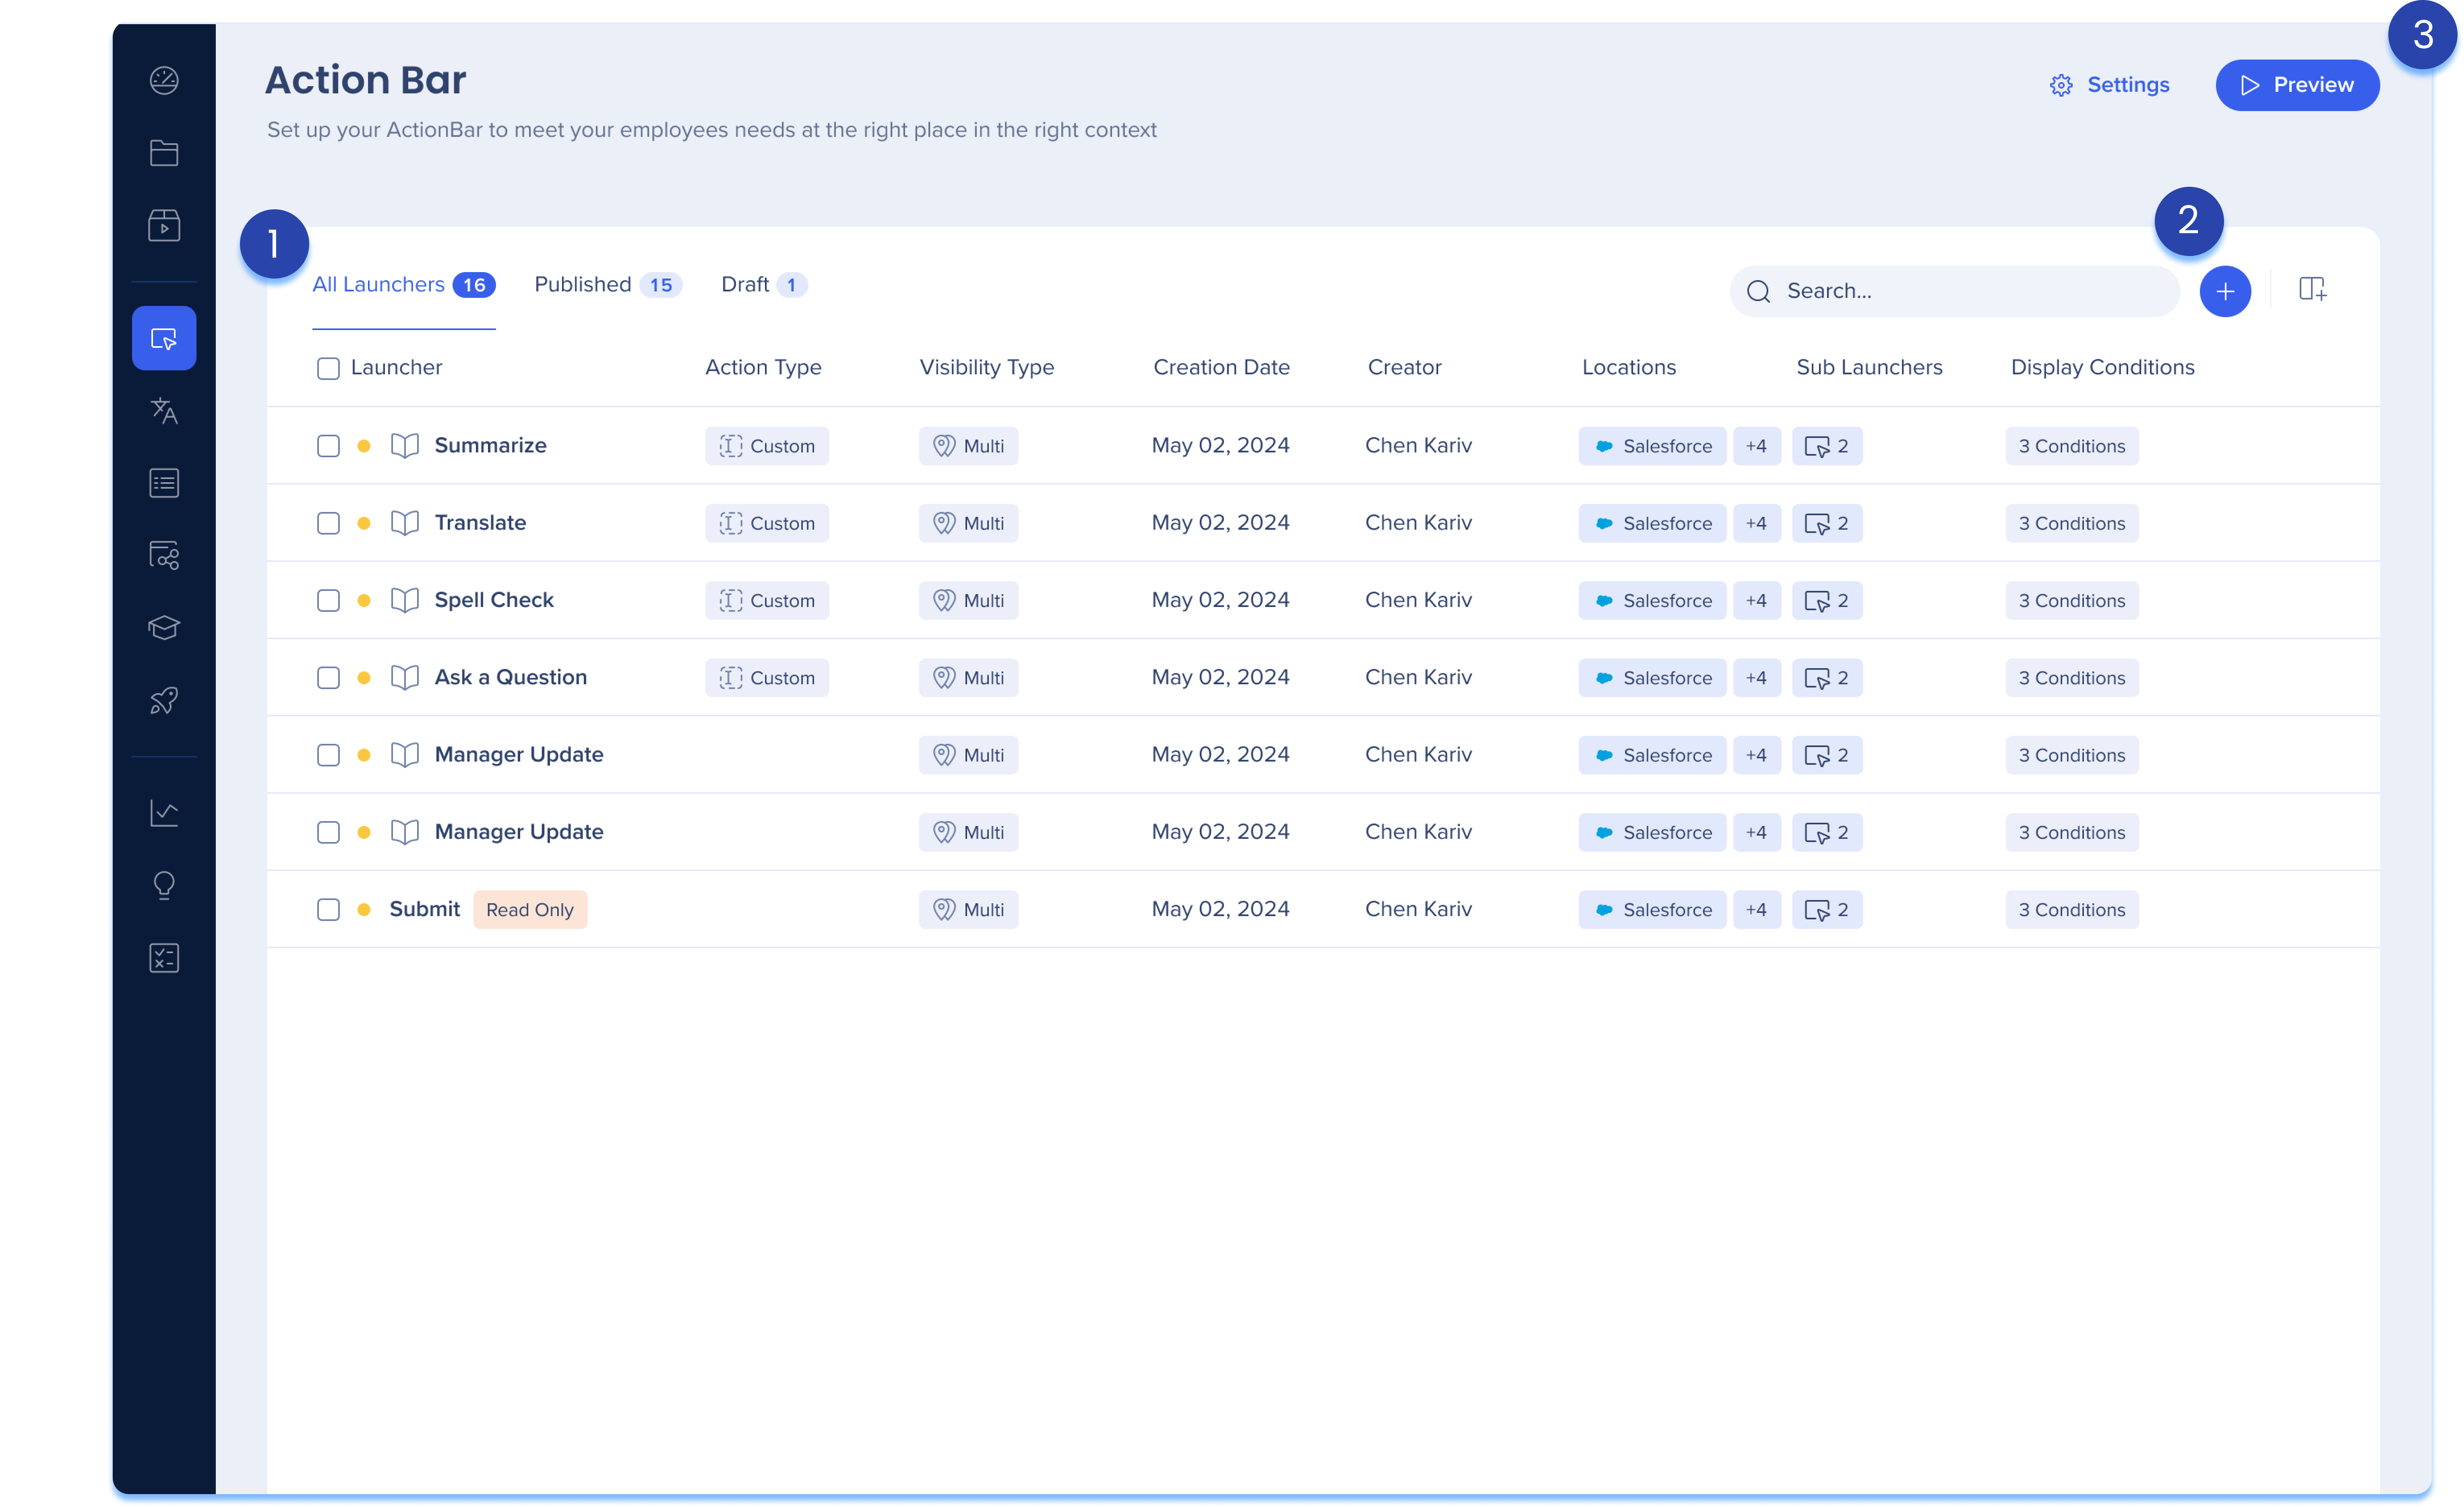
1. Launchers table
The Launchers table displays a list of all of the launchers you've created. The list includes three tabs for organization:
-
All Launchers: A full list of published and unpublished launchers
-
Published: A list of all published and active launchers
-
Drafts: A list of all unpublished and saved launchers
-
Archived: A list of archived launchers
You'll find a few pre-defined launchers for the Action Bar that are readily available in the table upon opening the app. They will appear as drafts and can be published immediately for quick use.
Table Columns
-
Launcher: The name of the launcher
-
Action Type: The action the AI will perform once initiated
-
Visibility Type: If the launcher was made for Multiple Locations or Single Location
-
Creation Date: Date the launcher was created
-
Creator: User who created the launcher
-
Locations: List of systems where the launcher will appear in the Action Bar
-
Sub Launchers: List of sub-launchers within this launcher
-
Display Conditions: List of conditions made in the condition builder for this launcher
Statuses
2. Table icons
Manage Columns 
Remove or add columns from the table.
-
Click the Manage columns icon
-
Select which columns you'd like to have in the table
-
Click Apply
Create Launcher
Click the create icon to create new launchers.
- Learn more in the Launchers section
3. Page buttons
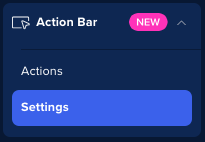
Settings
 Click the Settings icon to do the follow:
Learn more in the Action Bar settings section.
Preview
-
Click the Preview button to view how your launchers will appear and behave
-
Select a location
-
A list of connected launchers will display, along with a list of excluded, unconnected launchers to the system
-
Click Continue to select a tab
-
Select an open tab from the list or open a new tab
-
Click Preview
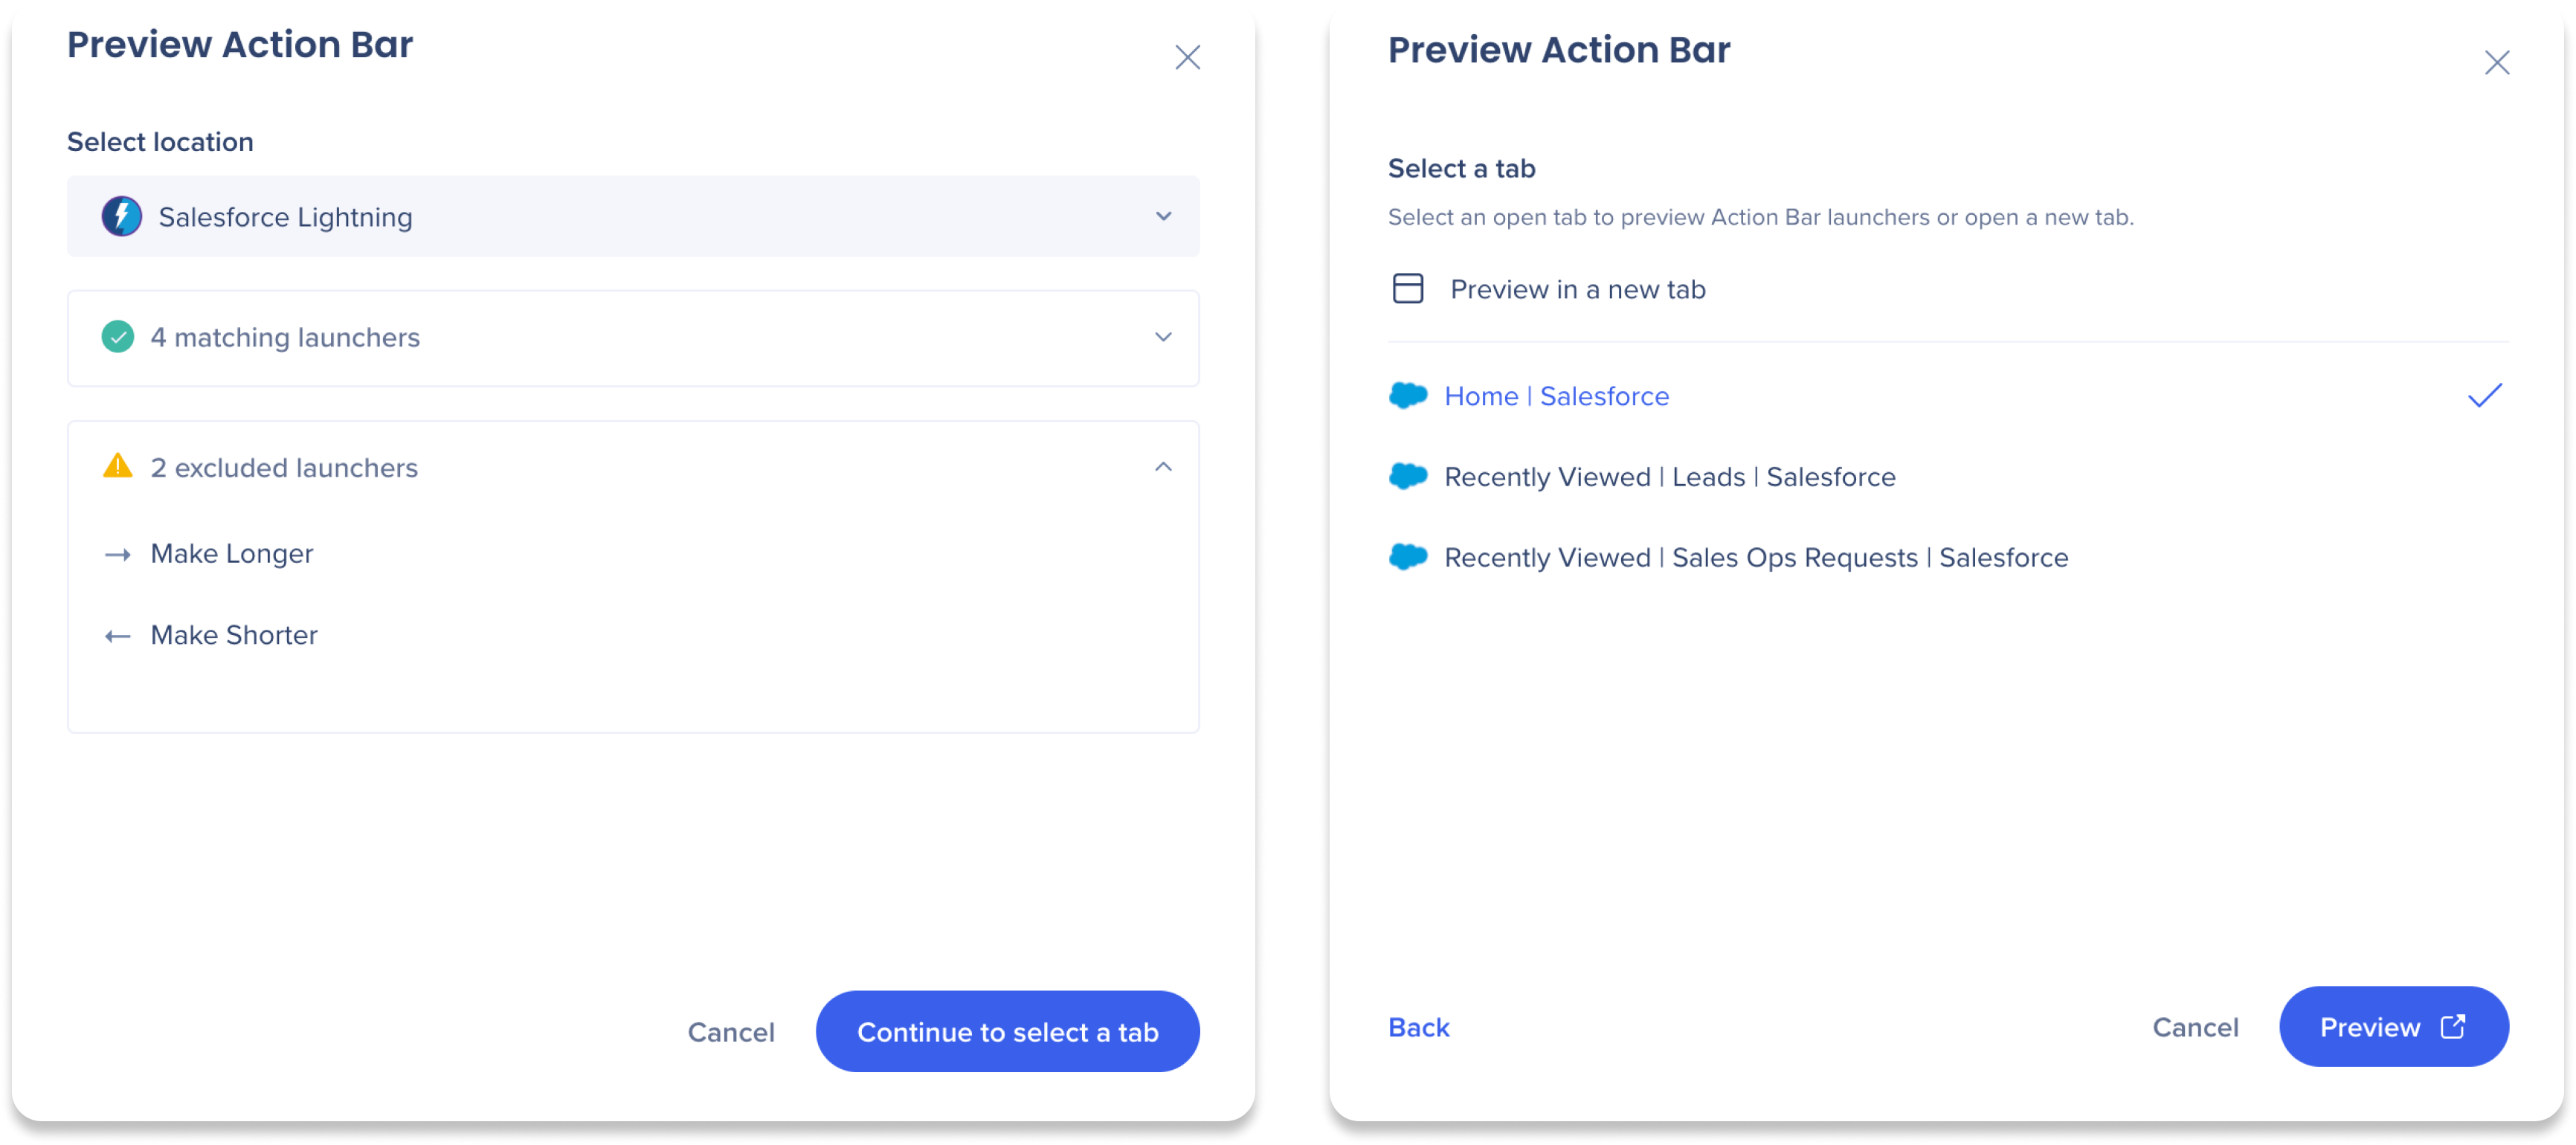
Note
Launchers without a shared location can't be previewed together.
How to Create a Launcher
 Get started by clicking the Create icon from the Action Bar page to open the “Create a launcher” side panel.
Step 1: Select Location Type
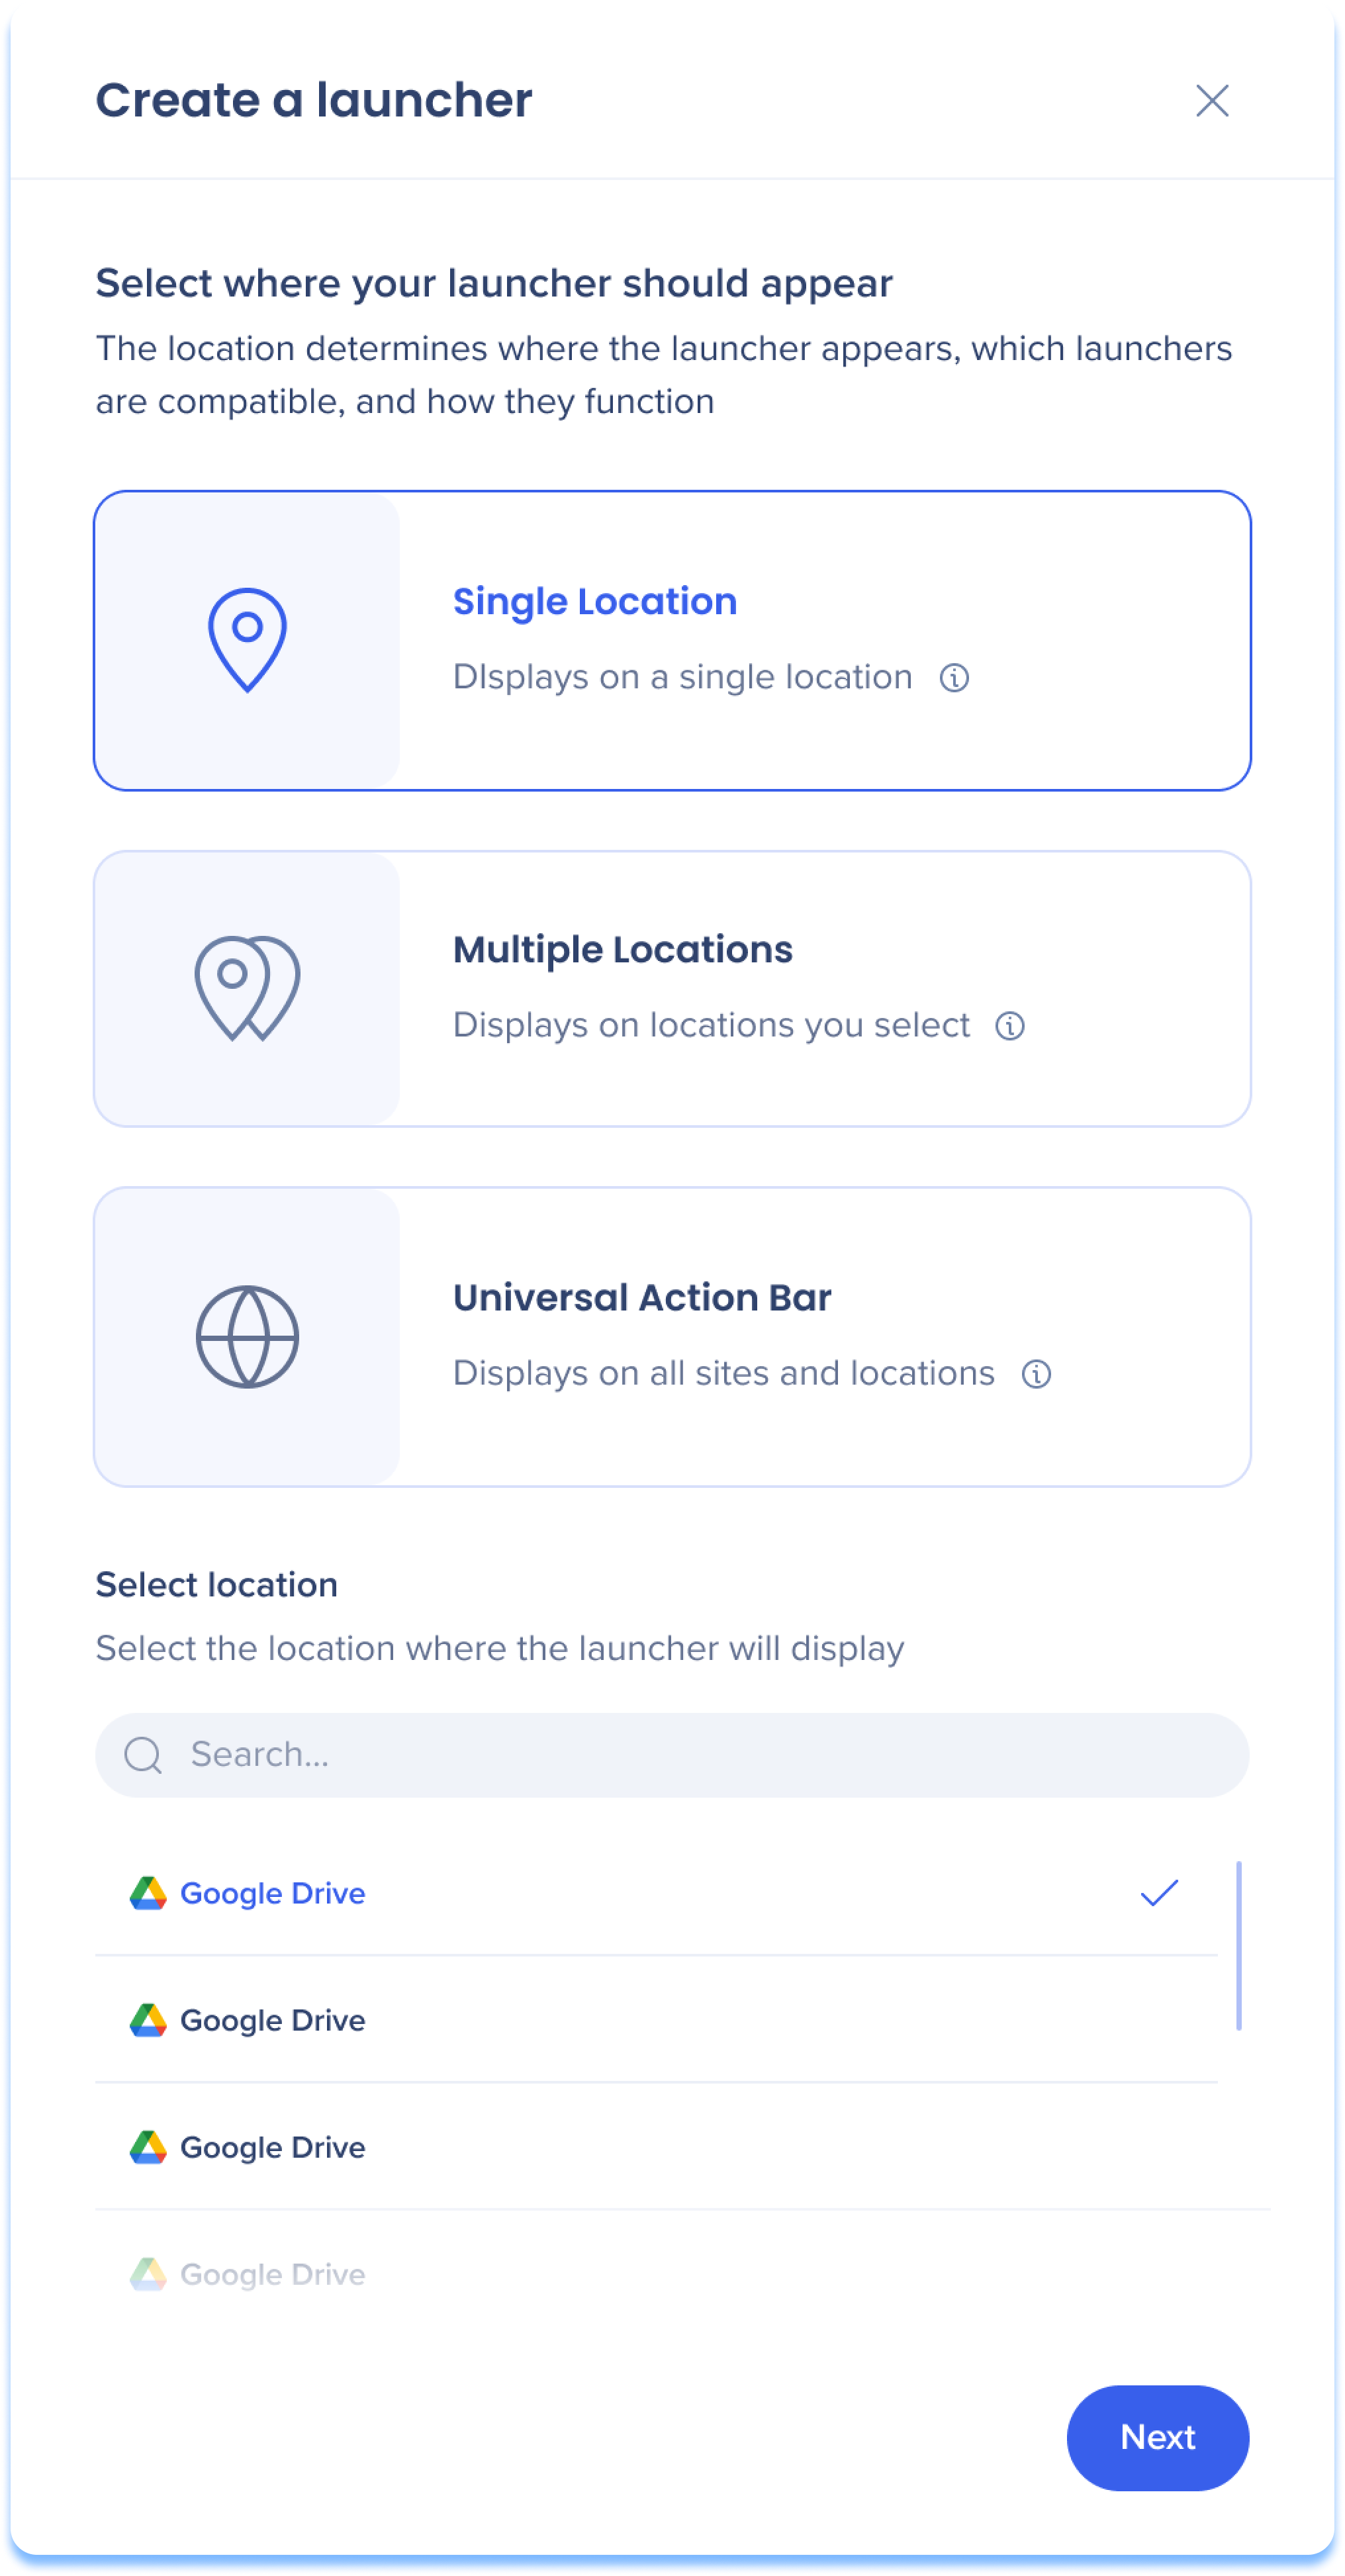 Choose where your launcher should appear by selecting a location type. Each type has compatible launchers.
-
Single Location: A launcher that will appear only on one specific system
-
Multiple Locations: A launcher that will appear on multiple systems
-
Universal Action Bar: A launcher that will appear on all sites and locations
Note
Customers should contact their WalkMe representative to enable Universal Mode.
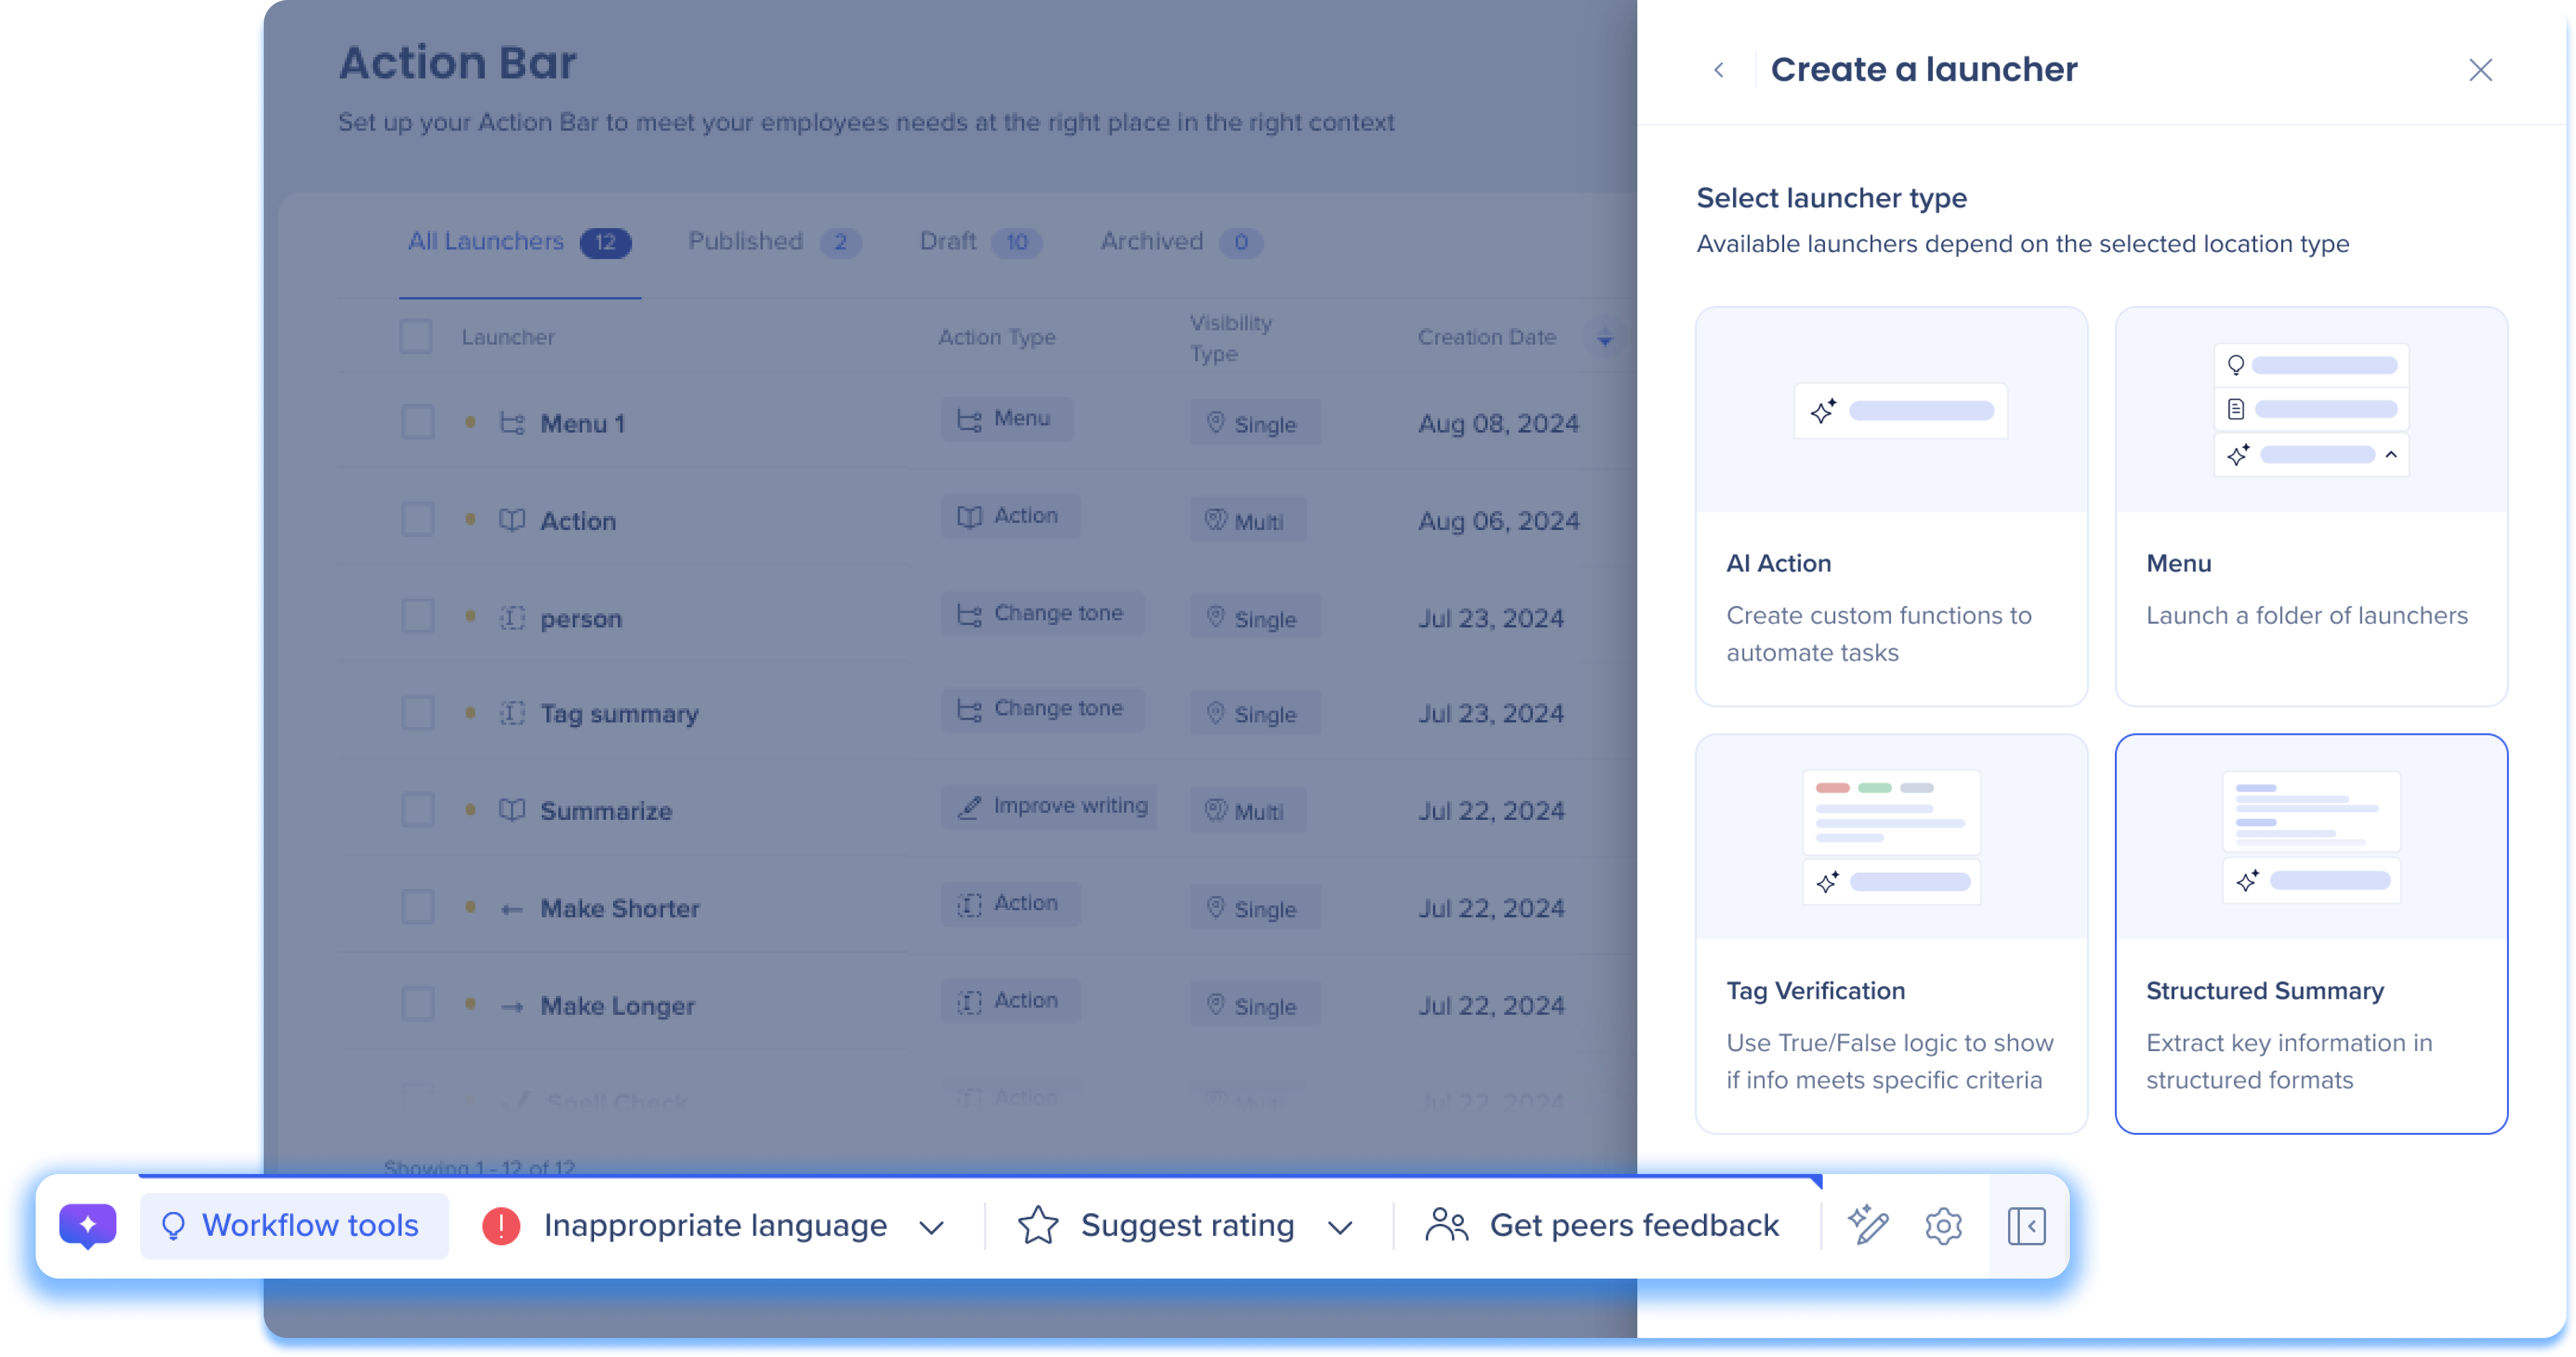
Step 2: Select a Launcher Type
Choose a launcher type to customize for your organization's needs.
-
AI Action: Create custom function powered by AI that respond to personalized prompt. By defining specific instructions, you can automate tasks, generate content, or analyze data tailored to your needs
-
Menu: Create a customizable list of launchers and folders to organize tasks, streamline access, and enhance workflow efficiency
-
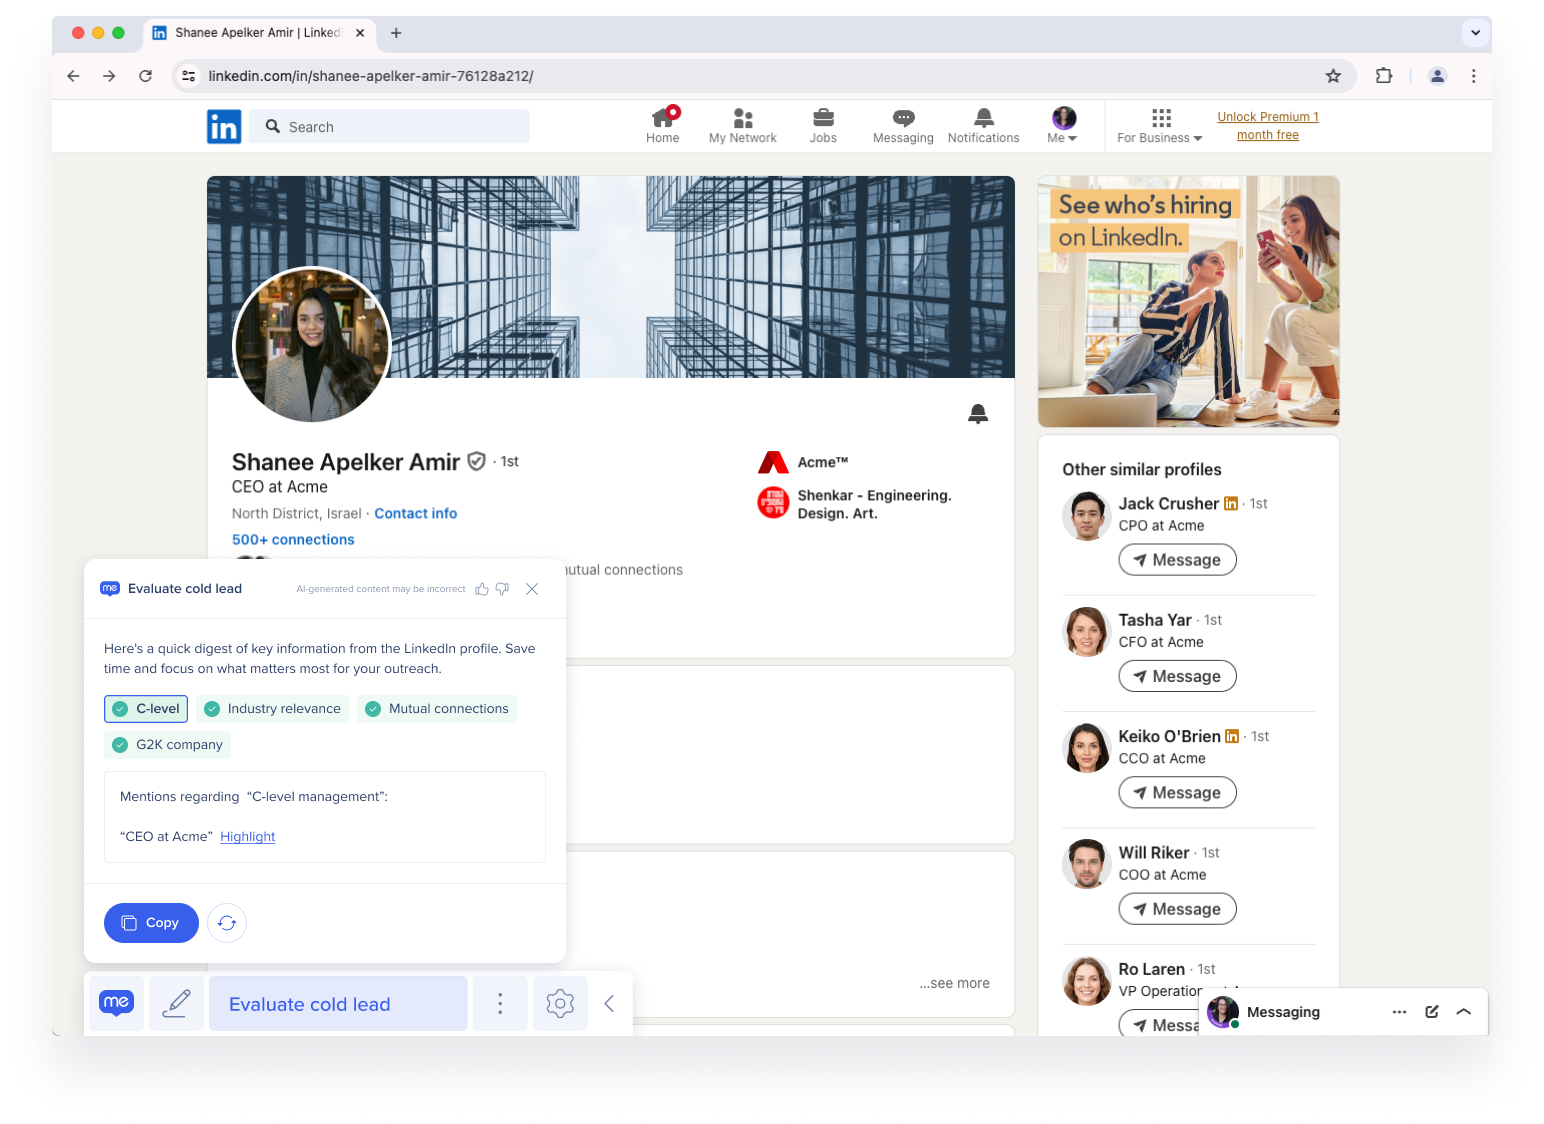
Tag Verification: Use True/False logic to evaluate specific criteria. By employing color-coded tags--red for false, grey for no results, and green for true-- users can quickly assess data relevance. Additionally, highlighted text shows where relevant information is location on screen SINGLE LOCATION ONLY
Example of Tags Summary...
LinkedIn Tags Summary Example
-
Console Build: In this example, the builder captured a LinkedIn page and created the following tags: C-level, Industry relevance, Mutual connections, and G2K
-
AI Action: The AI checks if these tags are present on the page based on “true” and “false” conditions set by the builder
-
Result: All tags were found and therefore are shown as green
All tag colors and meaning
-
Green: True
-
Orange: False
-
Grey: Undetermined
- Structured Summary: Organize and present key information in a format that allows for quick digestion. Additionally, highlighted text shows where relevant information is located on screen SINGLE LOCATION ONLY
Single Location Only
“Single Location Only” launchers will only appear if Single Location was selected in the previous step because capturing is required.
Step 3: Complete Launcher Type Settings
The following section provides an overview of the launcher type settings. Each launcher has three settings pages: Appearance, Behavior, and Visibility.
Appearance Settings

Display name
Enter a name for your launcher that will appear to end-users in the Action Bar.
Display type
Display types control how your launcher appears in the bar, either as a “standard” or “alert” action/menu. Select a display type from the dropdown and an icon if “standard” is selected.
-
Standard action/menu: Ideal for routine tasks, this option displays actions in the Action Bar with a custom icon
-
Alert action/menu: Ideal for condition-based critical tasks, the option displays a fixed icon when triggered, or a red alert dot if actions are hidden
Launcher/Menu preview
View how your launcher will appear in the Action Bar.
Note
Other launchers may appear next to this one if additional launchers are created or default launchers are enabled.
Menu note Menu launchers only
Turn on the Menu note toggle to add a note that guide users on menu options. We couldn't load the file.
Behavior Settings
AI Action Behavior Settings
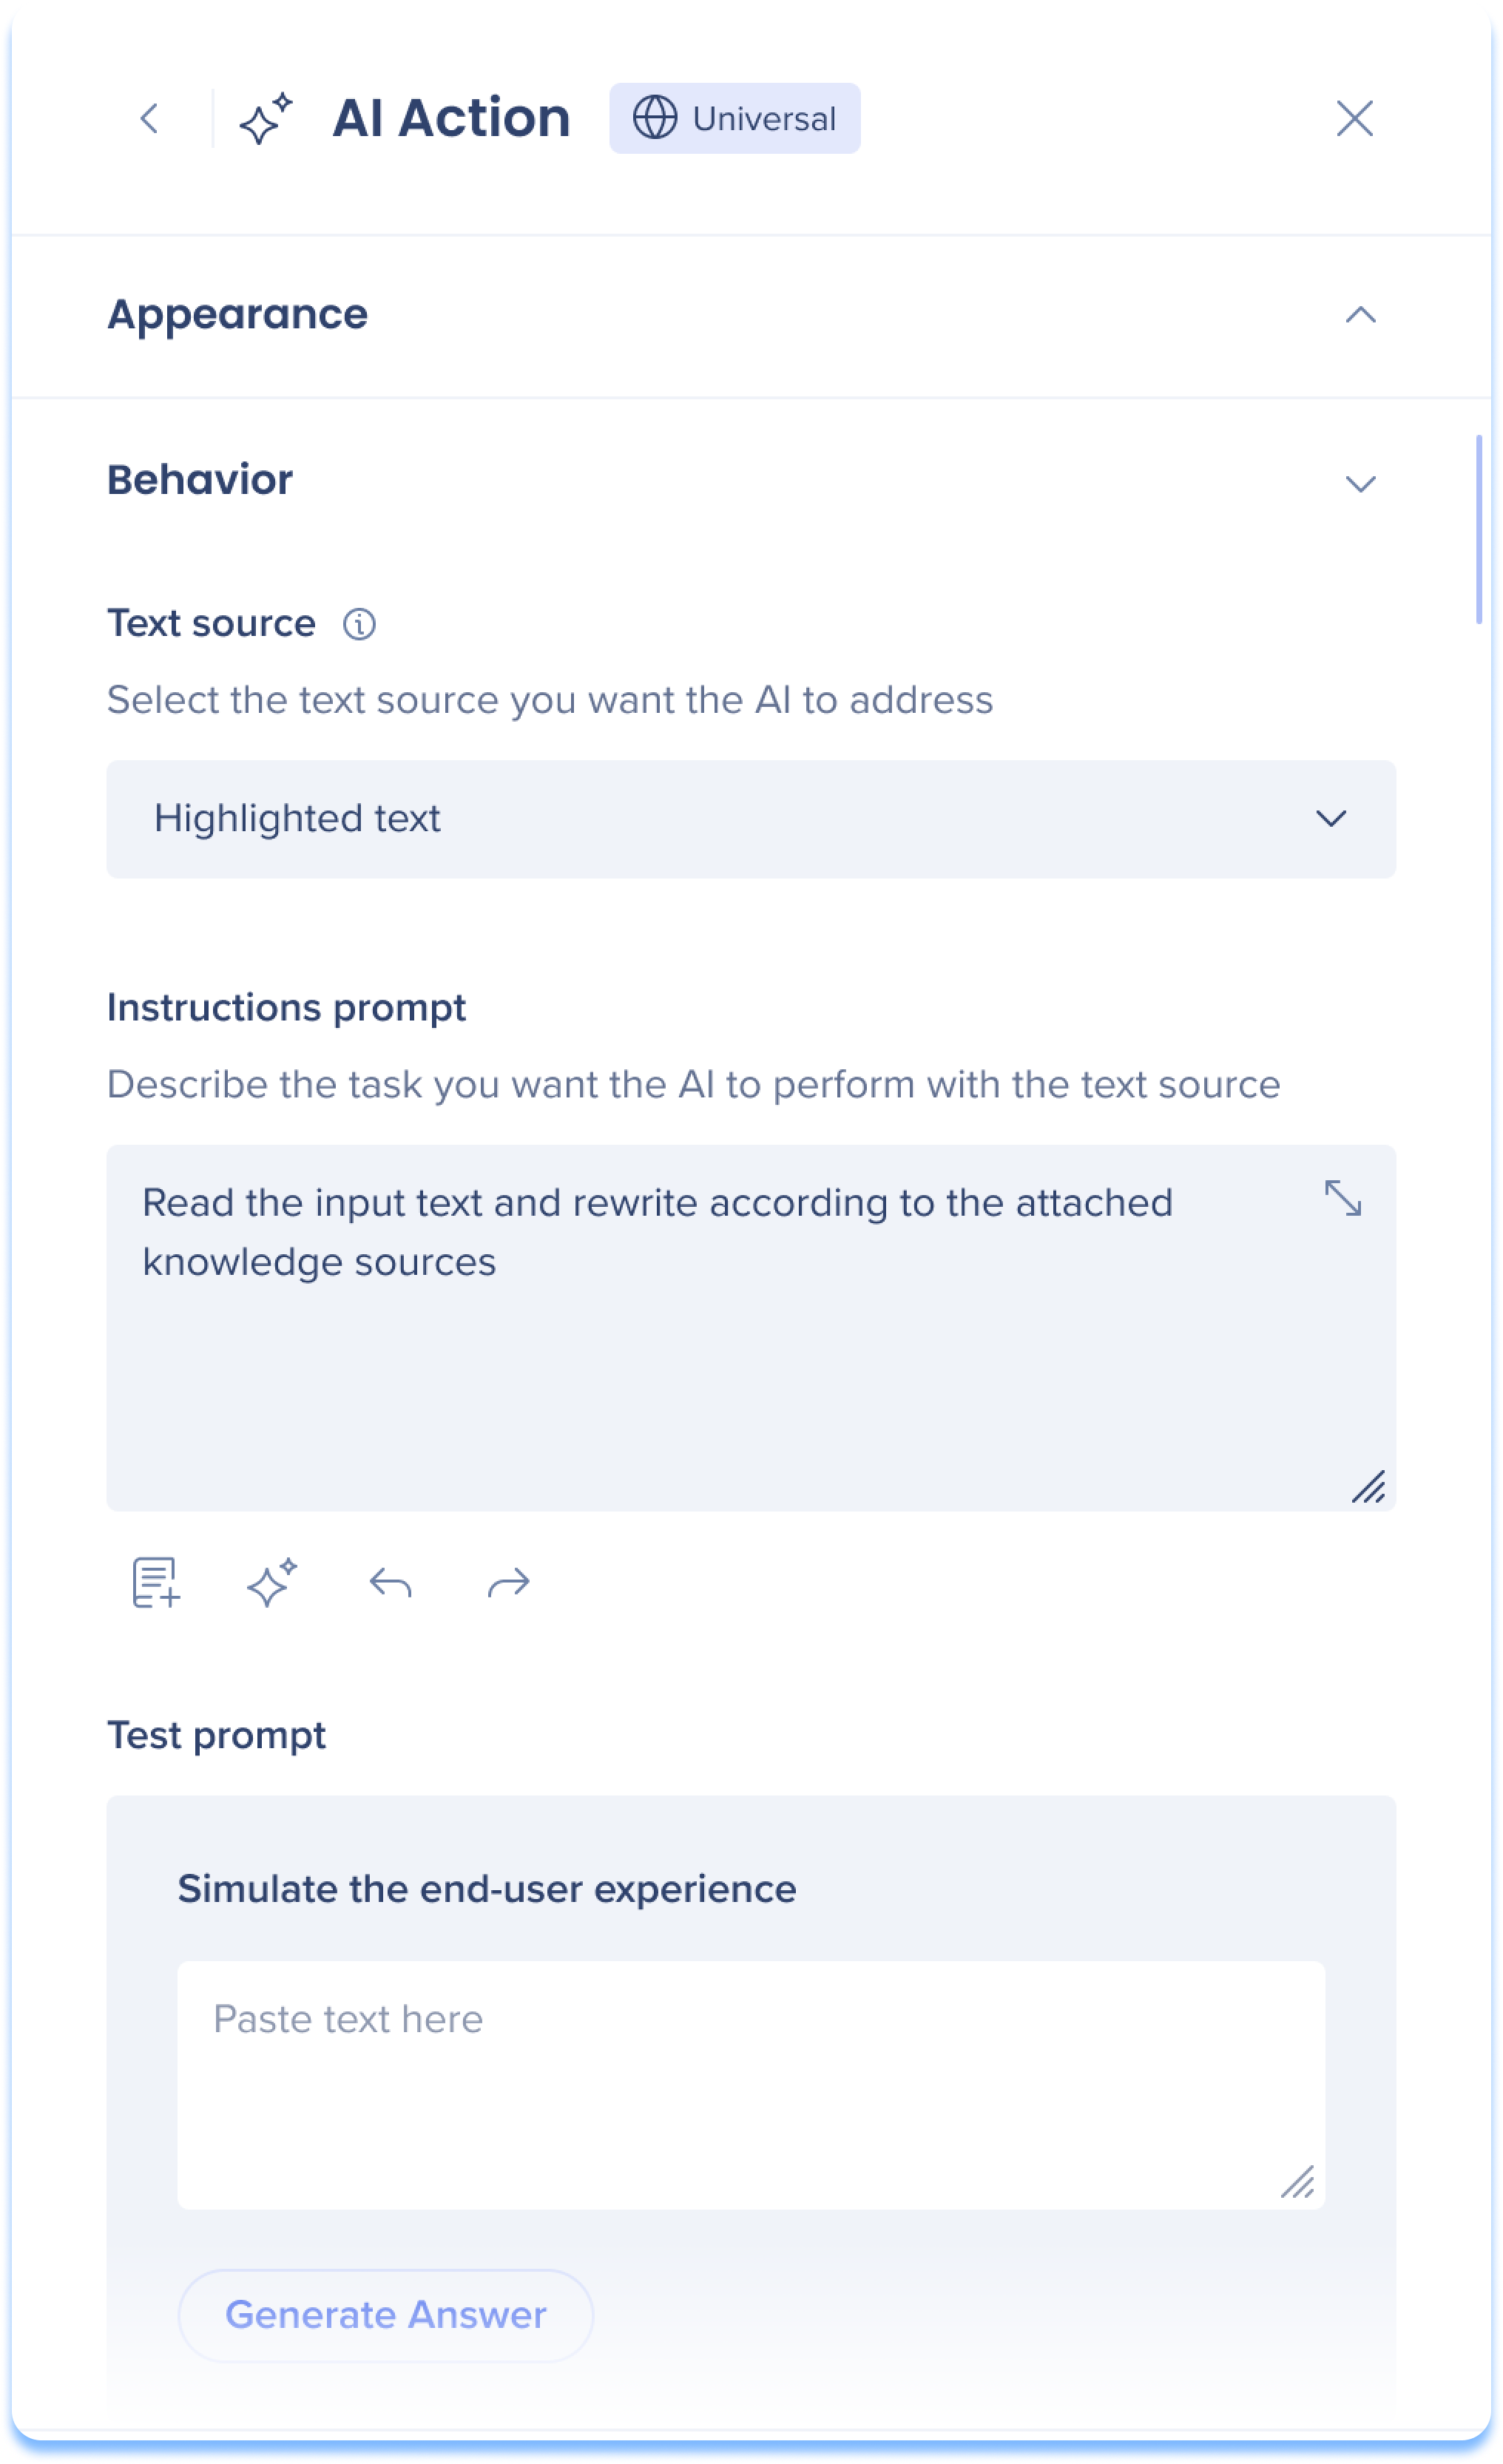 Text source
Select the text source you want the AI to process.
-
Text on screen: The launcher appears without specific context and performs AI text processing on the entire page, or specific text if highlighted
-
Element on screen: The launcher appears when a specific element appears on screen and performs AI text processing on the selected text
-
Highlighted text: The launcher appears when text is highlighted by the user and performs AI text processing on the selected text
Instructions prompt
Enter a prompt to instruct the AI what task to perform with the text source.
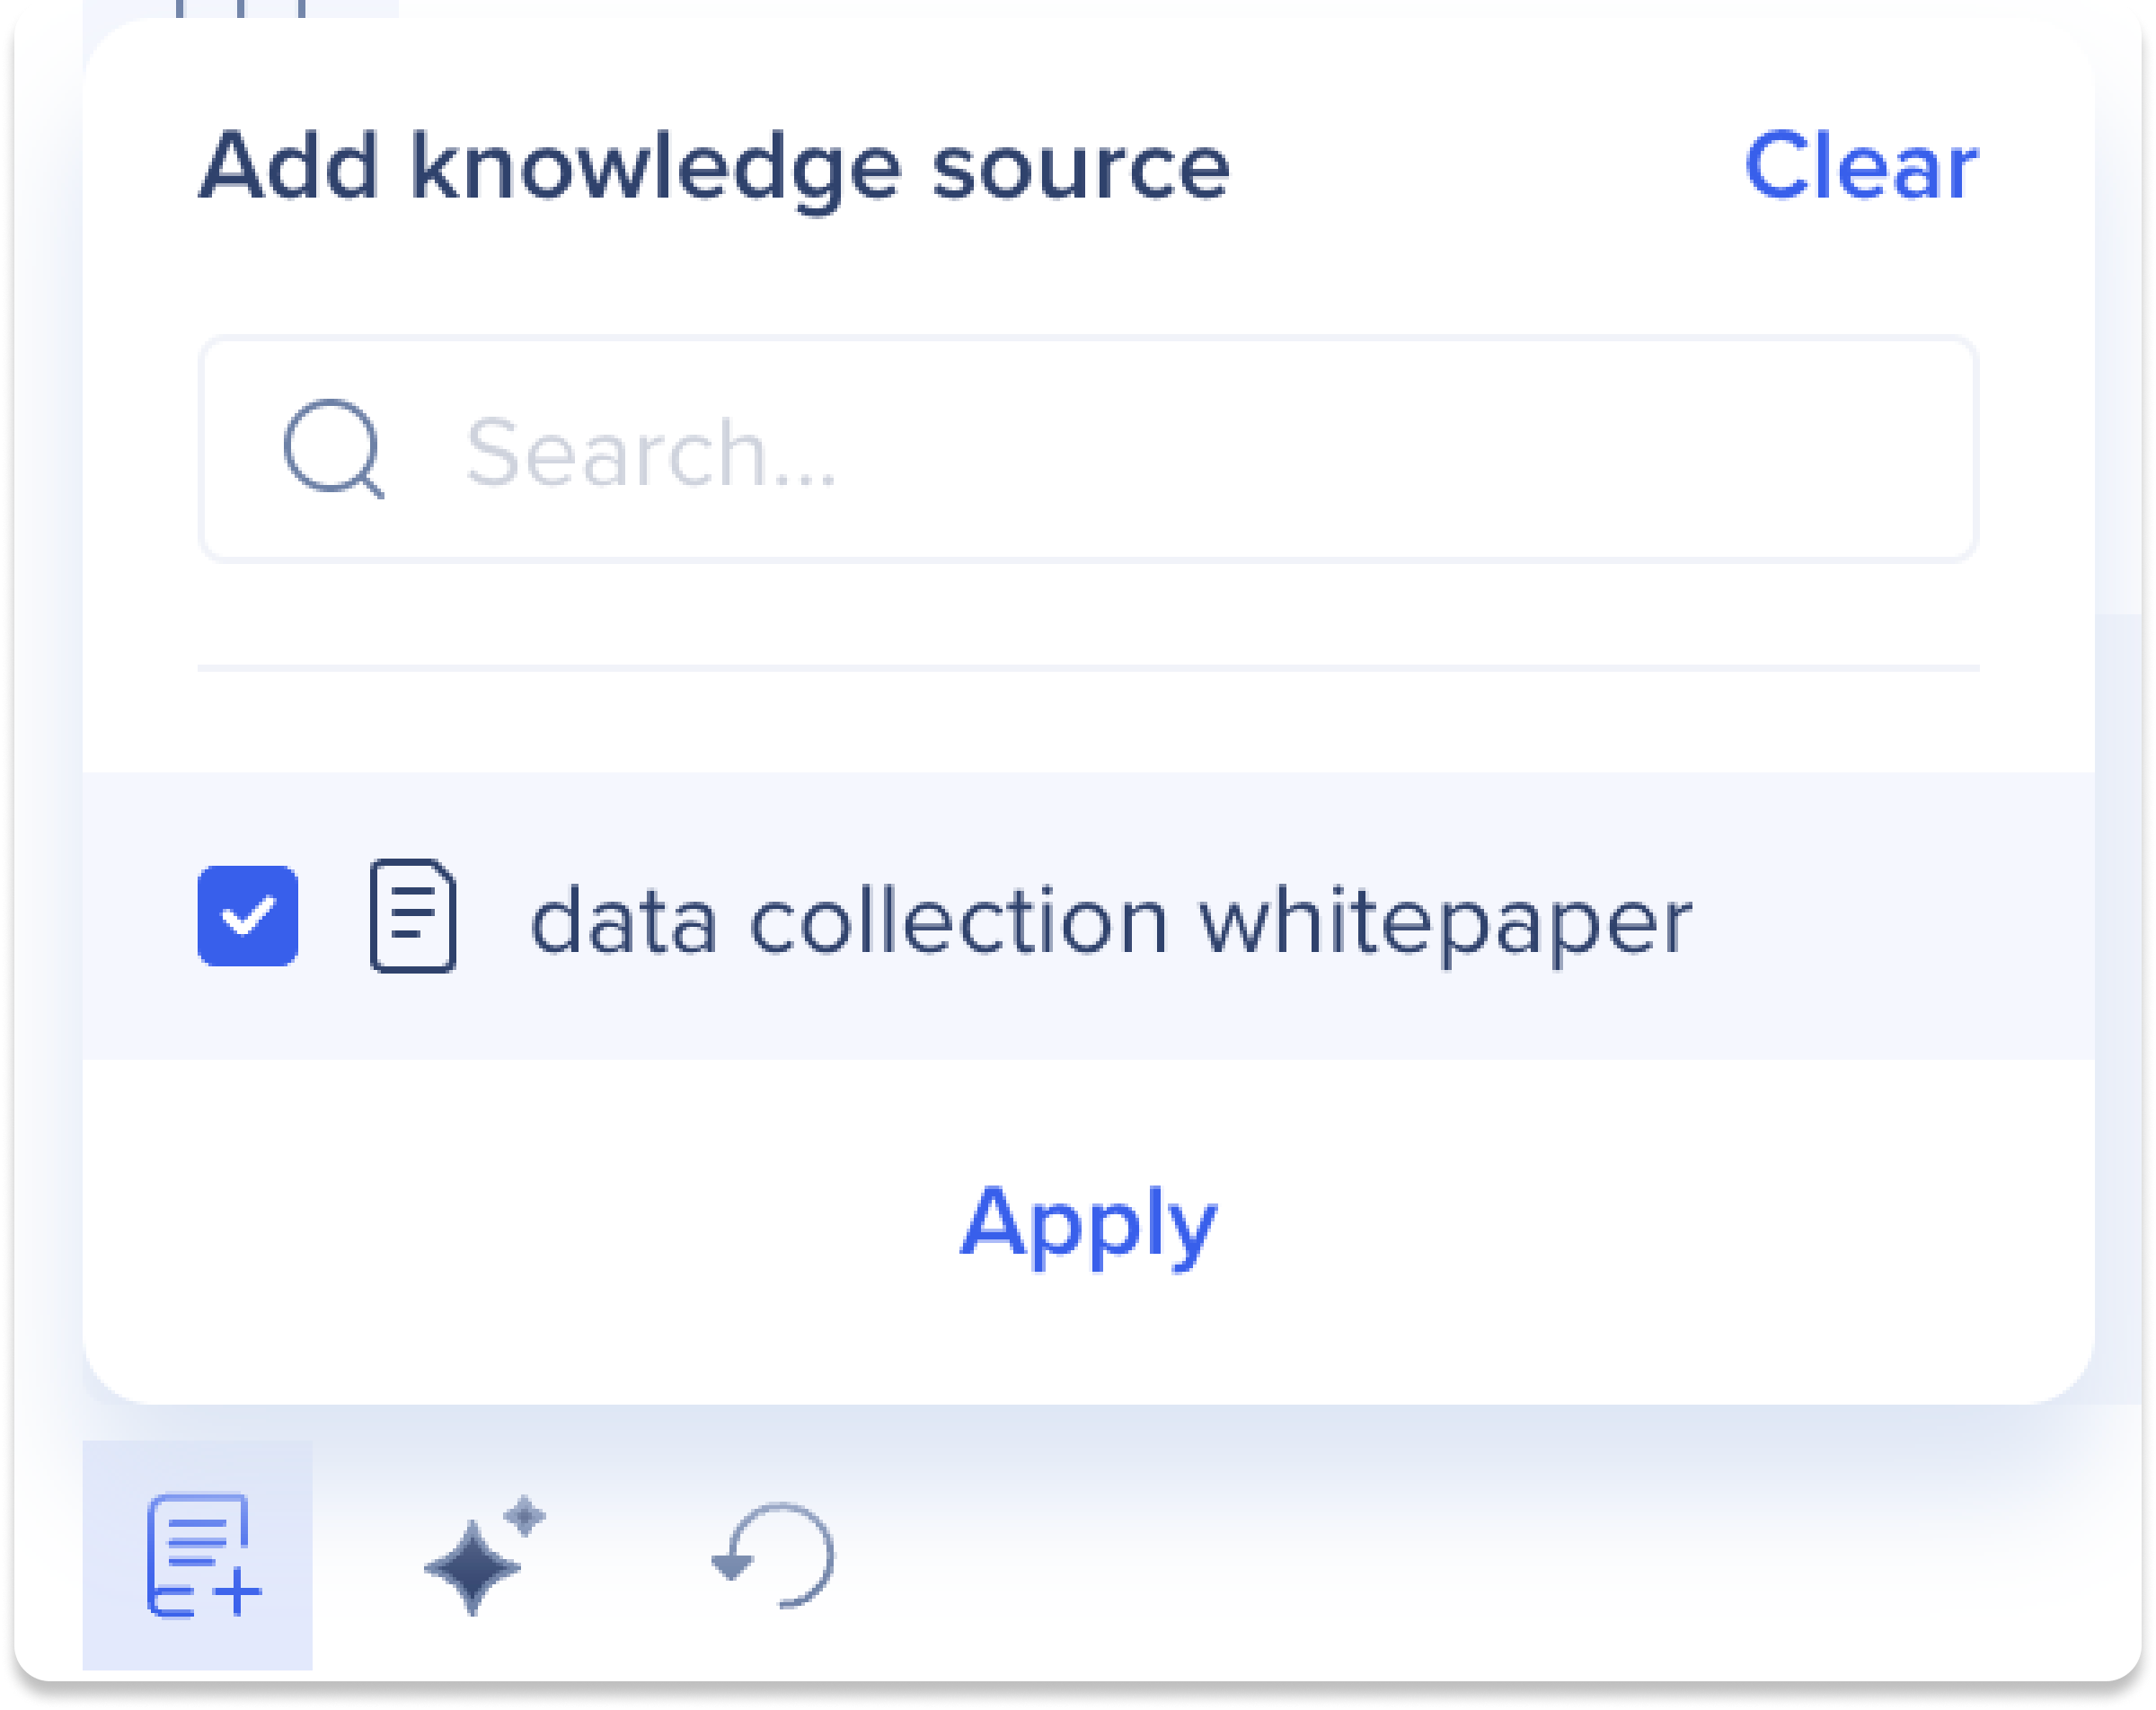
Prompt tools
-
 Add knowledge source: Add knowledge sources to help end-users compare on-screen text with their policies and documentation using these sources in prompts
-
 Improve my prompt: Enhance your prompt using AI
-
 Undo/Redo: The undo reverts the last action, while redo reapplies an undone action
Test prompt
Test your launcher by simulating the end-user experience. Enter text as an end-user and click Generate Answer to see the results.
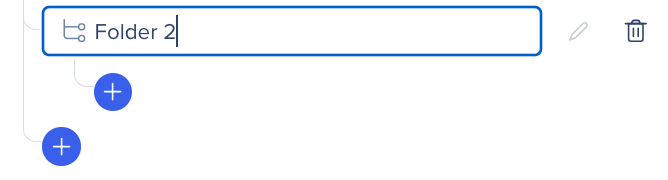
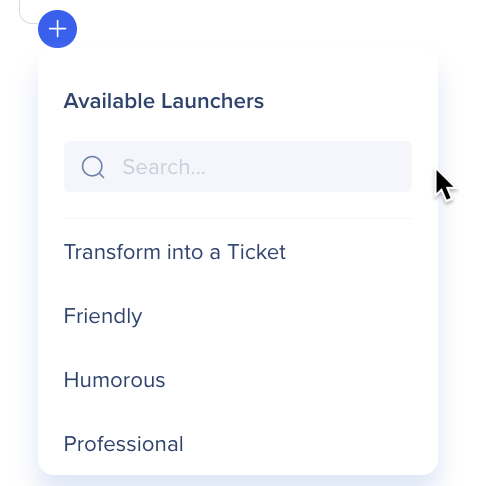
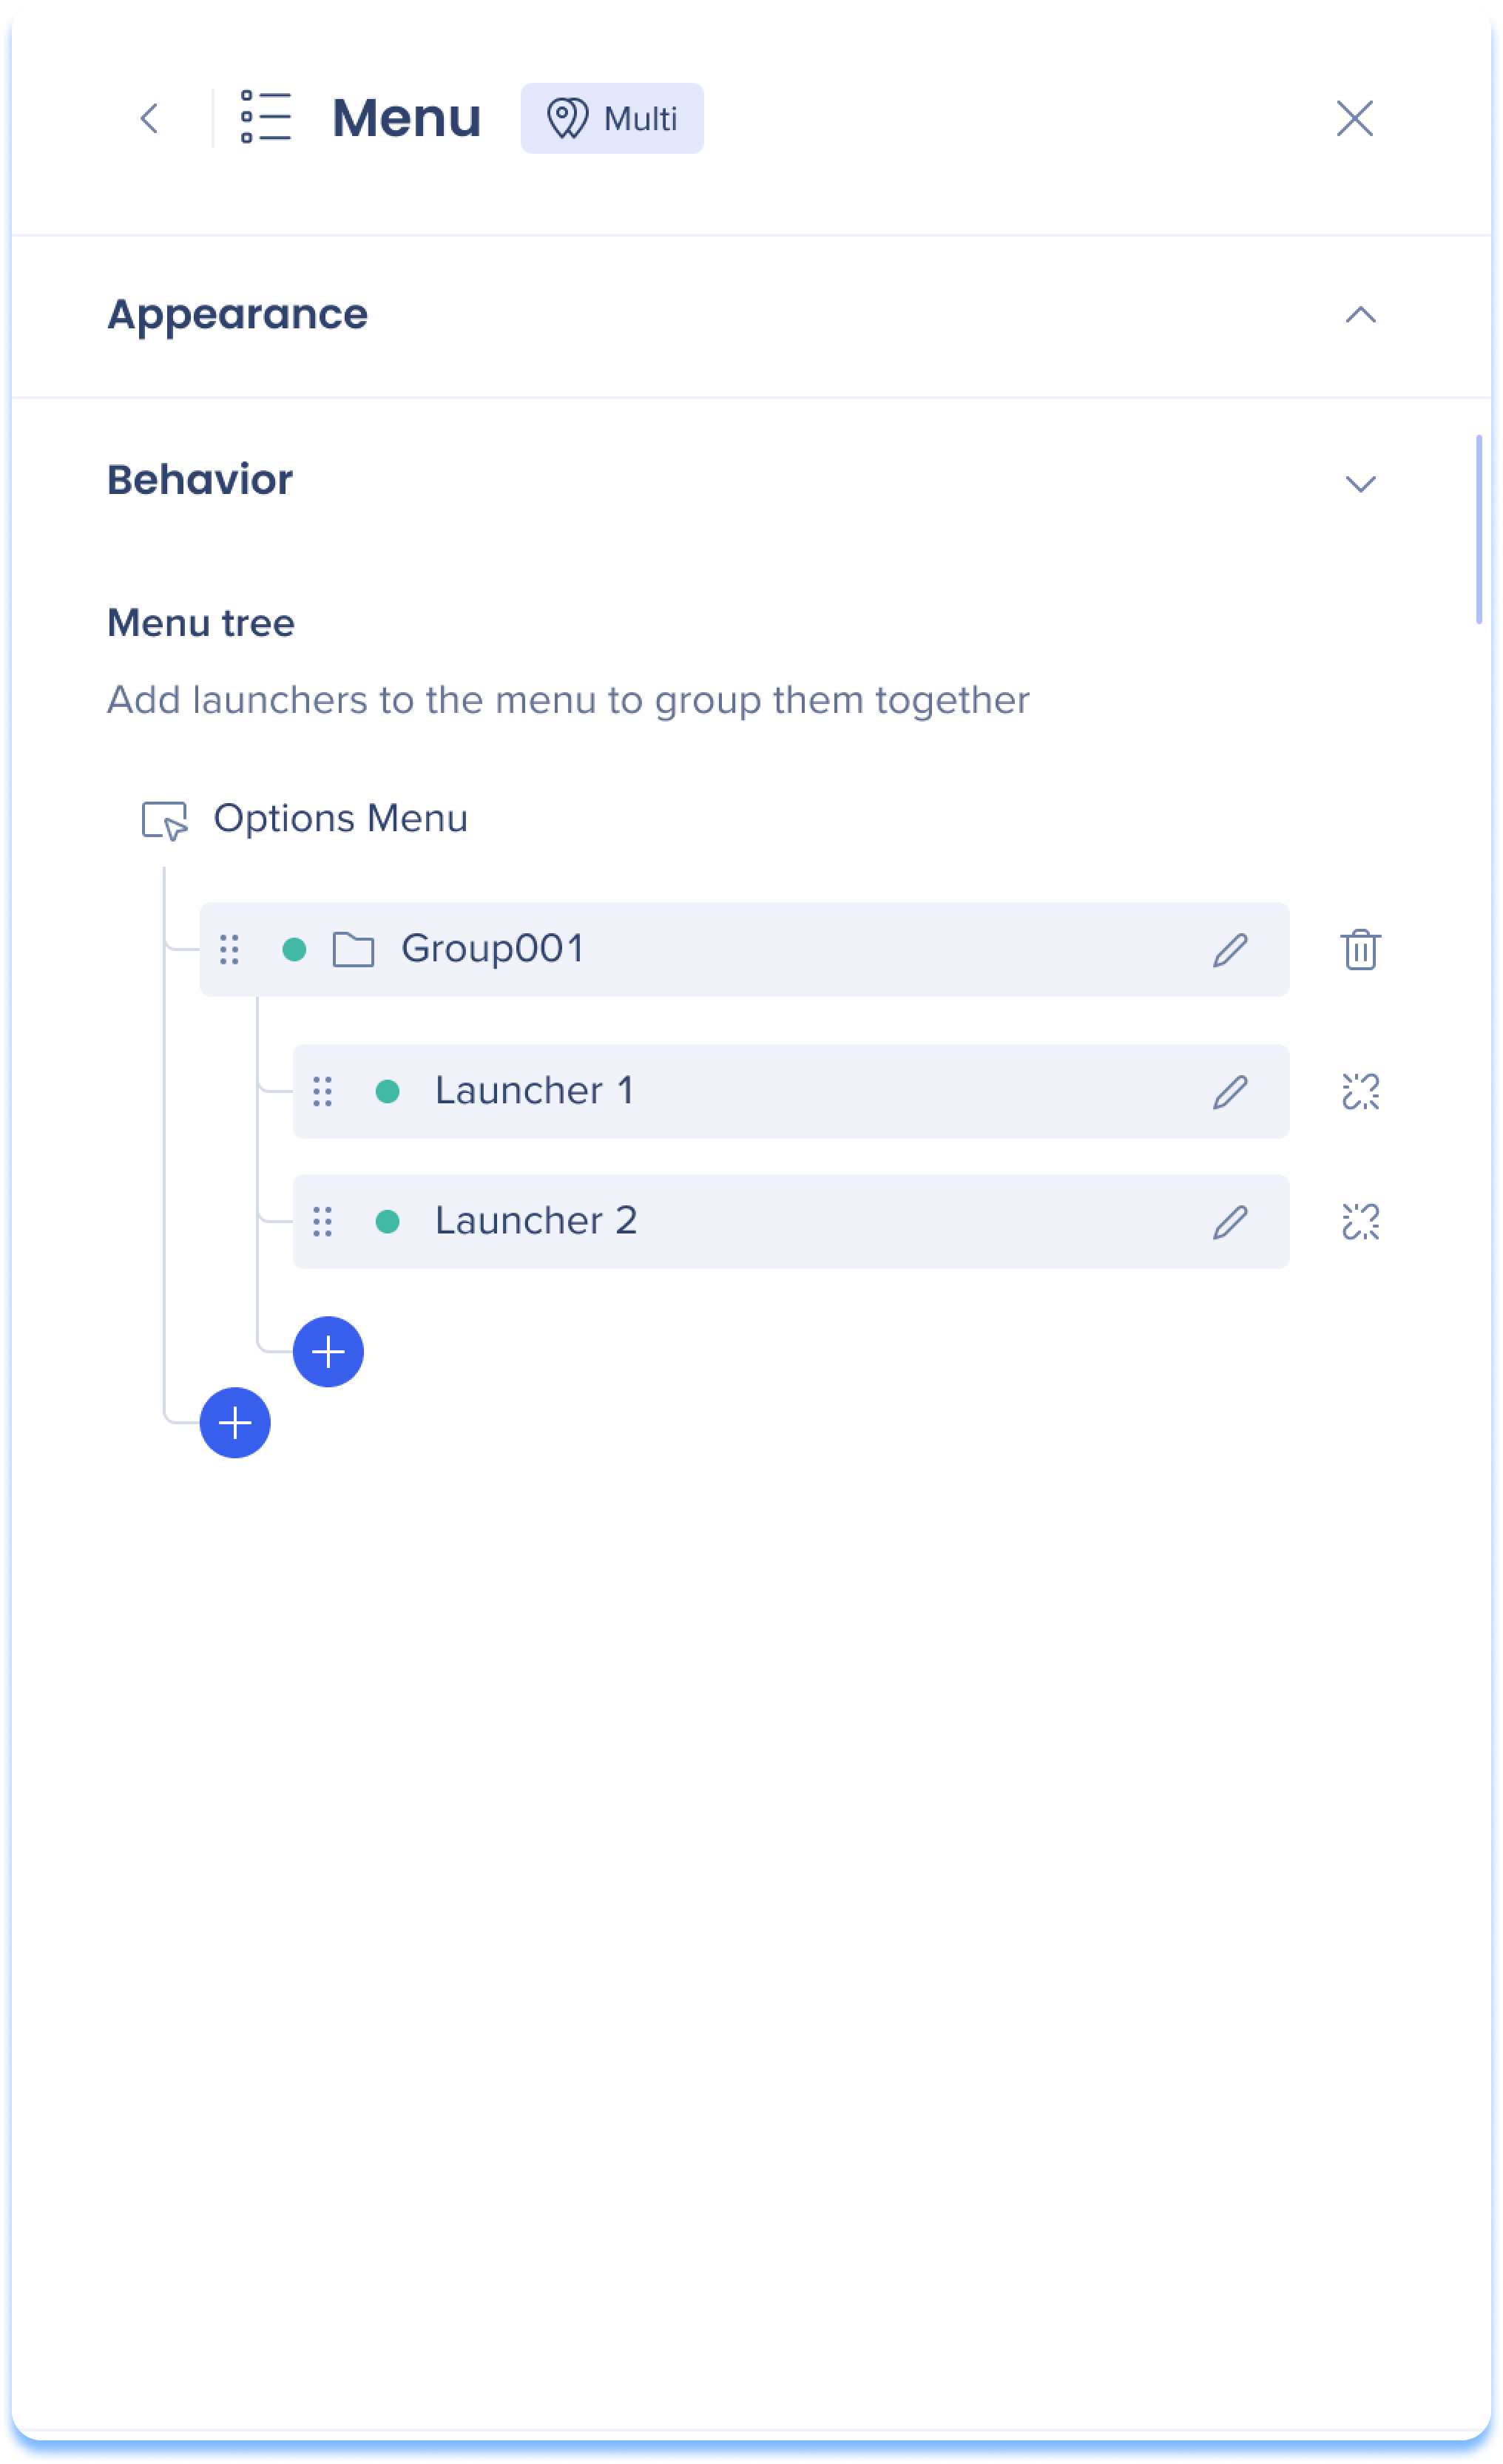 Menu tree
Add launchers to the menu to group them together in folders. Click the Create button to add items to your menu tree.
- Create a New Launcher: Opens a modal to create an AI Action launcher from behavior settings
Note
-
You can only select launchers of the same multi or single location
-
Adding or updating launchers in menus inherit the locations of the parent menu launcher
-
Unlinking a published nested launcher converts the sub-launcher to a regular launcher and archives it
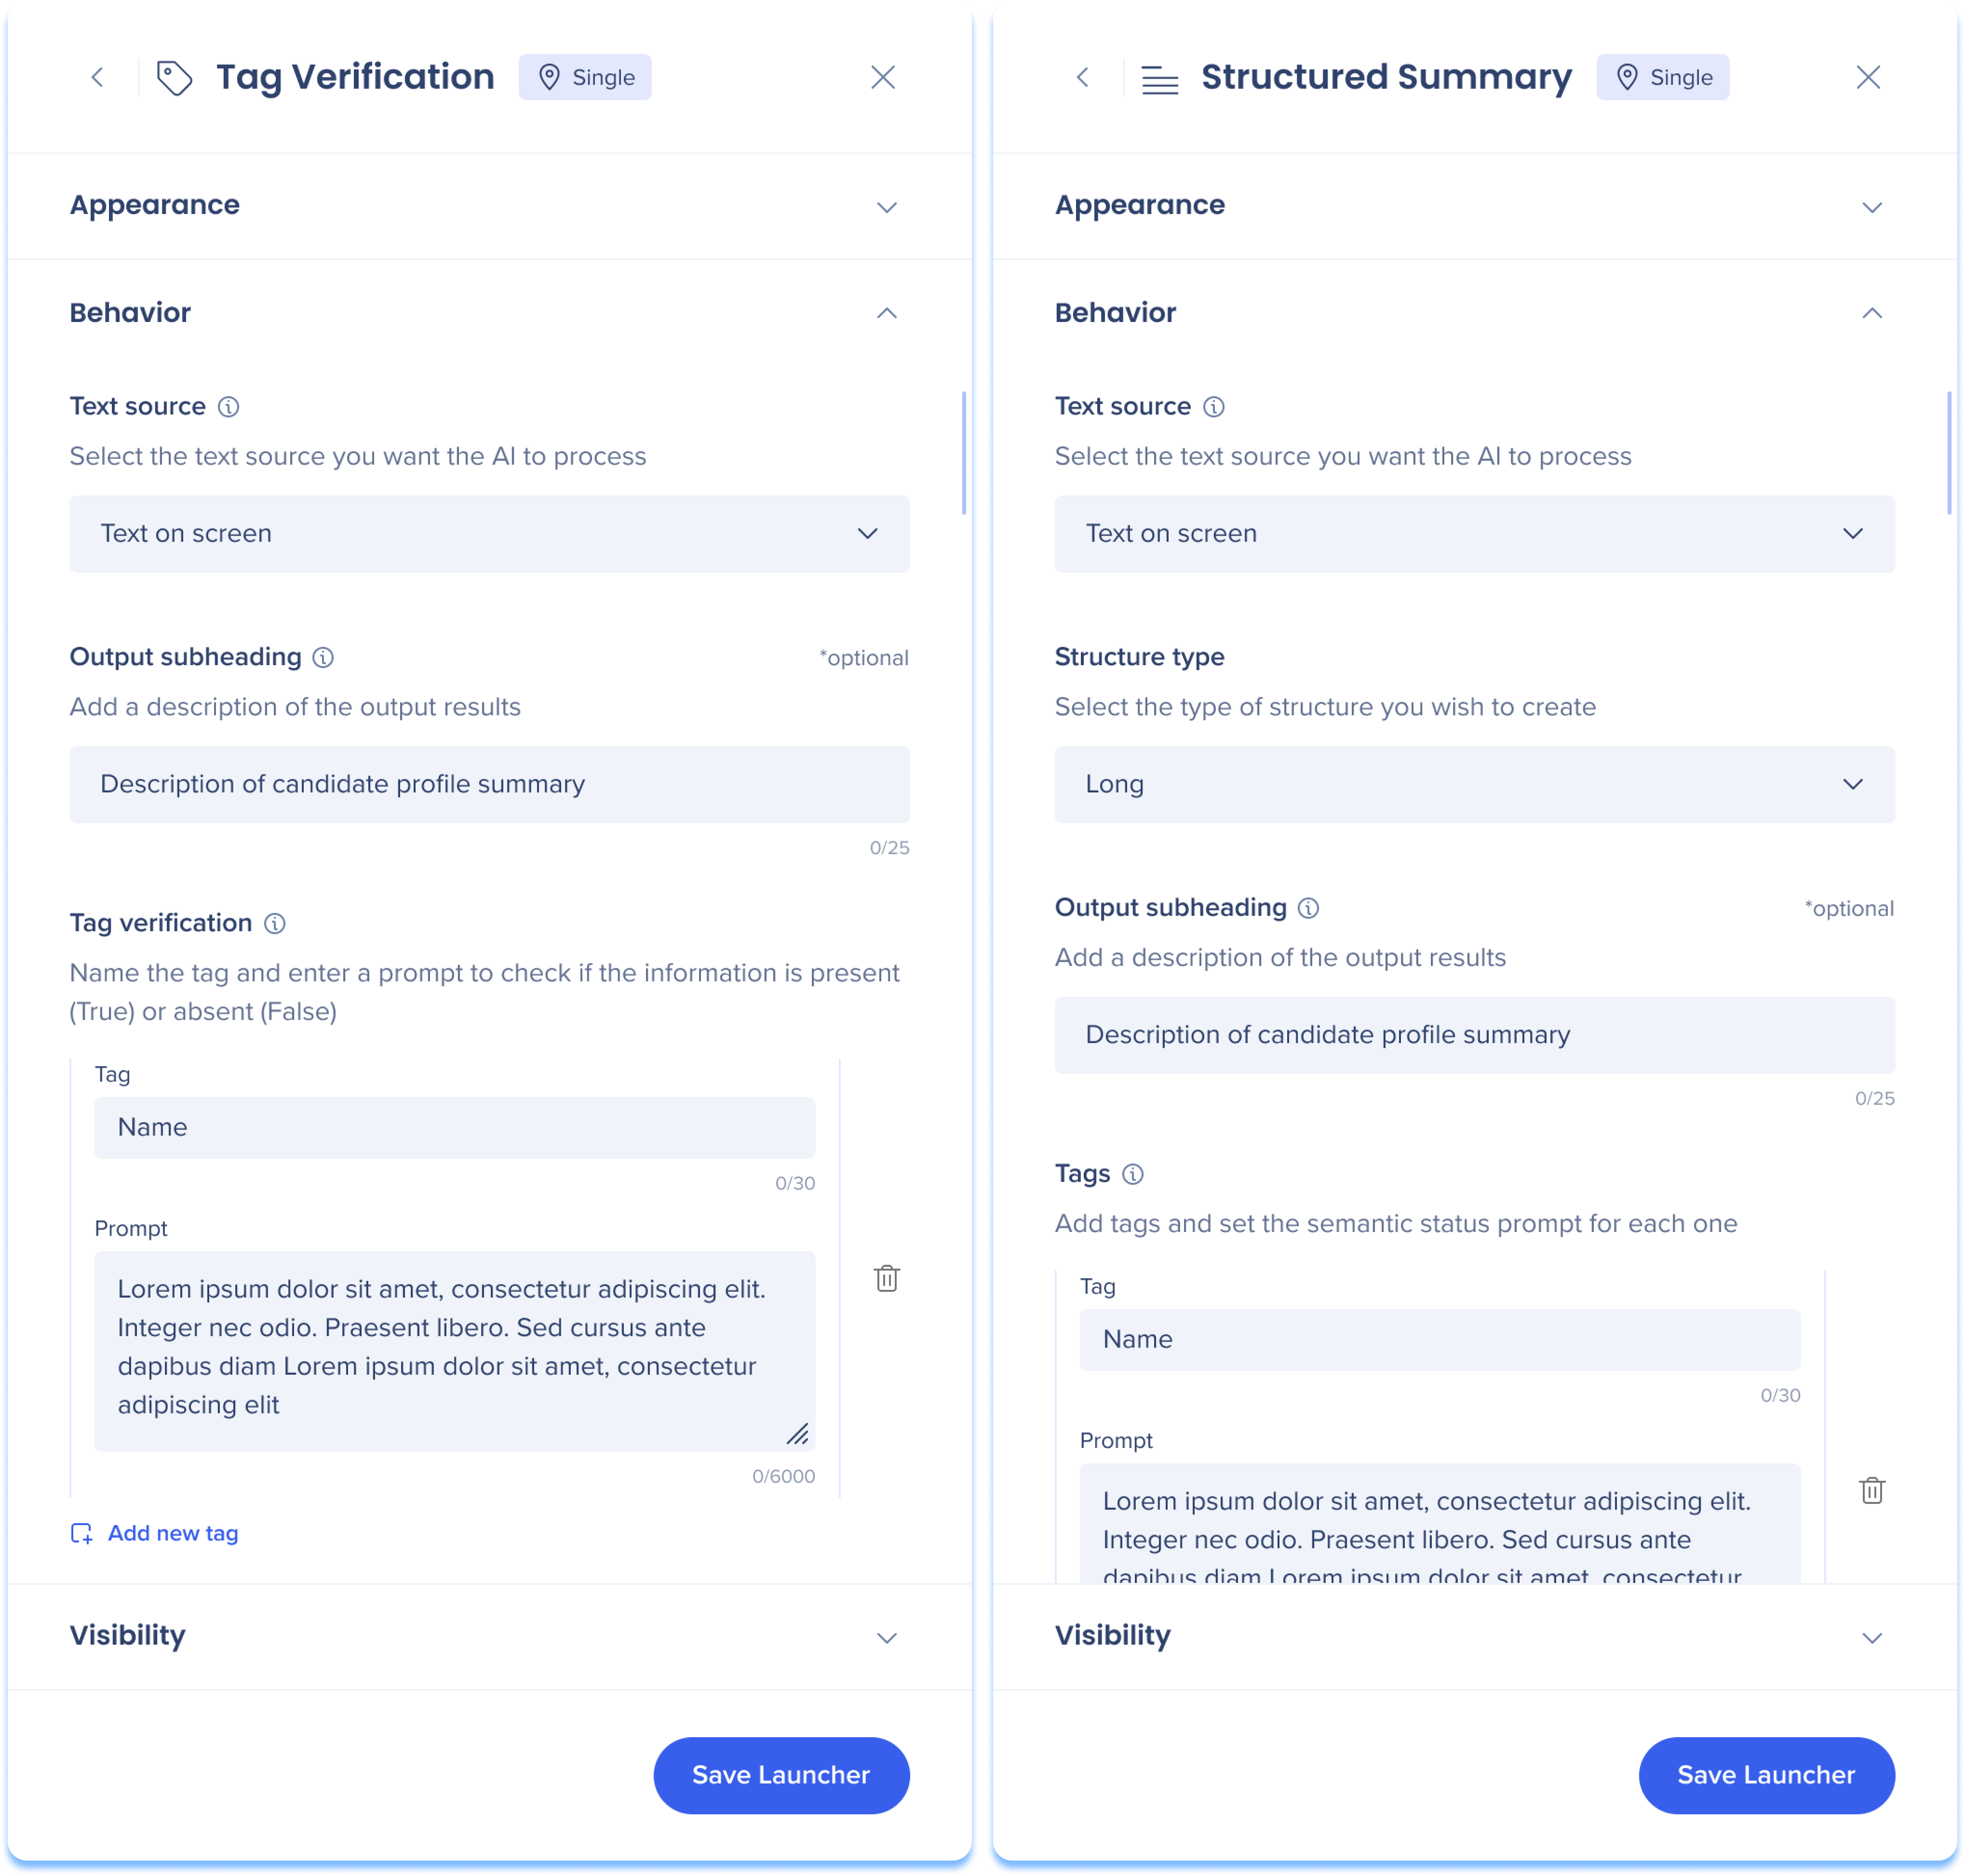
Tag Verification and Structured Summary Behavior Settings
 Text source
Select the text source you want the AI to process.
-
Text on screen: The launcher appears without specific context and performs AI text processing on the entire page, or specific text if highlighted
-
Element on screen: The launcher appears when a specific element appears on screen and performs AI text processing on the selected text
-
Highlighted text: The launcher appears when text is highlighted by the user and performs AI text processing on the selected text
Output subheading
Add a description of the generated output results. The output subheading will be located below the launcher name.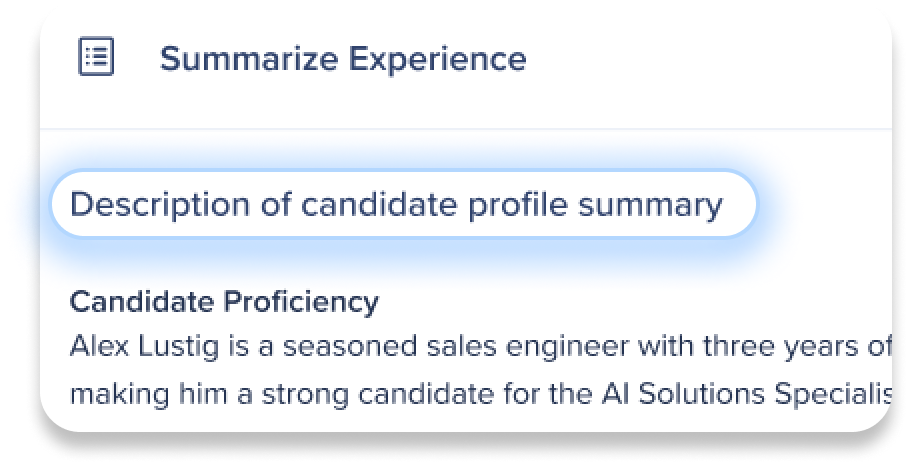
Tag verification only
Tag verification
Name the tag and enter a prompt to check if the information is present (True) or absent (False).
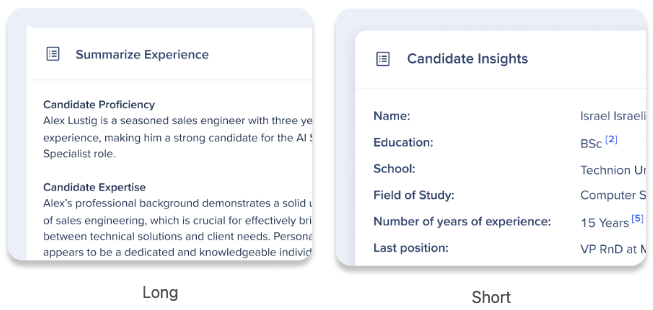
Structured summary only
Structure type
Select the type of structure you wish to create:
-
Long: Add tags of the information you wish to extract from the text to create structured section for the summary, the result will populate the sections
-
Short: Add tags of the information you wish to extract from the text to populate the list on the left, and the summary results will appear on the right
Tags
Add tags to the title of a section in the summary and enter a prompt to define its content.
-
Tag: Enter the section name
-
Prompt: Instruct the AI what specific information should go under this section in the summary
-
Add new tag: Click Add new tag to continue adding more sections for your summary
Visibility settings
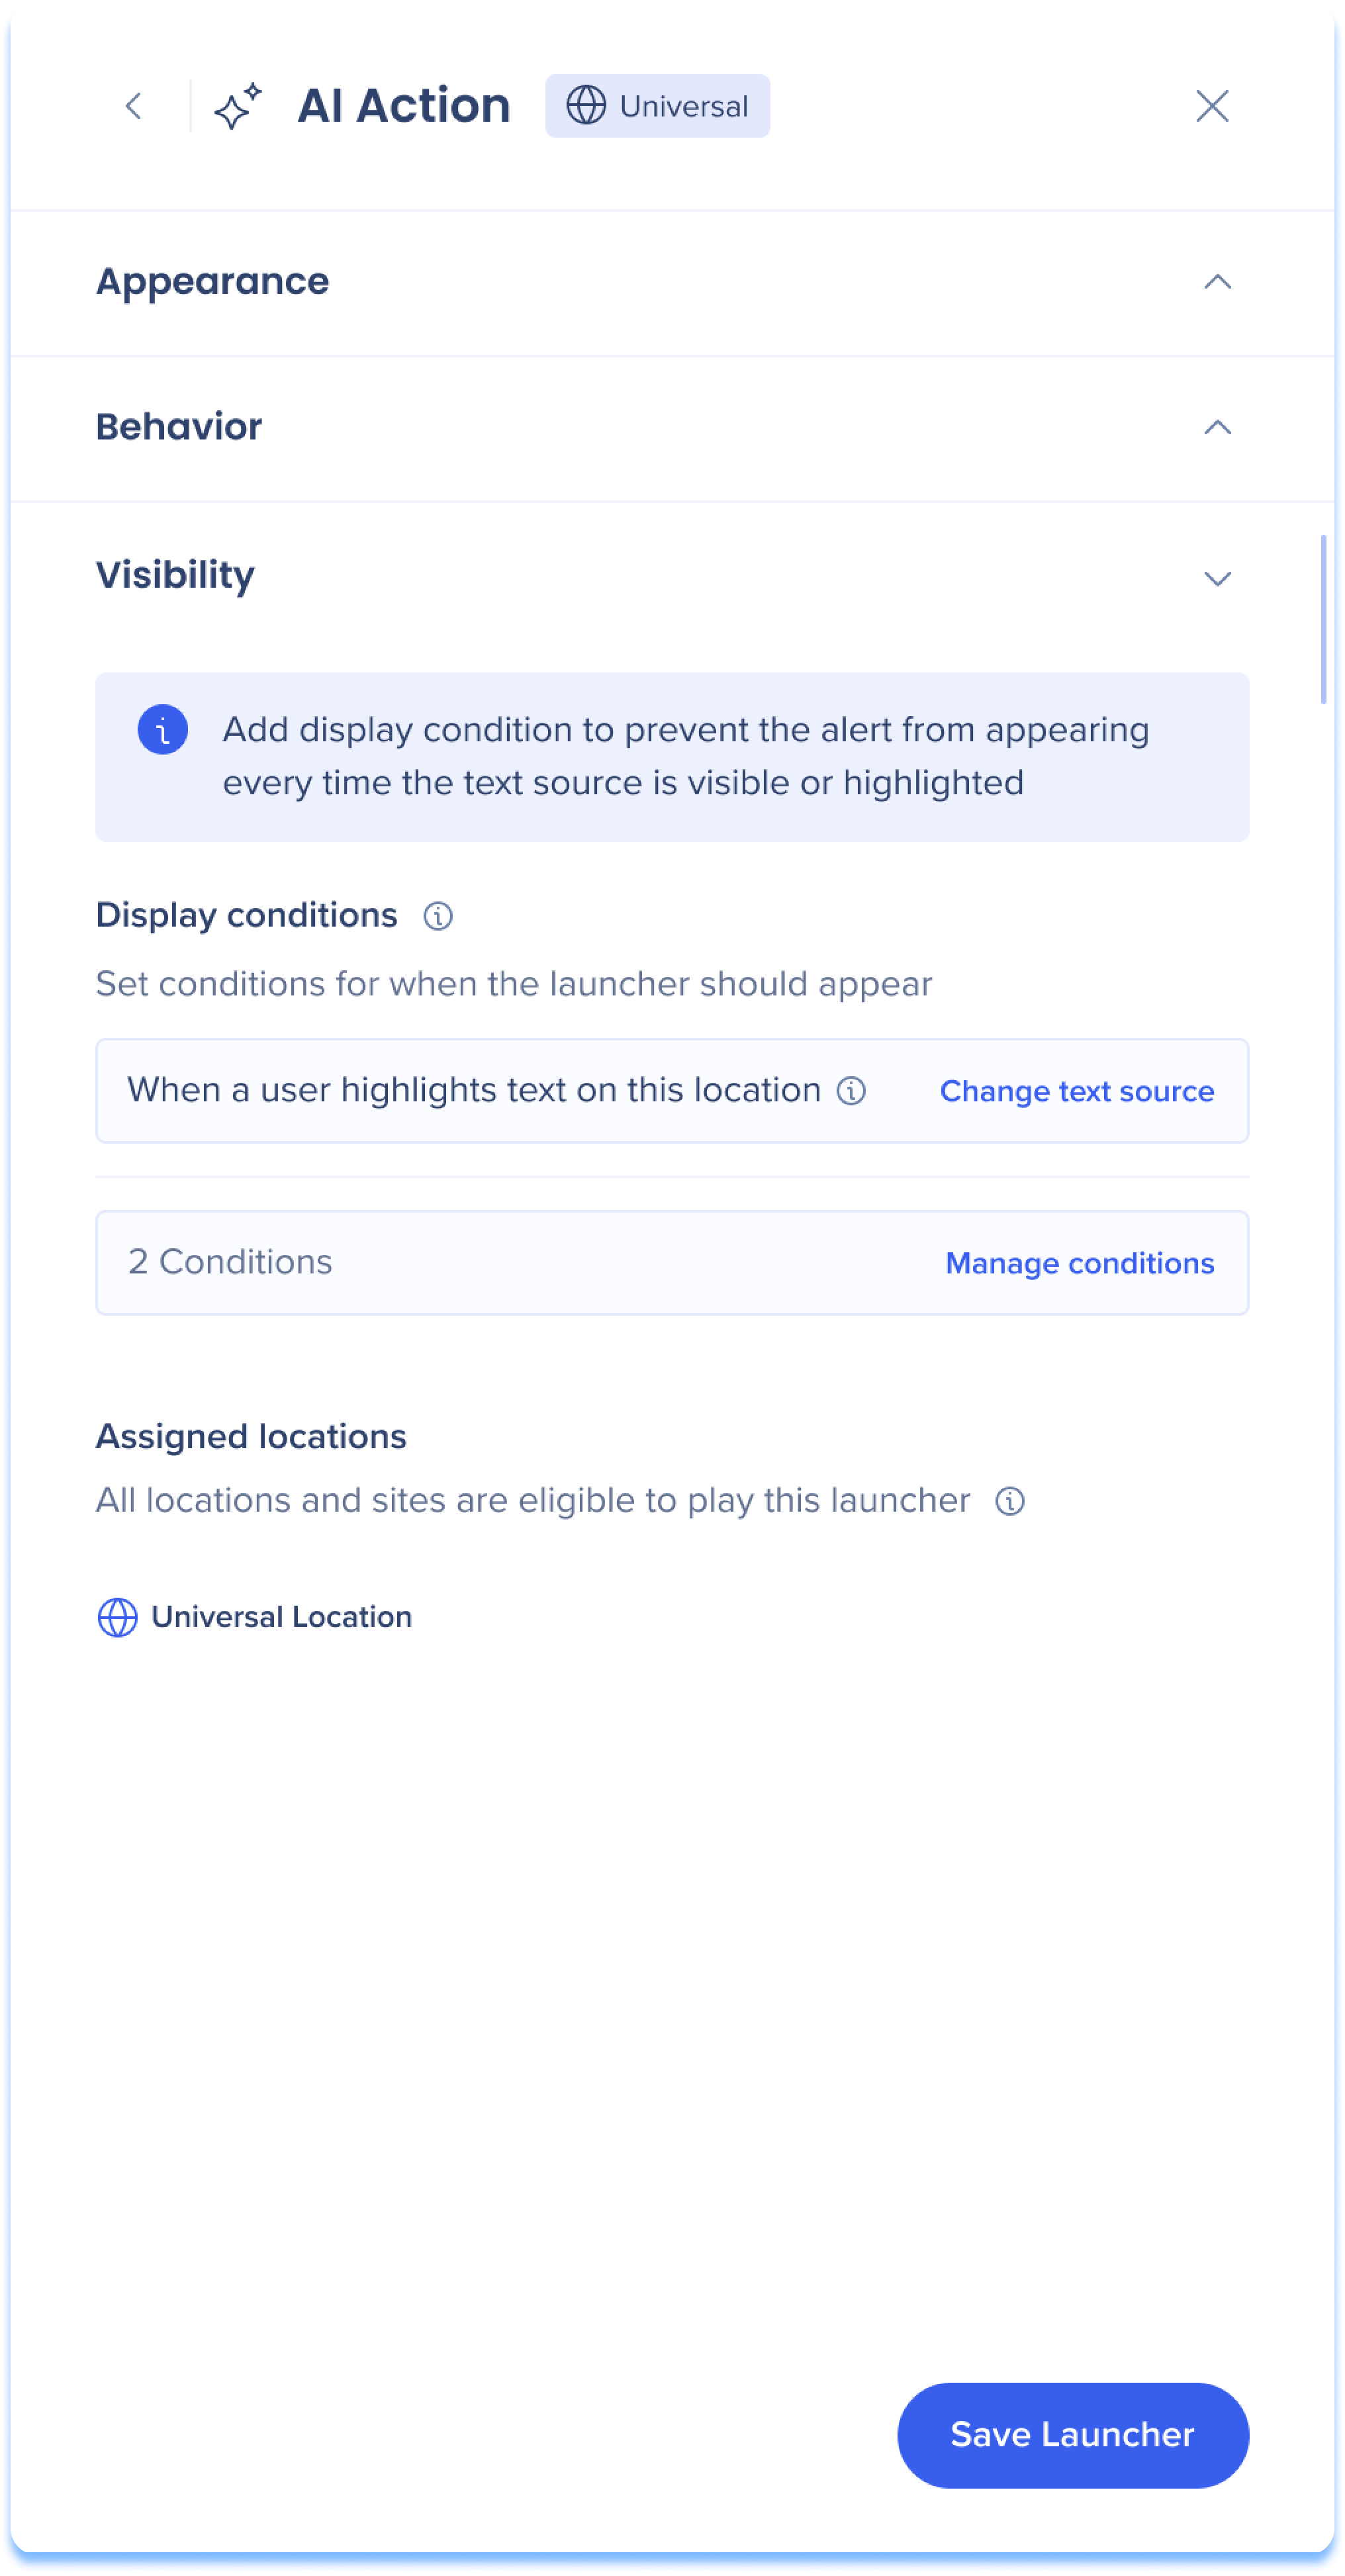 Ensure your launcher appears in the correct location and situation by managing display conditions and locations.
Display conditions
Launcher display conditions use our condition builder technology from within the Action Bar app. Learn more
Assigned locations
Review the locations type that defines where this launcher will play.
Info notification
The info notification appears when AI Action and the "Alert" display type are selected. To avoid unnecessary interruptions, we recommend adding a display condition for alerts. Without this, the alert will appear whenever the text source is visible or highlighted.
Action Bar Settings
 Click the Settings icon to access the Action Bar settings or click the Settings page from the console side navigation.
-
Note: Action Bar settings are visible to all users, but only Admins can make changes
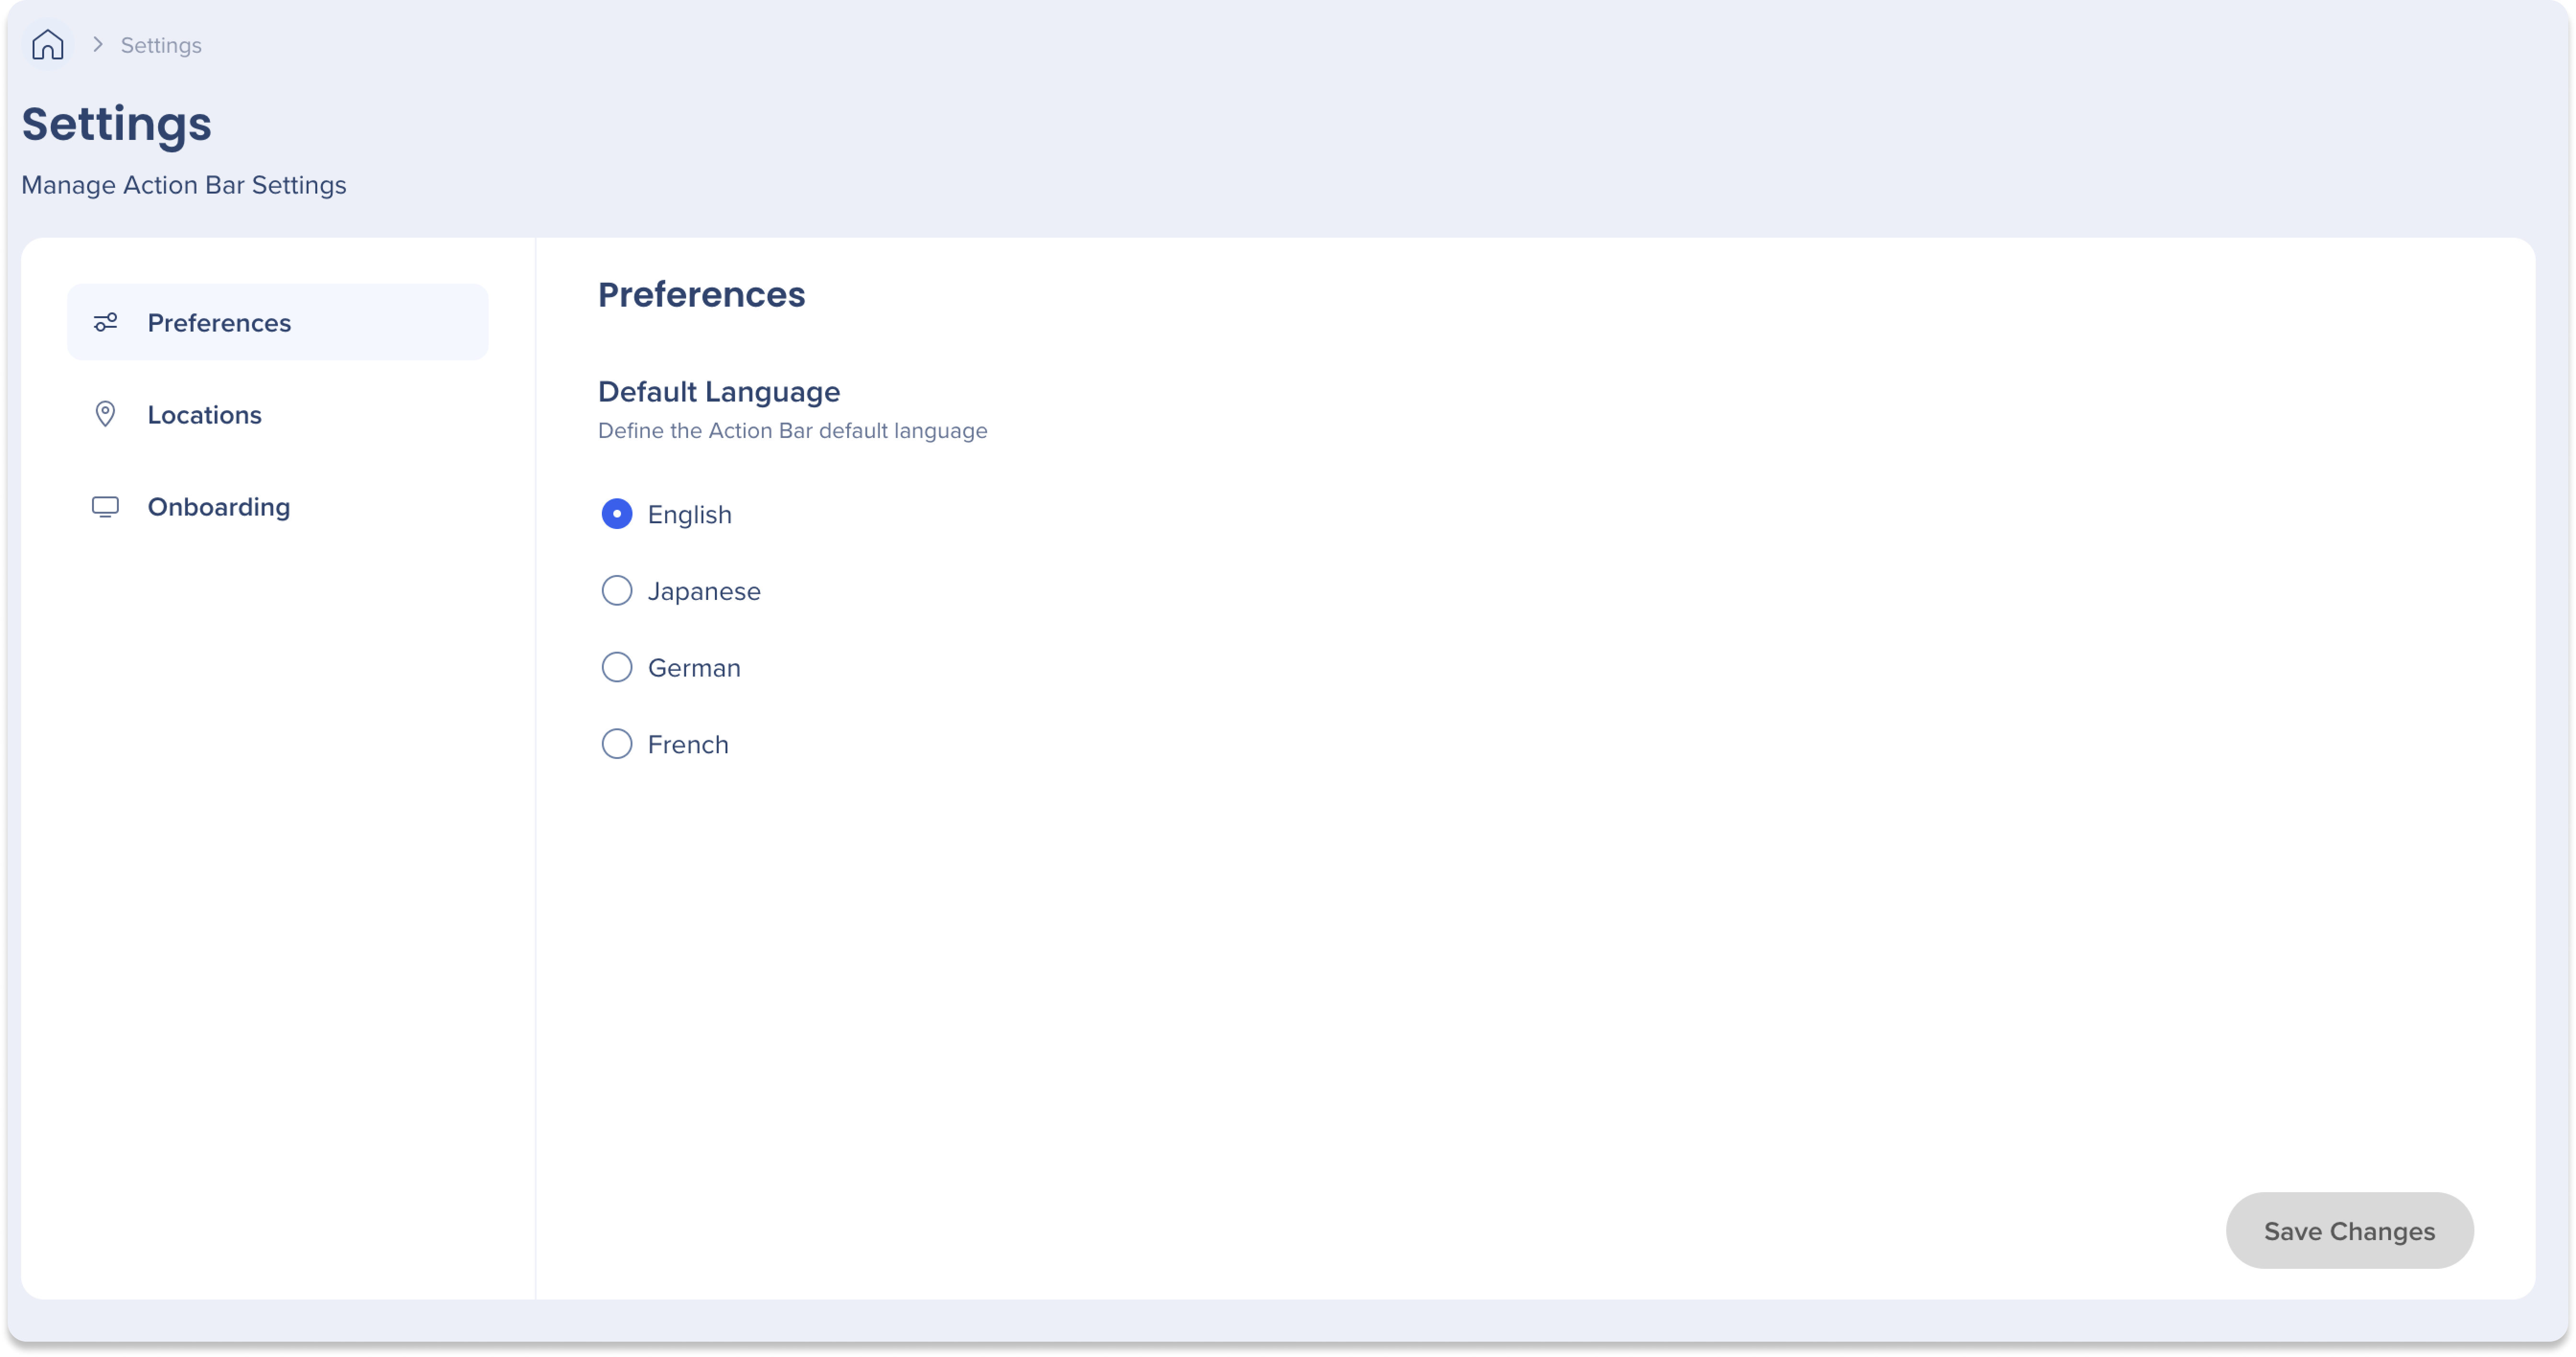
Preferences
Define your Action Bar default language with the following options:
-
English
-
Japanese
-
German
-
French
Locations
Choose where the Action Bar should appear from two options:
-
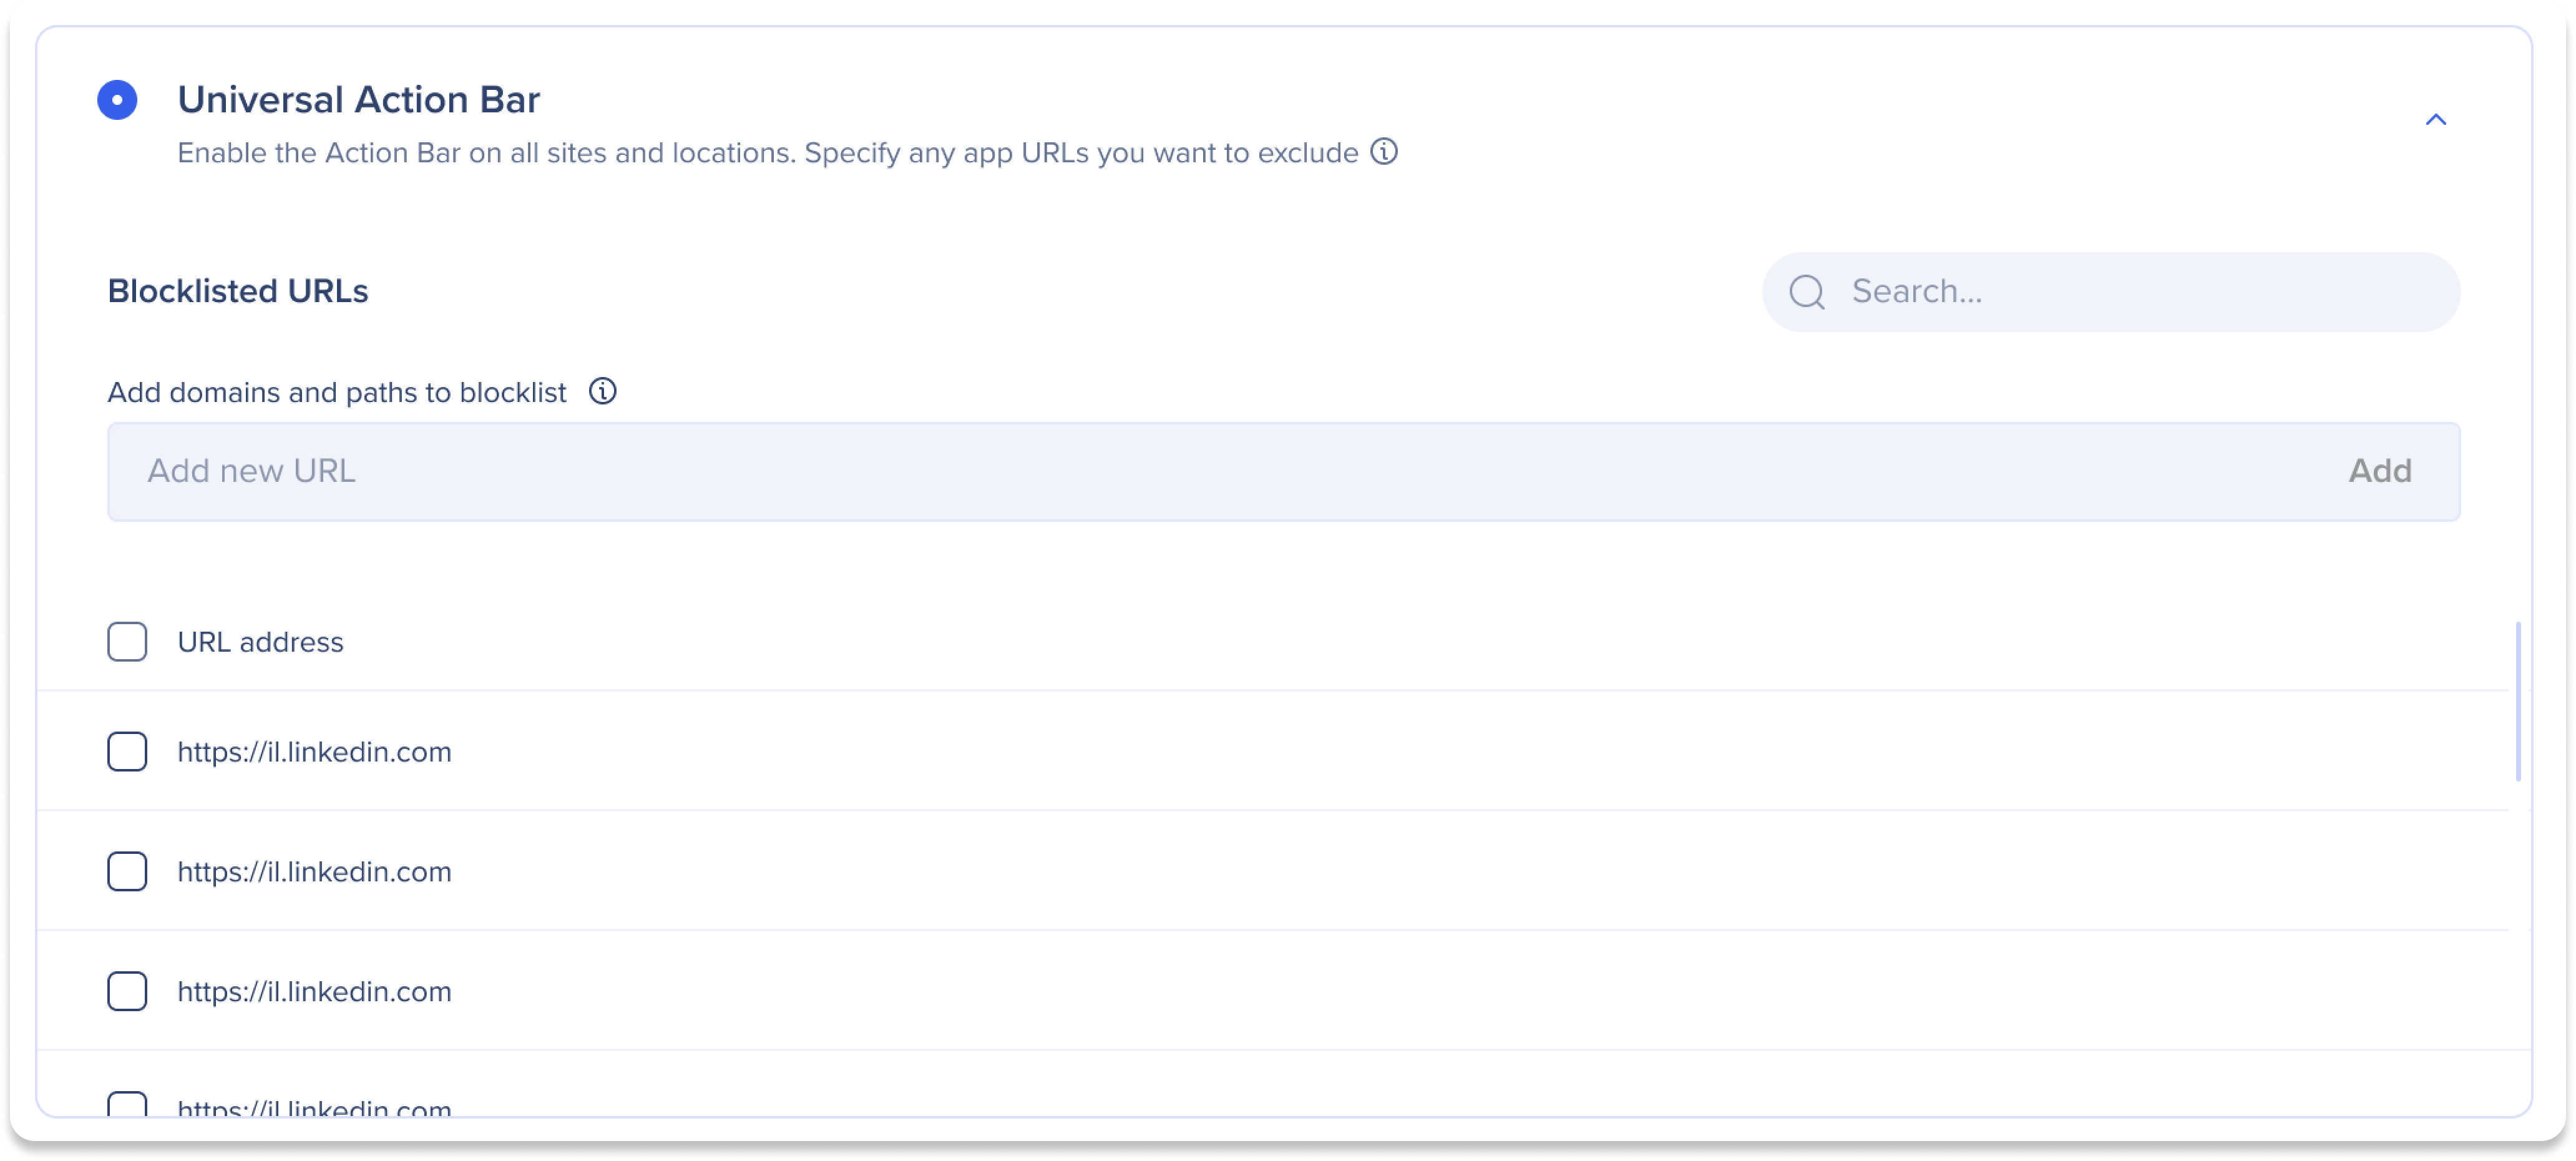
Universal Action Bar: Appears on all sites and locations, and allows users to block specific app URLs if needed
-
Note
Customers should contact their WalkMe representative to enable Universal Mode.
-
Location-Specific Action Bar: Appears only on selected locations
-
Click Select All for the Action Bar to appear on all locations
Blocklist URLs
Blocklisting prevents specific URLs from displaying the Action Bar
To blocklist a URL:
-
Enter the domain in the Add new URL field
-
Click Add
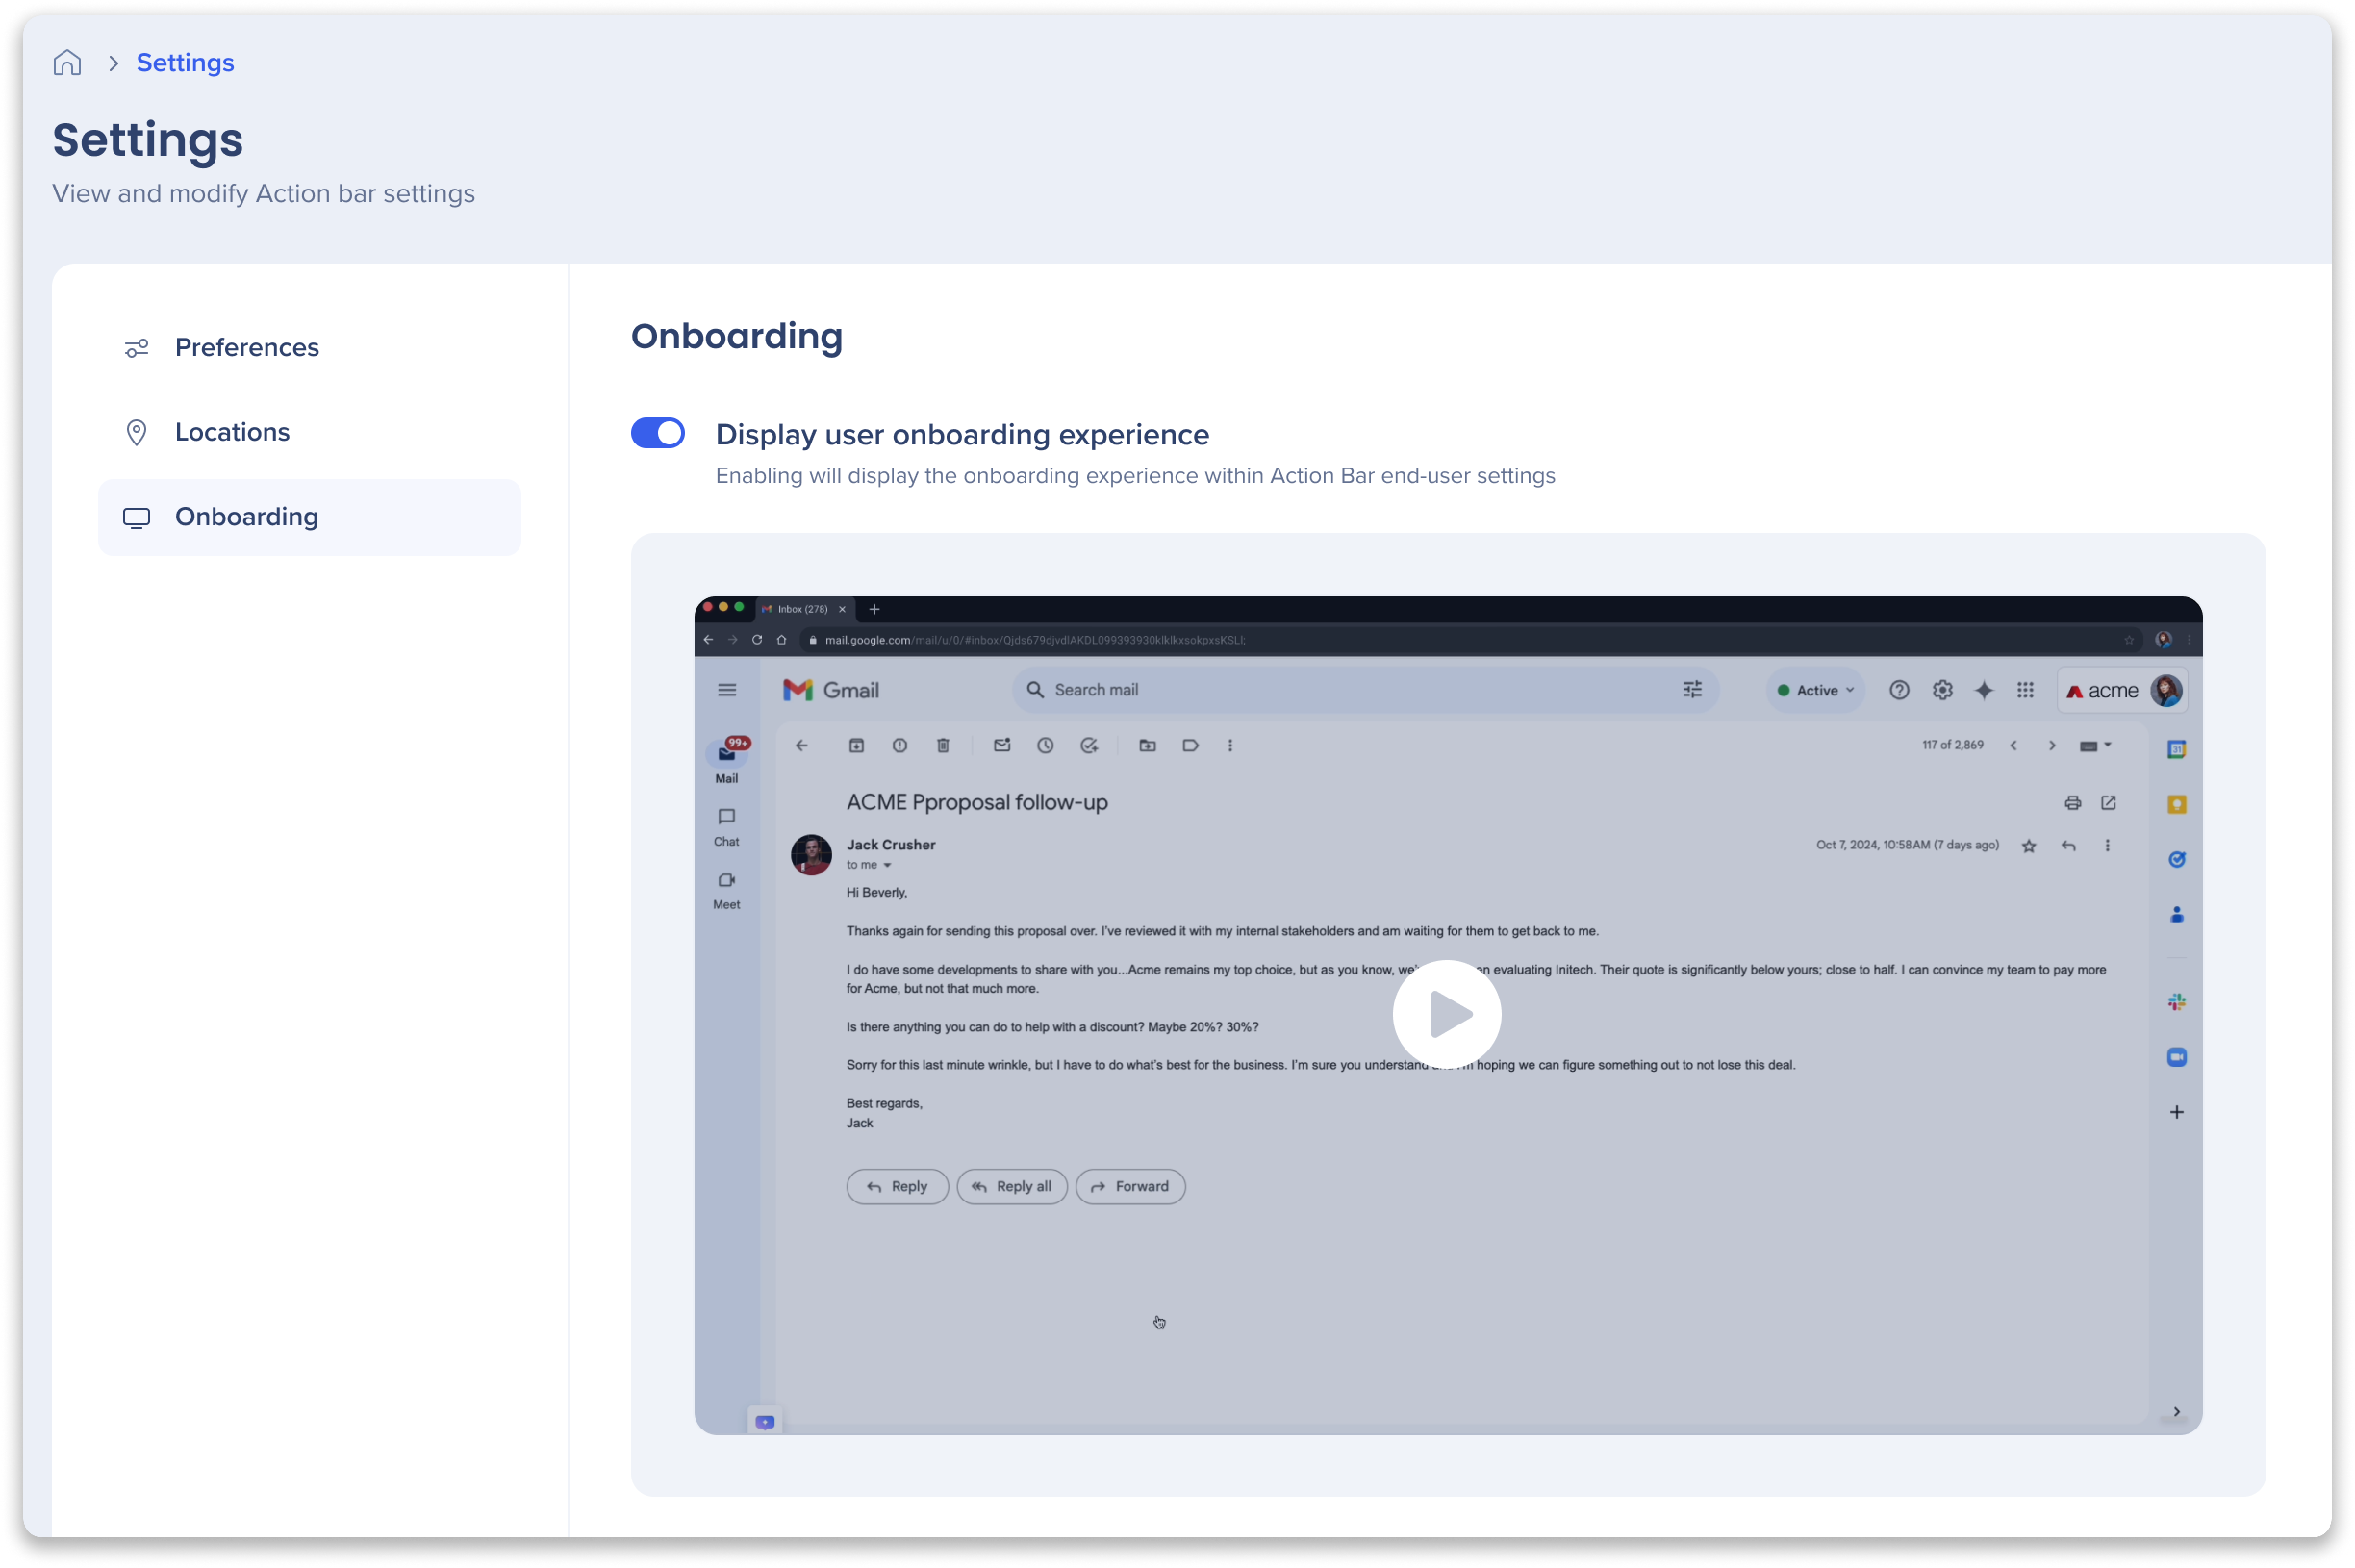
Onboarding
Turn on the Display user onboarding experience to display the onboarding experience for new users.

When users first view the Action Bar, the onboarding guide will automatically appear. This guide walks users through the main features of the Action Bar, providing brief videos to explain each feature. The onboarding process ensures that users understand how to utilize the action bar effectively, enhancing their overall experience with the tool.
- End-users will also have the ability to replay the onboarding guide from their Action Bar settings
Technical Notes
Prerequisites
Implementations
Note
Customers should contact their WalkMe representative to enable Universal Mode.
Limitations
-
System Configuration
-
Launcher Setup
-
A launcher cannot be changed from a single system to a multi system or vice versa
-
Assistive reading launchers (tag summary & structured summary) are only supported in single system launchers since they require a captured element
-
A menu launcher can only contain launchers of the same location type and locations (i.e. single location launchers contains single location launchers)
-
Deleted launchers can only be restored via the WalkMe editor (single location only)
-
Action Bar settings are visible to all users, but only Admins can make changes
-
10 tag limit for Tag Verification launcher type
-
15 tag limit for Structured Summaries launcher type