Welcome to the WalkMe Help Center

Please login in order to continue:

Work flows better with WalkMe
Work flows better with WalkMe.

Incoming Azure Blob Integration

Last Updated June 5, 2024

Brief Overview

The incoming integration of WalkMe with Azure Blob offers a seamless way to import data from Azure, significantly enhancing user experience through advanced personalization and automated updates.

The integration allows you to bring in a diverse range of attributes from Azure, enabling them to create highly customized content. Any updates to these attributes in Azure are automatically synced with WalkMe, ensuring that the content is always relevant and tailored to your needs, without having to manually update.
Set Up an Incoming Integration with Azure Blob

Step 1: Access the Integrations page in Insights Classic

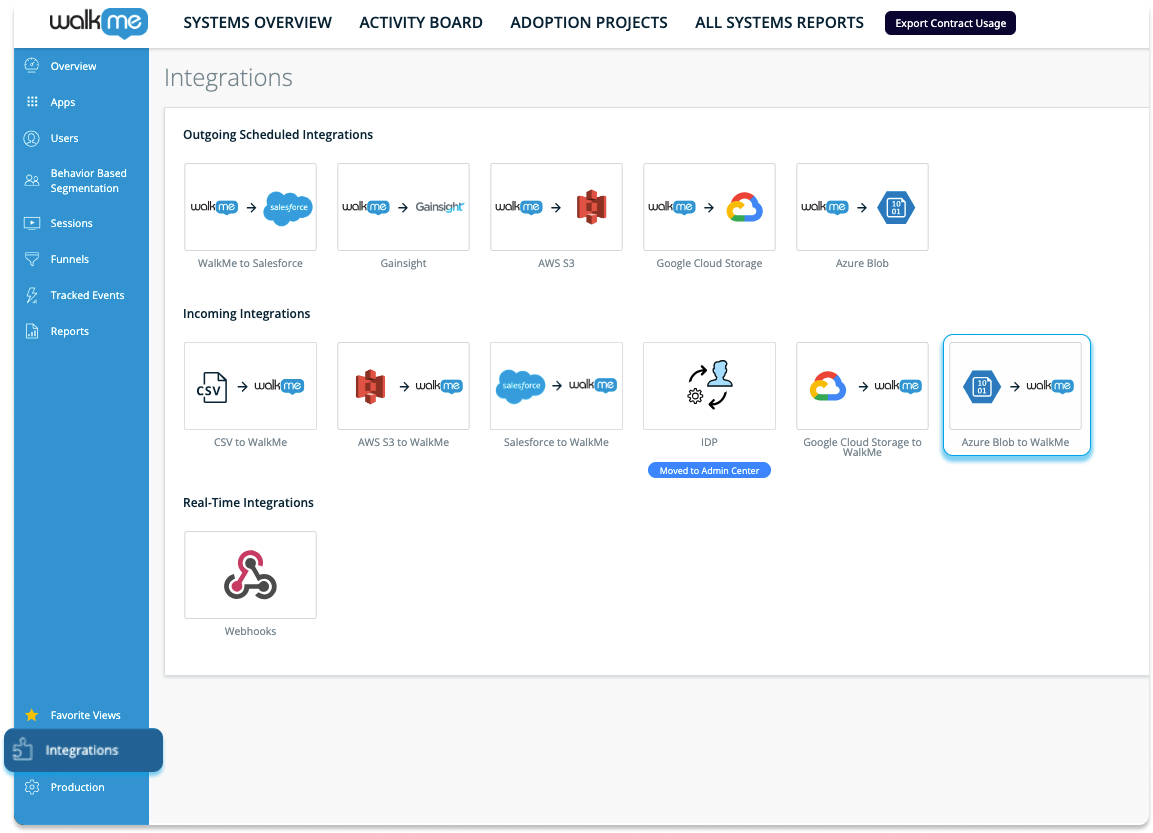
  1. Navigate to Insights Classic: https://insights2.walkme.com/
  2. Select the system you would like to setup the integration on from the Monitored Systems widget
  3. Click the Integrations tab in the sidebar
  4. Click Azure Blob to WalkMe under Incoming Integrations

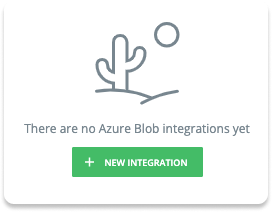
5. Click the NEW INTEGRATION button to get started
Step 2: Create a Source

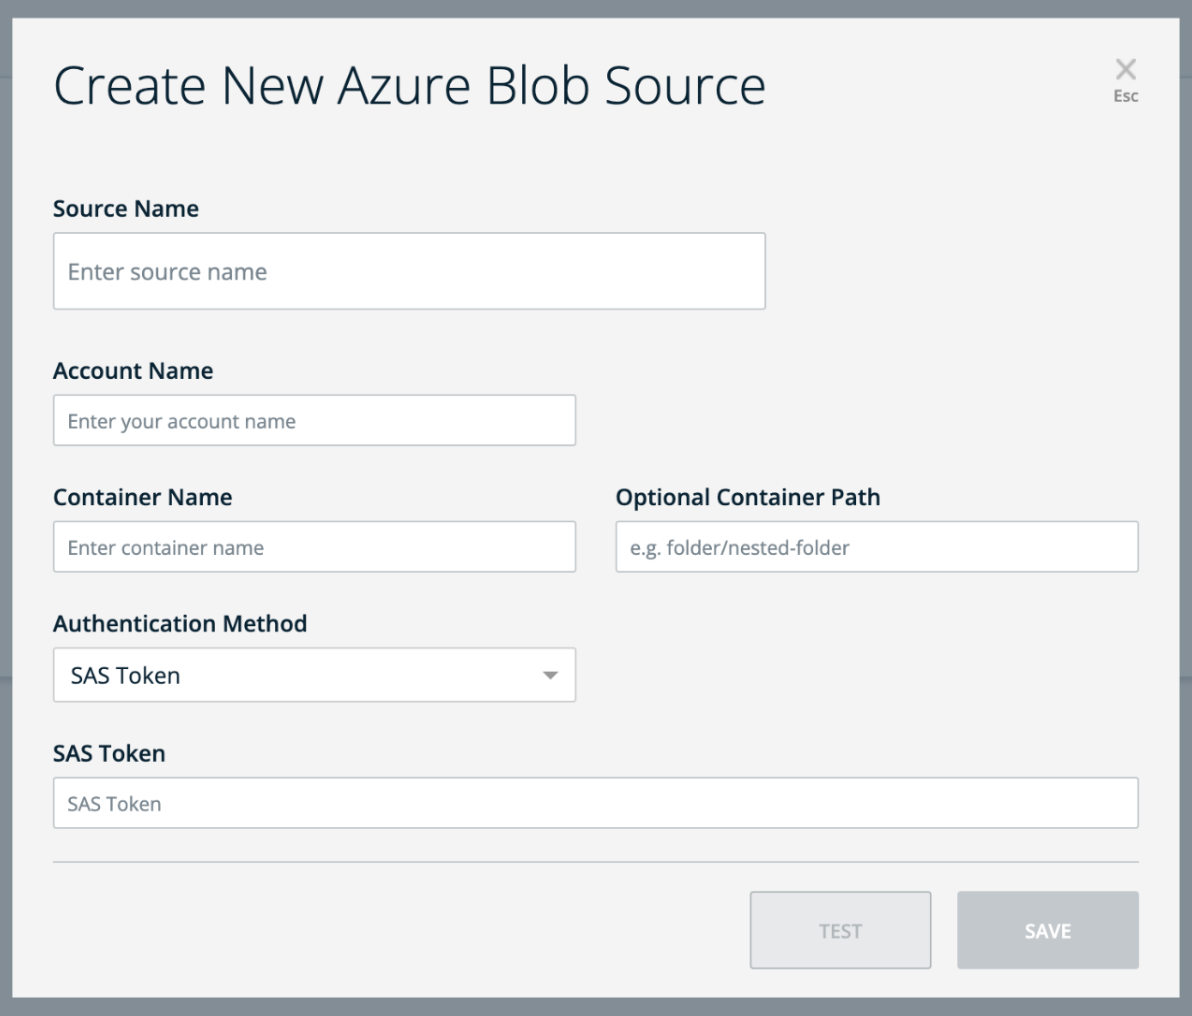
The next step is to create a source in Azure Blob. Meaning, from where the files will be received by WalkMe.

This step can be also performed during Step 3 when adding a new integration.

Information needed to enter:

  • Source Name: A name to recognize the file source location
  • Account Name: The name of the relevant Storage Account in Azure Blob
  • Container Name: The name of the relevant container within the Storage Account in Azure Blob
  • Authentication Method: Select a secure  authentication method to verify user or system identity when accessing Azure Blob storage
    • If SAS (Shared Access Signature) Token is selected, you will be promoted to enter the following:
      • SAS Token = the SAS token generated for the relevant Storage Account
    • If Microsoft Entra ID is selected, you will be promoted to enter the following:
      • Client ID = a unique identifier assigned to your application by Azure Active Directory to recognize it during the authentication process
      • Client Secret = a confidential key or password used by your application in conjunction with the Client ID to authenticate itself to Azure Active Directory
      • Tenant ID = a unique identifier for your organization's instance of Azure Active Directory, specifying the directory in which your application is registered and authenticated

** The “Container Path” is an optional field.
Step 3: Add New Integration

Adding a new integration can be completed in 3 simple steps:
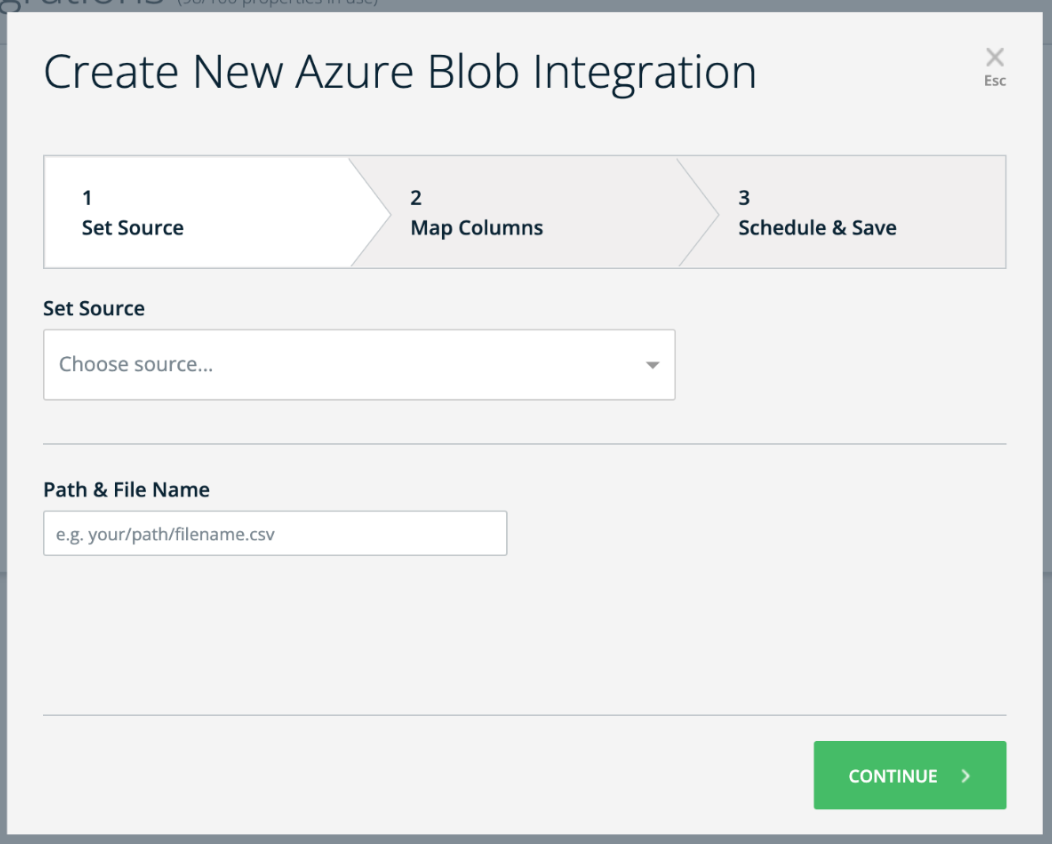
  1. Set Source → Choose a source from the dropdown or create a new source as described in step 1
    • Additionally, enter the Path & File Name
  2. Map Columns → Choose a unique user identifier to establish data synchronization between Azure Blob and WalkMe
    • Then, select the properties you wish to import into WalkMe, ensuring they are correctly mapped to their respective property types (string, number, boolean, etc.)
    • If necessary, you can also rename the properties at this stage
  3. Schedule and Save → Specify the integration's name and determine if you wish to schedule it to run at specified intervals
    • Upon clicking Save, a new integration will be generated. You can choose to execute it manually upon request or set it for automated execution at defined intervals
The report will be sent in CSV format.

Set Up a Microsoft Azure Account and Blob Container

Sign Up for Microsoft Azure

  1. Go to the Microsoft Azure website
  2. Click on “Start free” or “Sign up” to create a new Azure account

Create a Storage Account

  1. Once you have an Azure account, log in to the Azure portal
  2. Click on “Create a resource” and search for “Storage account
  3. Follow the prompts to create a new storage account
  4. Choose a unique name for your storage account and configure other settings as needed

Create a Blob Container

  1. After creating a storage account, open it in the Azure portal
  2. In the left-hand menu, under “Data storage” click on “Containers
  3. Click “+ Container” to create a new container
  4. Choose a unique name for your container, configure access level settings, and create the container

Authentication Method

Create a SAS (Shared Access Signature) Token

To interact with your Azure Blob Storage, you'll need to generate a Shared Access Signature (SAS) token.

  1. In the Azure portal, navigate to your storage account and select “Security + networking” > “Shared access signature
  2. Configure the desired permissions, expiration date, and other settings for your SAS token
  3. Click “Generate SAS and connection string
  4. Copy the generated SAS token and connection string to share with your service for accessing the container
  • Allowed Services → Blob
  • Allowed Resource Type → Object
  • Allowed Permissions → Read, Write, Delete
  • Blob Versioning Permissions → Leave empty
  • Allowed Blob Index Permissions → Leave empty
  • Start and Expiry Date/Time → Subject to your discretion
  • Allowed IP Addresses → Leave empty
  • Allowed Protocols → HTTPS only
  • Preferred Routing Tier → Basic (default)
  • Sining Key → Key1

Shared File Integrations

Currently, Multi-system integrations is not supported, but we plan on implementing this in 2025.

If you plan to use a shared file for multiple integrations, it's important to note that you will need to create a separate integration for each file.

Insights has a specific way of processing data for each integration, and it looks for a particular file location. Once the data has been processed, the file is then moved to a designated folder for either "success" or "failed" files within the defined location.

If a second integration tries to access the same file, it won't be able to locate it since the file has already been moved. This will cause the second integration to fail.

To avoid this issue, set up a separate integration for each file, even if they are using the same data source. This will ensure that each integration can access the file it needs without conflicting with other integrations.

Was this article helpful?

Thanks for your feedback!

Be part of something bigger.

Engage with peers, ask questions, share ideas

Ask the Community
×