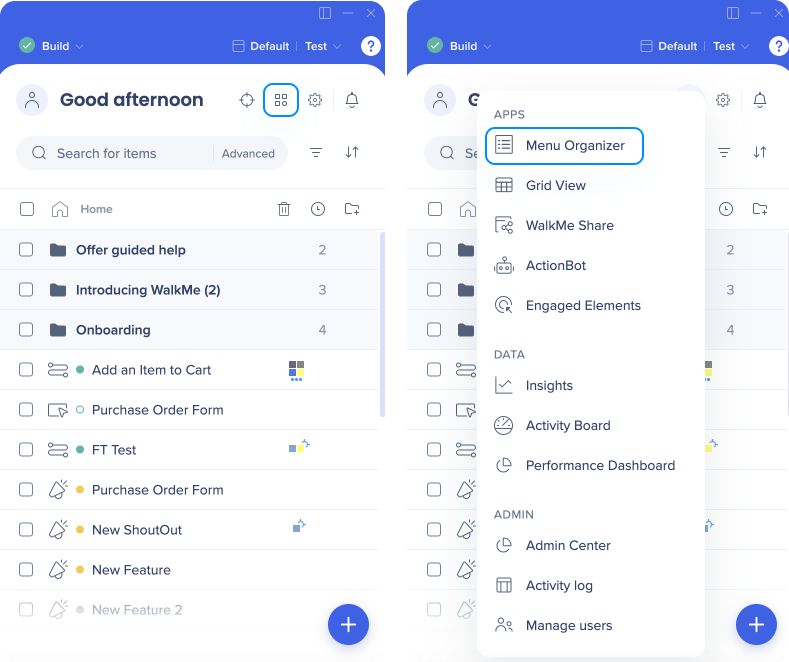
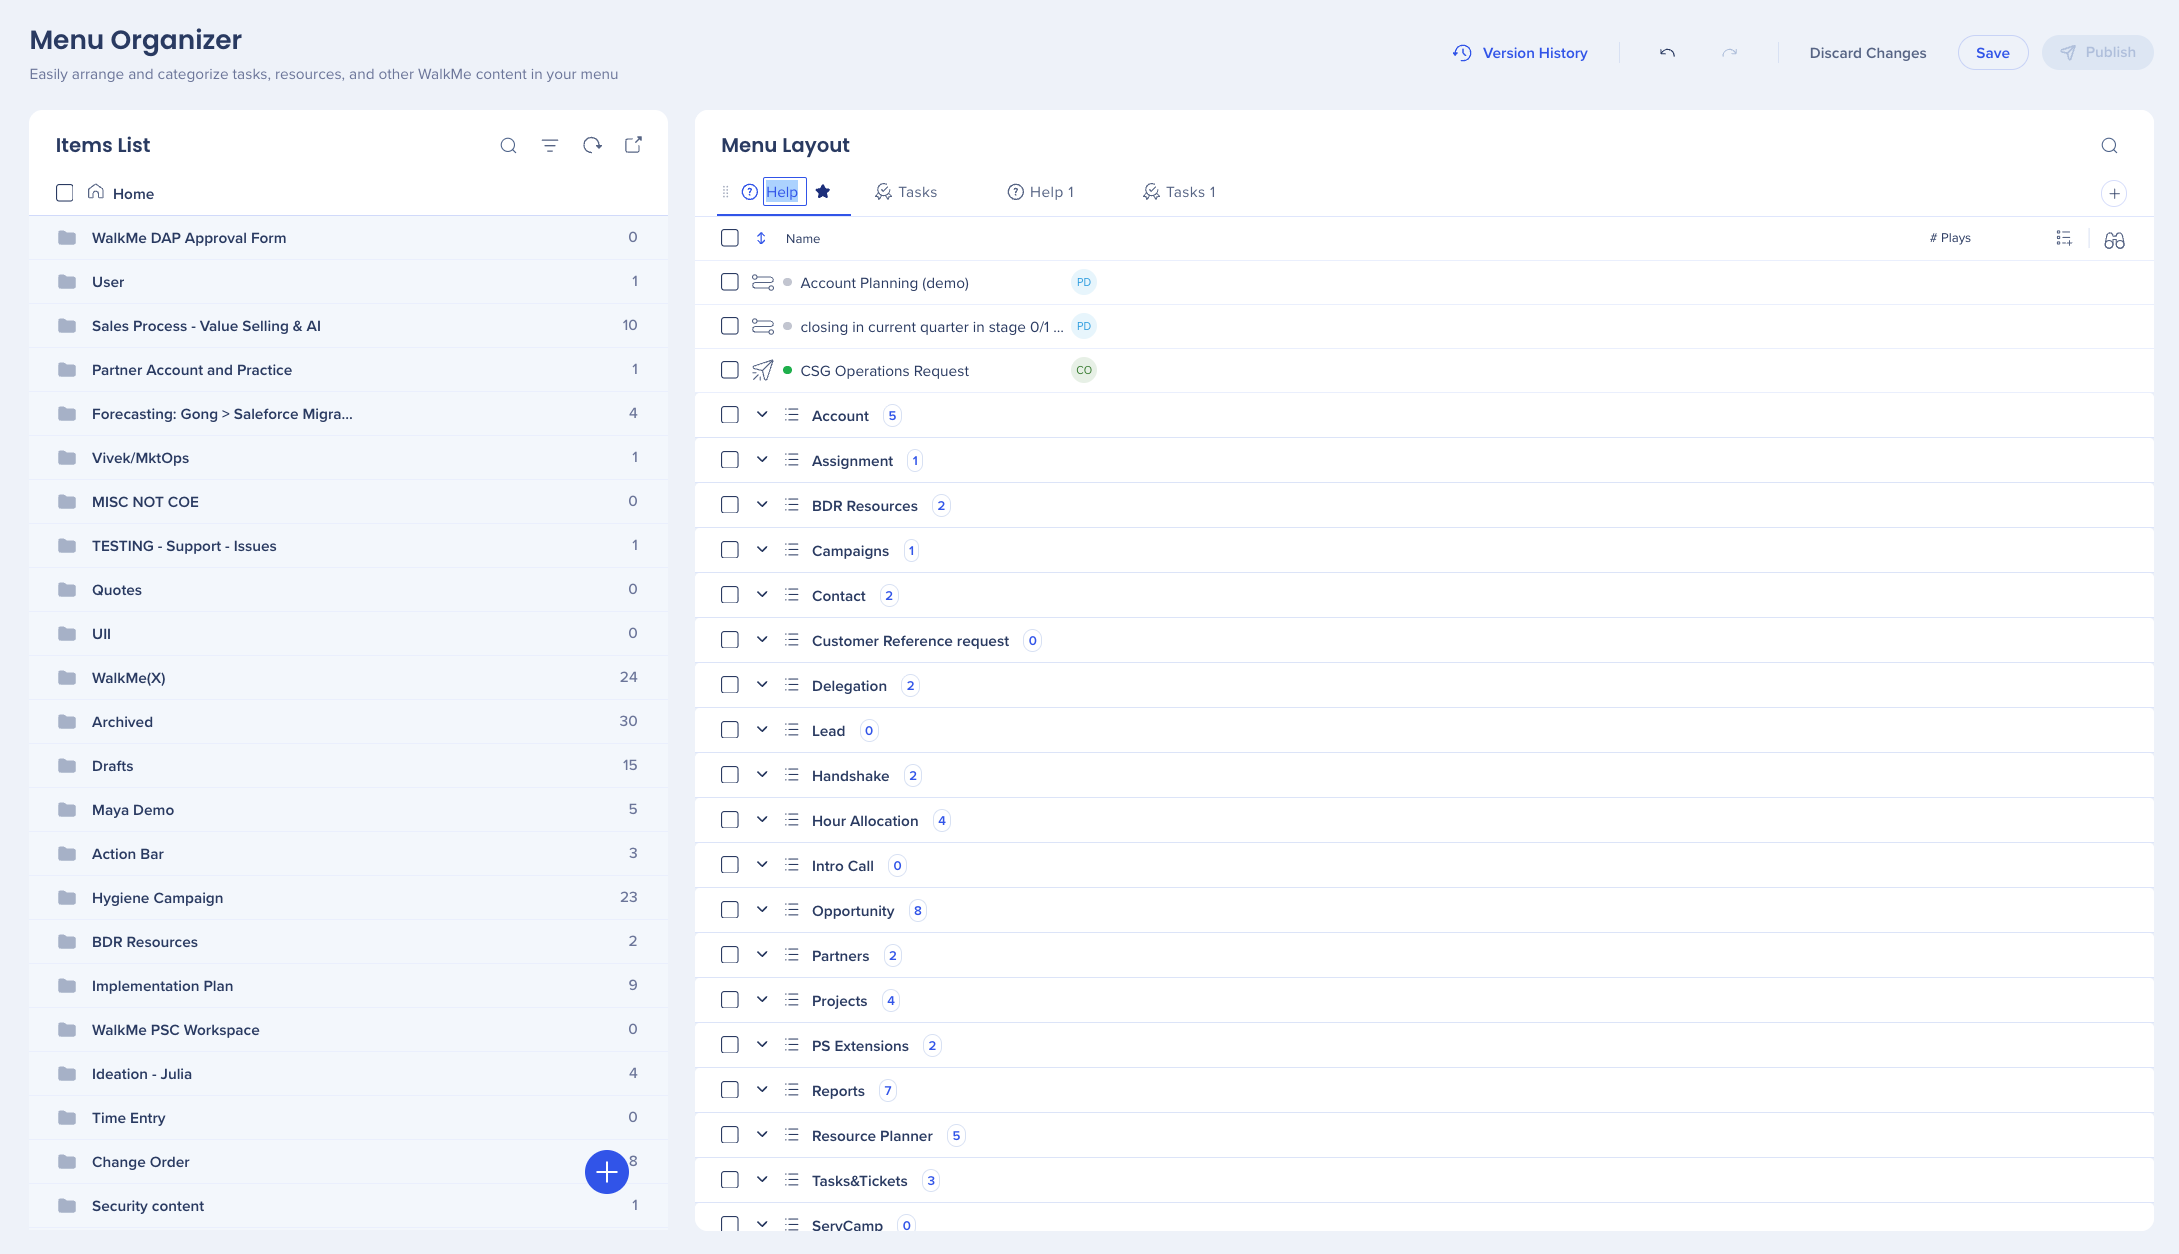
The WalkMe Menu Organizer is your workshop for building and managing your WalkMe Menu. The menu organizer displays all of the resources, onboarding tasks, and Smart Walk-Thrus that are in your editor.
With the Menu Organizer, you are able to:
Add WalkMe content, including onboarding tasks, to the menu
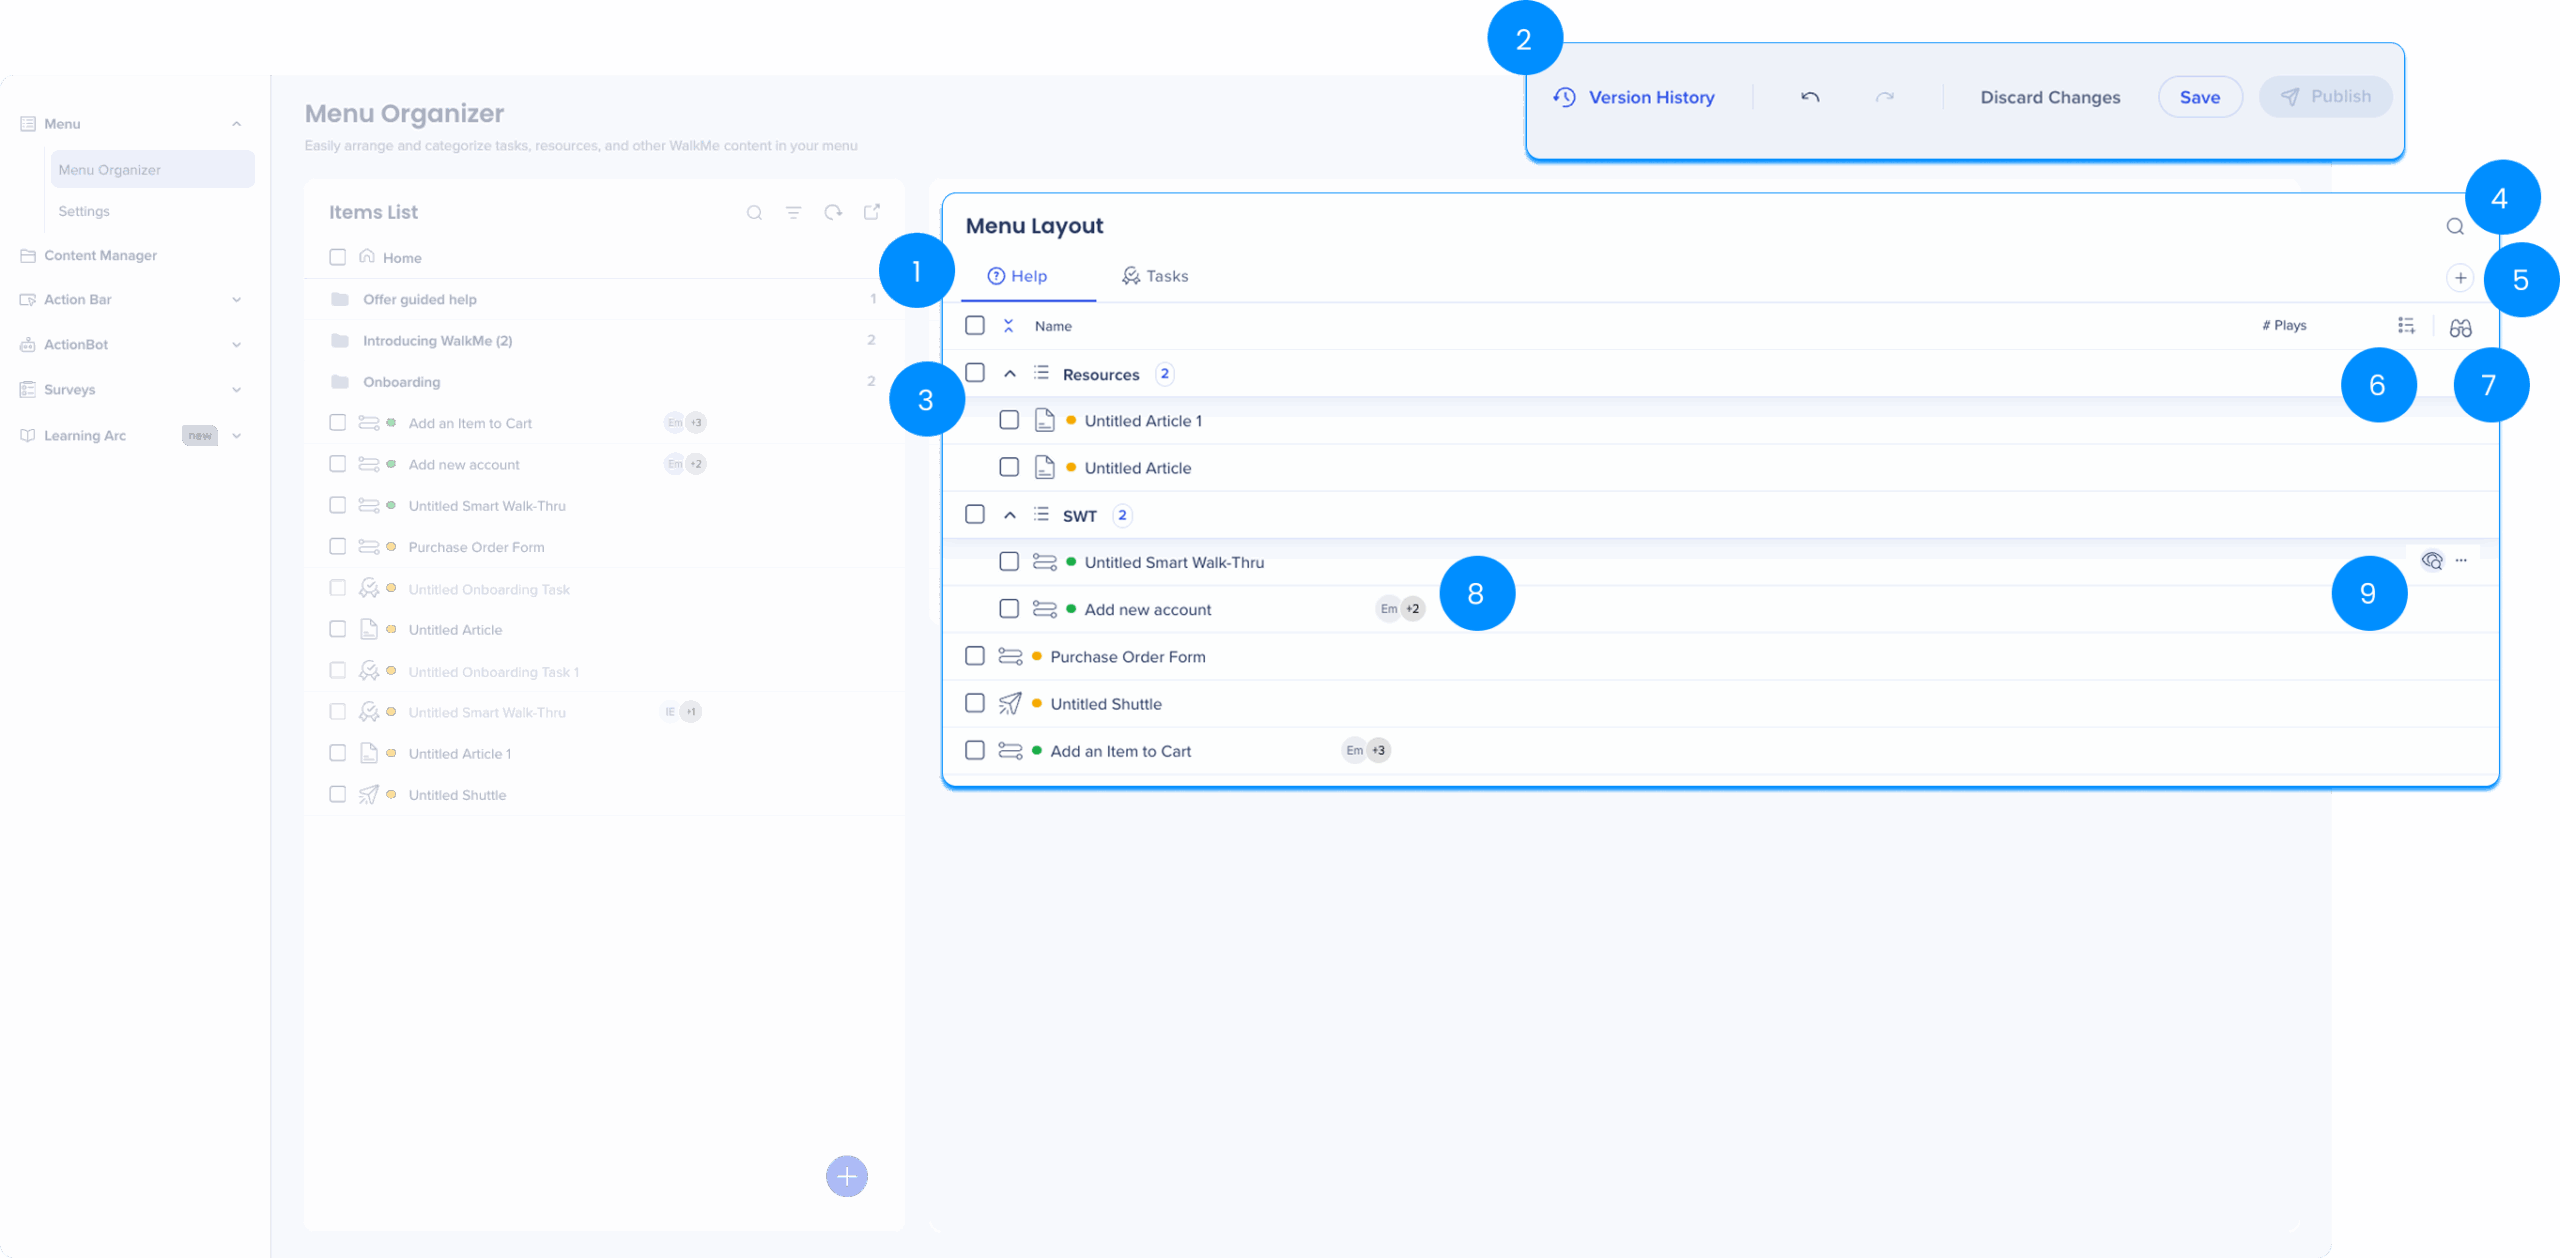
Left side panel: Displays all the WalkMe items that were built in the editor and can be added to the menu - Content here isn't visible to menu users
Right side panel: Displays the WalkMe items that are visible to users in your menu
Left side panel
You will see the Items List in the left side panel. This displays all the WalkMe content that was created in the editor and can be added to the menu using drag and drop capability.
The left side panel includes:
Item list
Search
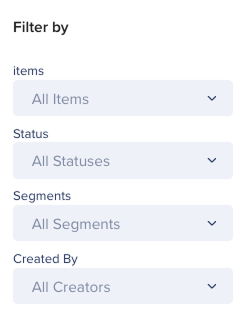
Filter options, according to:
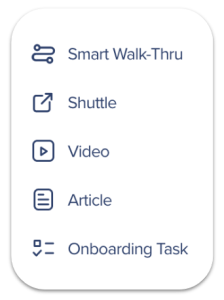
Item type
Publish status
Segmentation
Creator
Tip
If you filter the Item List according to segmentation, once you create a new item those segments will automatically be added to the new item.
Refresh
Open editor shortcut
Add a new item
Adding Smart Walk-Thrus or onboarding tasks will redirect you to the WalkMe Editor
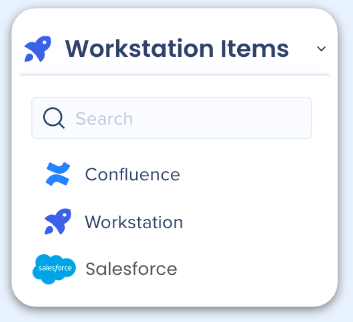
Desktop/Mobile Systems Content Manager
For Desktop/Mobile systems only, you can duplicate items between systems by dragging the item into your WalkMe Menu.
Make you've selected your Desktop/Mobile system
Click the drop down next to Item List
Select the system that has the item you'd like to duplicate
Drag the item from the Item List to the Menu, just like any other item
Note: Items will also be duplicated in the Editor.
Right side panel
The right side panel shows content that has been added to your menu. These will be displayed to your menu users.
The right side panel includes:
Menu tabs
You can rename and rearrange the tabs.
Action buttons: Undo, Redo, Discard, Save, Publish, Version History
Note
Checking the "Publish all menu items" box will also publish any menu design updates you made.
Categories: Items are arranged within designated categories, similar to folders in the editor
Note
Content cannot be duplicated within the same category. It can be present multiple times in the same tab, but only if it is placed in separate categories.
Search
Add a new tab
Add a new category
View by segment: Lets you check the segments and see what items are assigned to them
Segments: Displays which segments this item is available to
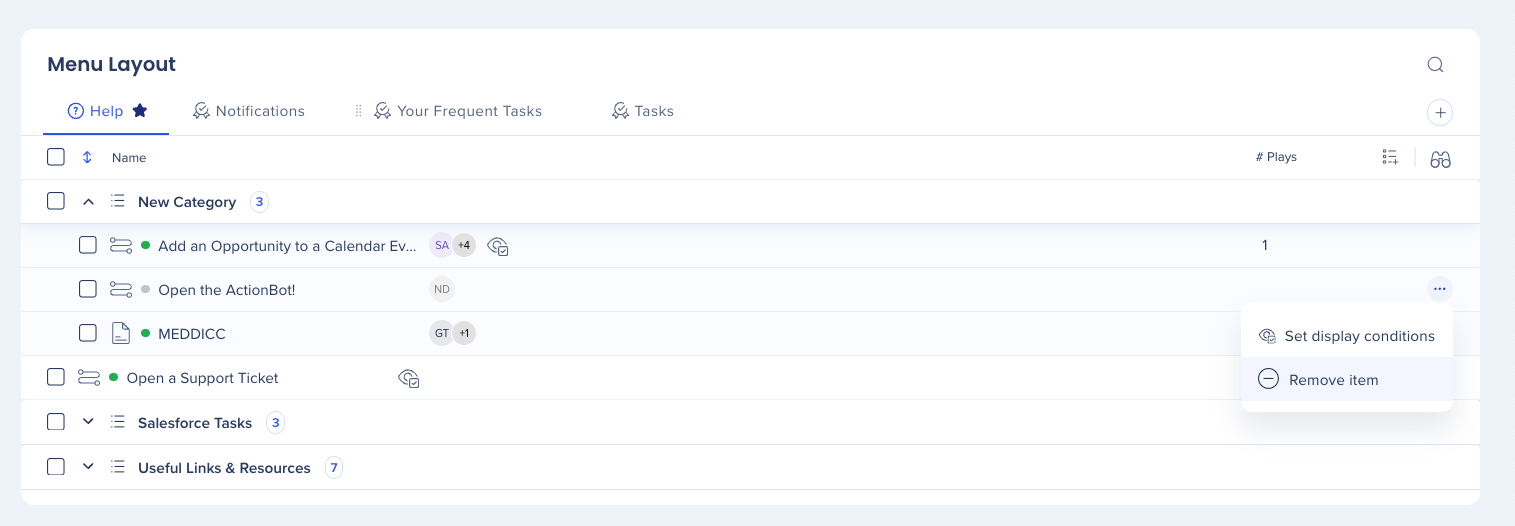
Item settings
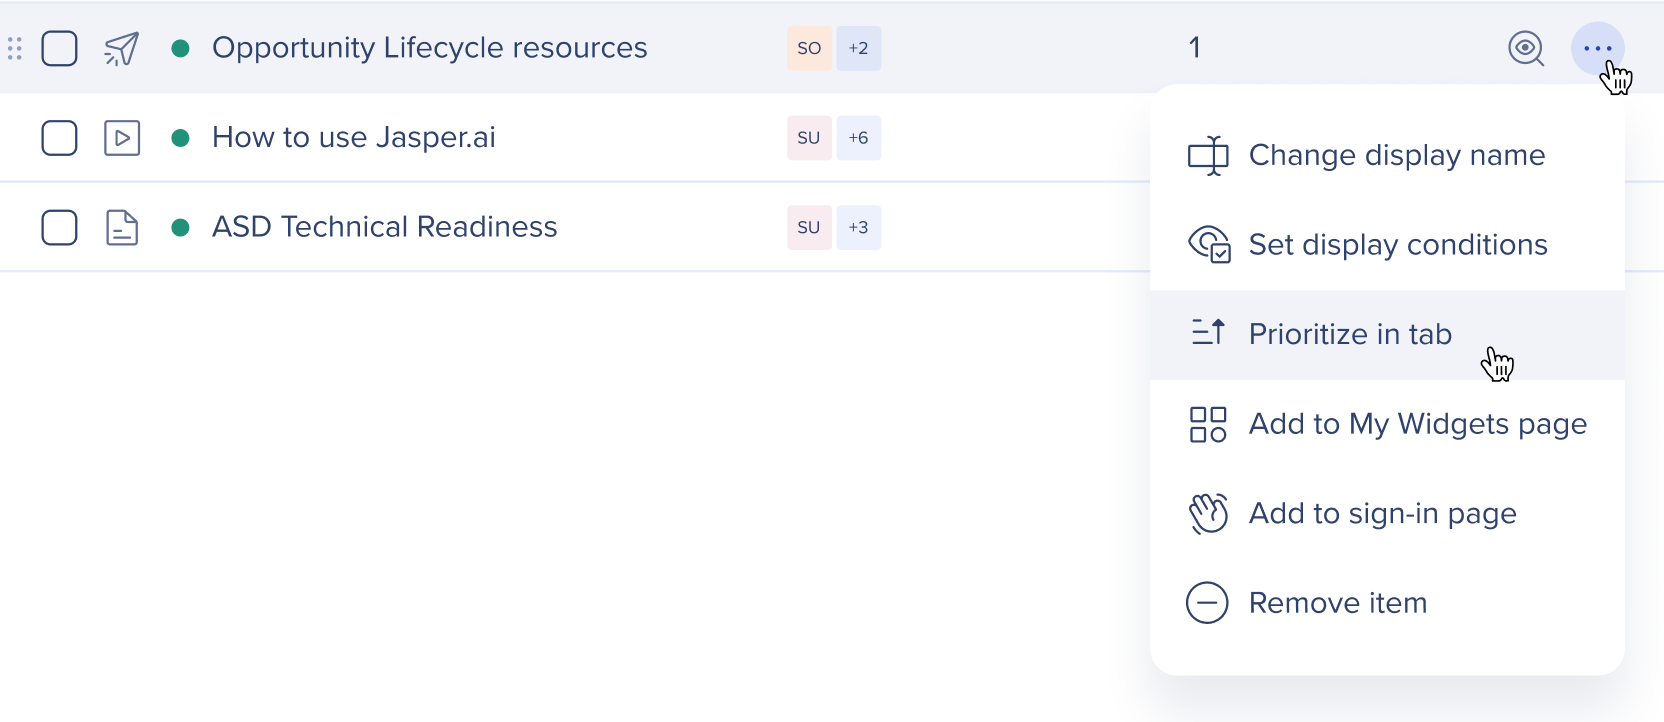
Change display name
Set display conditions
Prioritize in tab
Add to My Widgets page
Add to sing-in page
Remove item
Tab management
View by segment
In the right panel you will also find the View by segment dropdown to filter and see how a specific segment or a number of segments will view the menu
The Menu will save the segmentation for the next time you access it. Meaning, the last filter you applied will appear on your next session.
Segmentation filters will clear should you clear your cache.
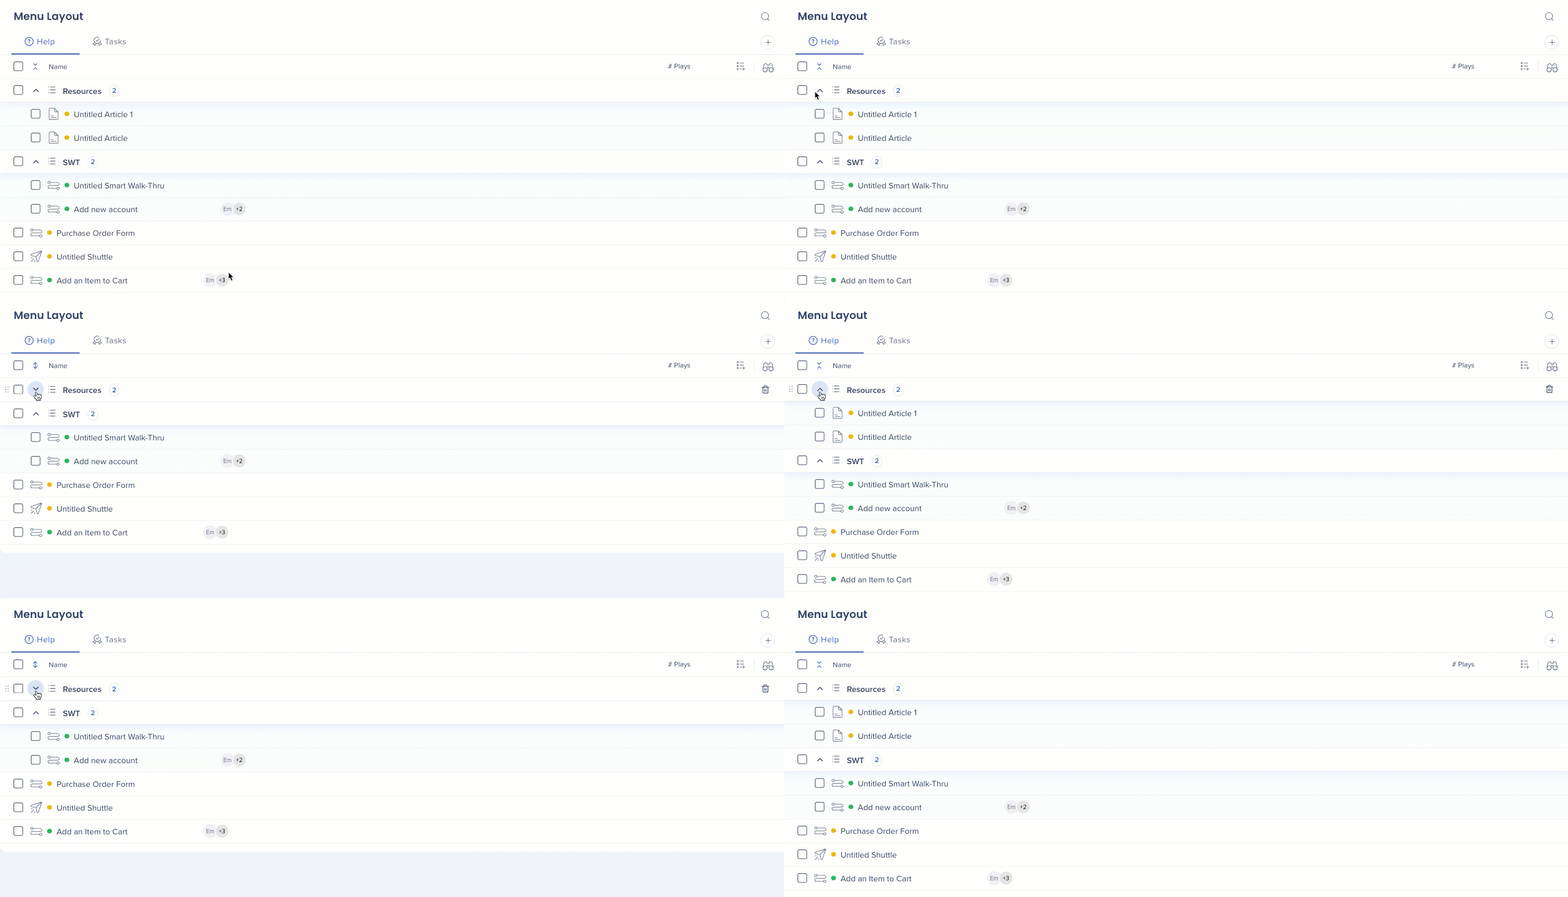
Expand / Collapse
You can use the arrows to expand/collapse all menu categories in one click
Create tab
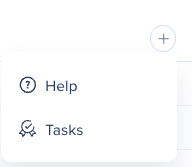
To create a new tab:
Click on the Create new icon
Select the type—Help or Task
Note
Up to 9 tabs in total can be created (5 Help, 4 Tasks) in the Pro menu.
Duplicate tab
Pro menu tab management
This capability is available for Pro menu type only.
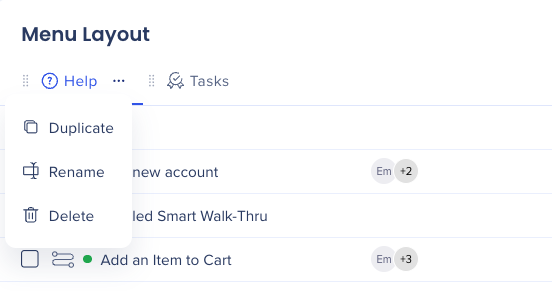
You can also create a new tab by duplicating an existing tab:
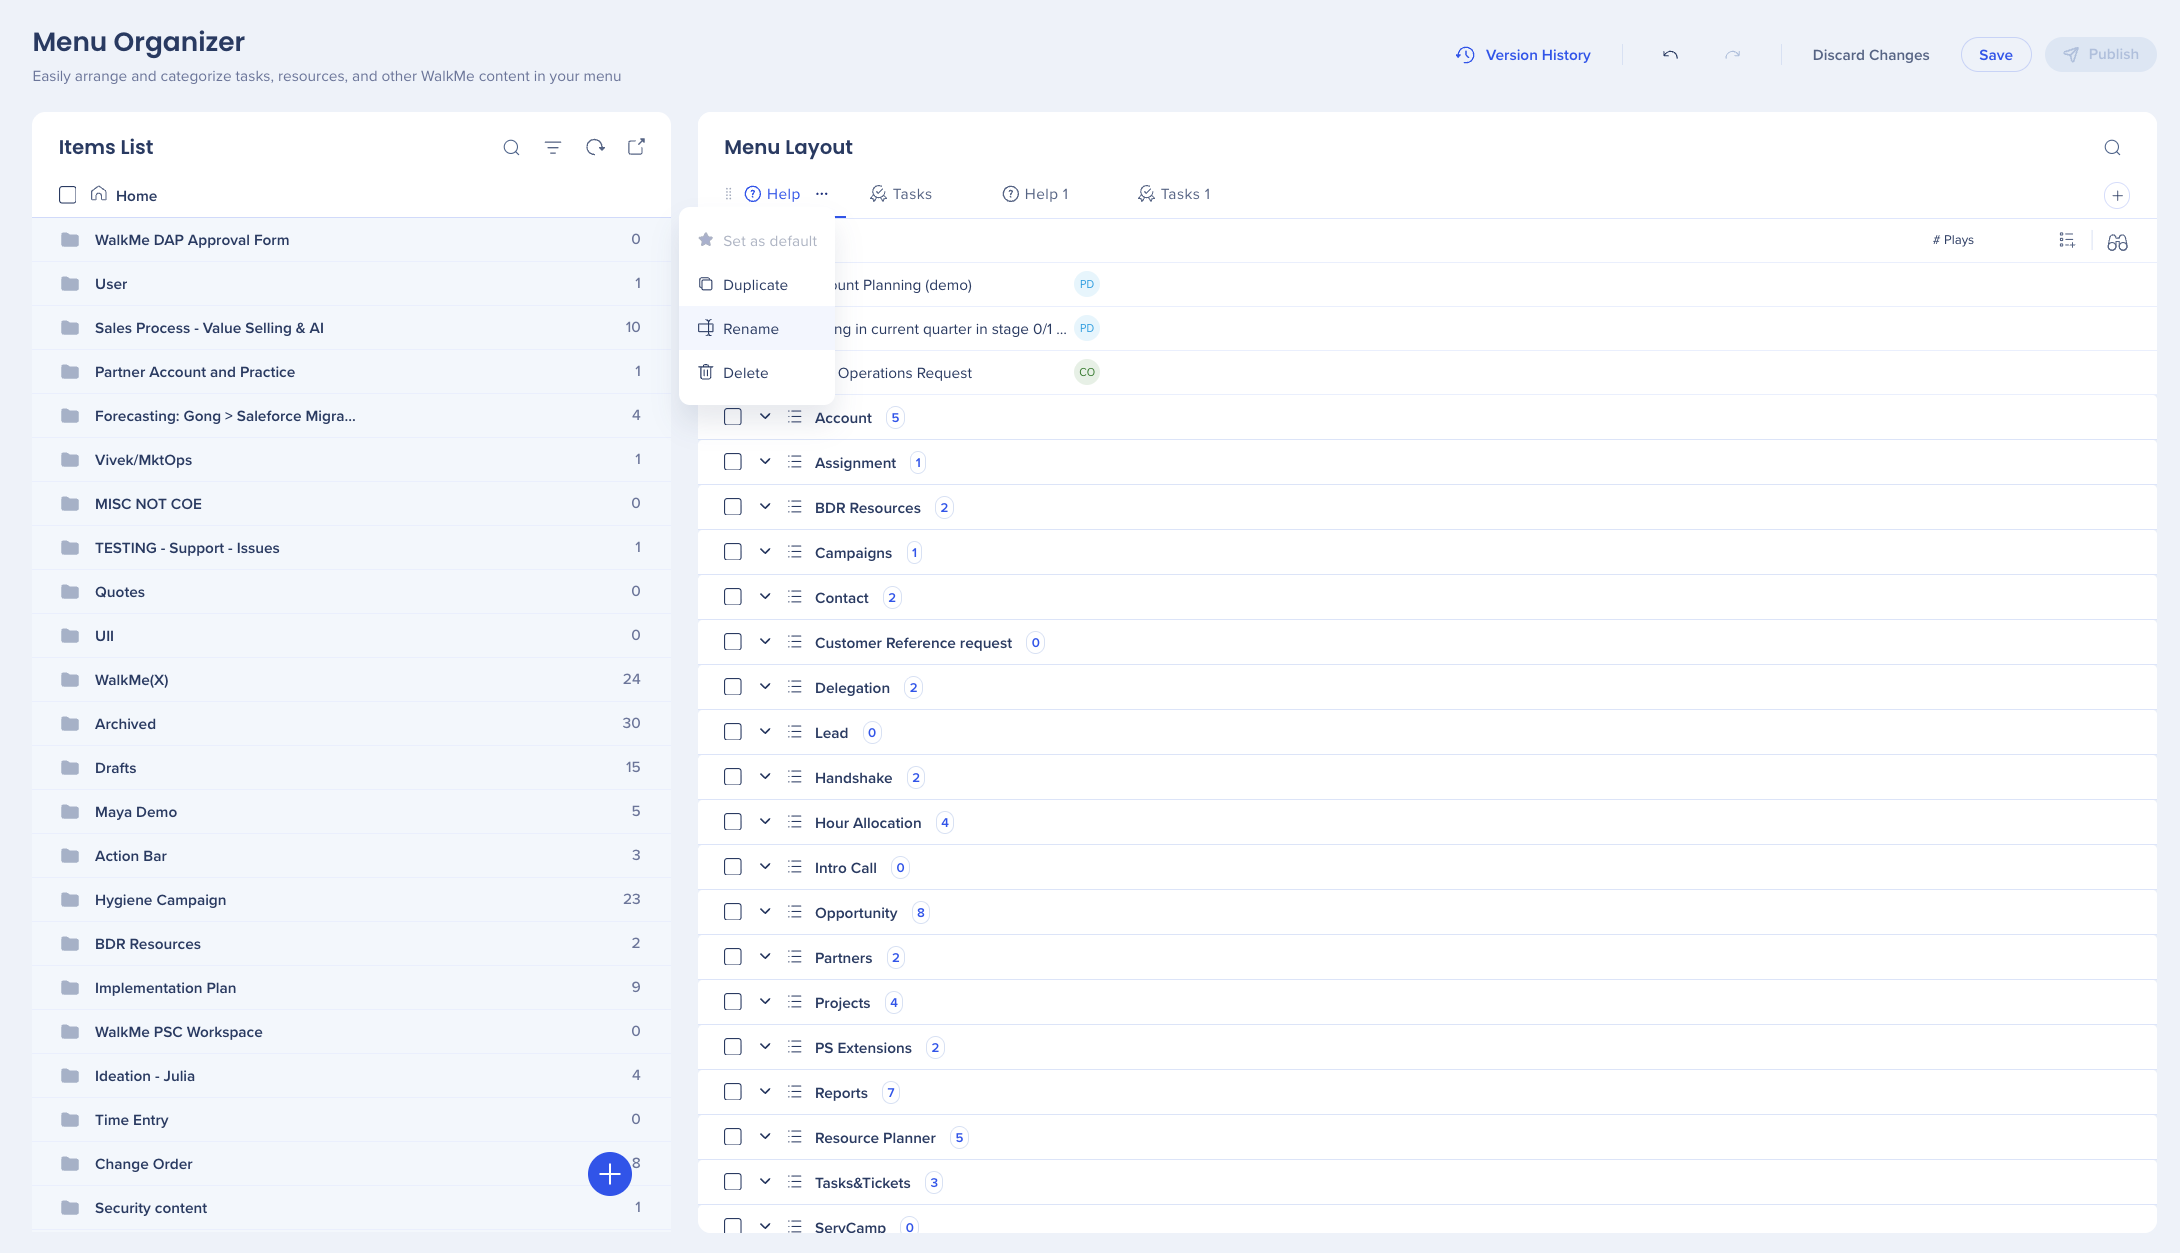
Click on the Options menu at the right side of the tab you'd like to duplicate
Select Duplicate
An identical tab will be created with all it's content and categories
The automatic name will be “copy of {source tab name}”
For example, if you copied a tab called “Help”, the duplicated tab name will be “copy of Help”
Rename
To rename a tab:
Click twice on the current tab's name
or, in the Pro menu also:
Click on the Options menu
Select Rename
Note
The name will appear in full up until 22 characters. If the name exceeds 22 characters, we'll show a tooltip with the full name.
Reorder
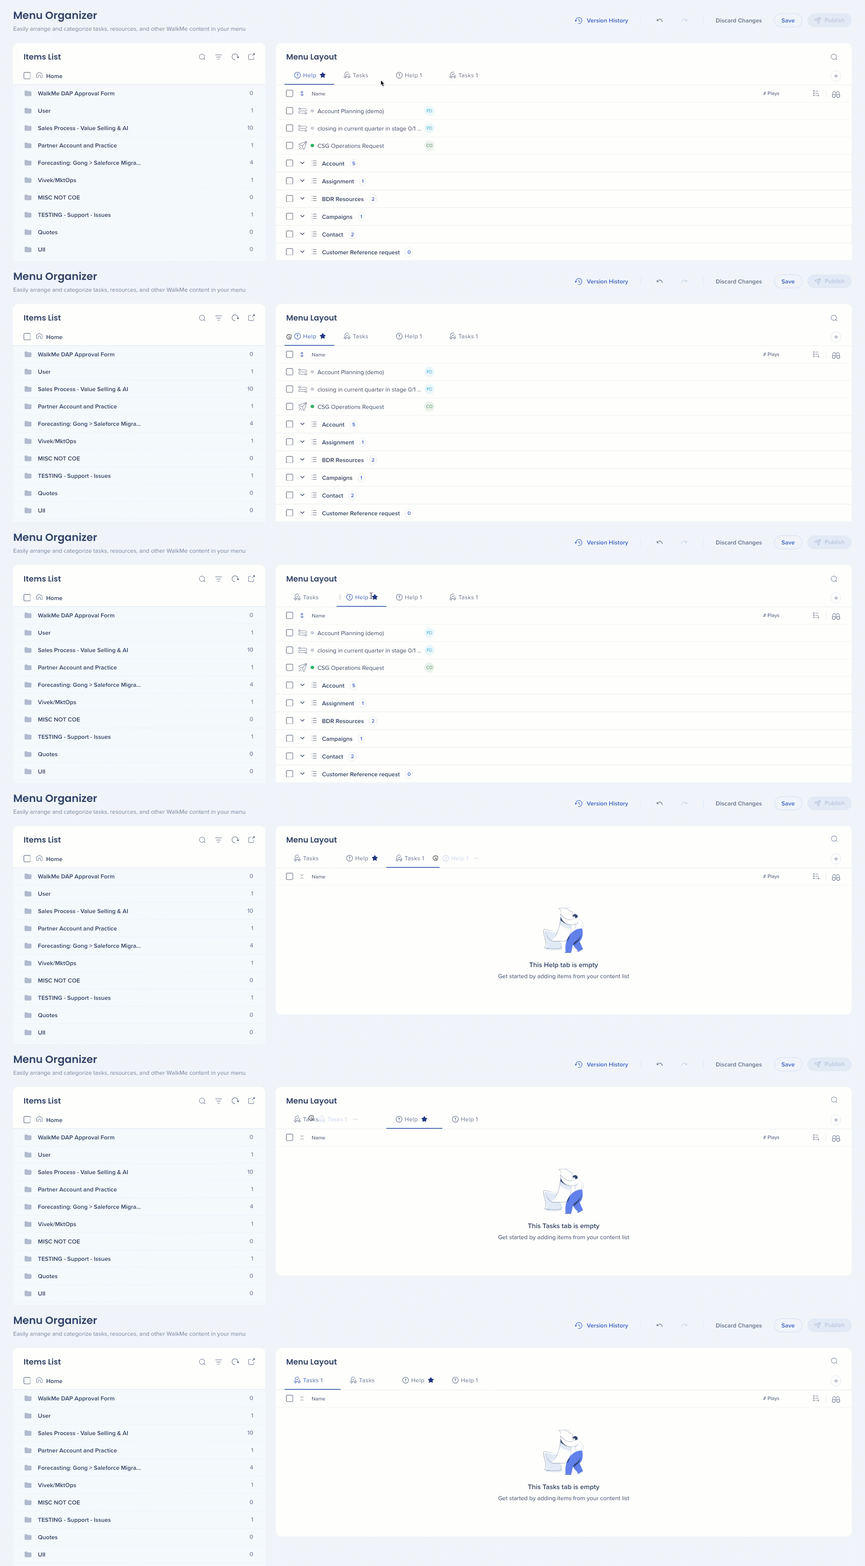
To reorder your tabs:
Hover over the selected tab
Click on the 6 dots—the cursor will change to hand
Holding it will allow you to drag and drop the tab to the right place
Failing to reorder will re-instate the tab in it's original place
Set tab as default
Pro menu tab management
This capability is available for Pro menu type only.
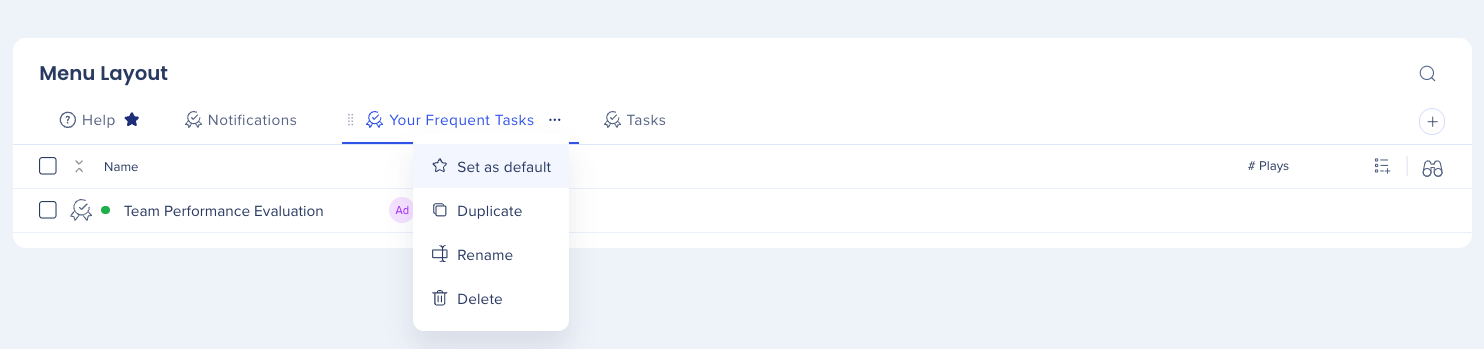
You can set a tab as default while keeping it in the same location. The end user will see the default tab as active tab by default in their menu. To set a tab as default:
Hover over the tab
Click on the Options menu
Select Set as default
This action will:
Add a “star” icon next to the tab
Delete tab
To delete a tab:
Hover over the tab
Click on the Options menu
Select Delete
A confirmation modal will show—confirm you want to delete the tab
Note
If the deleted tab was set as default, then the 1st tab will become the default one.
Categories and sub-categories
Pro menu tab management
This capability is available for Pro menu type only.
Menu supports up to 3 levels of category layer: Category → Sub-category → Sub-sub-category.
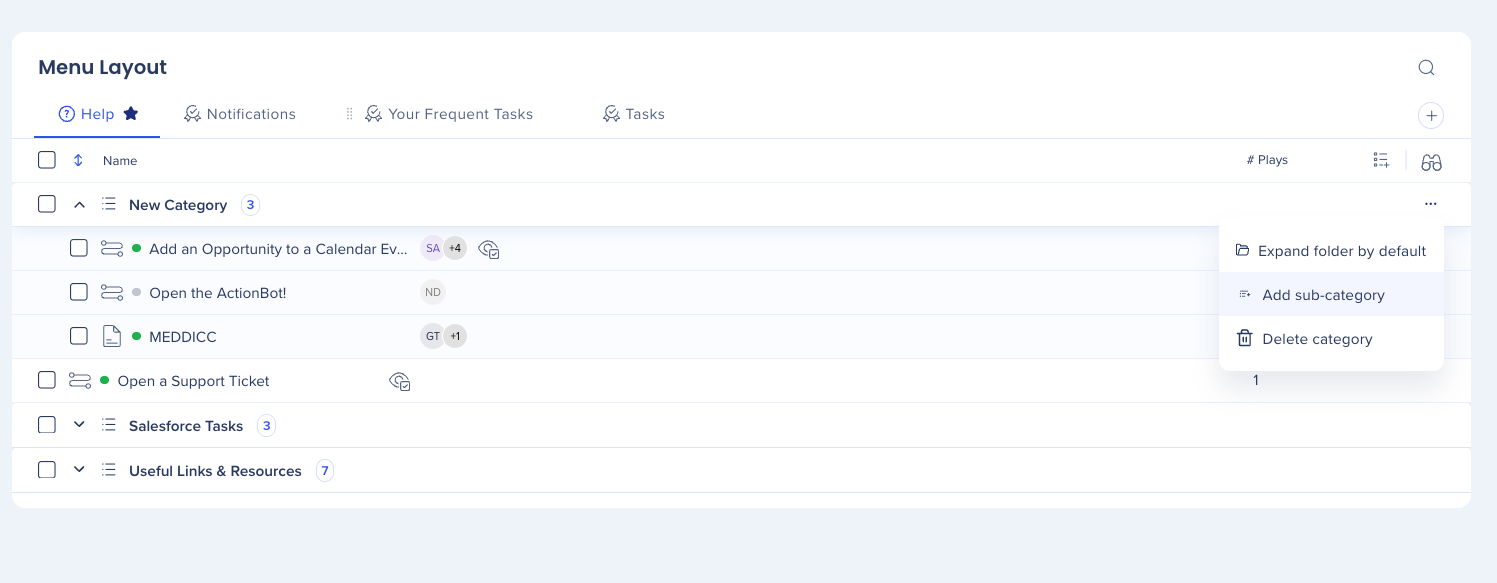
To add a sub-category:
Click on the Options menu icon on the category level
Select Add sub-category
Add items
To add items into a sub-category:
Hover over the item
Click on the 6 dots—the cursor will change to hand
Holding it will allow you to drag and drop the tab to the right place
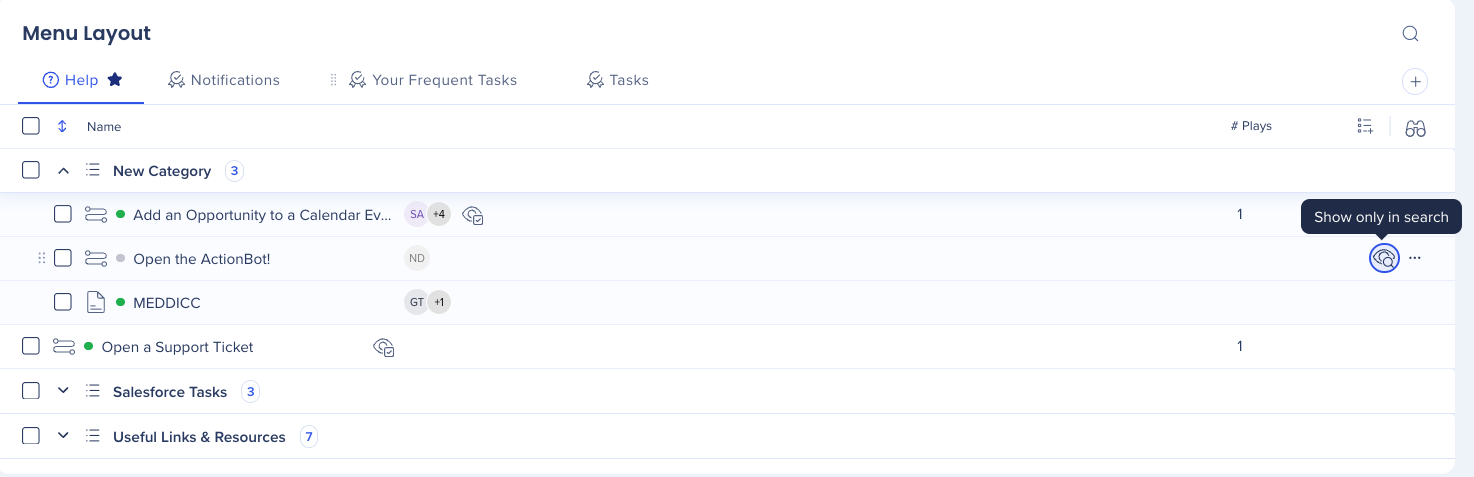
Hide item from menu
You can hide an item from the menu if you don't want your users to see it. It will still be available via search.
To hide an item:
Click on the eye icon—the eye will close to indicate the item isn't shown in the menu
Click on the eye icon again to bring it back
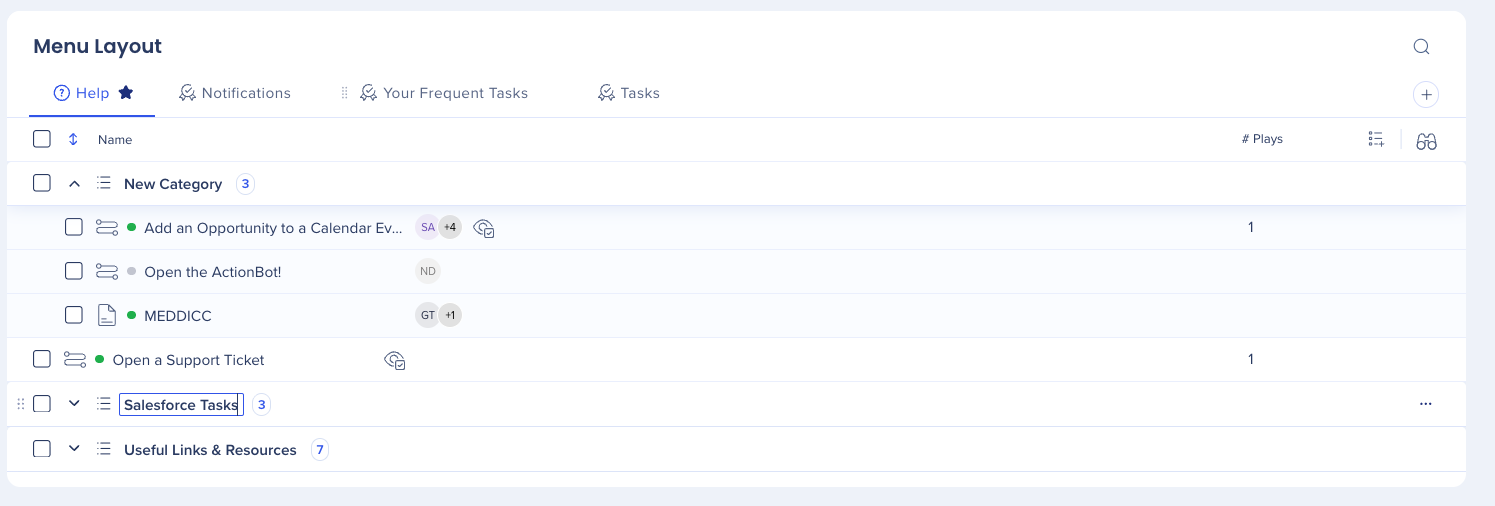
Rename category
To rename a category, click on the name field
Type in the new name
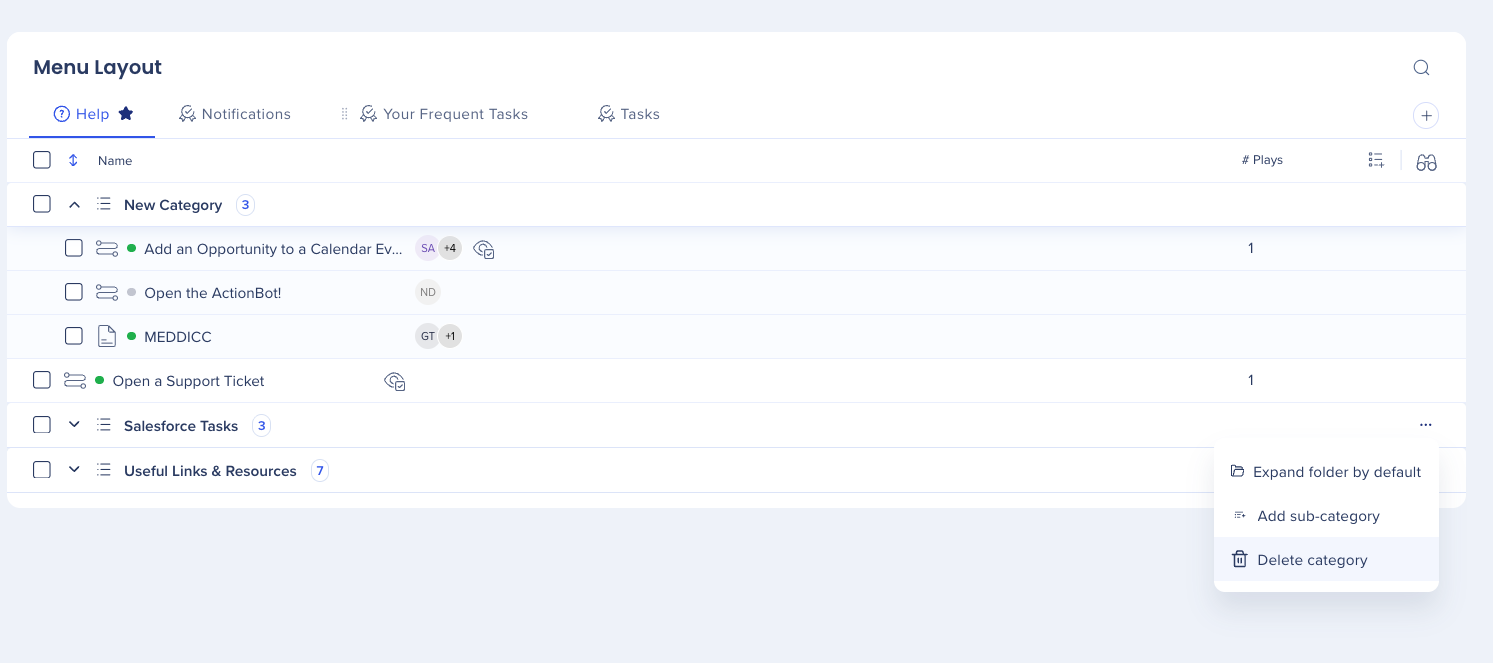
Delete category
To delete a category:
Click on the Options menu on the category level
Select Delete category
Note
If you proceed with this action, the category will be permanently deleted. You won't be able to restore it, only create a new one.
Remove item
To remove an item from your menu, click on the Remove icon
You'll be able to add this item again from your items list
Item settings
To access an item's settings, hover over the item and click the Options menu.
Available settings
Change display name: Rename how the item appears to end users in the menu, without changing the original item name in the editor
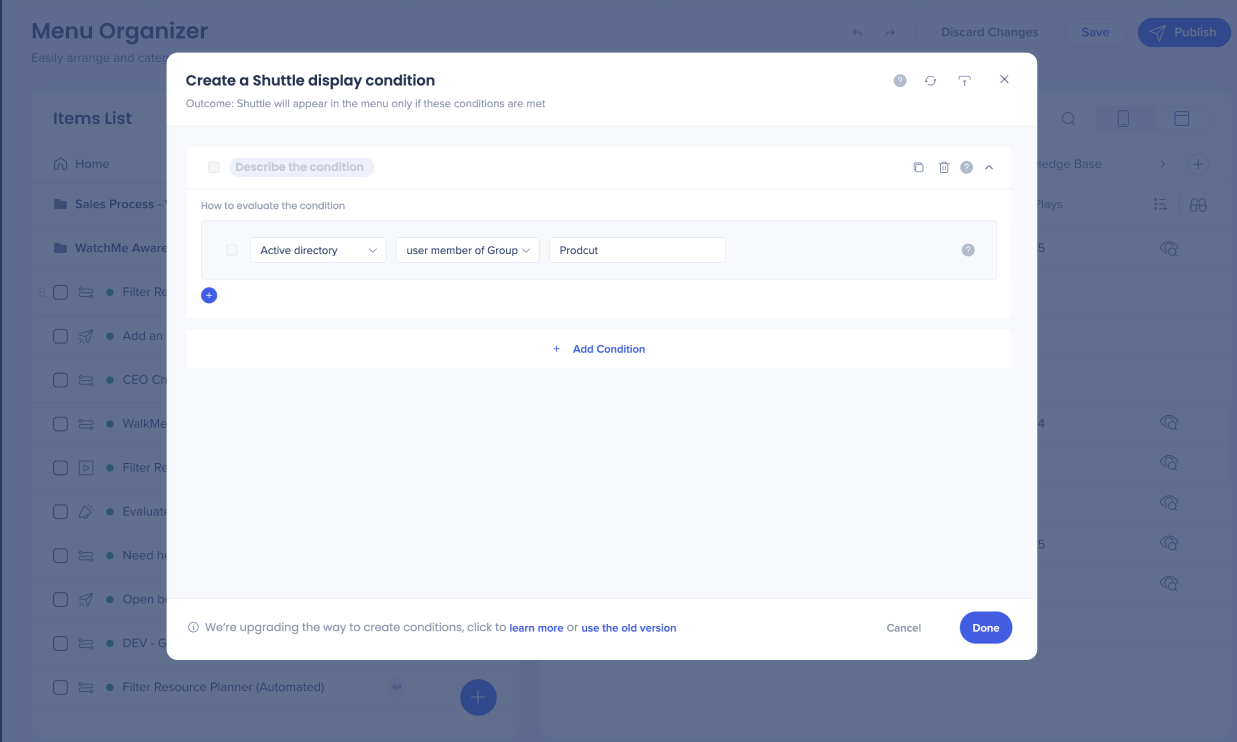
Set display conditions: Control when and to whom the item is visible based on specific conditions. Set your conditions in the condition builder. Display conditions will apply to this item in the menu. If the item appears more than once, the same conditions will apply to all its appearances. To edit or delete existing conditions, click the Options menu on an item that already has conditions set
Prioritize in tab: Pin the item to the top of the tab so it's always visible to users without scrolling. Set conditions in the condition builder to control when the item is prioritized
Add to My Widgets page: Add up to two items in the desktop and mobile menu's My Widgets page for quick access
Add to sign-in page: Make the item visible on the sign-in page so users can access it before logging in
Remove item: Remove the item from the menu. The item will still be available in the left panel item list and can be re-added at any time
Adding conditions is required for Set display conditions and Prioritize in tab.
Additional Features
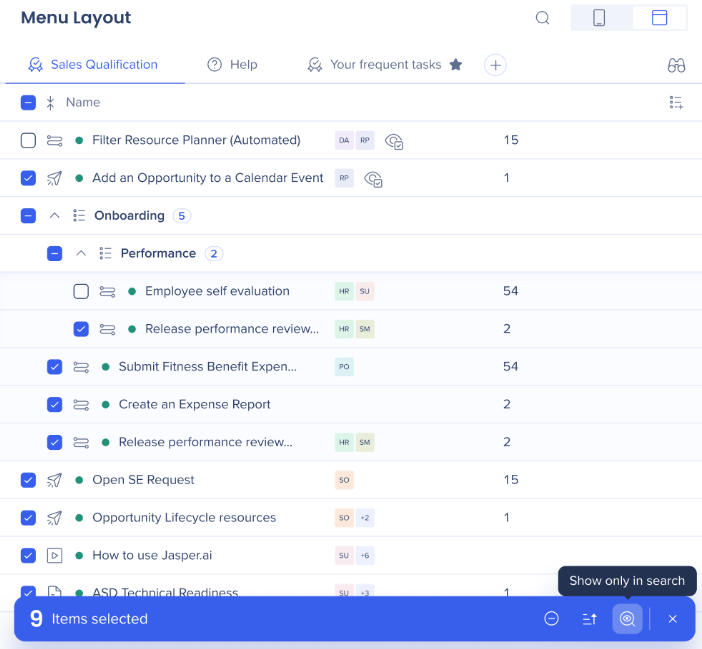
Bulk actions
Multi-select items in the Menu Organizer for applying bulk actions across multiple items.
Select all the items you want to perform a bulk action on
Select a bulk actions:
Removeitems: Remove selected items from the menu
Assign segments: Apply segments to all selected items at once
Show only in search: Hides selected items from the menu view; they remain accessible via search only
Show only in tab: Moves selected items back into the menu tab view if they were previously marked as Show only in search
Prioritize in tab: Pins selected items to the top of the tab so they're always visible to users without scrolling
Version history
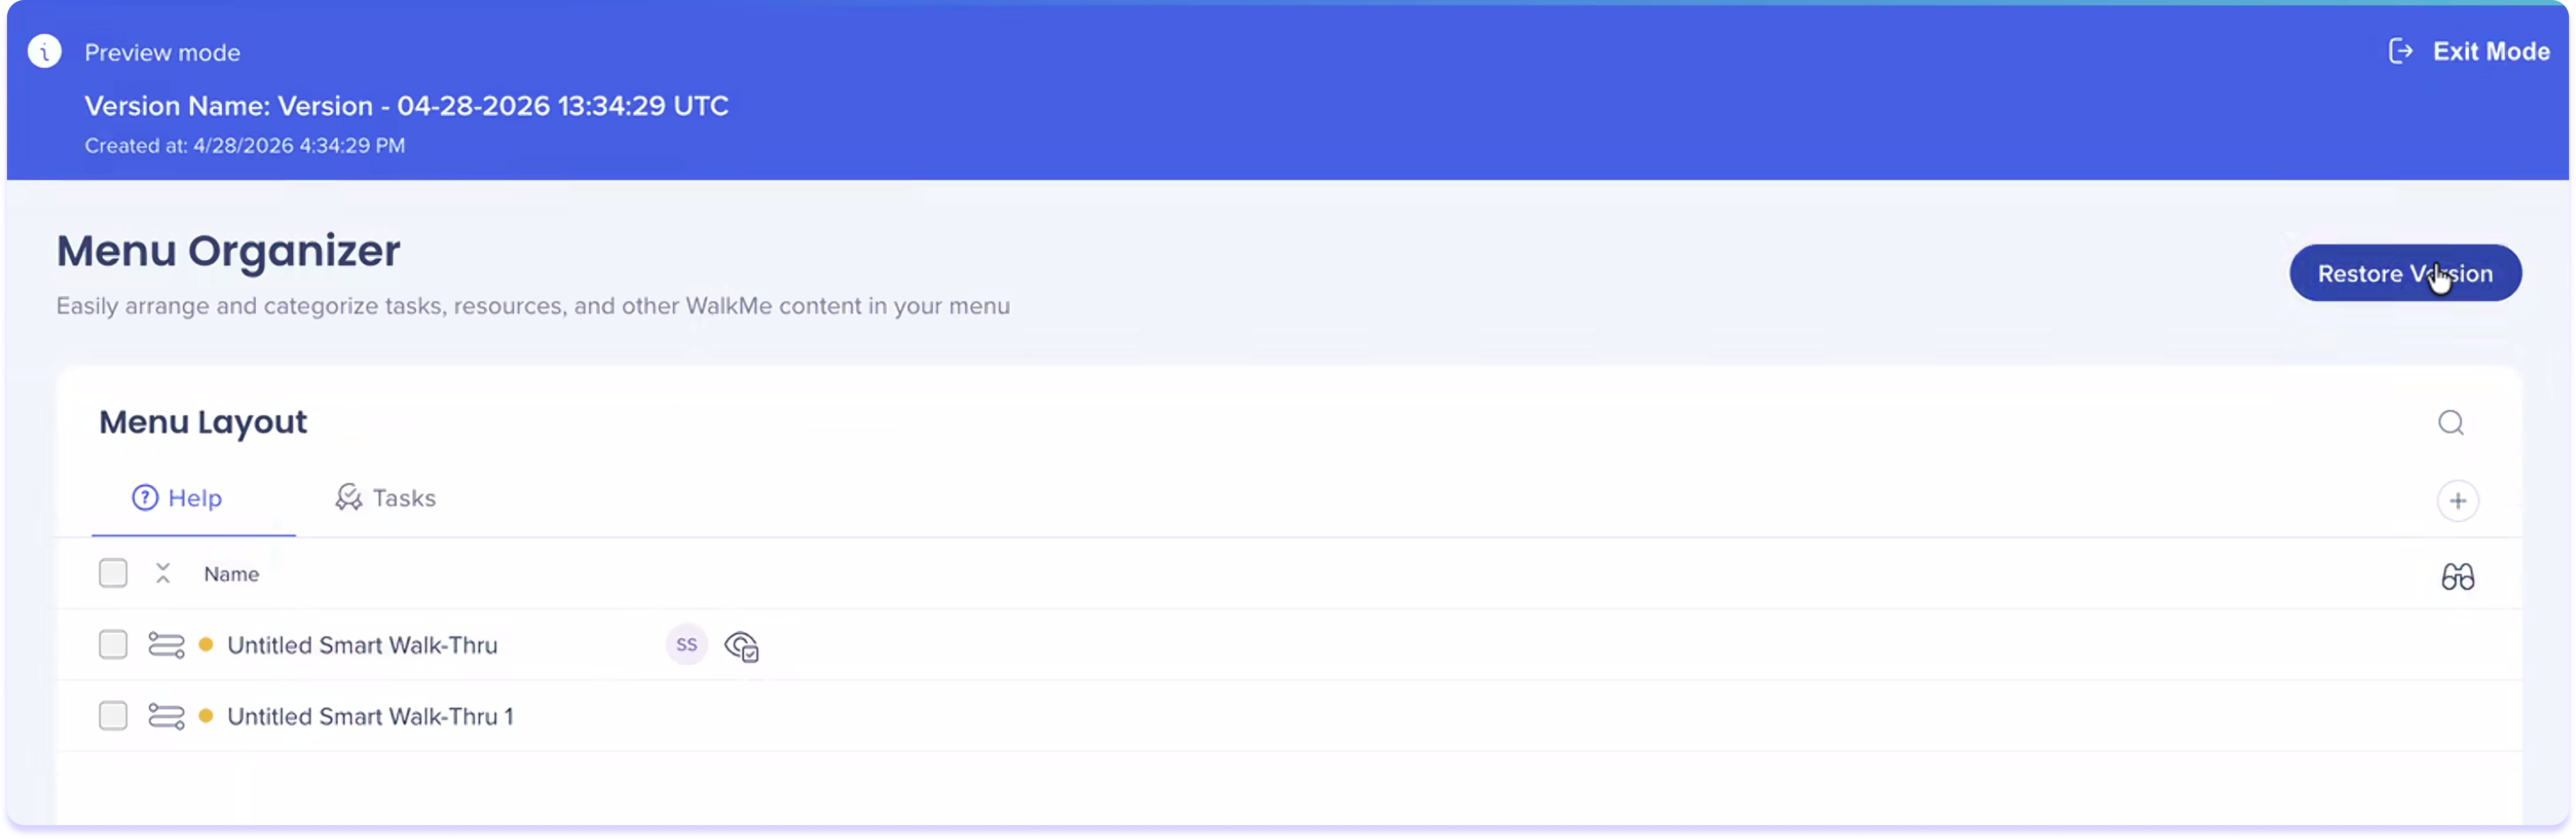
The Version History feature lets you preview previous versions of the WalkMe Menu before deciding to publish or revert changes.
How to use:
Click Version History in the Menu Organizer header bar
Select the version you want to preview
Browse the menu layout as it appeared in that version
To restore that version, click Restore Version
To exit without making changes, click Exit Mode
Note
Version history is view-only, no edits can be made while in preview mode.
Technical Notes
The Menu Organizer is available in English, Japanese, French, German, and Spanish
The Task tab in the menu only supports onboarding task items
Onboarding task items include: Smart Walk-Thrus and resources
Desktop/Mobile systems can also create an onboarding task from a shuttle
Item names will be visible to your menu users, keep this in mind when creating your WalkMe content
Up to 9 tabs in total can be added (5 Help, 4 Tasks) for Pro menu type
One additional tab can be added for other menu types (maximum is 3 tabs)
When using screens with a minimum width of 1600 pixels and a zoom level greater than 100%, the container holding the icons on the right side of the menu organizer (Search, Add category) retains its original dimensions. The user interface will appear cut off, compromising the visibility of some of the icons. This kind of zoom responsiveness is planned to be supported in the future.
Known Issues
Menu search doesn't return correct results
For example, searching "item add" does not return "add item" in the results, or searching "add card" will return the correct item in the search but also shows other items from the rest of the list