
ActionBot Conversation Steps

Brief Overview
This article is a comprehensive guide on how to effectively utilize all step types when constructing an ActionBot conversation.
An ActionBot conversation usually includes a series of steps that are designed to guide the user through a particular process. While it can consist of just one step, typically it involves multiple steps that work together to create a seamless flow.
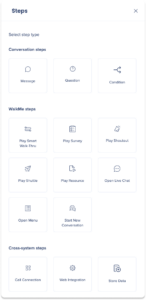
The steps are categorized into three main types:
- Conversation steps: These steps consist of three main types: message, question, and condition steps. Together, these steps enable the ActionBot to guide users through a series of interactions to complete a task or answer a question
- WalkMe steps: These steps provide a seamless way for users to trigger WalkMe items while in conversation with the bot. This allows for automation, redirection, or access to additional resources
- Cross-system steps: These steps use end-user input to automate tasks and perform actions, allowing for instant background completion without leaving the bot interface
By the end of this article, you will have a thorough understanding of each step type and how to implement them in your ActionBot Conversation.
Conversation Steps
Message step
Messages are written texts that the bot can display to your users during a conversation. These messages serve various purposes, such as providing links, explanations, or answers to questions that may be helpful to your users.
Message name
Enter a name for your message in the Message name field. The message name will only appear internally in the conversation diagram.
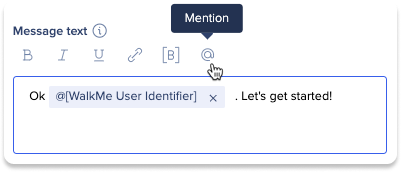
Message text
Type your message that will appear to users.
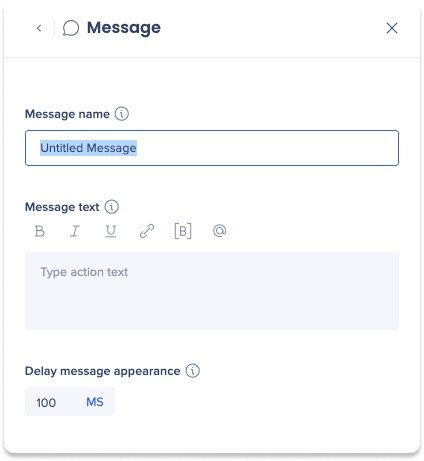
Delay message appearance
Adjust the amount of time that your conversation will be paused before playing the message.
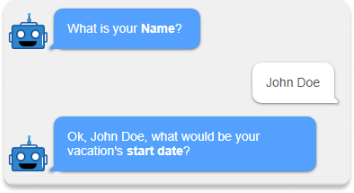
Question step
A question is written text that the bot can display to your users and requires the bot to wait for the user's response before moving on to the next step in the conversation. These steps typically utilize natural language processing (NLP) to understand and interpret the user's answer.
The Question step has three tabs:
- Settings
- Suggestions
- Answer validations
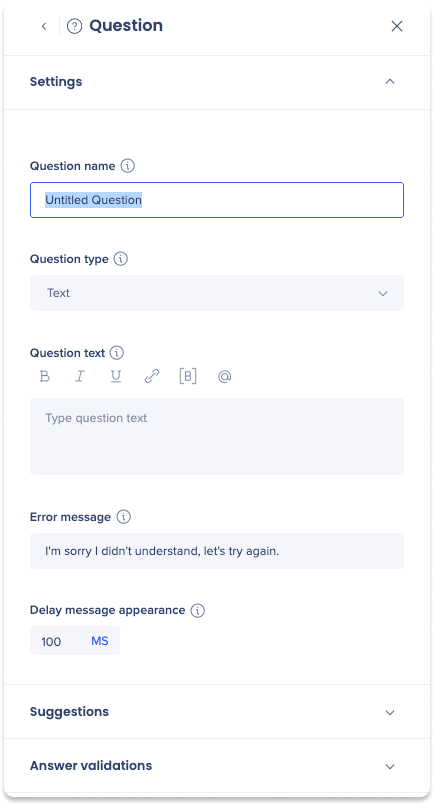
Settings
Question name
Enter a name for your question in the Question name field. The question name will only appear internally in the conversation diagram.
Question Type
A question type refers to the format in which a question is asked to elicit a specific type of response.
- Each question type comes with built-in validations to ensure accurate responses
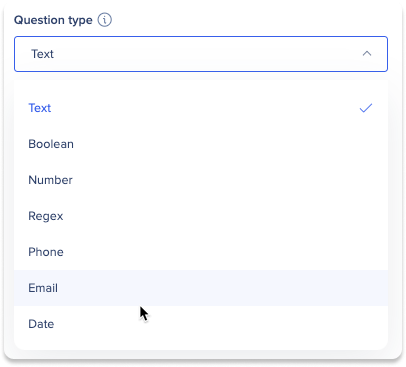
To select the appropriate question type, consider the desired answer format and choose from the following types below.
Question text
Type your question that will appear to users.
- You can use Bold, Italic, Underline, or connect a link as part of the message in order to emphasize information or make it clearer to your users
- You can separate lines and it will be reflected to the user
Error message
Type your message that appears to users when the bot couldn't extract an answer.
Delay message appearance
Adjust the amount of time that your conversation will be paused before playing the question.
Question Types
1. Text
Prompts the user to enter a response in a typed answer.
- It allows for open-ended responses and enables users to provide more information
- No NLP is used
- The bot will record the user's complete input and store it in a log
- The bot can extract the user's input and use it in a follow up question
2. Boolean
Prompts the user for a "Yes" or "No" answer.
- The boolean question type allows for clear and efficient branching of the conversation based on the answer provided
- The user can respond with open text that conveys a “positive” or “negative” intent and/or you can set suggested answers for your user to choose from (see Suggestions below)
- The bot uses NLP to interpret whether the user's response is “positive” or “negative”. It then assigns a “true” / “false” value as the extracted answer
- Example for a "positive" intent is "Sure" → Extracted value would be "true"
- Examples for “negative” intent is "Nope" → Extracted value would be "false"
- For Boolean question types, you'll have to set an answer validation (see Answer validations below)
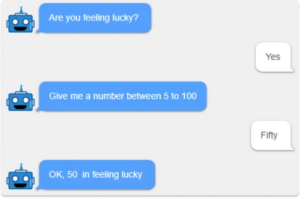
3. Number
Prompts the user to enter a numerical answer.
- Used to ask for a numerical input from the user, such as a quantity or a price
- Uses NLP
- If the user's input is “Five hundred dollar“ the extracted value would be 500
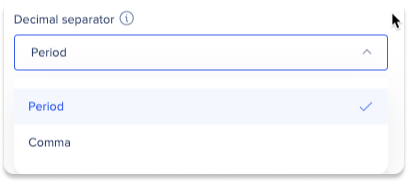
- When you select Number as your question type, a new field will open asking you to select a decimal separator
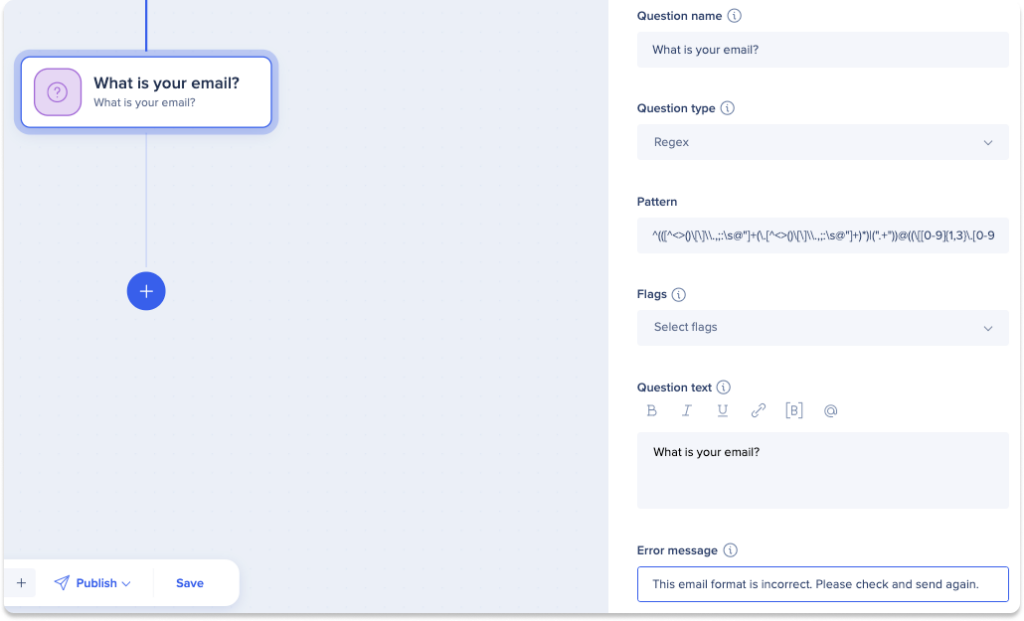
4. RegEx (regular expression)
Prompts the user to input any type of response. Then, with the assistance of RegEx fields, the bot will verify the accuracy of the response provided before continuing.
- This feature is beneficial for ensuring that the user inputs details correctly
- Regex is especially useful inputs that follow a consistent format even with minor variations, such as emails, phone numbers, flight numbers
- No NLP is used
- When you select RegEx as the question type, two new fields will open:
- Pattern: Enter the RegEx expression in the patten field
- Flags: Regex flags are special characters used to modify the regex pattern. Select which flags you'd like to added to your pattern:
- g (global match): finds all matches rather than stopping after the first match
- i (ignore case): if u flag is also enabled, use unicode case folding
- m (multiline): treats beginning and end characters (^ and $) as working over multiple lines (i.e., match the beginning or end of each line (delimited by \n or \r), not only the very beginning or end of the whole input string)
- u (unicode): treats the pattern as a sequence of unicode code points
- y (sticky): matches only from the index indicated by the last index property of this regular expression in the target string (and does not attempt to match from any later indexes)
5. Phone
Prompts the user to enter a phone number.
- The bot use NLP to identify and extract any user response that resembles a phone number
6. Email
Prompts the user to enter an email.
- The bot use NLP to identify and extract any user response that resembles an email
7. Date
Prompts the user to enter a date/day.
- When you select Date as your question type, a new field will open asking you to select a Format
- The bot uses NLP to extract a date from the user's response and then will respond with the date in the same format as defined as the Format
- The date can vary between different input types such as "Tomorrow," "Next week," and 1.2, and or 1-9-1990
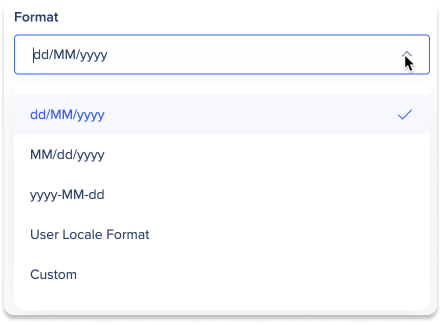
- Users Locale Format: The computer's date format using user locale
- Custom Date Format: A custom format set by the builder
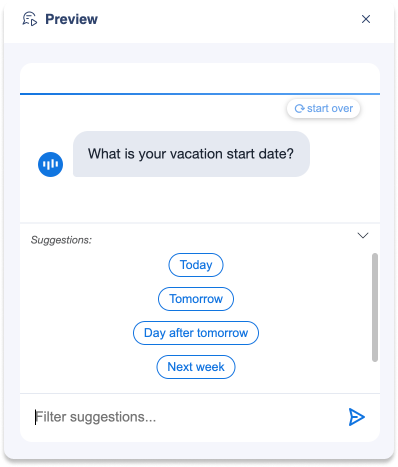
- When you select Date as your question type, a new toggle will appear - Display date picker
- The bot will display a list of date options for the user to choose from
- You can create suggestions in the Suggestions tab below

8. Choice
Prompts the user to respond with only specific options. The options are pre-determined by creating Suggestions (see below) that are are the only correct user responses.
- If a user types their response, the bot will use keywords from the Suggestions to validate that it matches the one of the suggestions
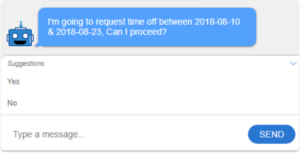
Suggestions
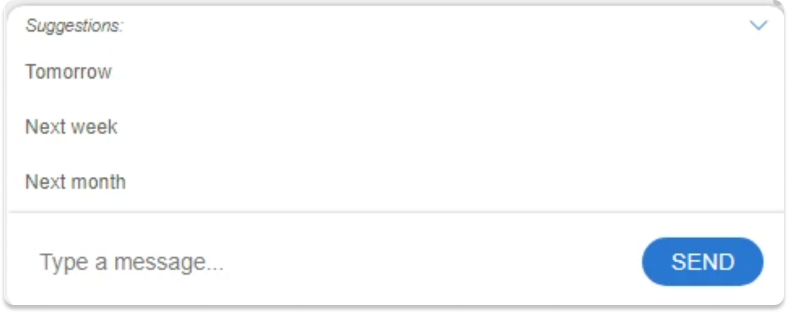
Depending on your question type, you may was to present your user with a list of pre-built suggested answers for quick reply. These suggestions will automatically be displayed to your users following a question.
- You can enter as many suggestions as you like
- Up to 4 suggestions will be visible at a time
- Users can scroll to see more or type to filter the suggestions
How to use
- Click + Add new suggestion
- You can type your input or click Variable to select a specific value
- Click + Add new suggestion to continue adding more
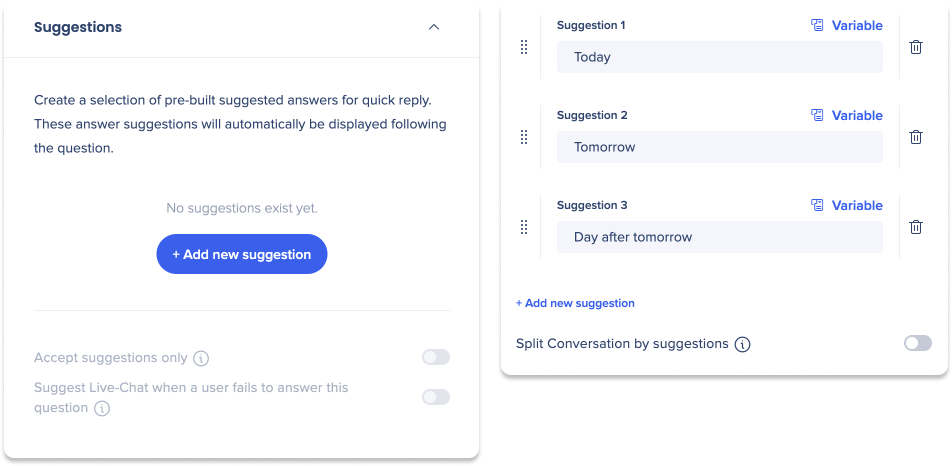
Split Conversation by suggestions: Once you've added at least two suggestions, you can enable this toggle to branch the conversation based on the suggestions
- This will limit the conversation to accept suggestions only, user will not be able to type an answers for this question
Accept suggestions only: Choosing this option will disable your users' ability to type an answer to the Bot and they will only be allowed to choose from the list of suggestions in order to reply to the Bot's question.
Suggest Live-Chat when a user fails to answer this question: If the user was unable to answer the question, enabling this option will give the users an option to open a Live-Chat to that connects with your customer support to provide real-time assistance.
Live chat has to be enabled in the editor for this option to be available.
Answer Validations
Adding validations helps ensure that the user doesn't enter incorrect information that might cause issues with an automation process, requiring correction later on.
Validations uses a condition builder to define the rules that data must meet to be considered valid.
- If all the validations have passed (the conditions are met) it will proceed to the next step
- If at least one validation fails (one of the conditions didn't met) it will present an error message assigned to the validation and the bot will wait for a different answer from the user
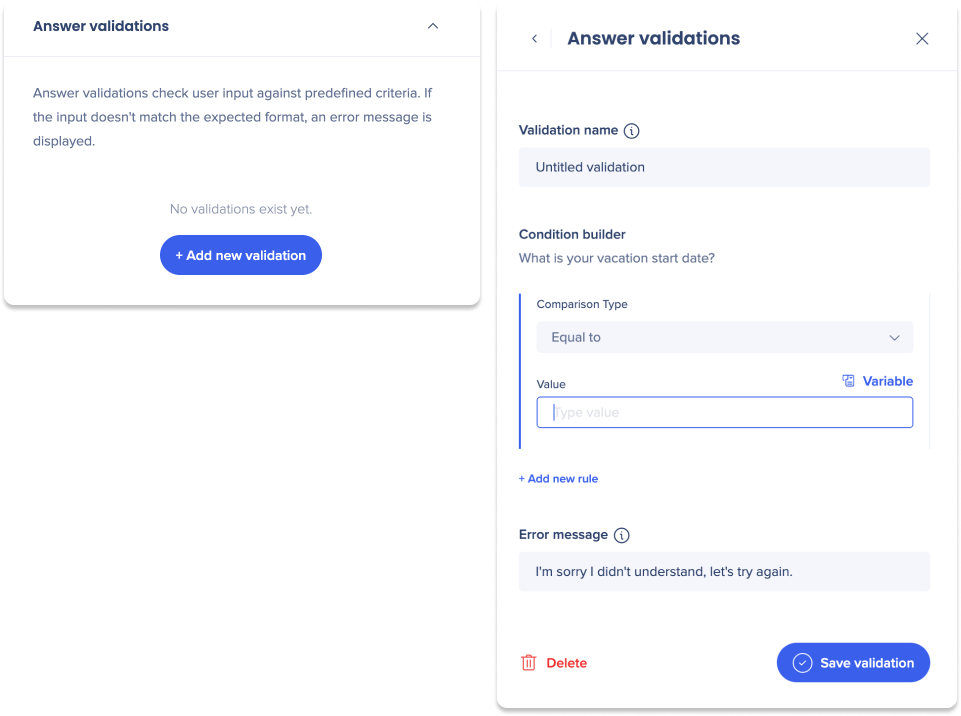
How to use
- Enter a Validation name
- The name will only appear internally
- Select a Comparison Type
- Comparison Types are all the different logical rules you can use to check an answer
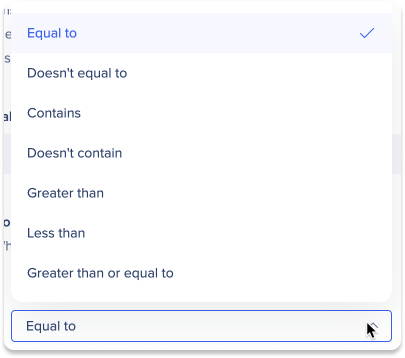
- Comparison Types are all the different logical rules you can use to check an answer
- Enter a value
- You can type a value or click Variable to select a specific value
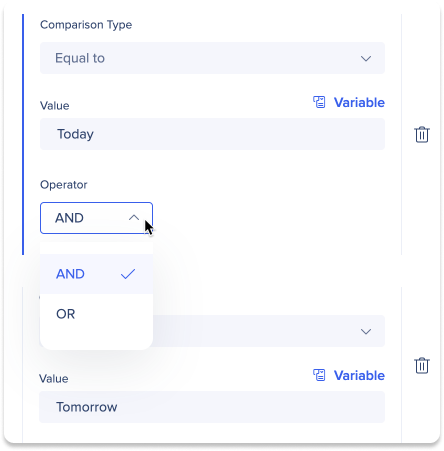
- Click + Add new rule to add additional conditions
- Once you've added a new rule, you must select an Operator
- AND: The user's answer must contain both values
- OR: The user's answer must contain at least one of the values
- Enter an Error Message
- If the validation didn't meet the conditions, this error message will be displayed to the user
- When writing your message, keep in mind that it should help your user to correct their answer or better understand what is expected
- Click Save Validation
Condition Step
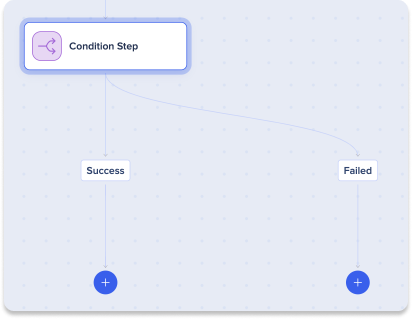
A condition step splits the conversation based on the user's response to a question or a predefined variable. It will direct the conversation to one of two branches according to a condition built:
- Success: If the user's response followed condition rules, they will proceed to the next step in this Success branch
- Failed: If the user's response did not follow condition rules, they will proceed to the next step in the Failed branch
A condition step is used after a question step.
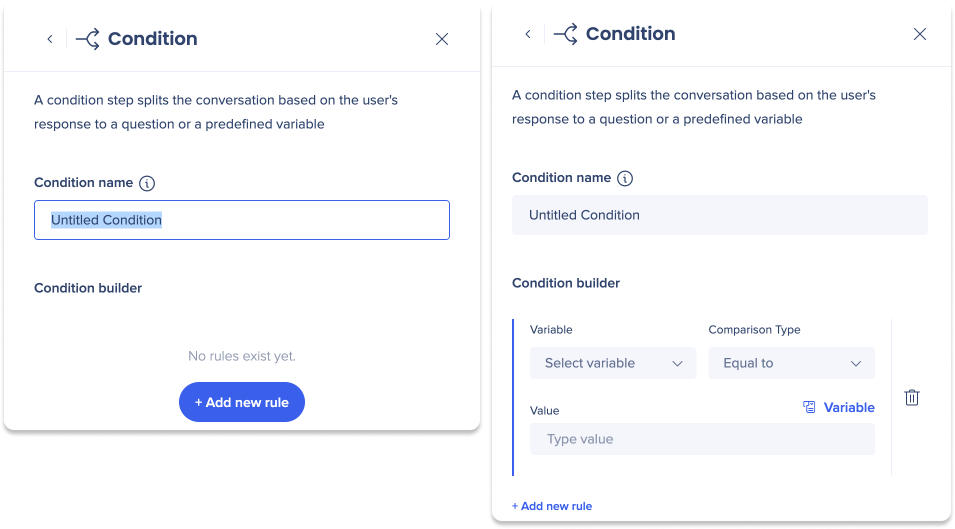
Condition name
Enter a name for your condition in the Condition name field. The condition name will only appear internally in the conversation diagram.
How to use
Using the Condition Builder, create rules to branch the conversation:
- Click Add new rule
- Select a Variable
- Select a Comparison Type
- Enter a Value
- You can type a value or click Variable to select a specific value
WalkMe Steps
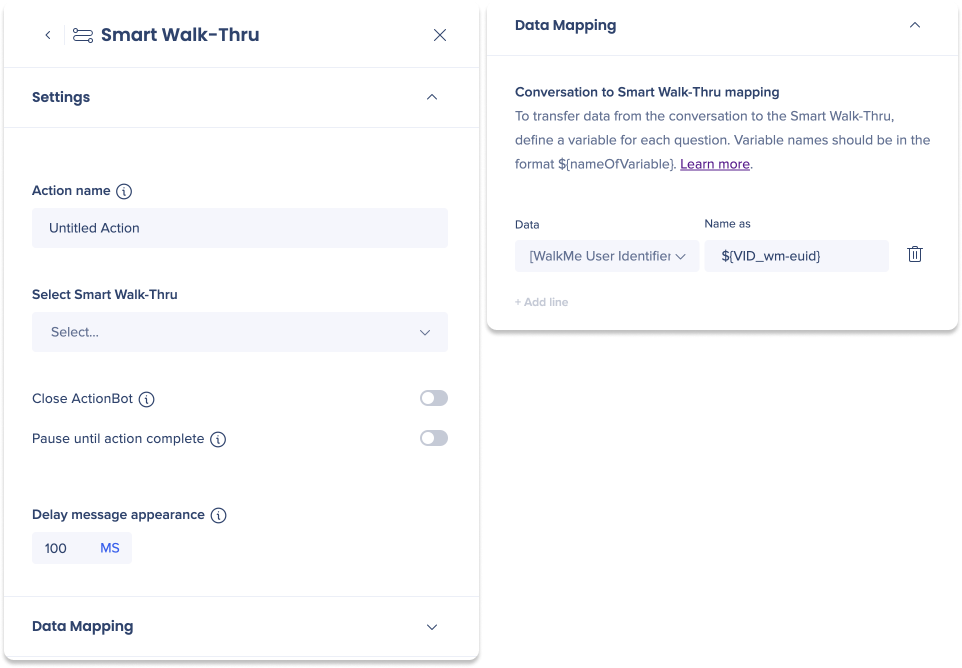
Play Smart Walk-Thru
The Play Smart Walk-Thru step can be used to automate or guide the user through a process, redirect the user to a different location, or trigger an alternative resource for the user.
Settings
Action name
Enter a name for your action in the Action name field. The action name will only appear internally in the conversation diagram.
Select Smart Walk-Thru
Select a Smart Walk-Thru from the dropdown that you'd like to play for users.
Close ActionBot
If the playing the Smart Walk-Thru is the last step in your conversation, you can enable this toggle to automatically close the bot.
Pause until action complete
If you'd like to wait until the user completes the Smart Walk-Thru to continue the Conversation, you can enable this toggle to pause the conversation until the action is complete.
Delay message appearance
Adjust the amount of time that your conversation will be paused before playing this step.
Data Mapping
Conversation to Smart Walk-Thru mapping is used to automatically transfer data from the conversation to the Smart Walk-Thru, which helps to automate processes for users.
Data is mapped by selecting data from questions in the conversation that you've created. By selecting data and defining variables, the bot will extract the data to use in the SWT.
How to use
- Select data from the Data dropdown
- Enter a variable name in the Name as field for the data
- Click + Add line to include more data to map
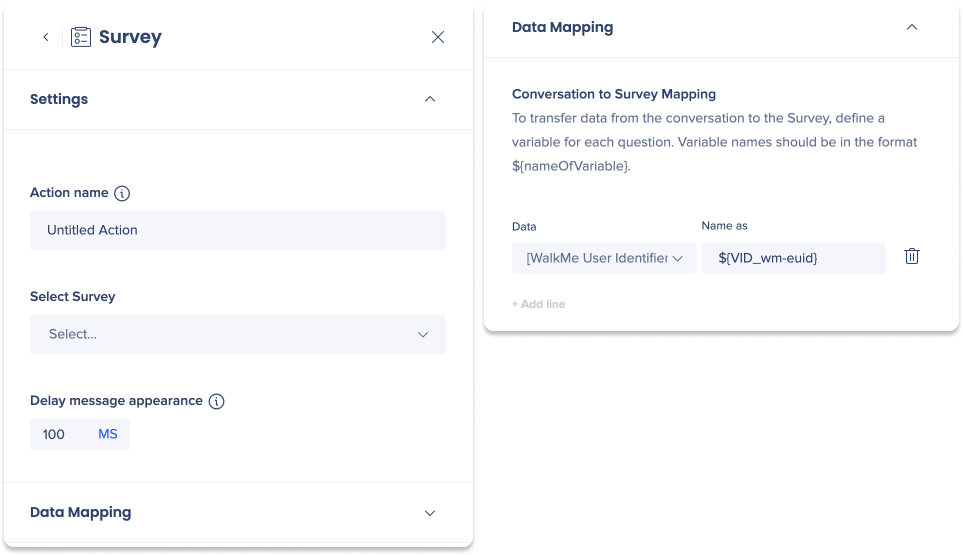
Play Survey
The Play Survey step can play a WalkMe Survey and can automate the process of collecting feedback.
Settings
Action name
Enter a name for your action in the Action name field. The action name will only appear internally in the conversation diagram.
Select Survey
Select a Survey from the dropdown that you'd like to play for users
Delay message appearance
Adjust the amount of time that your conversation will be paused before playing this step.
Data mapping
Conversation to Survey mapping is used to automatically transfer data from the conversation to the Survey, which helps to automate the processes for users.
Data is mapped by selecting data from questions in the conversation that you've created. By selecting data and defining variables, the bot will extract the data to use in the Survey.
How to use
- Select data from the Data dropdown
- Enter a variable name in the Name as field for the data
- Click + Add line to include more data to map
Play ShoutOut
The Play Survey step can play a WalkMe ShoutOut and automate information in the ShoutOut.

Settings
Action name
Enter a name for your action in the Action name field. The action name will only appear internally in the conversation diagram.
Select ShoutOut
Select a ShoutOut from the dropdown that you'd like to play for users.
Close ActionBot
If the playing the ShoutOut is the last step in your conversation, you can enable this toggle to automatically close the bot.
Pause until action complete
If you'd like to wait until the user performs a final action on the ShoutOut to continue the Conversation, you can enable this toggle to pause the conversation until the action is complete.
Delay message appearance
Adjust the amount of time that your conversation will be paused before playing this step.
Data mapping
Conversation to ShoutOut mapping is used to automatically transfer data from the conversation to the ShoutOut, which helps to automate the processes for users.
Data is mapped by selecting data from questions in the conversation that you've created. By selecting data and defining variables, the bot will extract the data to use in the ShoutOut.
How to use
- Select data from the Data dropdown
- Enter a variable name in the Name as field for the data
- Click + Add line to include more data to map
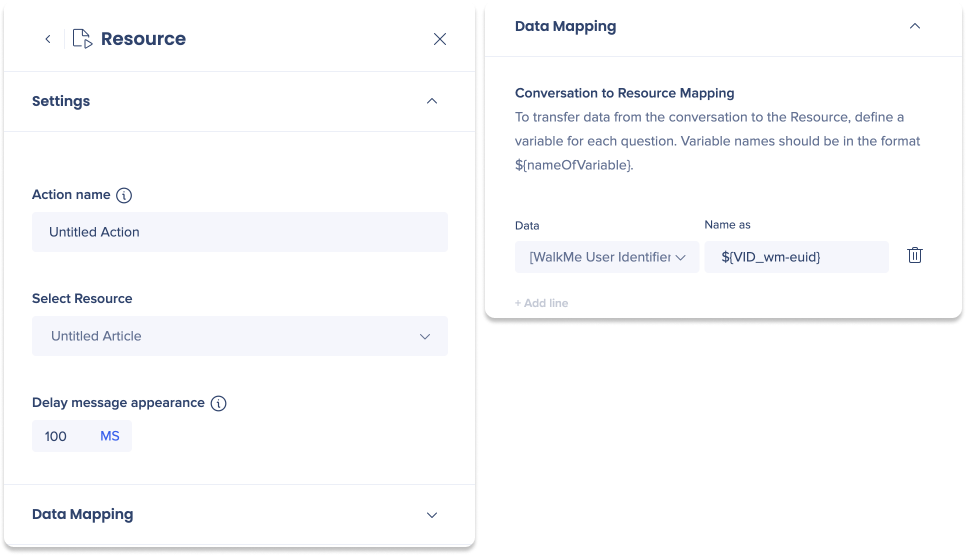
Play Resource
The Play Resource step can play a WalkMe Resource to redirect you and automate processes.
Settings
Action name
Enter a name for your action in the Action name field. The action name will only appear internally in the conversation diagram.
Select Resource
Select a Resource from the dropdown that you'd like to play for users
Delay message appearance
Adjust the amount of time that your conversation will be paused before playing this step.
Data mapping
Conversation to Resource mapping is used to automatically transfer data from the conversation to the Resource, which helps to automate the processes for users.
Data is mapped by selecting data from questions in the conversation that you've created. By selecting data and defining variables, the bot will extract the data to use in the Resource.
How to use
- Select data from the Data dropdown
- Enter a variable name in the Name as field for the data
- Click + Add line to include more data to map
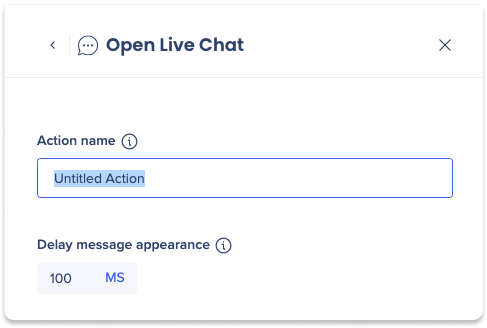
Open Live Chat
The Open Live Chat step will connect your users with your live support to provide real-time assistance. Live chat has to be enabled in the editor for this option to be available.
Action name
Enter a name for your action in the Action name field. The action name will only appear internally in the conversation diagram.
Delay message appearance
Adjust the amount of time that your conversation will be paused before playing this step.
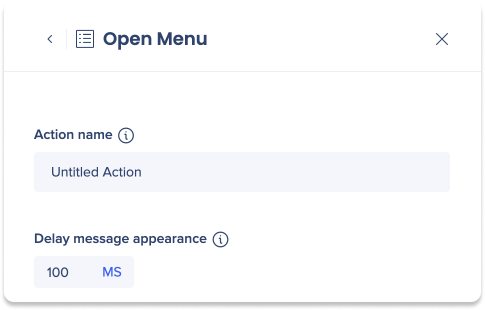
Open Menu
The Open Menu step will open WalkMe Enhanced Menu, which is a great way for users to connect with many resources and features all in one place.
Action name
Enter a name for your action in the Action name field. The action name will only appear internally in the conversation diagram.
Delay message appearance
Adjust the amount of time that your conversation will be paused before playing this step.
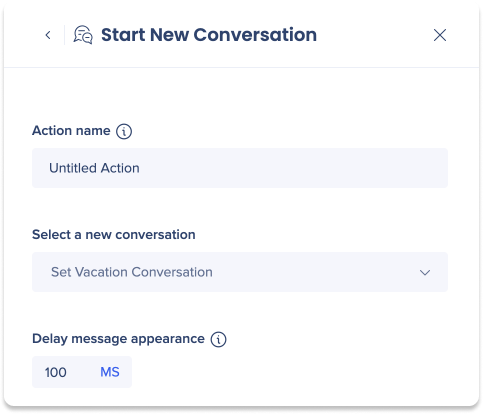
Start New Conversation
The Start New Conversation step will start a different conversation, allowing users to easily navigate through different topics without having to exit the bot.
Action name
Enter a name for your action in the Action name field. The action name will only appear internally in the conversation diagram.
Select a new conversation
Select a conversation from the dropdown that you'd like to play for users
Delay message appearance
Adjust the amount of time that your conversation will be paused before playing this step.
Cross-System Steps
Call Connection
The Call Connections step can call a predefined external API during a conversation. When calling an API ,the bot is able to send data to the API and to get data in the response.
The API could be used to send information to an external API (e.g. open an IT ticket), receive information from an external API (e.g. get a ticket number) or both.
Call Connection destinations are created on the Connections page in the console.
Settings

Action name
Enter a name for your action in the Action name field. The action name will only appear internally in the conversation diagram.
Select call connection destination
Select a destination from the dropdown.
Close ActionBot
If the Call Connection is the last step in your conversation, you can enable this toggle to automatically close the bot.
Stop Conversation upon failure
If the webhook API has a problem, turning on this toggle will stop the conversation.
Delay message appearance
Adjust the amount of time that your conversation will be paused before playing this step.
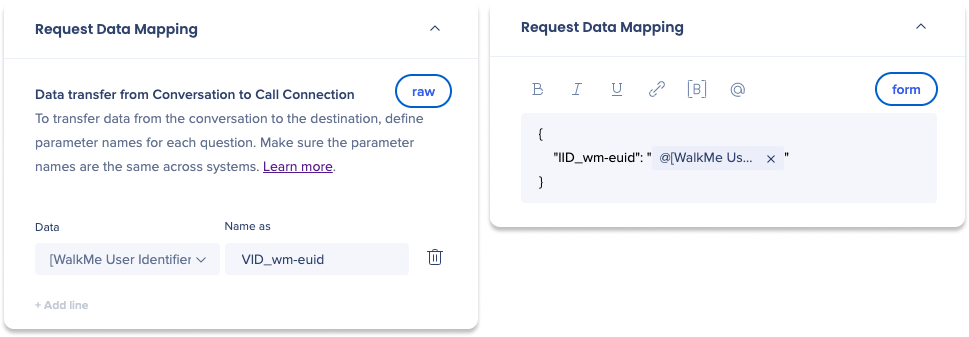
Request Data Mapping
Data transfer from Conversation to Call Connection is used to automatically transfer data from the conversation to the destination.
Data is mapped by selecting data from questions in the conversation that you've created. By selecting data and defining variables, the bot will extract the data to use in the destination.
How to use
- Select data from the Data dropdown
- Enter a variable name in the Name as field for the data
- Click + Add line to include more data to map
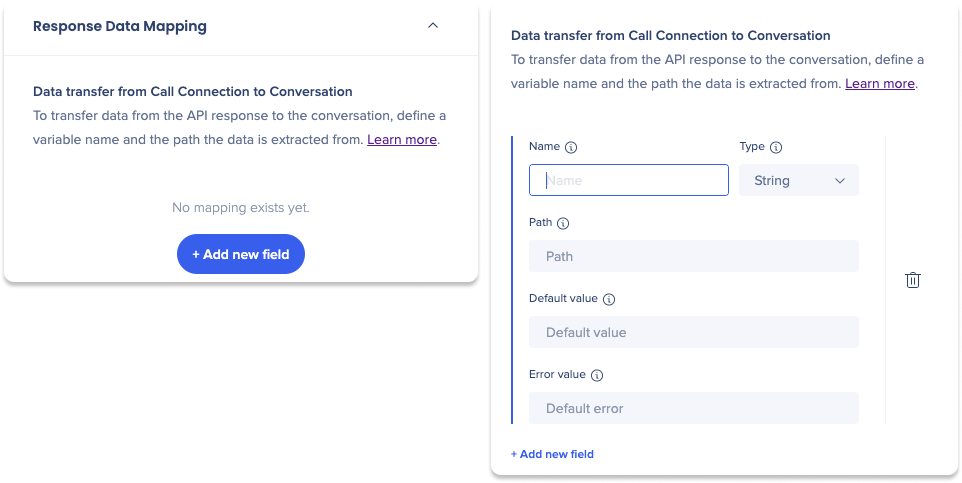
Response Data Mapping
Data transfer from Call Connection to Conversation is used to automatically transfer data from the destination to the conversation.
To transfer the data from the API response to the conversation, you'll need define how to extract data from the JSON file received by the api and assign it to new variables. It is important that proper path is defined so that the correct data will be extracted and assigned to the variable.
How to use
- Enter a variable name in the Name field for the data
- The variable name you choose will allow you to identify and use the variable later in the Conversation
- Select a data type for the variable in the Type dropdown
- Enter a Path
- Defines which data should be extracted from the response
- Enter a Default Value
- Defines which value should be used in case the parsing path does not contain a valid data
- Enter an Error Value
- Defines which value should be used in case the the call returns an error
- Click Add new field to include more variables to map
Web Integration
The Web Integration step enables a bot conversation's ending-action to connect to a separate Editor System to collect conversation parameters and then plays an automated WalkMe Item when redirected to a Web application.
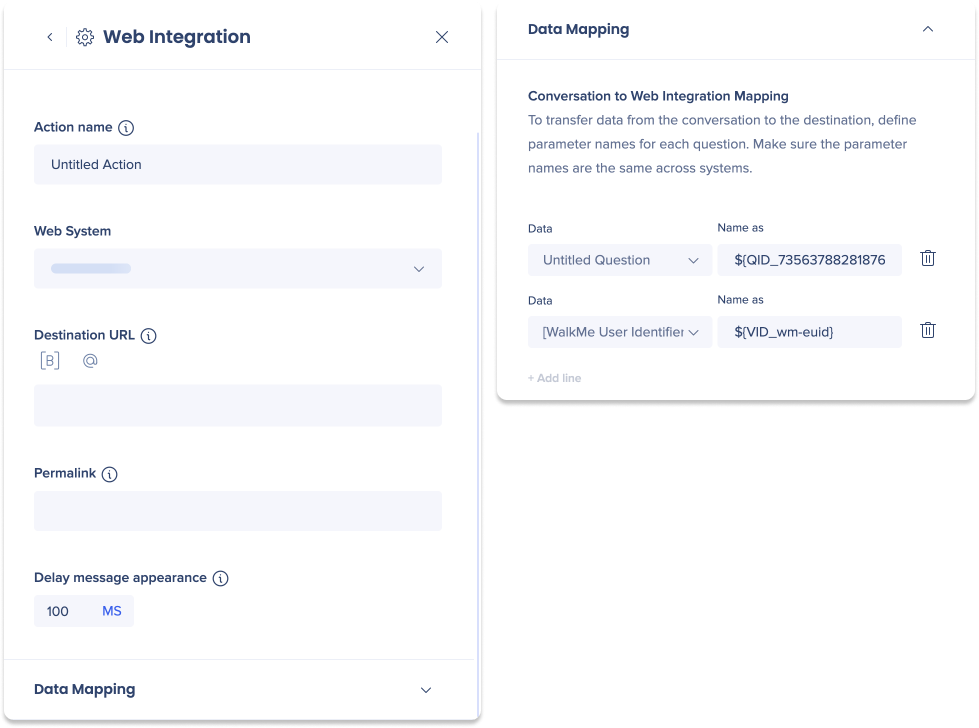
Settings
Action name
Enter a name for your action in the Action name field. The action name will only appear internally in the conversation diagram.
Select Web System
Select a Web System from the dropdown.
Destination URL
Enter the URL the Bot will navigate to when the user selects this action.
Permalink
Enter the permalink that determines which WalkMe item to play after the page redirects.
Delay message appearance
Adjust the amount of time that your conversation will be paused before playing this step.
Data Mapping
Conversation to Web Integration mapping is used to automatically transfer data from the conversation to the destination, which helps to automate the processes for users.
Data is mapped by selecting data from questions in the conversation that you've created. By selecting data and defining variables, the bot will extract the data to use in the Resource.
How to use
- Select data from the Data dropdown
- Enter a variable name in the Name as field for the data
- Click + Add line to include more data to map
Store Data
The Web Integration step enables the bot to collect and store data on another system.
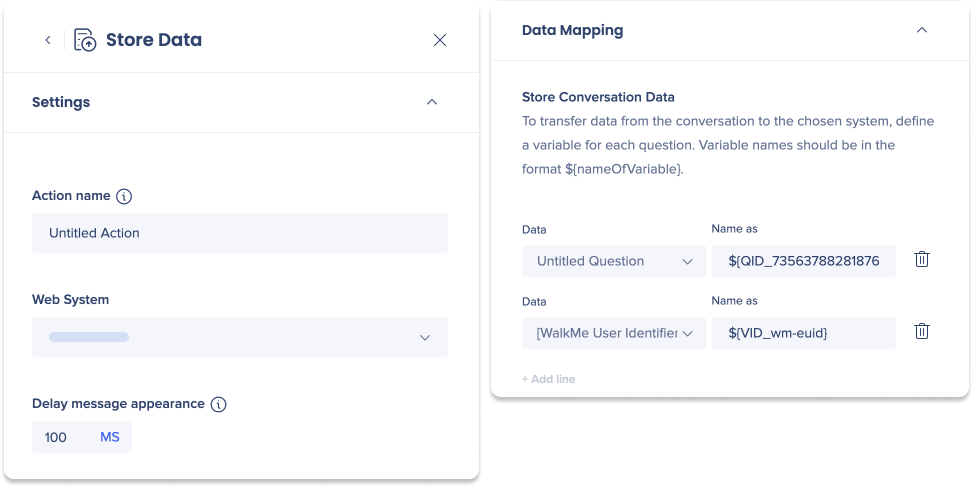
Settings
Action name
Enter a name for your action in the Action name field. The action name will only appear internally in the conversation diagram.
Select Web System
Select a Web System from the dropdown.
Delay message appearance
Adjust the amount of time that your conversation will be paused before playing this step.
Data Mapping
Conversation to Web Integration mapping is used to automatically transfer data from the conversation to the destination, which helps to automate the processes for users.
Data is mapped by selecting data from questions in the conversation that you've created. By selecting data and defining variables, the bot will extract the data to use in the Resource.
How to use
- Select data from the Data dropdown
- Enter a variable name in the Name as field for the data
- Click + Add line to include more data to map