Brief Overview
ActionBot's Web Integration step connects the end of an ActionBot conversation to another system, collecting information from the conversation and playing an automated WalkMe item on a web application. It's a way to automate your workflow and streamline your processes across systems.
This guide uses an Automated Smart Walk-Thru as the worked example, since it supports dynamic conversation parameters. The Web Integration step can redirect to any permalink-able WalkMe item.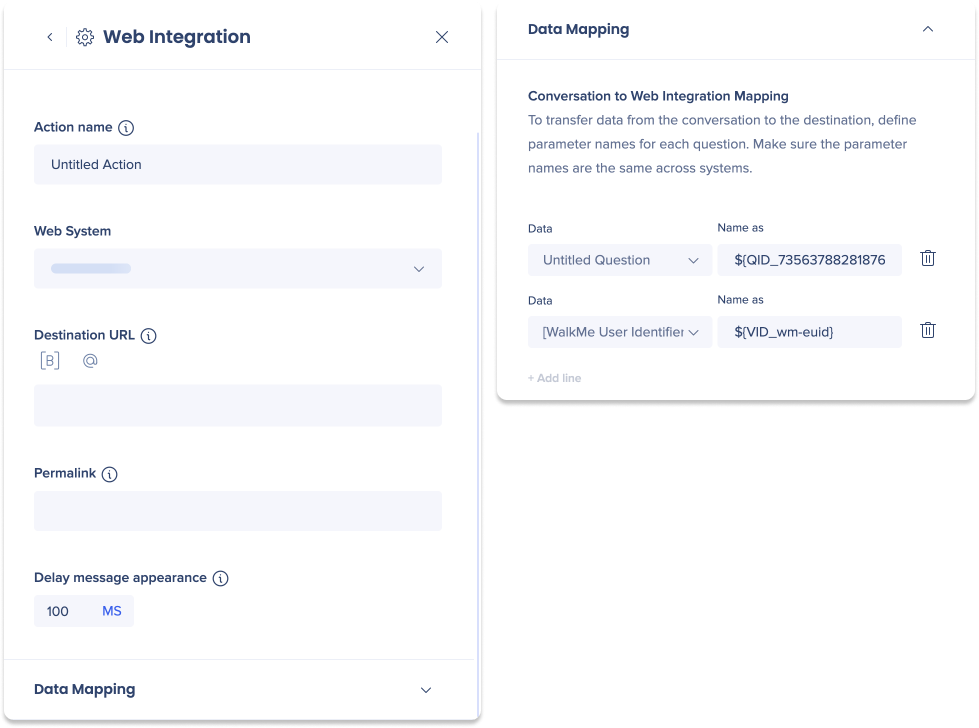
To learn more about what the WalkMe ActionBot is, check out this article:
What Is the WalkMe ActionBot?
How It Works
Setting up a Web Integration step involves two parts: configuring the WalkMe item you want to play in the editor, then connecting it to your ActionBot conversation in the console. The example below uses an Automated Smart Walk-Thru.
Automated Smart Walk-Thru Configuration example
First, within a Multi-System Account's Web Editor, you'll need to create an Automated Smart Walk-Thru (meaning it has Auto Steps) to connect to your ActionBot conversation. Learn how to create an Automated Smart Walk-Thru here.
During the process of creating the Automated Smart Walk-Thru, you will need to collect some data that will be required for configuring the ActionBot later. The following information will be needed:
1. Dynamic conversation parameters
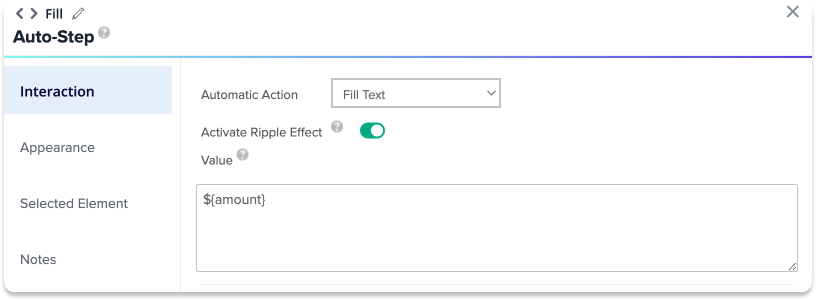
When you create an Automated Smart Walk-Thru, you'll use Auto Steps that include auto fill text. Sometimes, customers need to enter information into a text field, like their name or the amount of money they want to spend
Fill text allows you to set up "dynamic conversation parameters." This means you can create a parameter (like ${amount}) and ask the customer to enter the value for that parameter, instead of a specific value like $50. To do this, use this format:
-
- ${parameter_name}
- Example: ${amount}
- Copy and document each Automated Fill Step's dynamic conversation parameters, you'll need it later
2. Smart Walk-Thru permalink
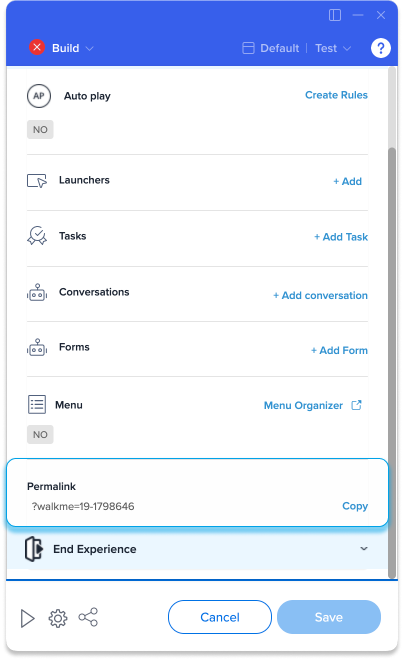
Once the automated Smart Walk-Thru is complete, copy and document its permalink, you'll need it later.
Where to find your SWT's permalink
- Select your Smart Walk-Thru in the WalkMe Editor
- Select the Initiators button atop the Smart Walk-Thru
- Scroll down to copy the permalink
Note: If you're redirecting to a different WalkMe item type, copy that item's permalink instead. Keep in mind that dynamic conversation parameters (above) rely on an Automated Smart Walk-Thru's Auto Steps.
3. Change the Storage Manager settings
To complete the configuration, the storage manager settings will need to be changed to cross-domain for conversation and data transfer systems. Reach out to your CSM to complete this step.
Once this step is completed, publish your WalkMe item to the same environment as the menu.
ActionBot Configuration
- In the Console, select the Content category
- Select the ActionBot app
- Select the Conversations page
- Open an existing conversation or create a new one
- Note: The desktop and mobile menu may ONLY contain one ActionBot with multiple Conversations
- Add Conversation Questions as needed
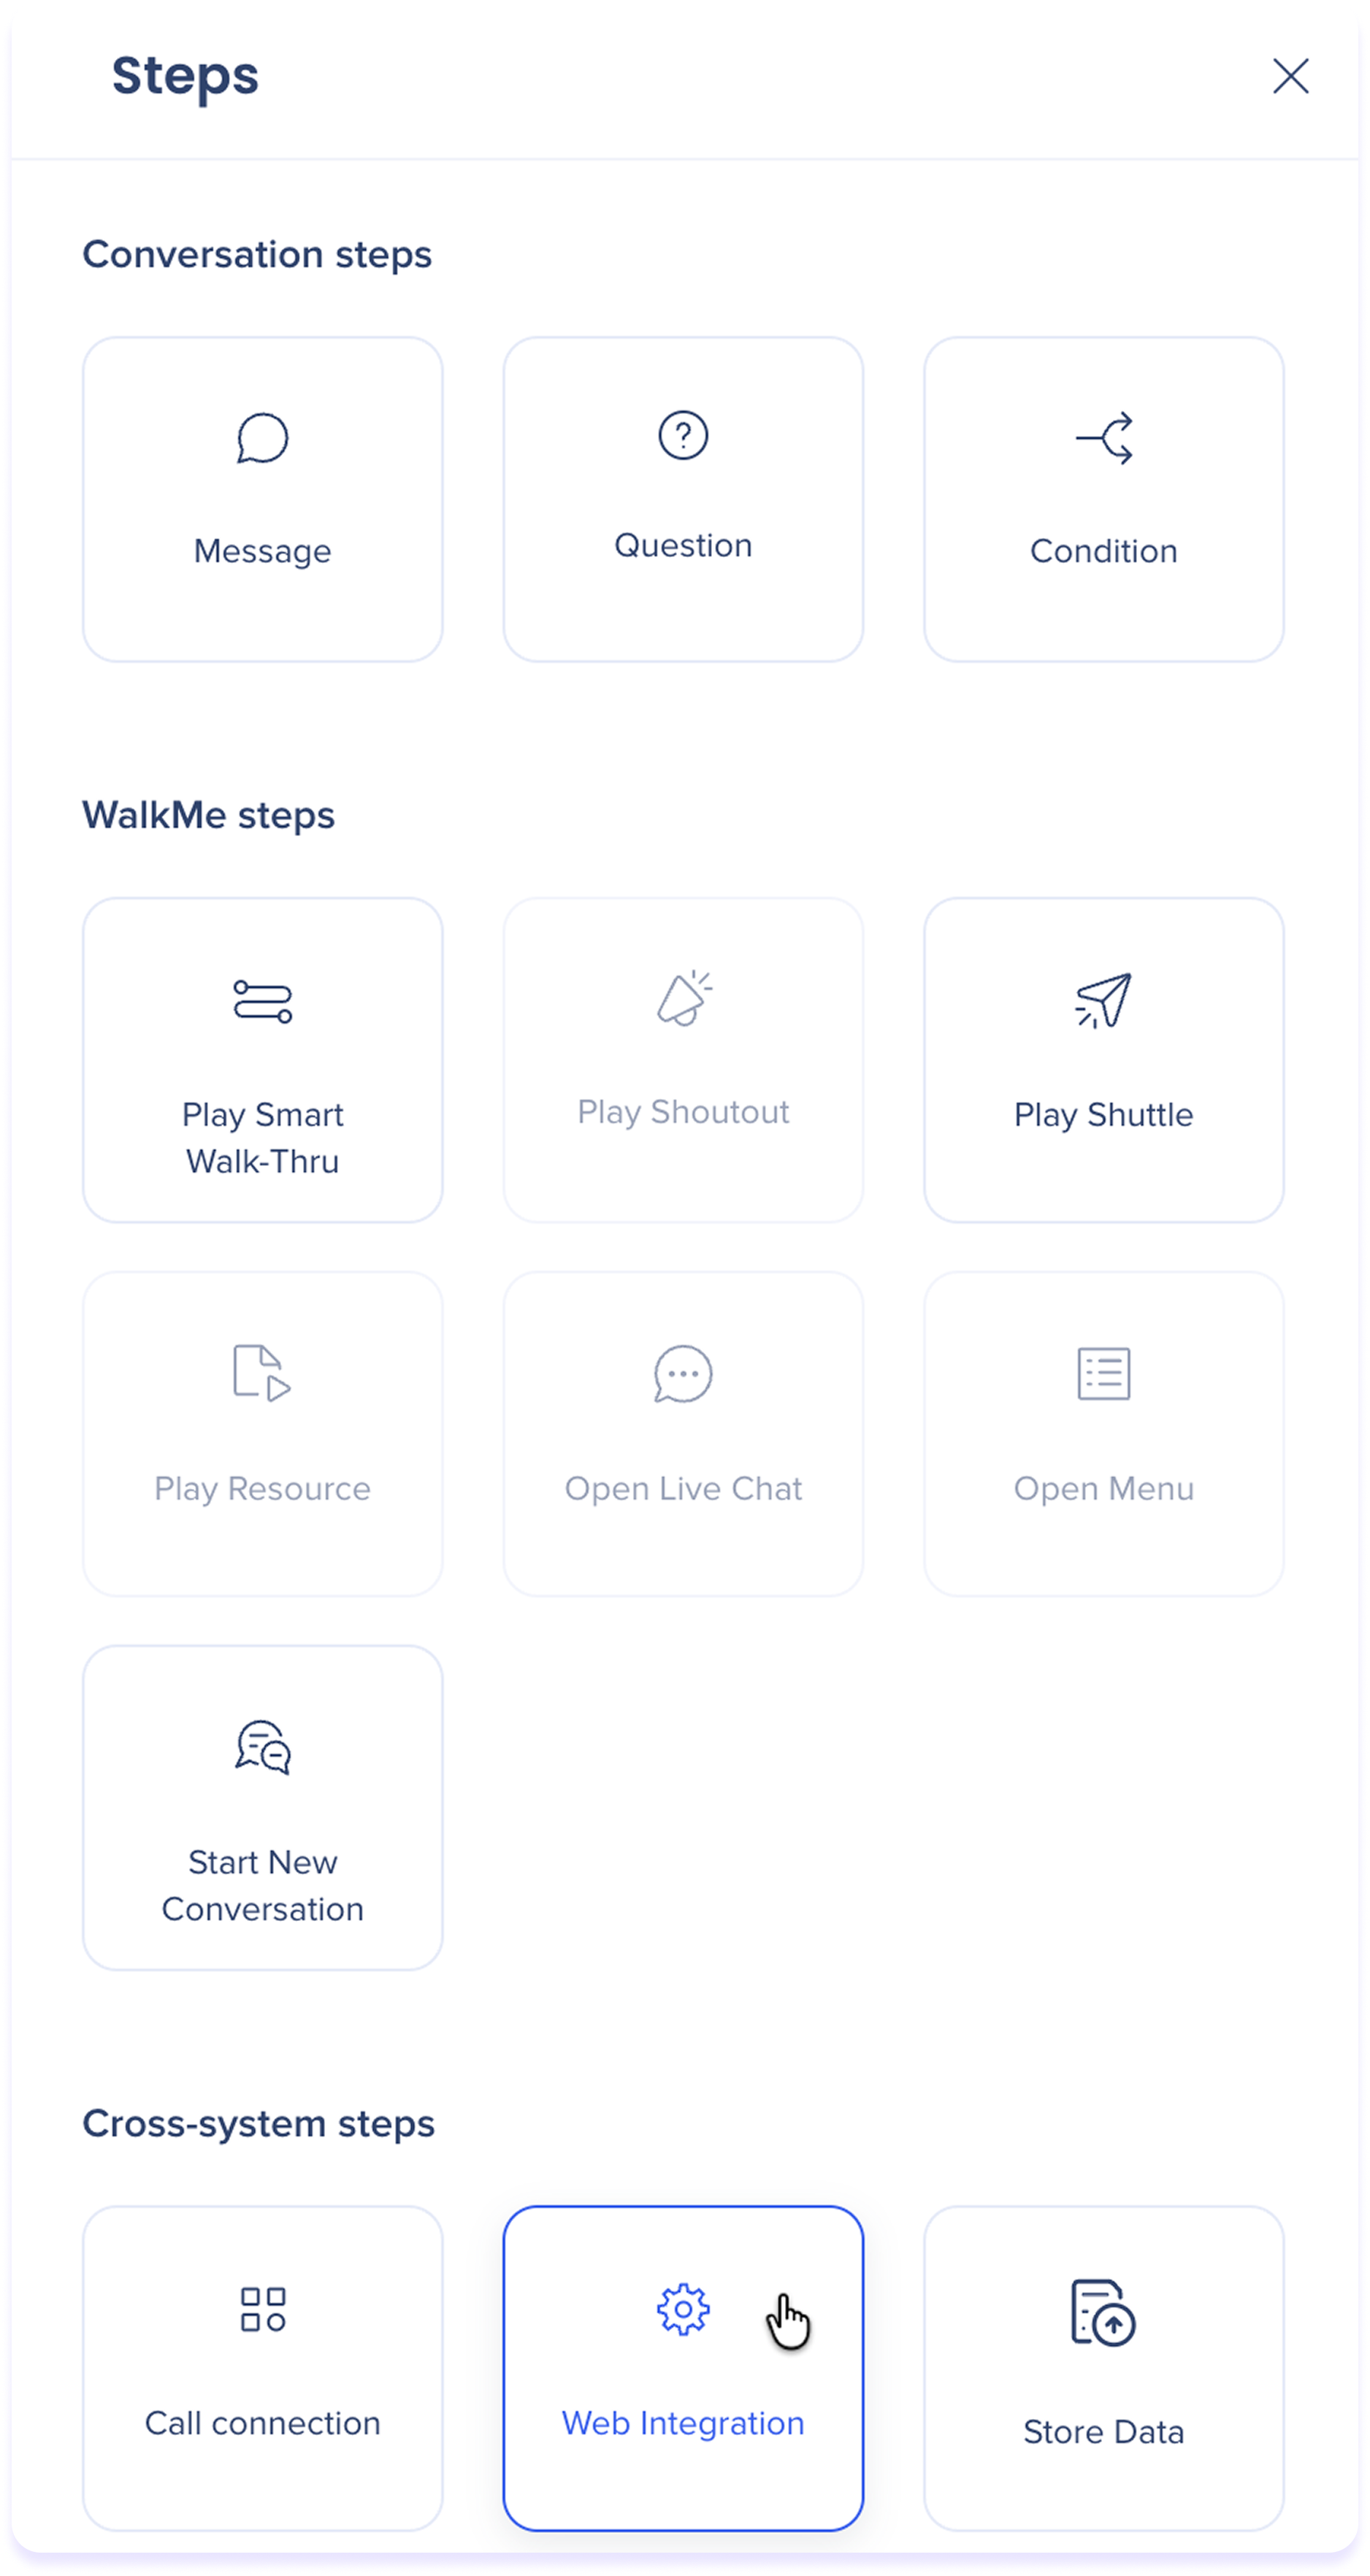
- To add the Web Integration step, select the Plus icon to add a step in the conversation flow

- Then under Cross-system steps select Web Integration
-
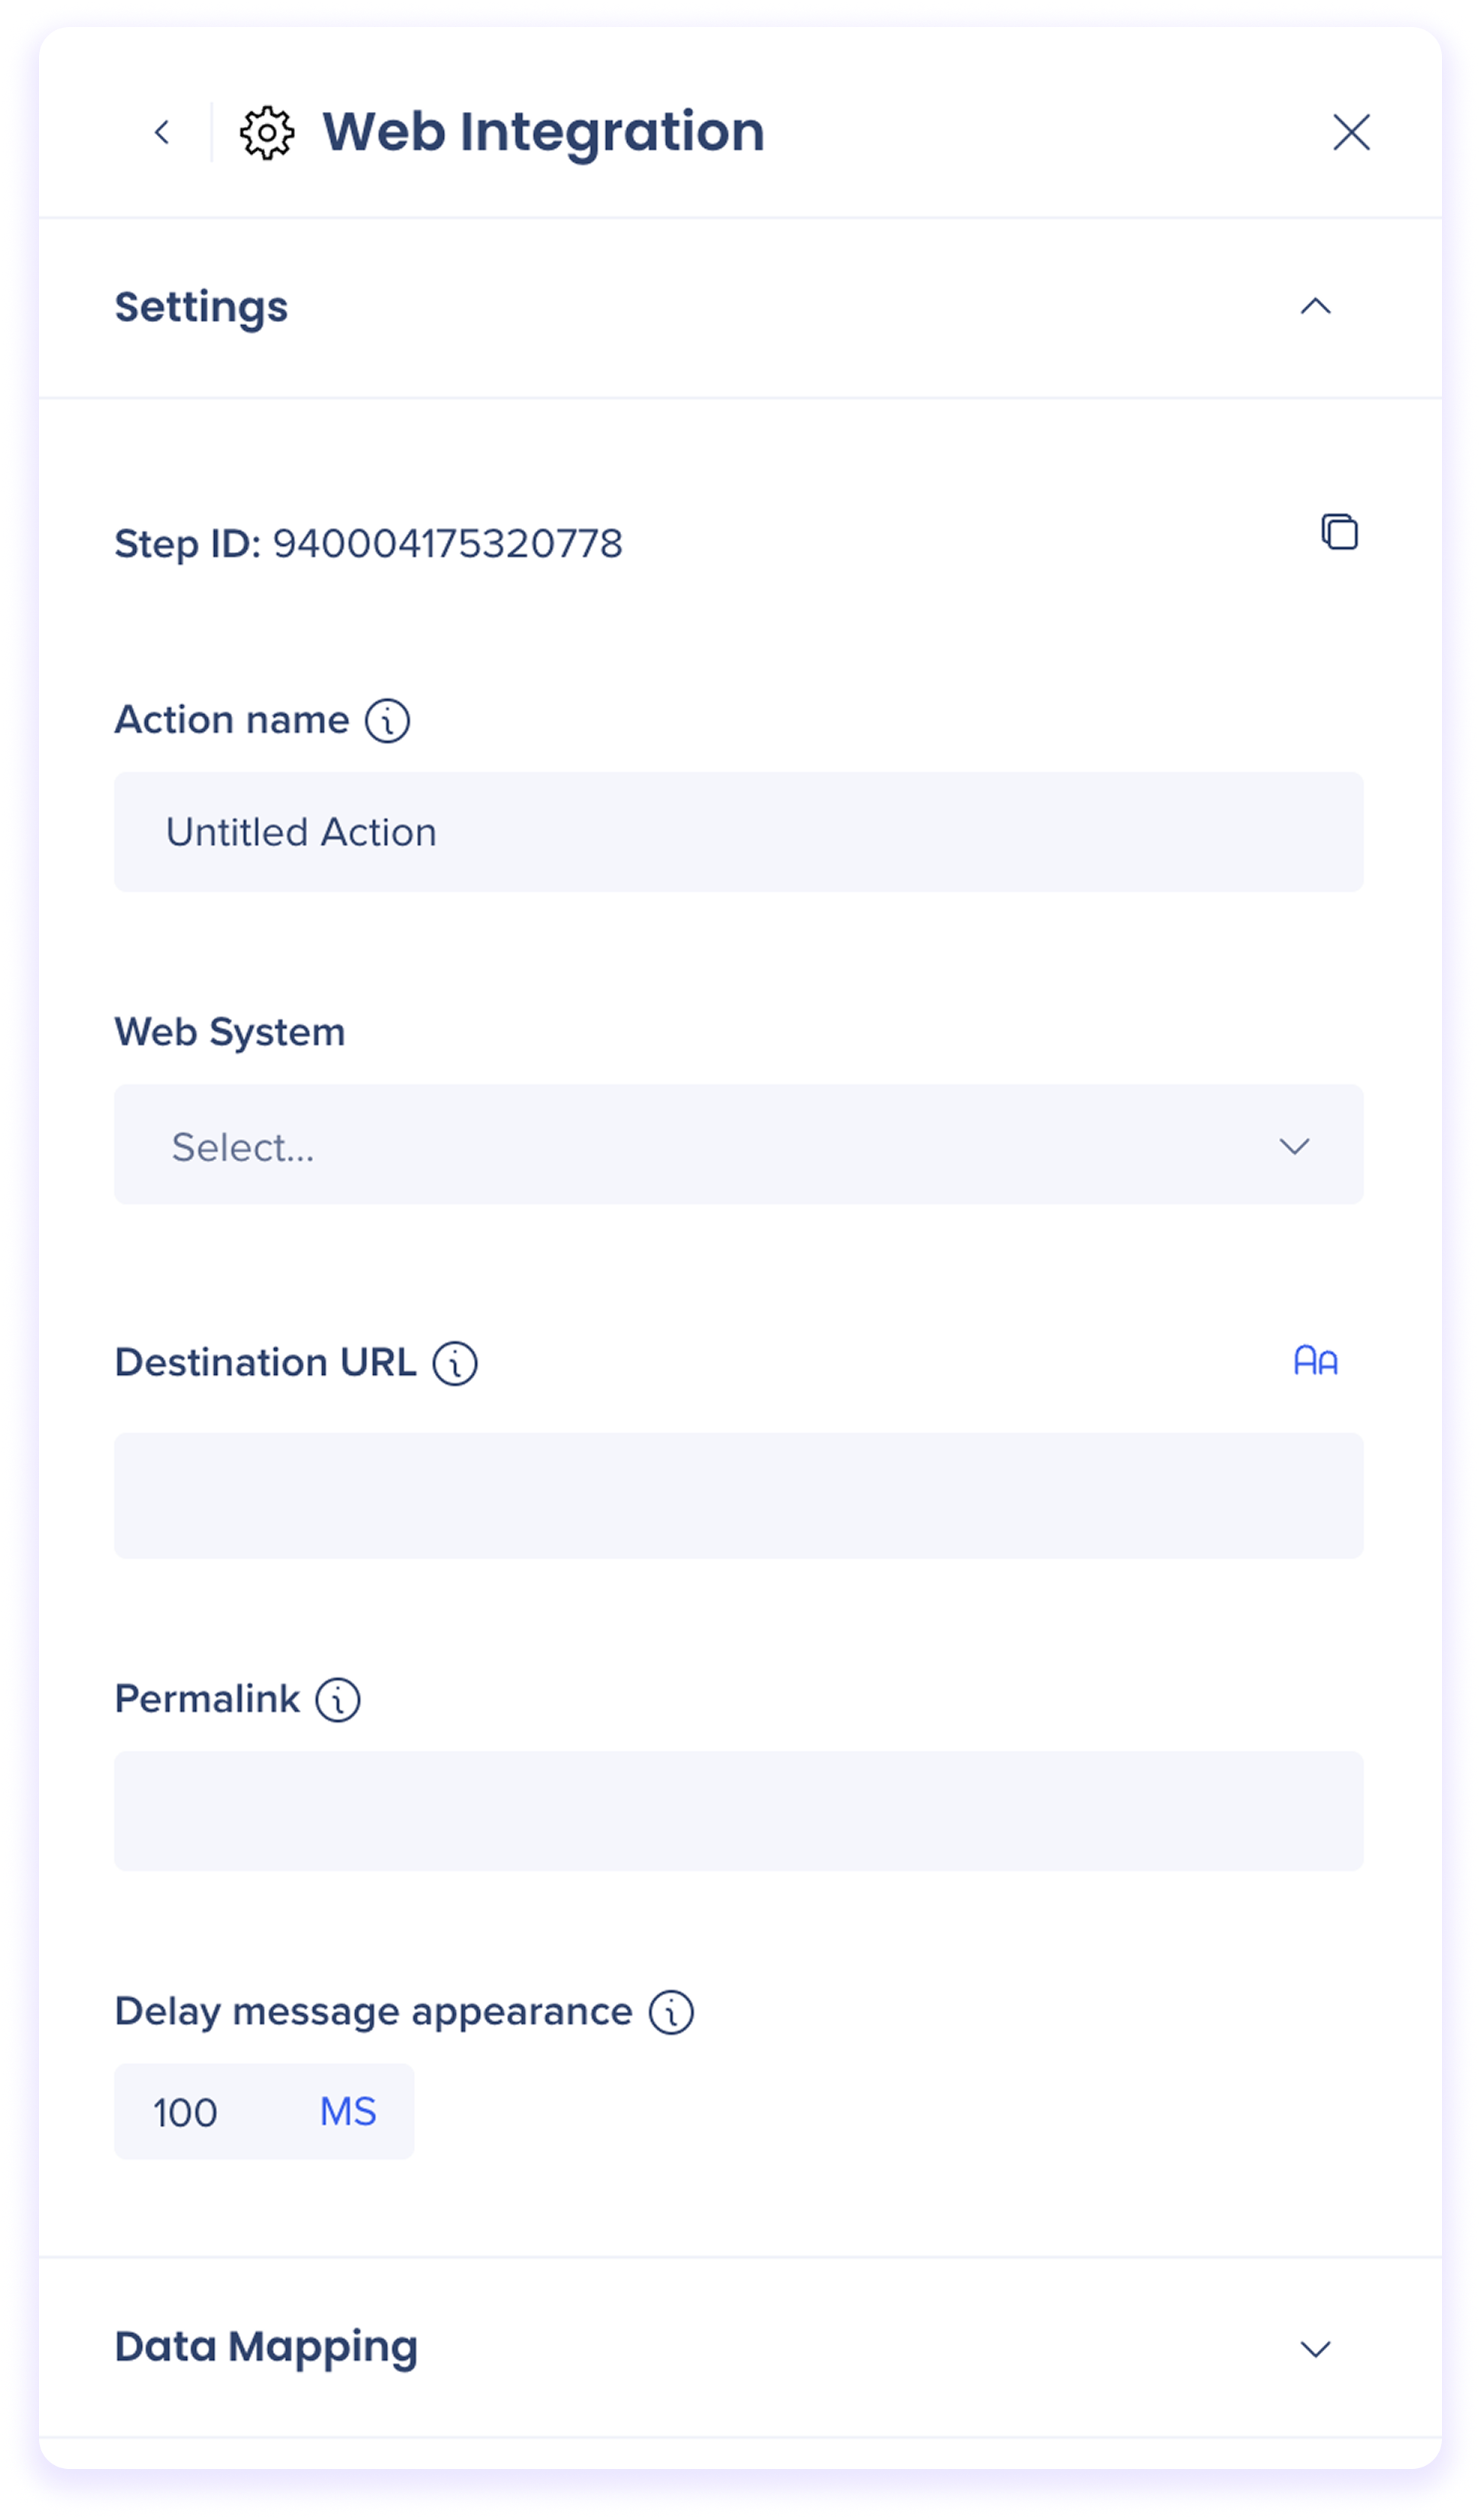
Enter the following:
- Action name: Type a name for the step
- Web system: Select the web system from the account you want to integrate with
- Destination URL: Type the URL for the step's redirect (BB code is supported for dynamic URLs)
- Permalink: Enter the permalink of the WalkMe item you want to play after the redirect
-
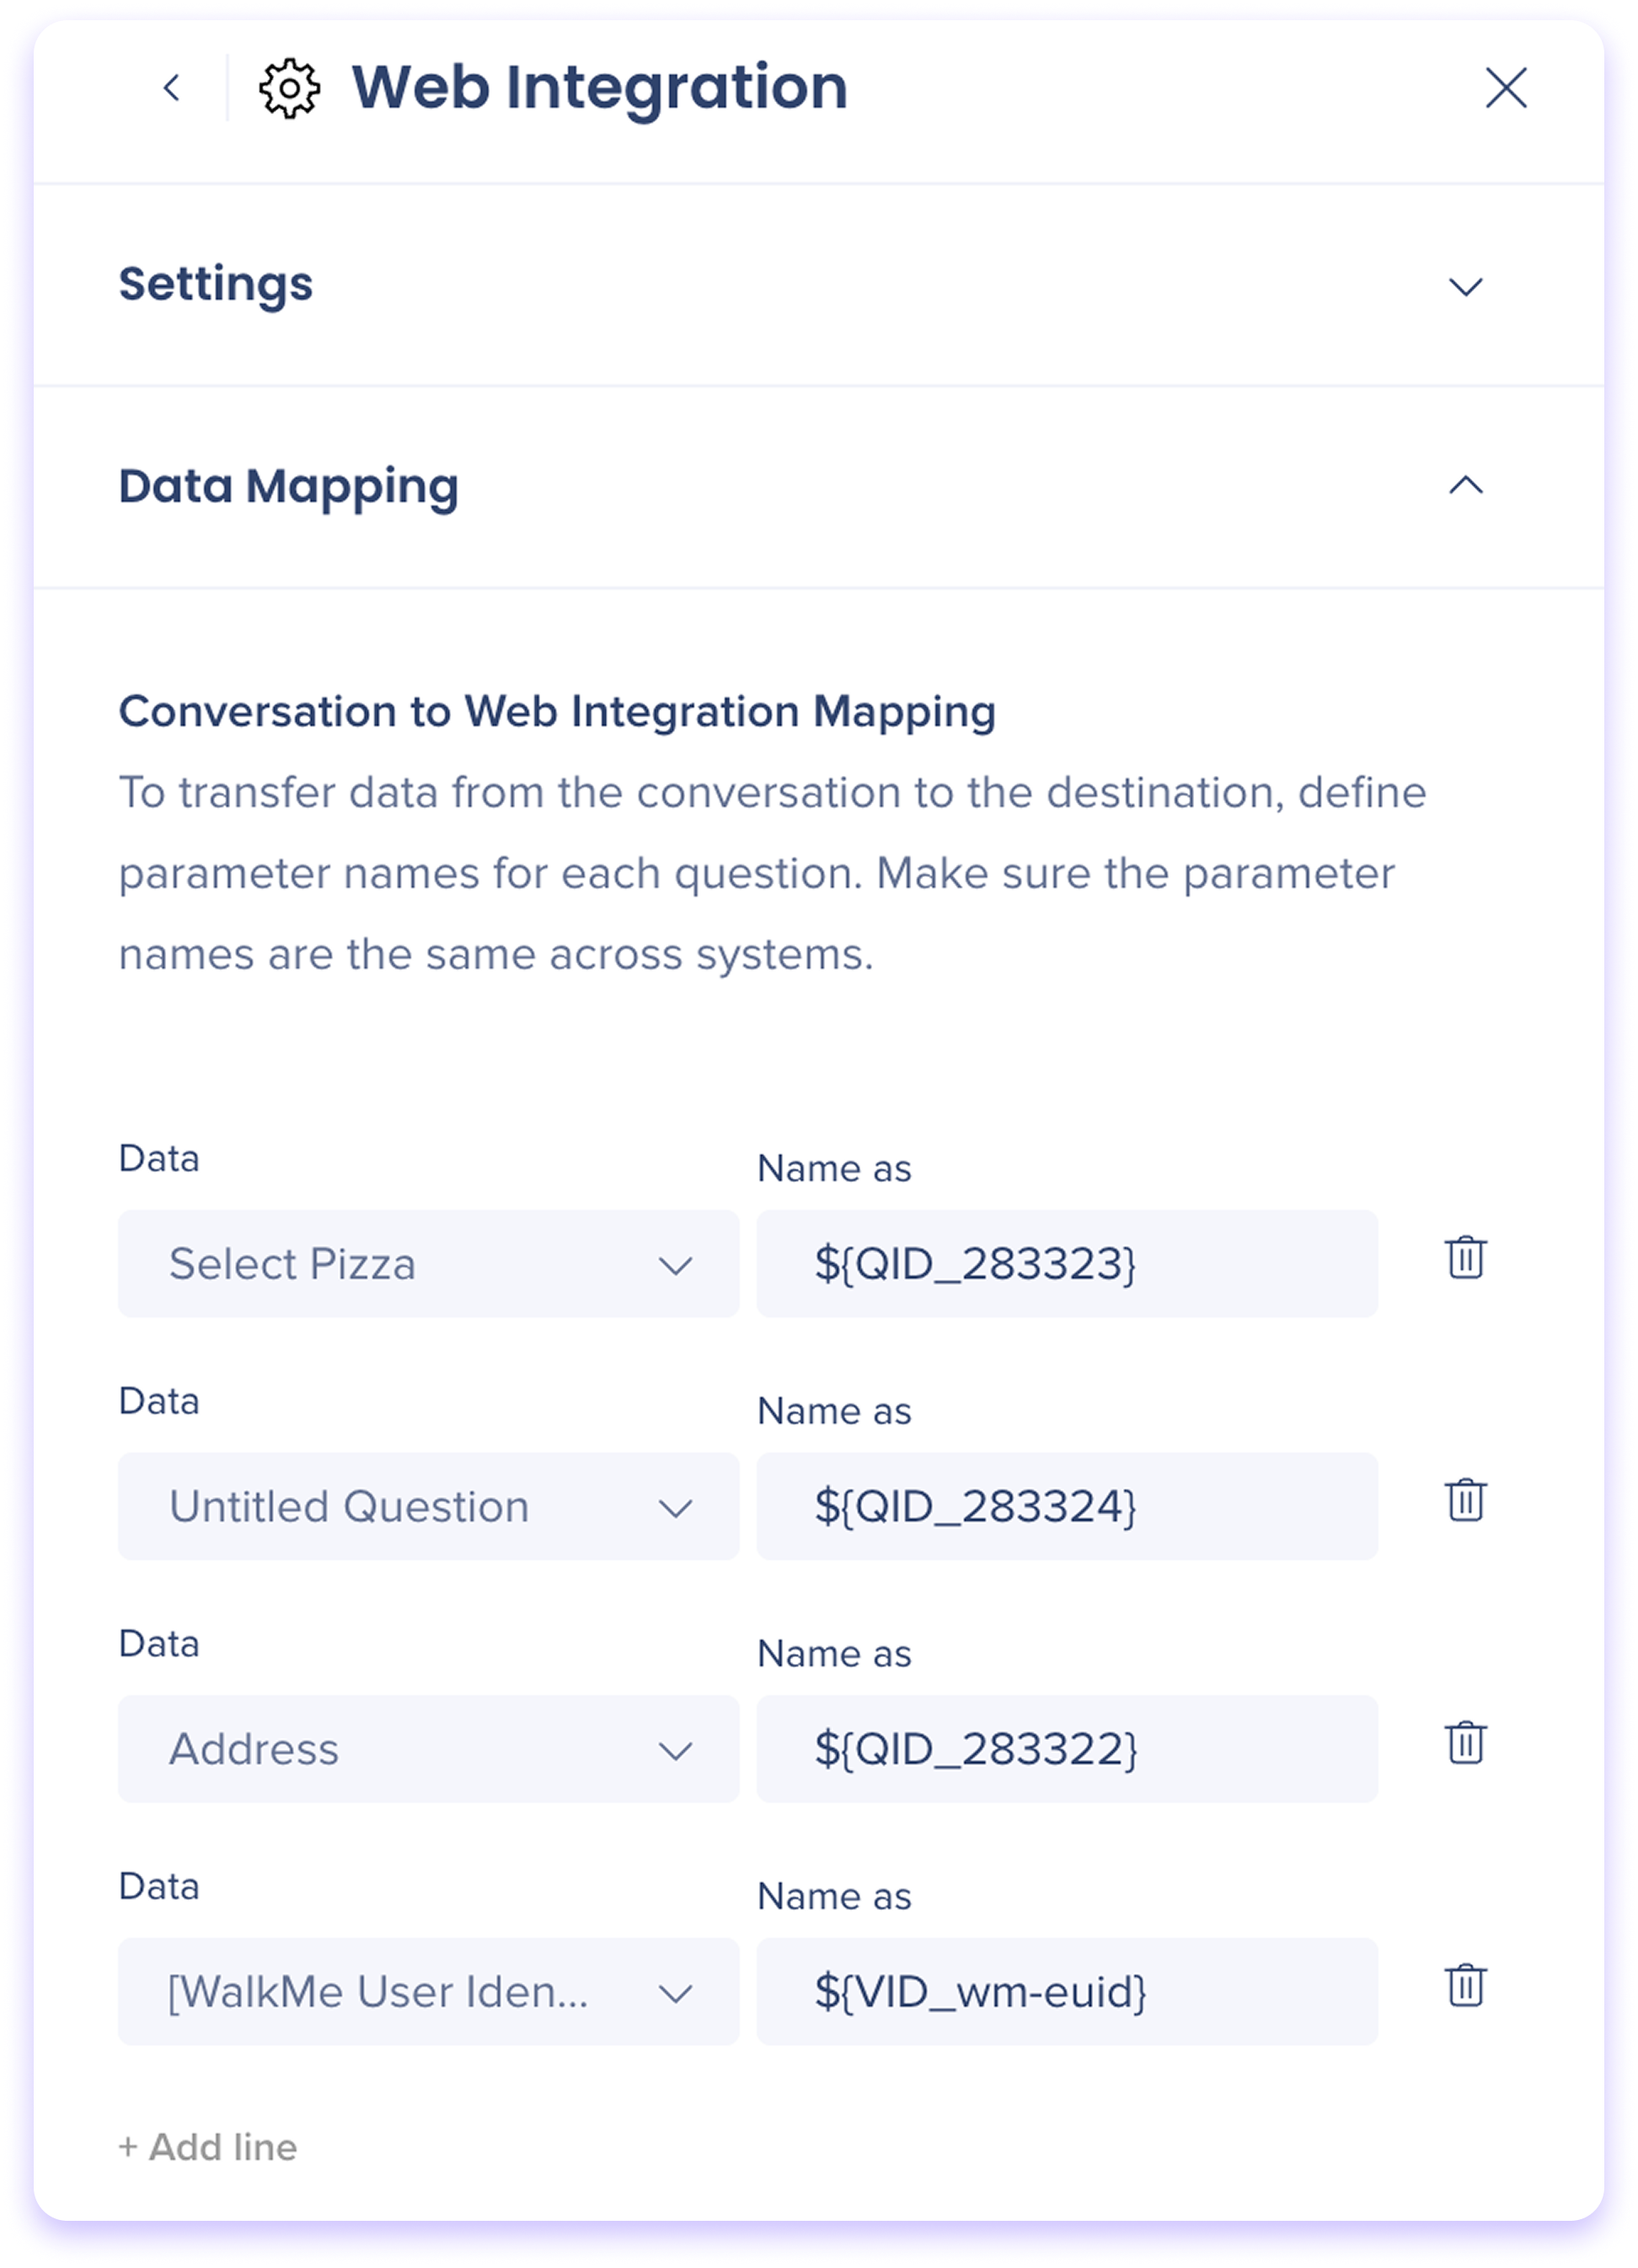
Under Data Mapping, in the Conversation to Web Integration Mapping section:
- To transfer data from the conversation to the destination, define parameter names for each question. Make sure the parameter names are the same across systems
- In the Data dropdown, reference the conversation question
- In the Name as field, add the matching dynamic conversation parameter applied to the corresponding Automated Fill Step
- Select + Add line to map additional questions
- Select Save
- Publish the bot and conversation to the same environment as the WalkMe ite
Configuration complete!
Technical Notes
- Multi-System Account is required — the system must be on this account as well
- The user must be logged in to the web application for the integration to play successfully
- The WalkMe Editor must be closed while testing
- The ActionBot and the WalkMe item must be published to the same environment
- Self-hosted accounts are not supported


