Welcome to the WalkMe Help Center

Please login in order to continue:

Work flows better with WalkMe
Work flows better with WalkMe.

Error Handling: Getting Started Guide

Last Updated April 22, 2022

Brief Overview

Error Handling Groups are a feature in Smart Walk-Thrus that allow you to create additional steps that will appear when a user encounters an error. Using Error Handling Groups help to make sure users get the help they need to get all the way through a process.

Despite a well-built Smart Walk-Thru, a user may get an error on a form. In these situations, we often want to display additional steps to help users fix their errors. With Smart Walk-Thrus, you can easily create a set of steps to appear only when there is an error on-screen using an Error Handling Group.

Error Handling Groups allow your Smart Walk-Thru to show specific steps to a user if they make an error during a process. These steps will loop until the user gets past the error.  Once they have recovered from the error it can return back to the Main Path so the user can complete the process.

How it Works

When the Smart Walk-Thru gets to an Error Handling Group, it will check the rules created that define the error. If the rule is true (error is present), WalkMe will play the steps within the Error Handling Group. When WalkMe is finished playing the steps in the Error Handling Group, it will recheck the rule to see if the error is still present. If so, the Error Handling Group steps will play again. If not, the guidance will continue with the Main Path.

Error Handling Groups allow you to use the Rule Engine to detect user error on the screen. You can then add steps to the Error Handling Group that help the user fix their mistakes. The Walk-Thru will play through all steps added to the Error Handling Group (all the steps within the orange dotted line) and then re-check the rule for the Error Handling Group to see if an error is still present (if the rule is true). If the error is still present (rule is true), the Error Handling Group will replay the steps in the dotted orange lines again. If not, it will continue on the Main Path

Tip

To validate multiple individual fields in a form we recommend using SmartTips.

Create an Error Handling Group

🎓 Digital Adoption Institute

Add an Error Handling Group to your Smart Walk-Thru

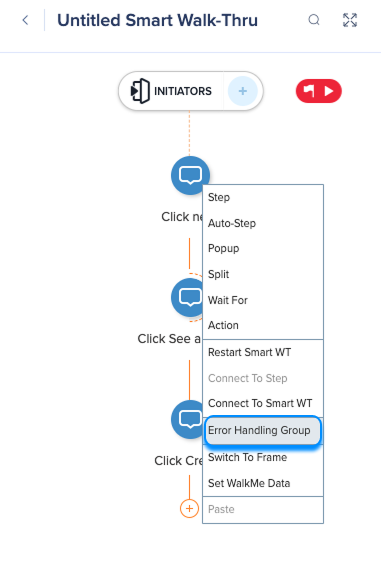
  1. Hover over the path where you would like to add the steps and select Error Handling Group from the Options Menu. Typically, the Error Handling Group is placed after the step that triggers the error; for example, after "Click Submit" or "Click Save."
  2. In the hover menu, select Error Handling Group:
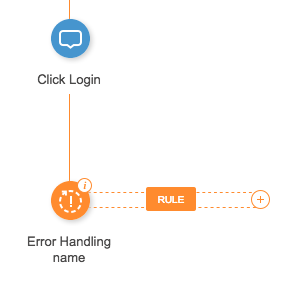
    After adding an Error Handling Group, it will appear in the Smart Walk-Thru as an orange icon: 

Create a rule to define the error

Create a rule that identifies when the user encounters an error. When the rule is true, the Walk-Thru will play the steps in the Error Handling Group. When it is false, it will continue along the Main Flow (skipping the steps in the Error Handling Group).

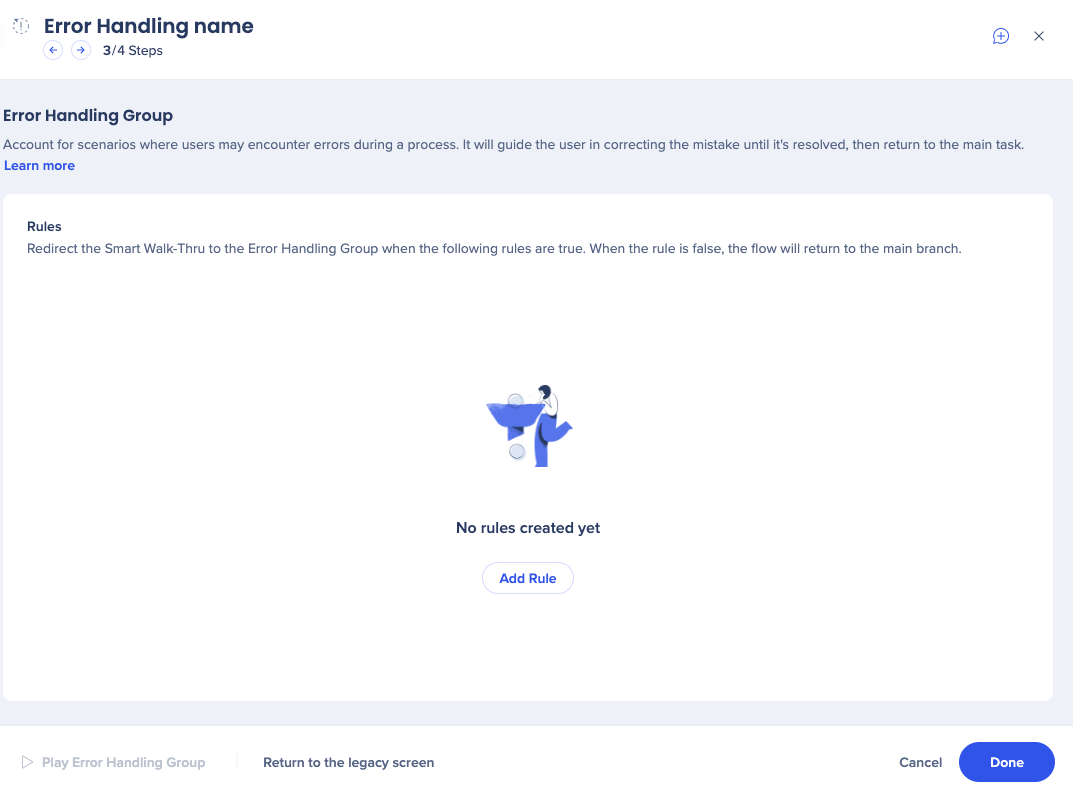
  1. Click Create Rules.
  2. In the Rule Engine, set Rules for the Error Handing Group.  When these rules are true, the WalkThru will enter the loop and will repeat until the rules are false.
    Usually, this rule will use the On-Screen Element selector to check whether an error is visible, but you can set any rules that are necessary for your process.
  3. When you have added the rules, click Done.

Learn more about creating rules in the Rule Engine.

A common rule type for Error Handling Groups is On Screen Element as often user error will result in a visible error message on the page. The example below shows a rule that defines the Error Handling Group with a rule that identifies an error message is visible on the login screen. Note that whether the error reads "Username required" or "Incorrect password" the rule will still be true because WalkMe is looking for the error message element, regardless of the text in it.
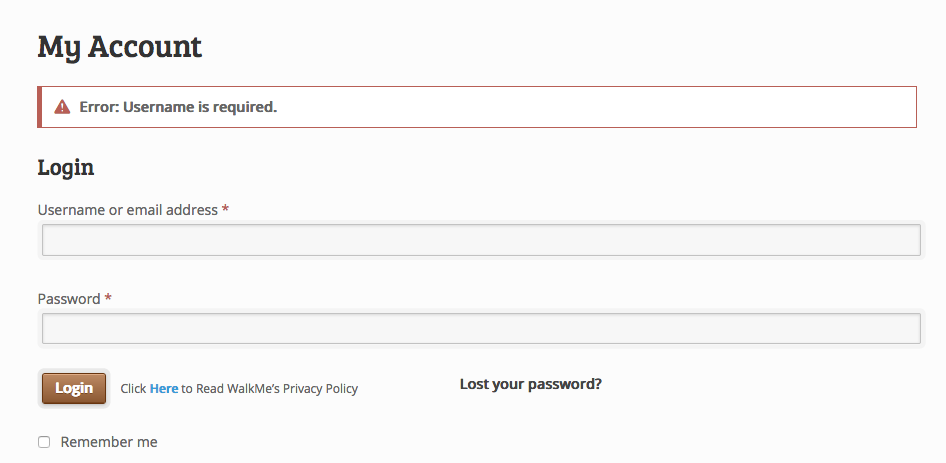
Make sure to change the name of the Error Handling Group so that it is easy to tell what it is by looking at the Smart Walk-Thru Map in the Editor.

To add steps to the Error Handling Group, hover over the + icon adjacent to the rule. You can add any number of steps to the Error Handling Group including regular steps and Flow Steps.

If there are many steps in the Error Handling Group, you may want to click the minimize icon to collapse the group in the Smart Walk-Thru Map.

Any steps added to this loop will continue to repeat until the conditions you have set in the Error Handling Group are FALSE.
WalkMe will re-check the Error Handling Rules when you reach the last step in this loop.
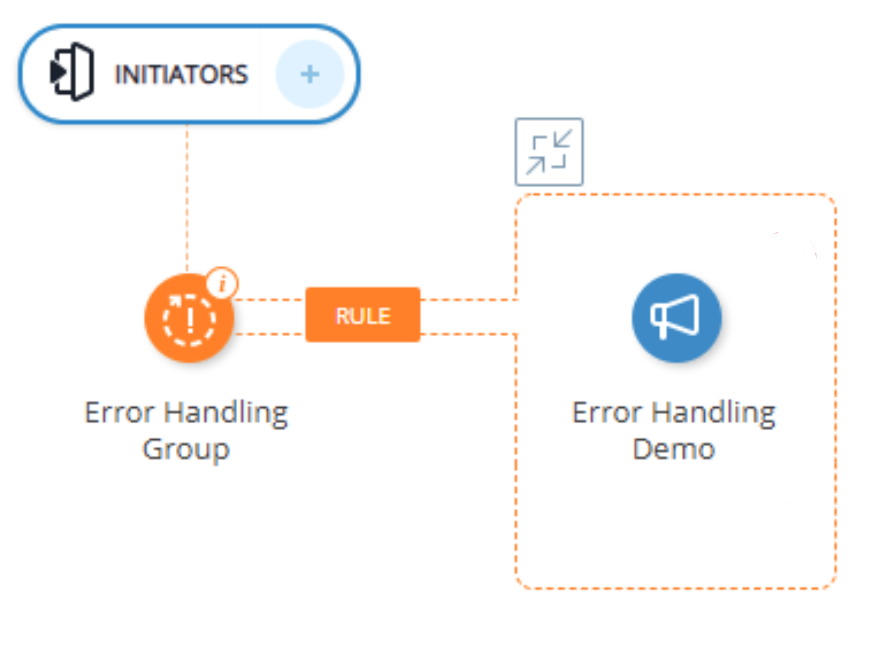
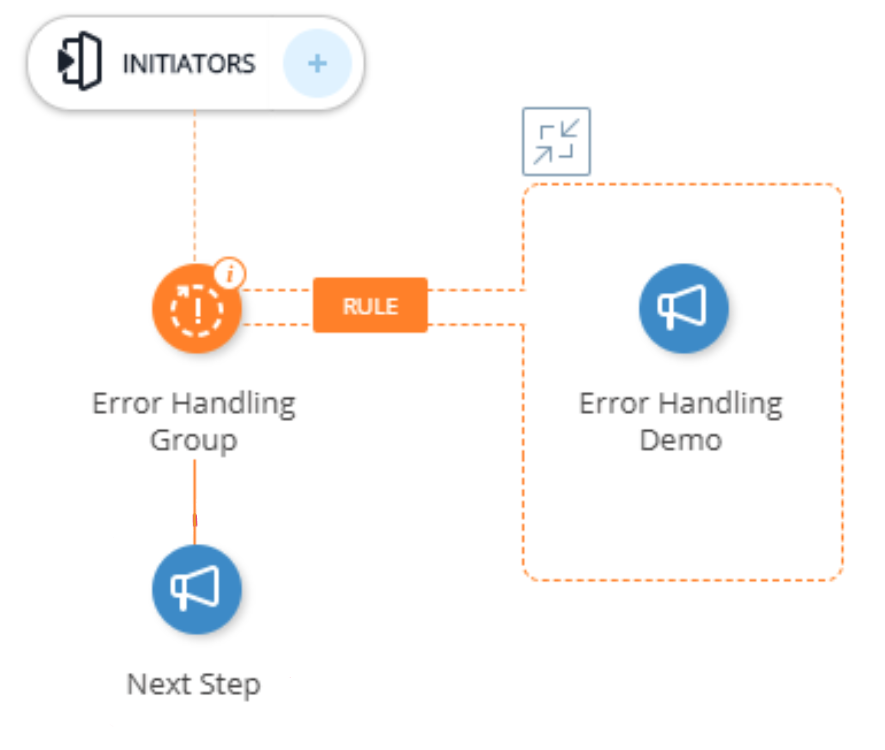
Once the Error Handling Rules are false (meaning there is no error), the WalkThru will resume with the next step in the process.
Was this article helpful?

Thanks for your feedback!

Be part of something bigger.

Engage with peers, ask questions, share ideas

Ask the Community
×