Build a Smart Walk-Thru
Build the Main Path
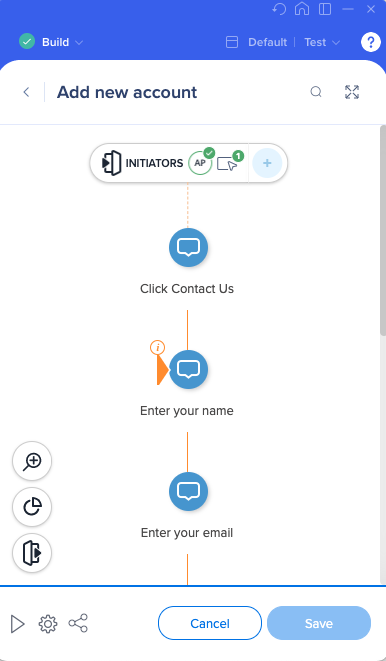
Each Smart Walk-Thru should focus on a very specific task that needs to be accomplished by the end-user. Name your Smart Walk-Thru something informative so that your users understand what the Smart Walk-Thru will help them accomplish. Plan your Smart Walk-Thru from the home page and be sure to include any navigational steps required to reach the correct page or element. Try and account for other starting places on your site as well, making sure that the steps necessary to exit or go back to a previous screen are present as well. Flow Steps can be added so that these steps only appear when necessary.
After your navigational steps, your Smart Walk-Thru should focus on the task at hand for your user. Include only steps that are required to complete the process. The best practice is to have your main flow focused on the path or route that the majority of users will take. Keep your guidance simple and the text short to keep users engaged. Make sure balloons do not block any text or important elements on the screen. Avoid steps that provide an overview or detailed information on an element or feature that is not directly related to the process. At the end of your flow, try adding a success popup to encourage your users.
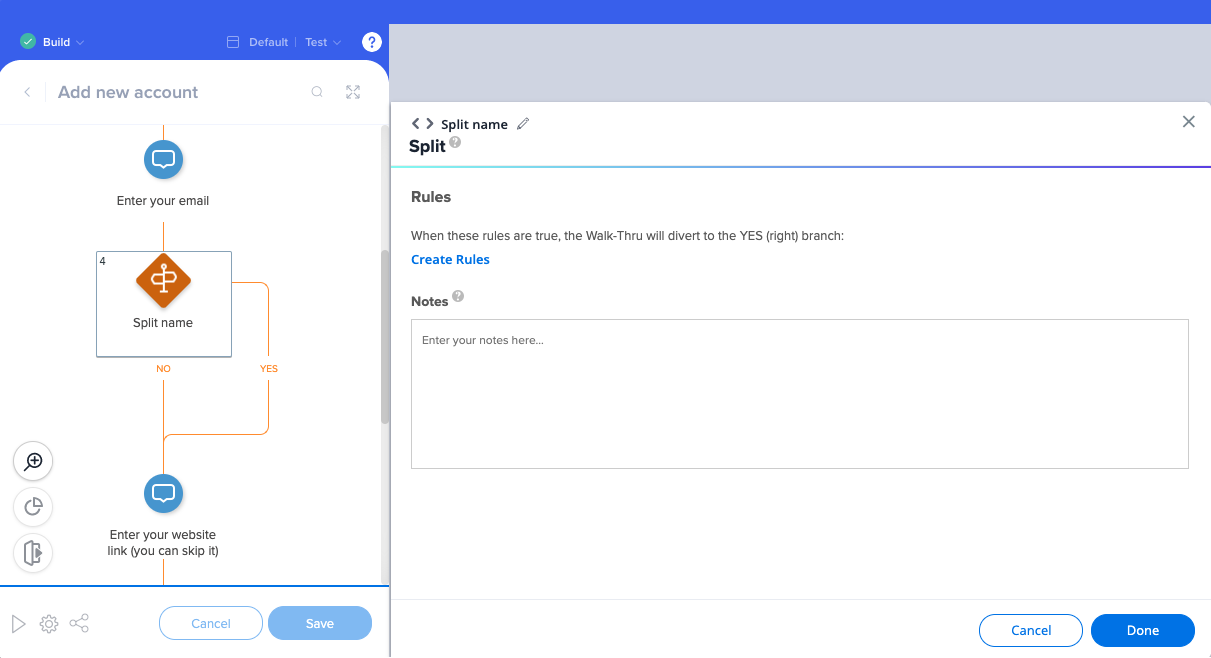
Add Splits
Add Peer Steps
Peer steps provide more guidance and information during a certain point in a process, within a Smart Walk-Thru. They are similar to regular steps, but they are used to emphasize several points of interest for a single point in time. Any step within your Smart Walk-Thru can be configured as a peer step. Each adjoining peer steps will be displayed when the original step is displayed and all will be triggered by the main step. You can add as many peer steps as necessary.
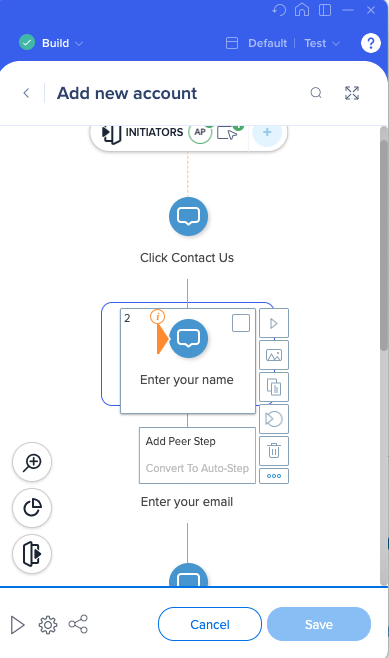
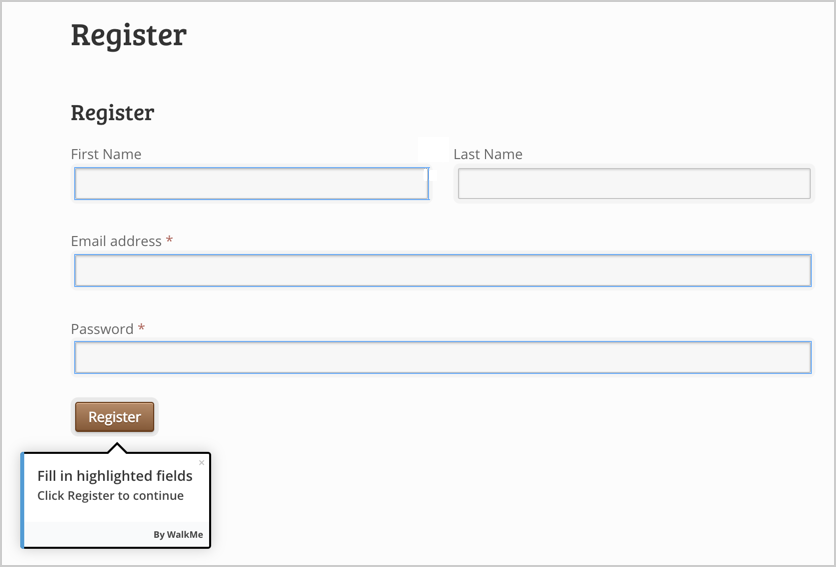
An example for using peer steps is guiding a user through filling out a form with multiple points (textboxes, radio buttons, etc) that need to be completed, using peer steps you can highlight all the necessary areas, as part of the same step:
Creating an Invisible Highlighter Peer Step:
Peer steps can also be used as highlighters for text boxes with no balloons at all, do this by:
- Selecting the Peer Step that you want to adjust.
- In the Appearance tab, toggle the Highlighter on:
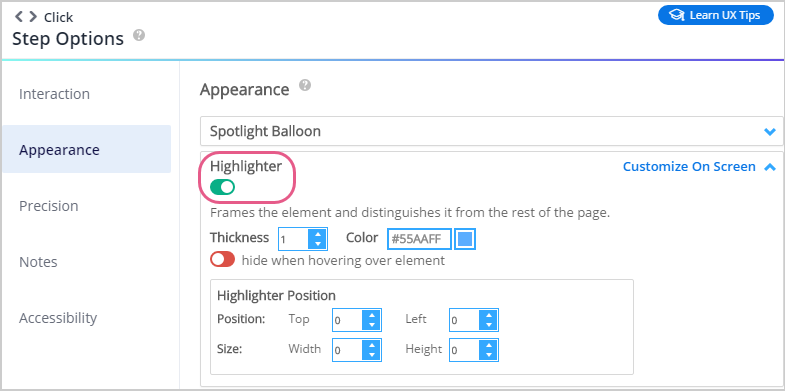
- Toggle the Invisible Balloon on:

Add Multiple Start Points
 Any step within your Smart Walk-Thru can be configured as a Start Point. Each Start Point will only be activated if the rule defining the starting point are true. Start points are evaluated from the bottom up, meaning that WalkMe checks the rule for the last starting point first.
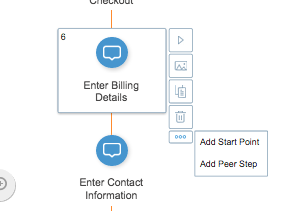
When creating new Start Points WalkMe pre-fills the rule engine allowing you to simply define the URL to easily create Start Points. In certain situations you may need to edit or modify statements to more accurately determine when the user should start for this step. When using an element on a page for a rule, it is best practice to use a URL in combination with On Screen Element in order to optimize performance.
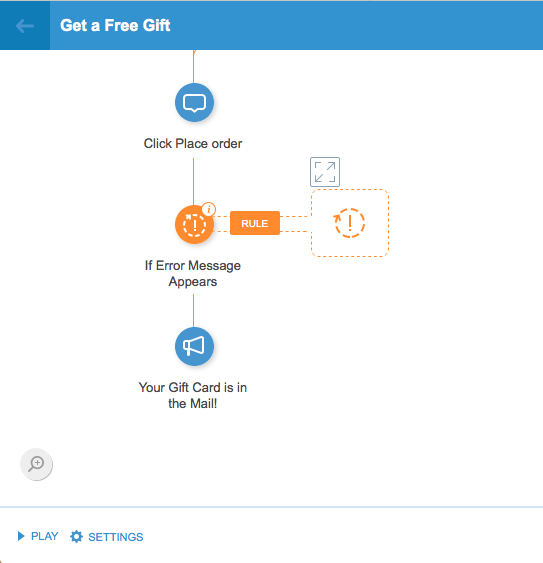
Add Error Handling Groups
Accommodate for users making errors with Error Handling Groups in your Smart Walk-Thru. Use an Error Handling Group to go to steps outside the main flow that can help users correct their mistake. An Error Handling Group is activated when the associated rule is true. Errors can be identified using a URL, On Screen Element (such as an error message), or a combination of the two. Creating a Rule based on the error message will ensure the Error Handling Group will continue to play until the error is resolved. Read more

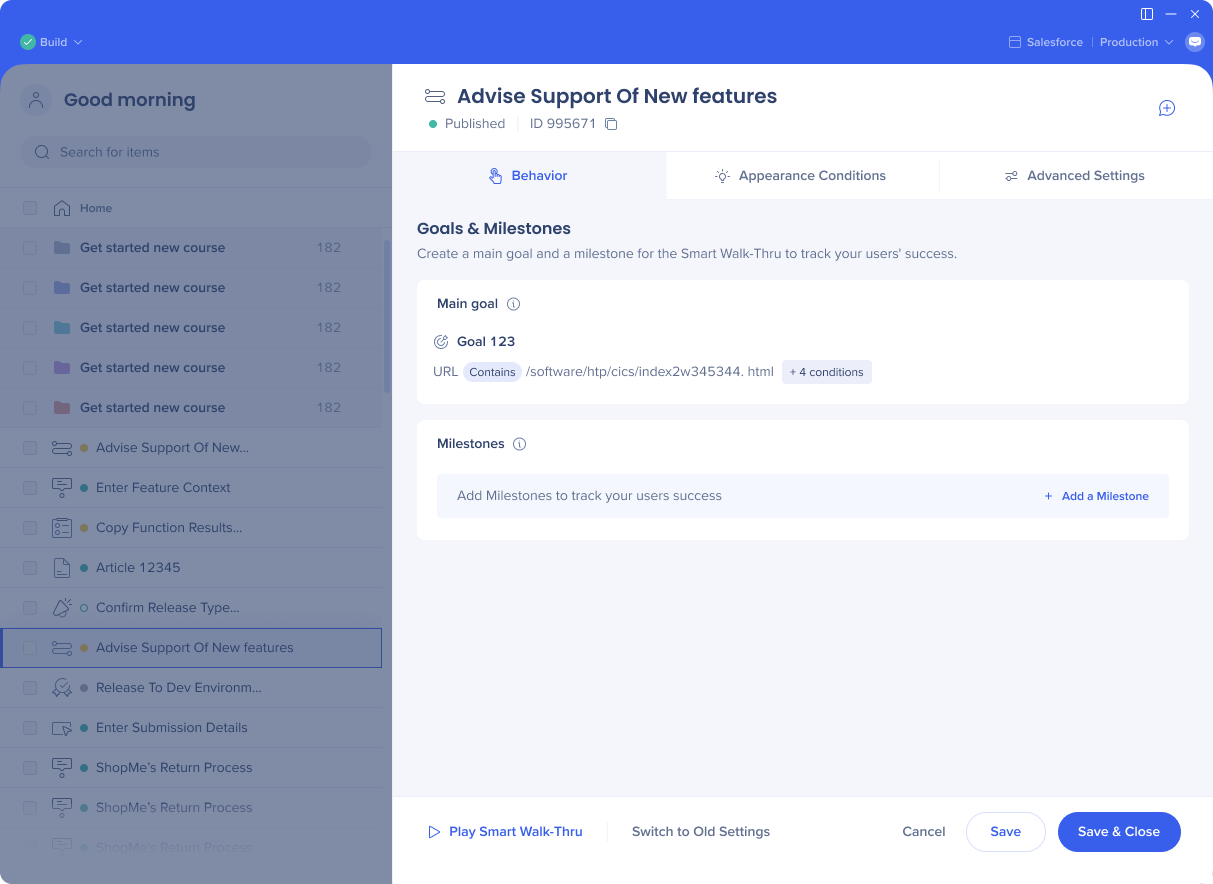
Add Goals
All Smart Walk-Thru should have a goal so you are able to track their value and track if they are successful in helping users achieve their tasks.
There are two types of goals for a Smart Walk-Thru: a main goal and a milestone. The best practice is to create a main goal that checks if users successfully complete a process. Milestones can check different stages in your process. Create your Smart Walk-Thru goals using a combination of URLs and on screen elements to capture the user's action on a specific page.