Brief Overview
Steps for Using Webhooks With Google Analytics
NOTE: Steps 1-6 are optional, and only need to be completed if you have not yet set up a Google Analytics account. If you already have a Google Analytics account, log into your account and skip to Step 7 and copy the Tracking ID for use in defining your webhook.
Step 1: Open an account or log into Google Analytics
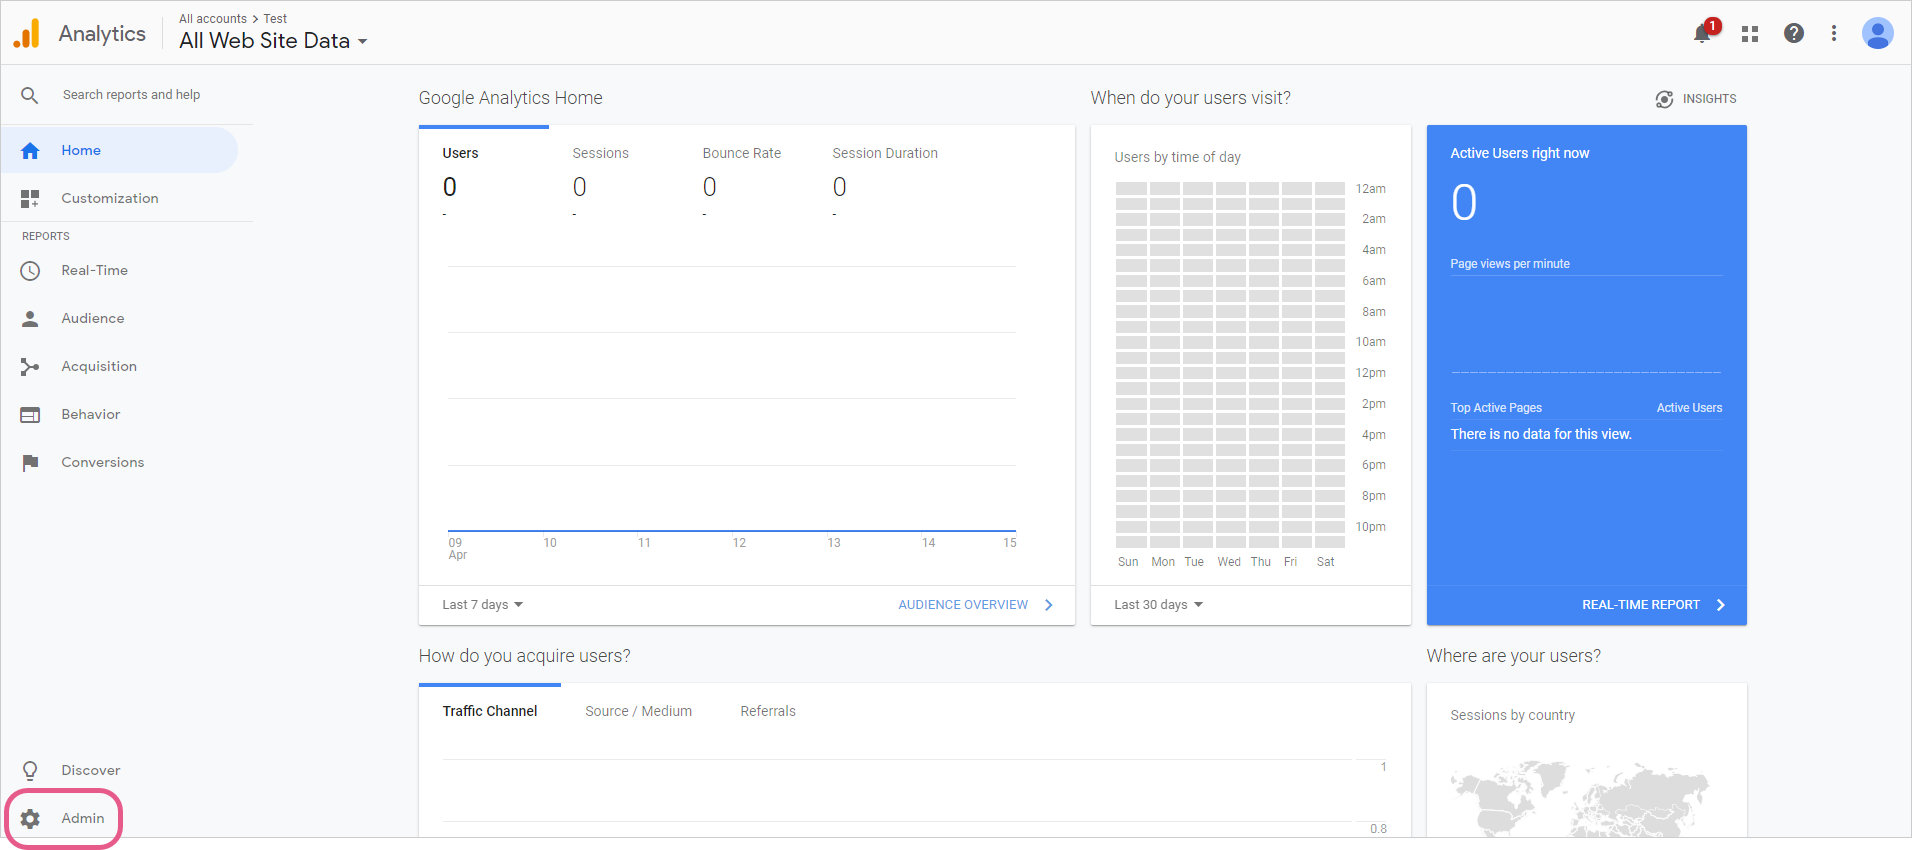
Step 2: Click Admin
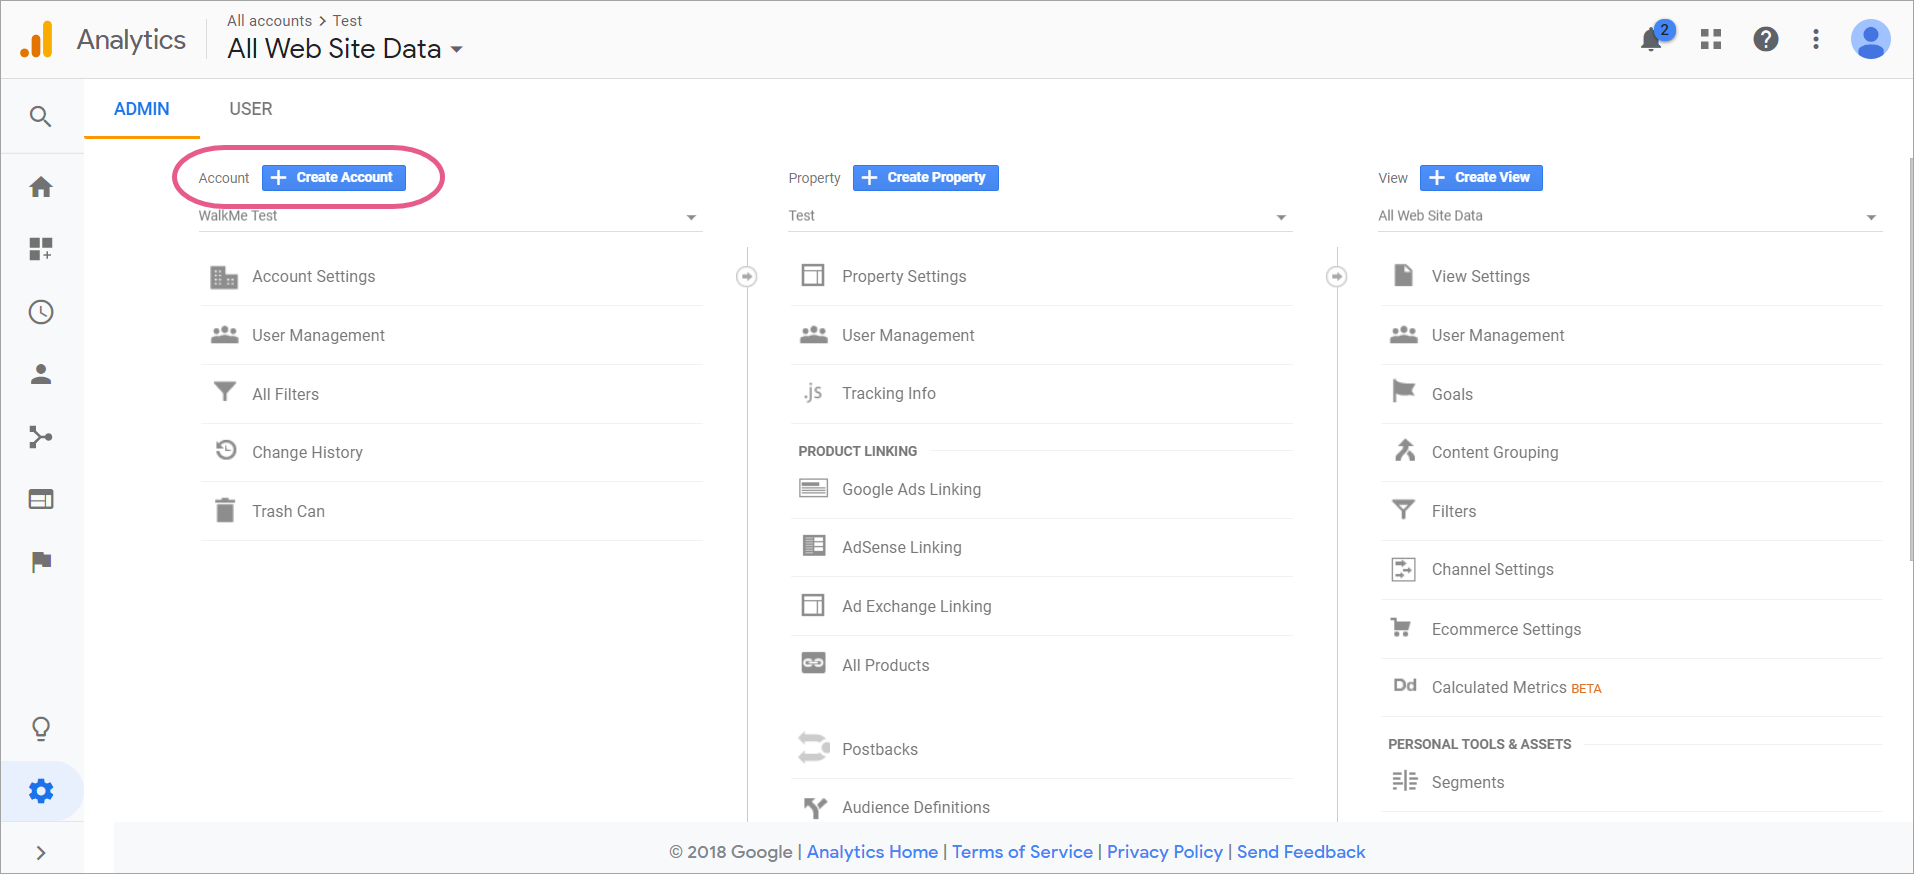
Step 3: Click Create Account
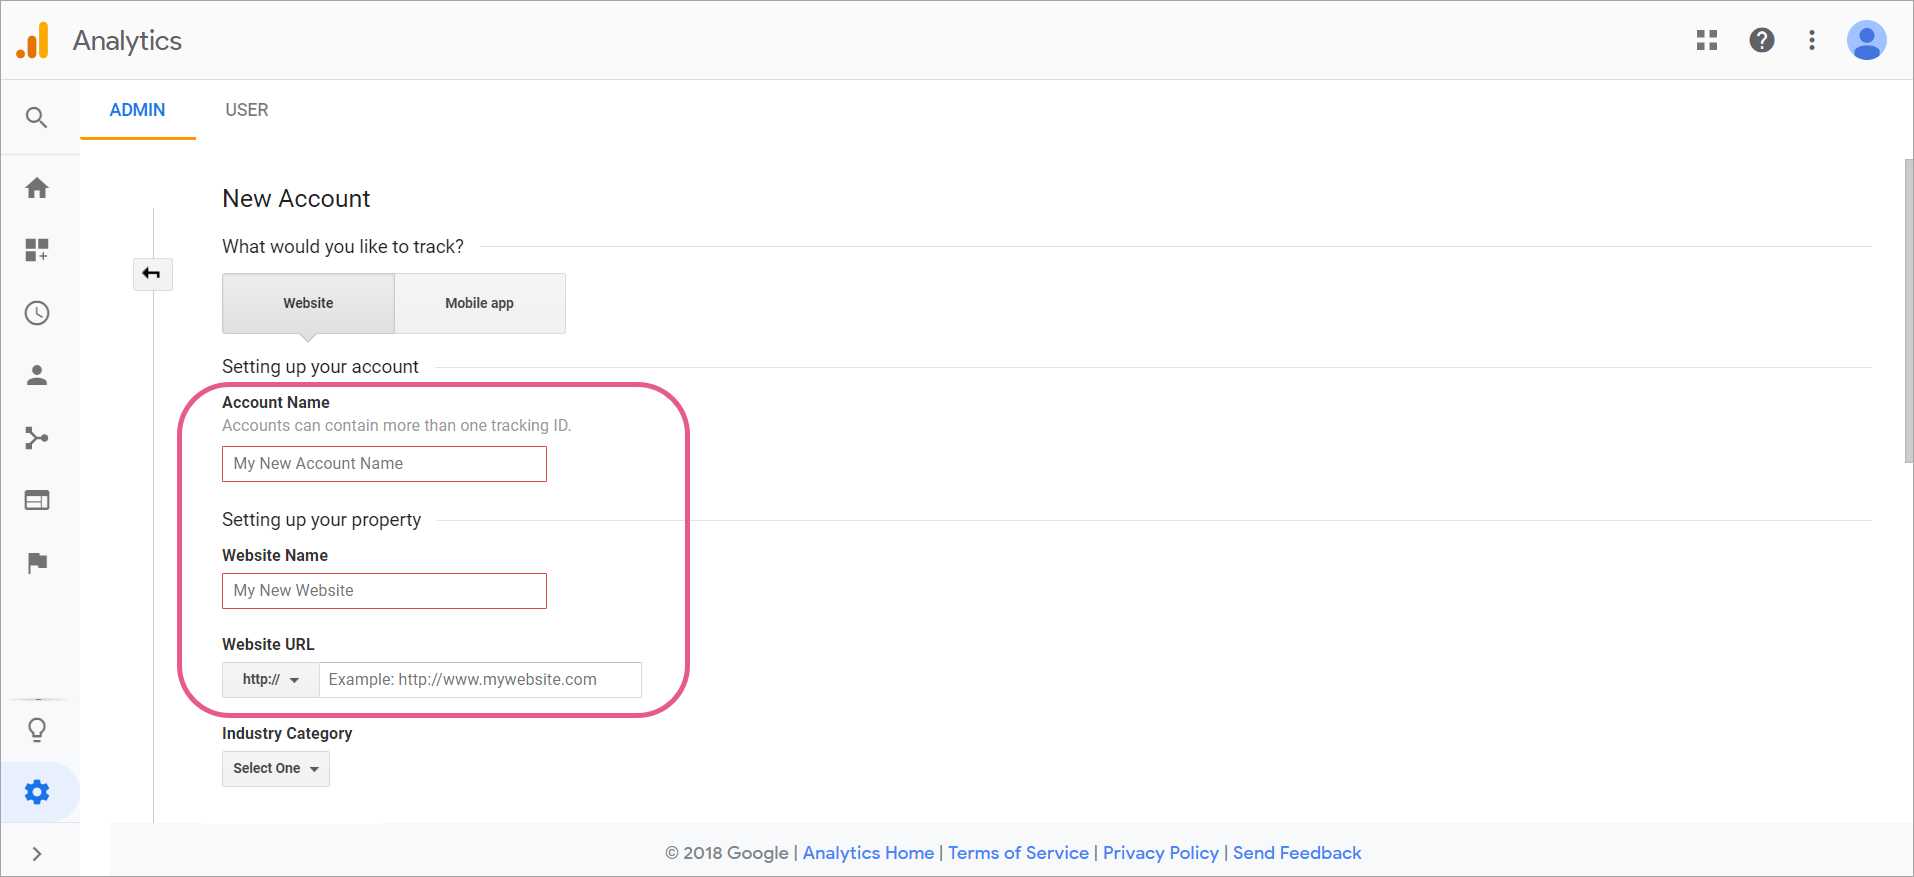
Step 4: Fill in account details
- Enter the account name and website details.
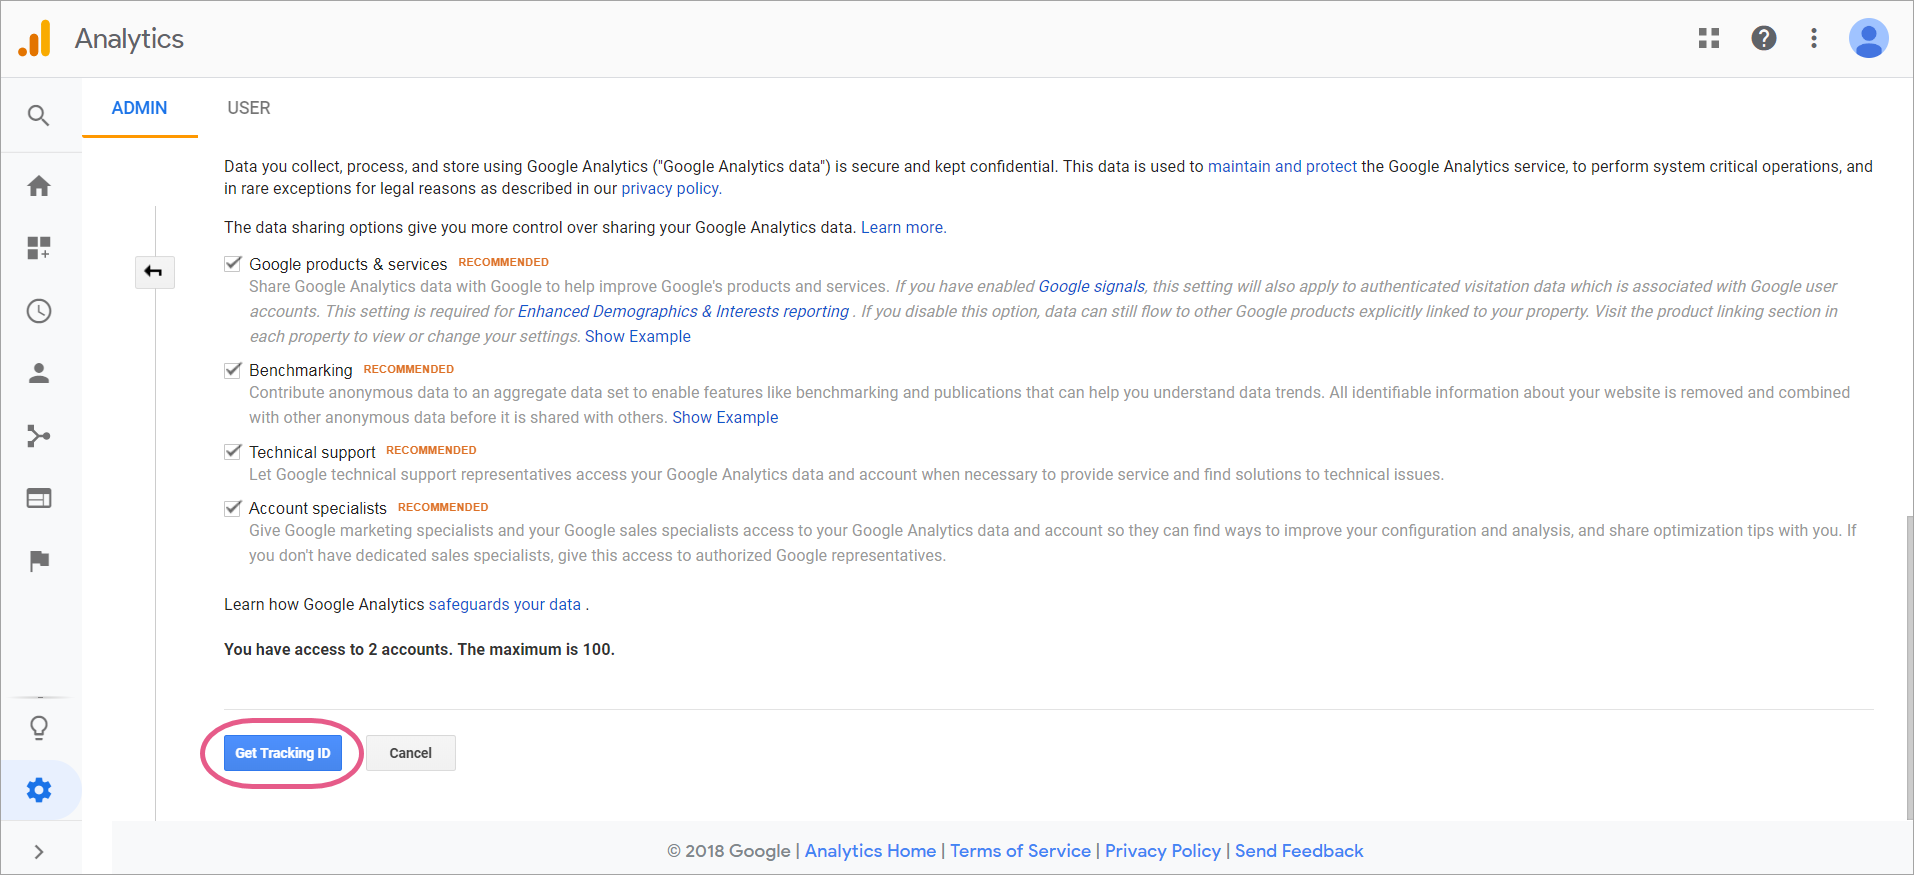
Step 5: Click Get Tracking ID
- Scroll down and click Get Tracking ID:
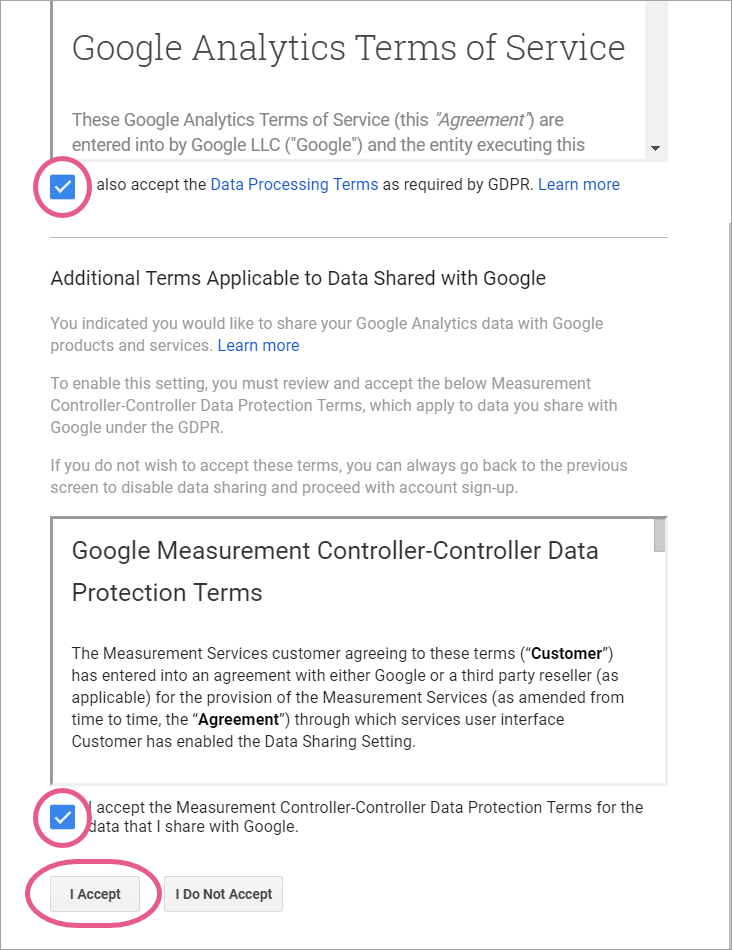
Step 6: Accept Google's terms of service
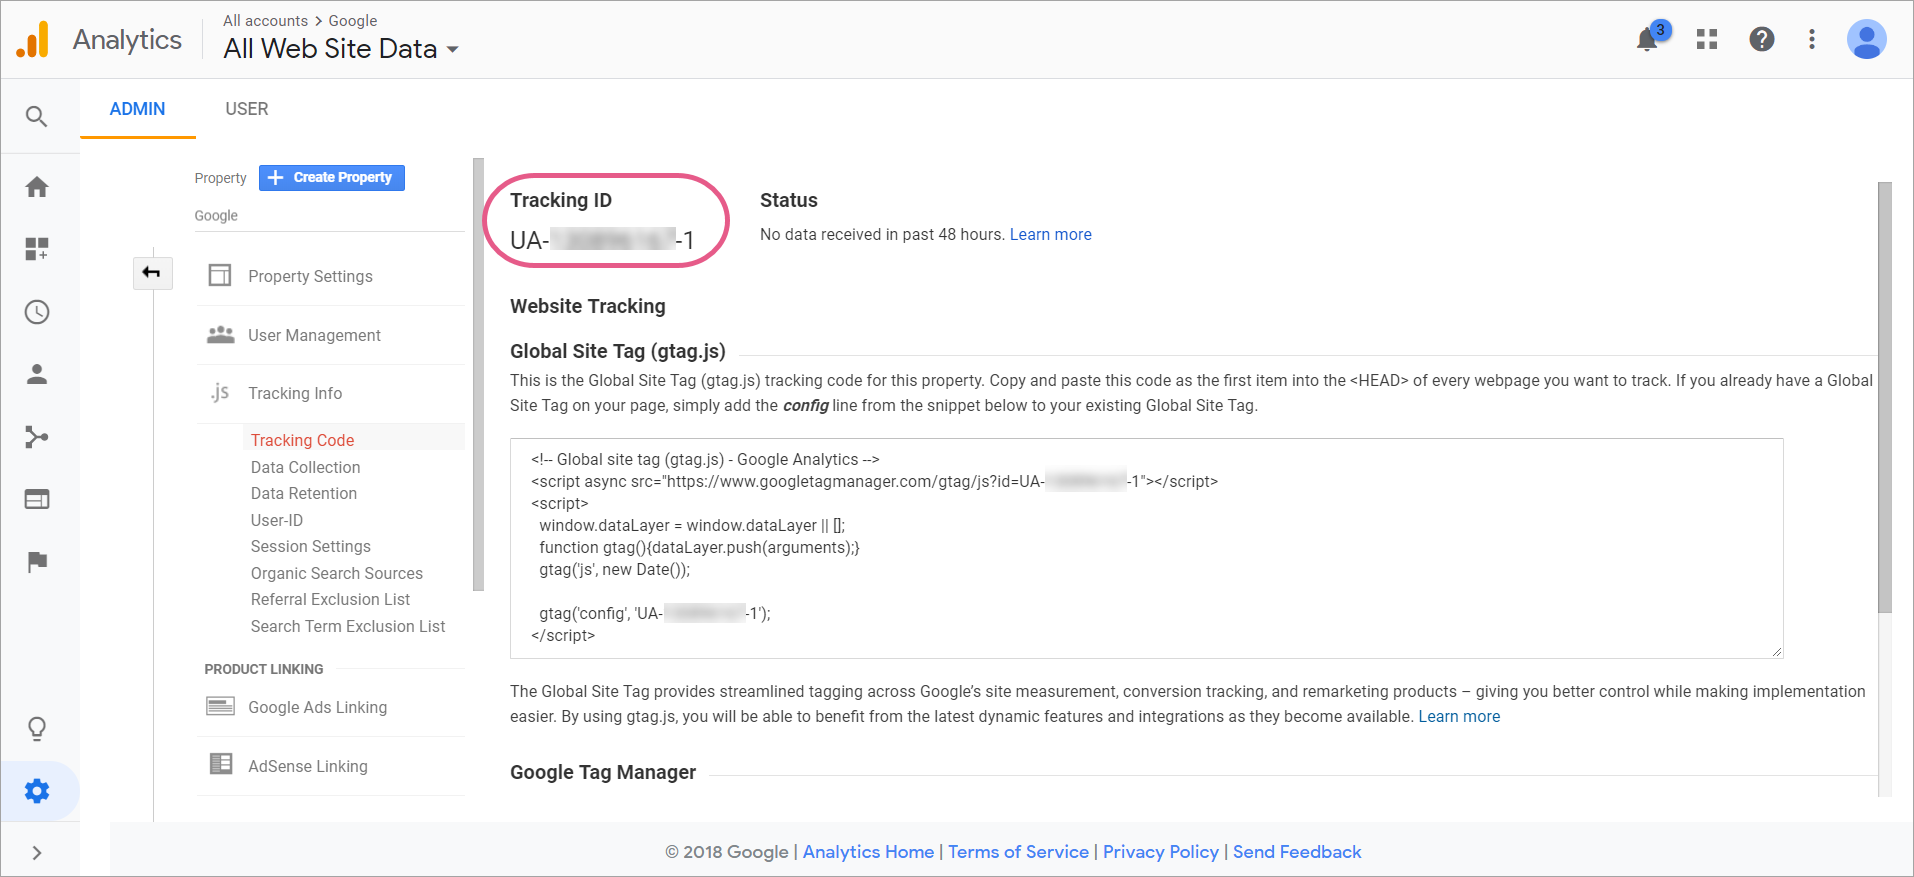
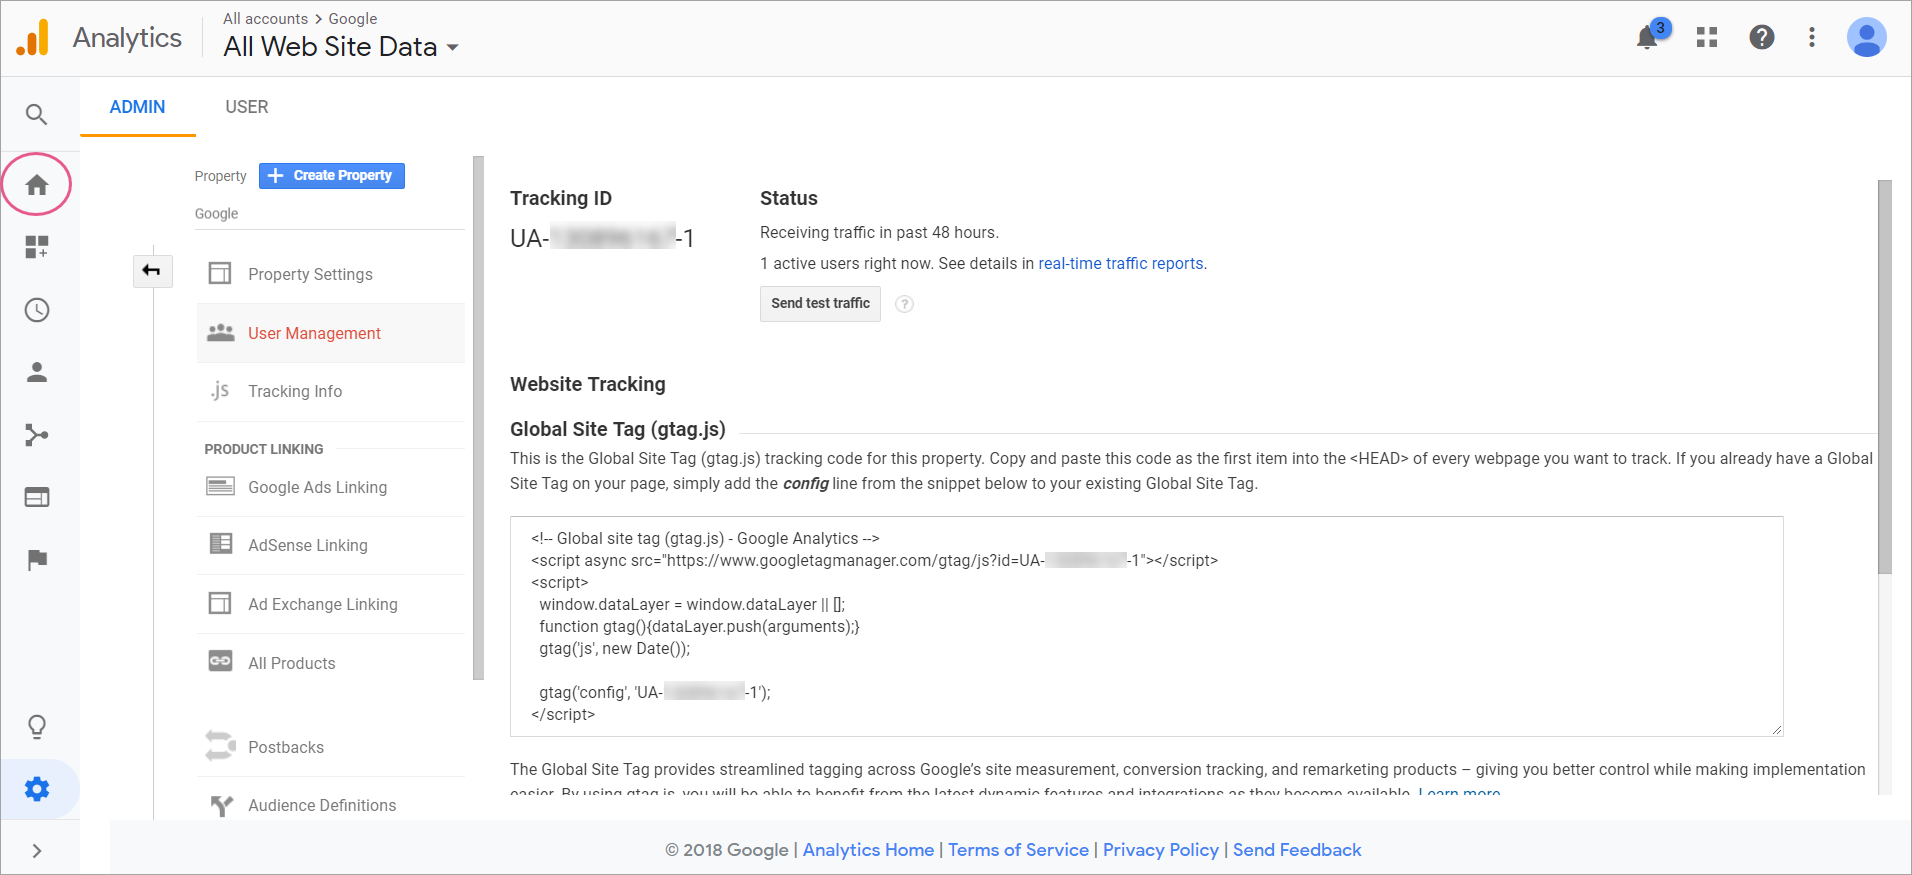
Step 7: Copy Tracking ID
Step 8: Review 'How to Set Up a Webhook' article
Step 9: Set up your Webhook in Insights using the Wizard
Wizard Step 1: Define event
Steps
- Select a WalkMe Event that will trigger your webhook;
- Select the Event Properties you would like to send to Google Analytics in the Advanced section;
- You can select from the pre-defined properties on the top and rename them (make sure to mark the event as selected), or click ADD PROPERTY to send a property with specific value;
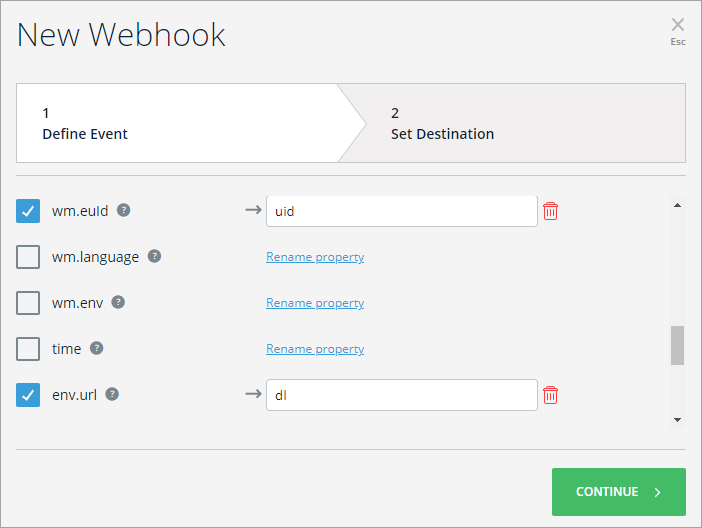
For example, we've sent the wm.euId as uid and the env.url as 'dl':
 And configured the following additional properties to match Google Analytics' mandatory properties:

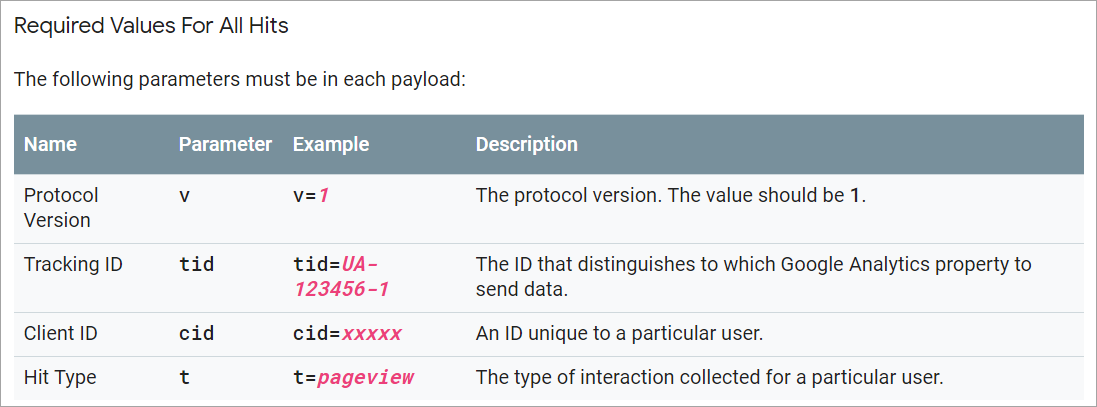
- tid - paste the tracking id value from step 6;
- v = 1;
- t = the type of hit type you want to map the event to (choose one from: 'pageview', 'screenview', 'event', 'transaction', 'item', 'social', 'exception' or 'timing');
- Notice that if you're using an 'event' type, you also need to configure the event category (ec) and action (ea), like we've added in our example.
- cid = client ID
Pro-Tip: See the Google Analytics Parameters Documentation for more information.
Wizard Step 2: Set destination
Steps
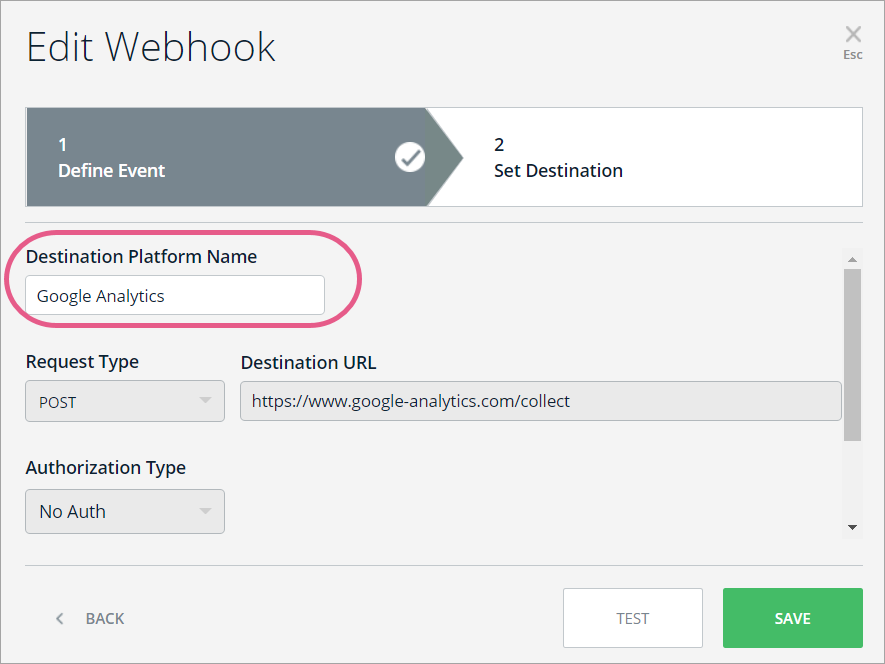
- Write in the Destination Platform Name. This name identifies the destination system (In this case Google Analytics):
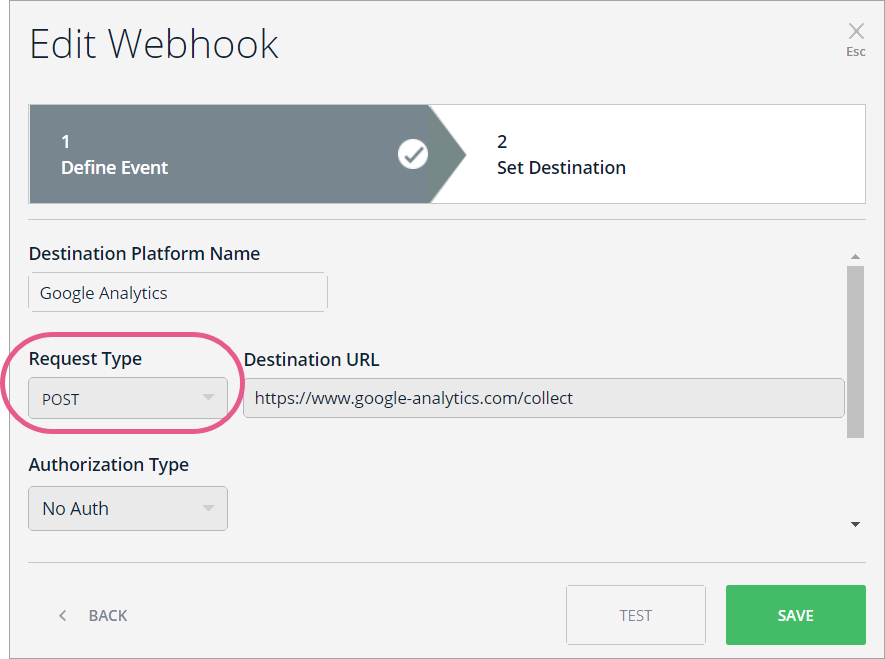
- Set Request Type to POST:
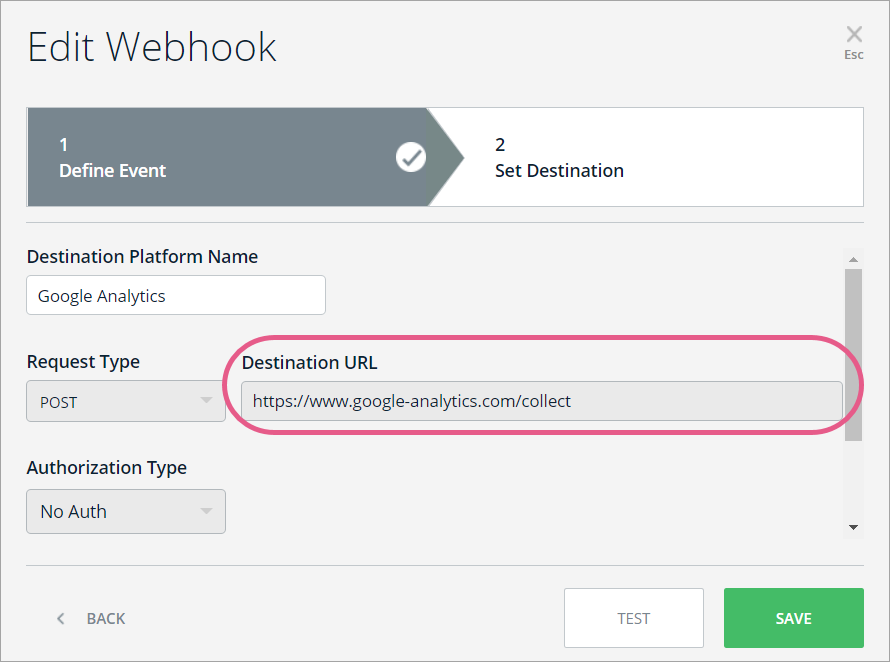
- Paste the URL according to your use case (in the following picture the URL is for creating tracker objects). The URL will always begin with "https://www.google-analytics.com/":
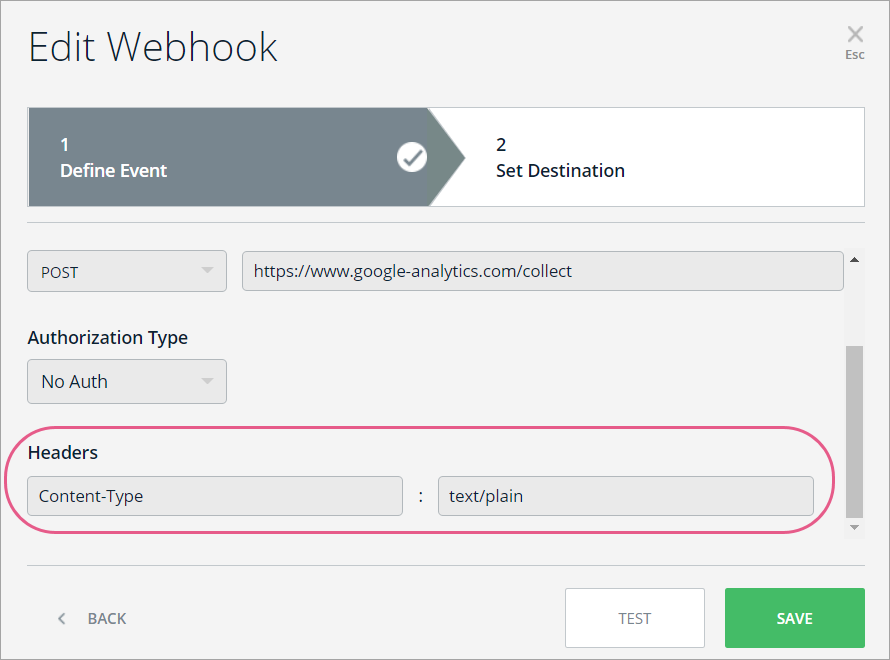
- Add Headers:
- Content-Type : text/plain:
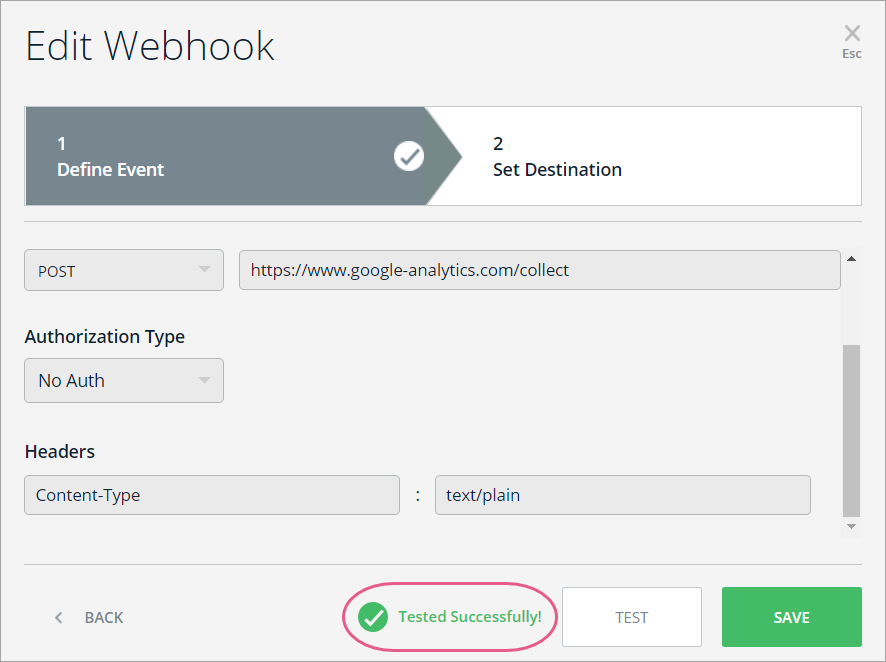
- Click TEST
- This will send the event that you defined in Wizard Step 1 to your destination platform to ensure that a connection was successfully made;
- You should see the message: "Tested Successfully!"
Step 10: Return to Google Analytics and click the Home icon
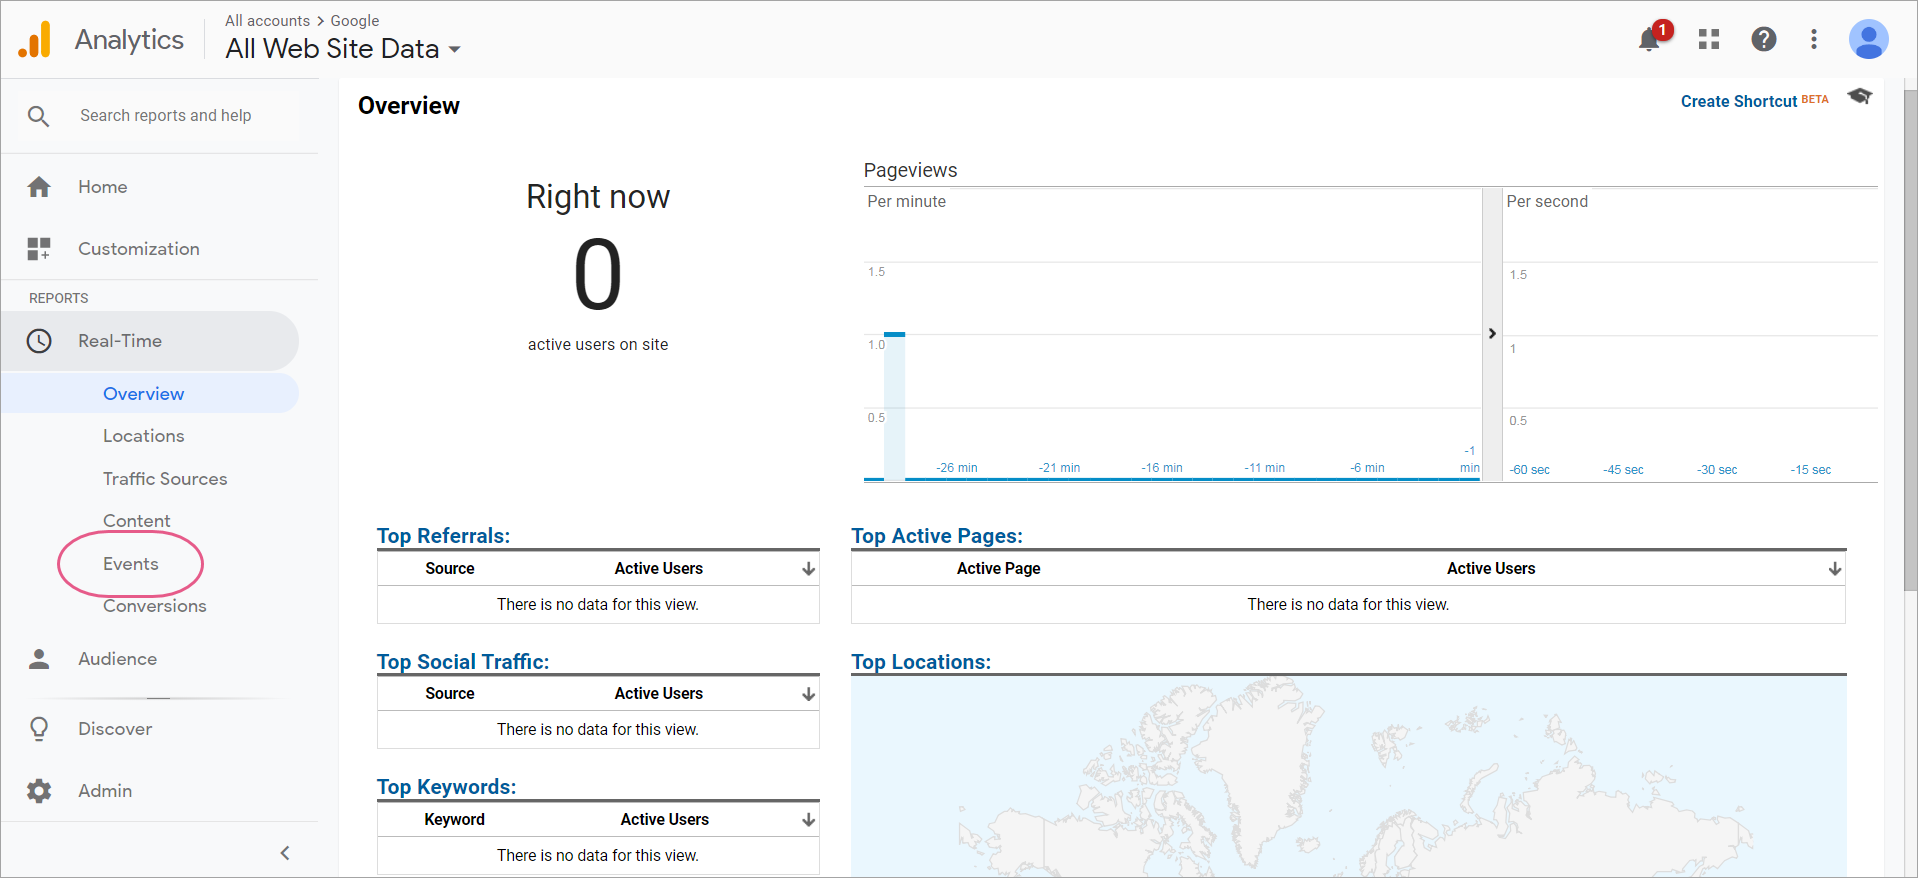
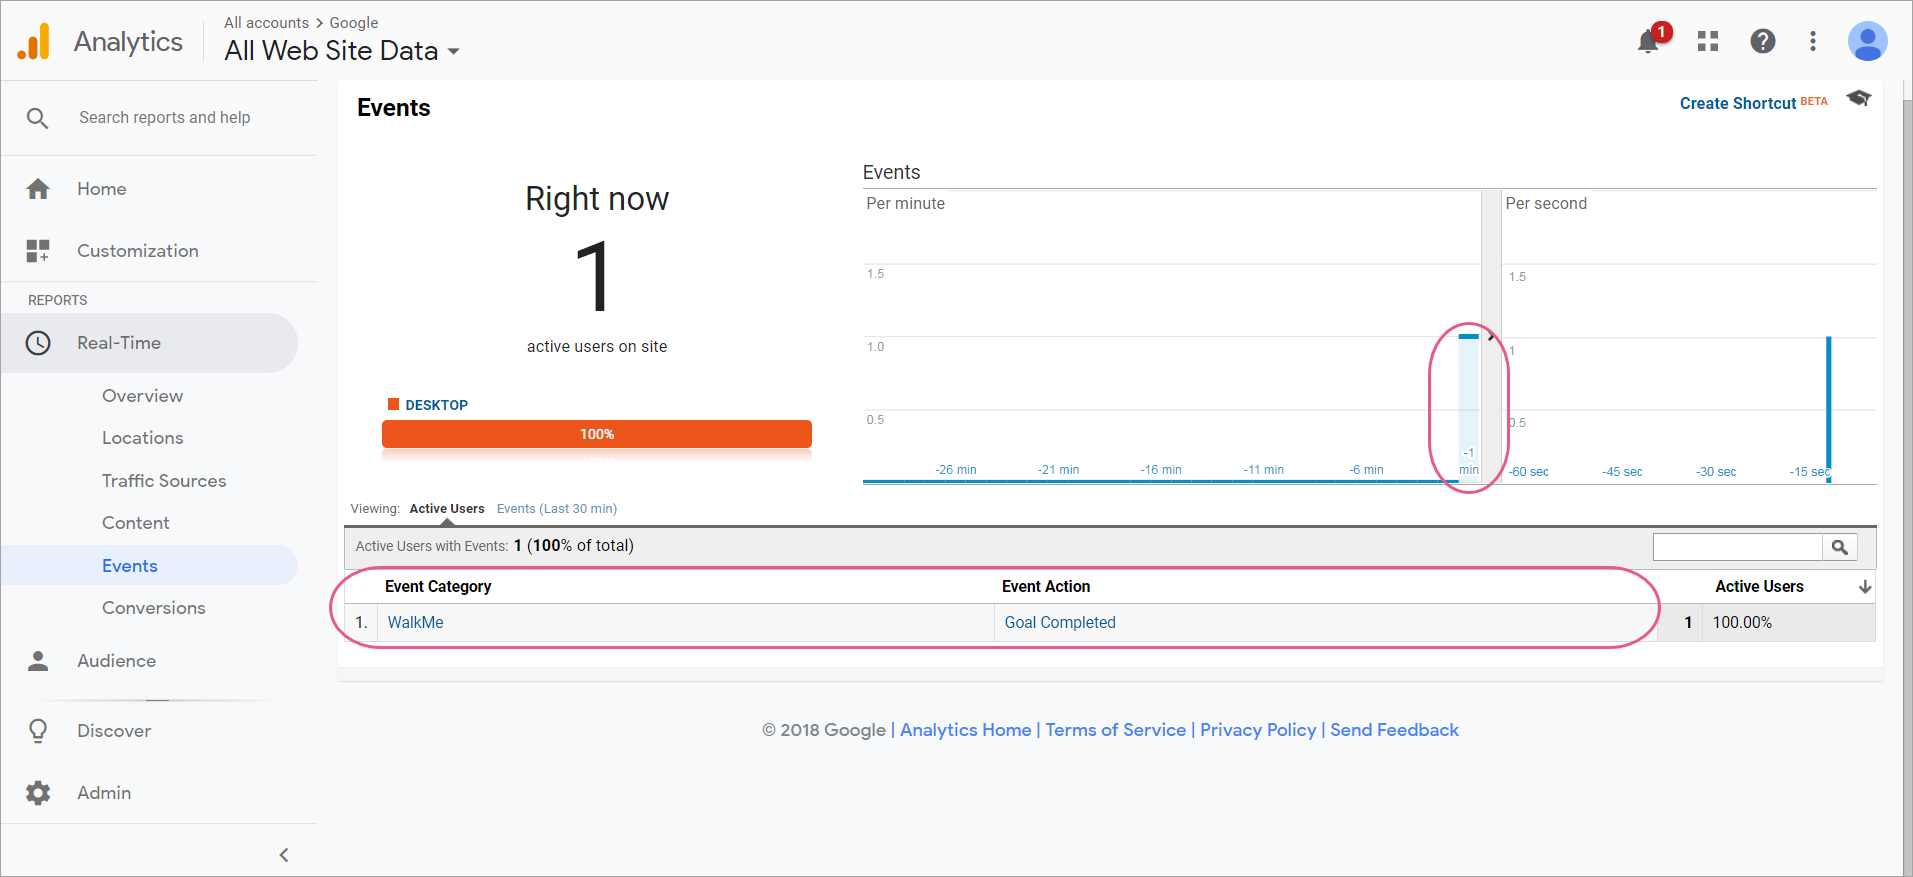
Step 11: Click Real-Time > EVENTS
- An event mark will appear with details:
Required Values
Pro-Tip: Some parameters may only be sent with specific hit types. For example, the pageview hit type requires the Page Path parameter ("dp").
Limitations
- Webhooks does not support new structure of data needed for GA4


