Splits: Getting Started Guide
Brief Overview
Splits are a kind of Flow Step in Smart Walk-Thrus that allows you to build variations in your guidance. A Split will create a new branch off of the Main Path where you can create dedicated steps that will only show under certain circumstances. Using Splits allows you to make flexible guidance that can accommodate users to take different paths through a process.
While the majority of users will follow the process laid out in the Main Path some users will need to deviate from the Main Path. Anticipate these variations by adding Splits to allow the guidance to continue even if the user needs to take a different route.
For example, use a Split to identify if a user is not logged in before starting a process. If they are not logged in, the Walk-Thru will branch off to specialized steps, reconnecting them to the Main Path once the user is logged in. Another example may be if users may have differently configured interfaces. The Walk-Thru may be set to check if a user has a certain tab available by default to click or if they need to go through a longer process to get there.
How it Works
Splits can be added anywhere in a Smart Walk-Thru - in the Main Path, in a branch, in a branch off a branch, etc. Splits are created with a rule in the Rule Engine. When WalkMe gets to the Split, it will check the rule. If True, the guidance will branch off the Main Path. The branch can include any number of steps and then reconnect to the Main Path at any step (or not!) If false, the guidance will continue playing along the Main Path.
Creating a Split
Add a Split Flow Step to your Smart Walk-Thru
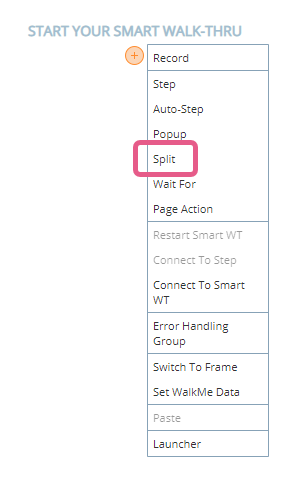
To add alternate paths to a Smart Walk-Thru, hover over the path where you would like to add the Split and select Split from the Options Menu.
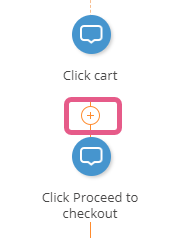
- In a Smart Walk-Thru, hover over the orange plus sign between two steps where you want to add a Popup Step.
- In the hover menu, select Split:
- To help navigate this Walk-Thru in the future, it is best practice to name the split using a question.
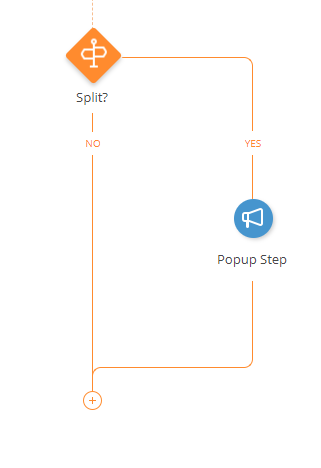
When you add the Rules to this Split, if the rules are true, the user will move down the YES path. Otherwise, the user will move down the NO path. - Click Create Rules.
- In the Rule Engine, set Rules for the Split. If these rules are true, the user will move down the YES path of the Split. Example Rules:
- Create rules to see if the user is logged in. If not, you can make the user log in before continuing.
- Create Rules to see if a collapsible menu is visible. If not, the user must expand the menu before choosing an option from the menu.
When you have added the rules, click Done.
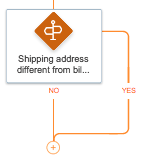
- The split will be represented by the Split Icon in the Smart Walk-Thru, and the Yes and No paths will branch out of it:
- If you don't want the two paths to join together, you can click the trashcan icon to prevent them from rejoining.
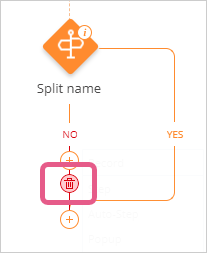


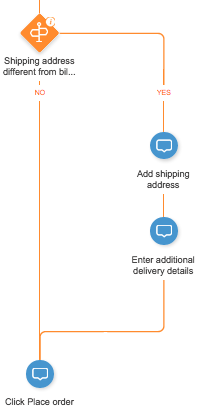
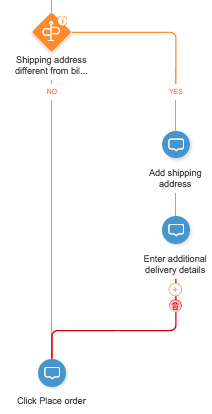 To reconnect a branch to the Main Path, simply hover over the orange + icon after the last step in the branch, click Connect to Step, and then select the step in the Main Path that you would like the guidance to continue playing from after the Branch. All steps between the Split and the step you select to continue playing from in the Main Path will be skipped when the rule for the Split is true.