Overview
The WalkMe Menu is built in the WalkMe Menu Organizer Console app.
Items that can be added to the Menu (both Help and Onboarding):
- Smart Walk-Thrus
- Resources: articles, videos
- Shuttles
- Onboarding Tasks
Items added to the Help tab are normally quick resources or guides for everyday tasks. While items added to the Tasks tab are Onboarding Items which have a goal associated with them and are often only needed for training.
Onboarding Tasks: Getting Started Guide
🎓 Digital Adoption Institute
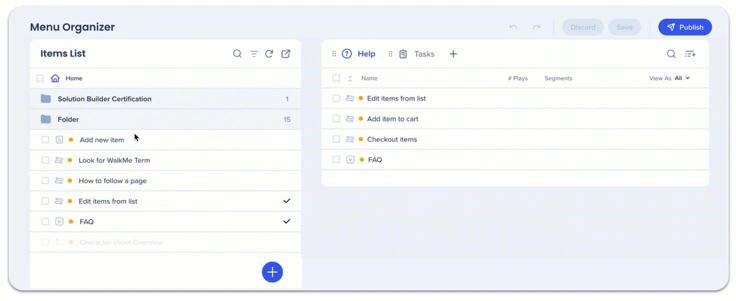
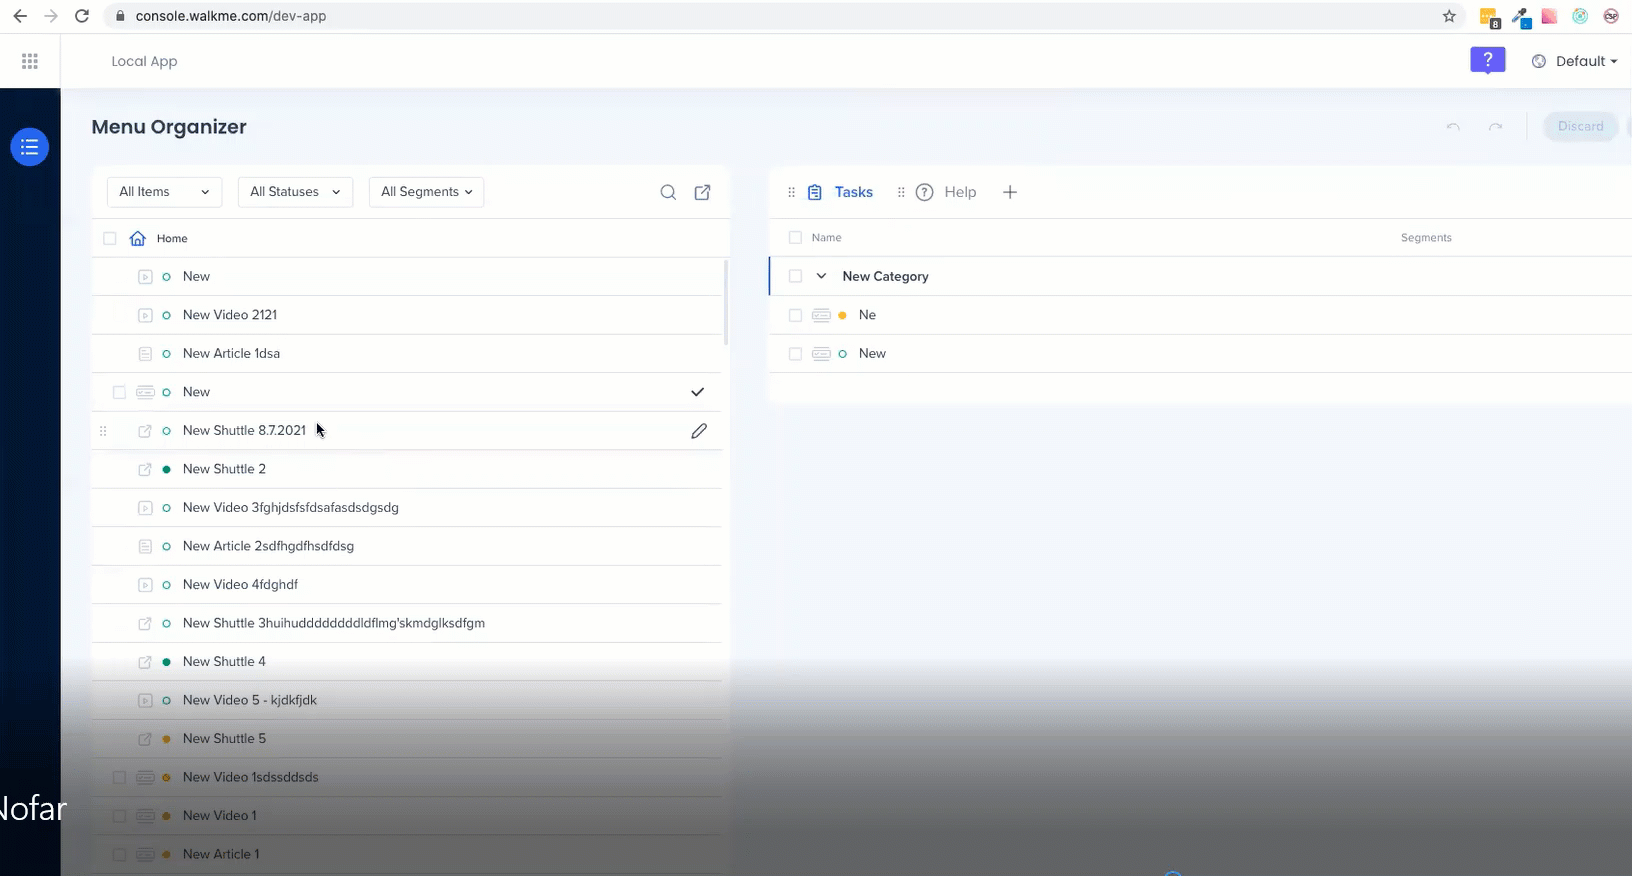
All of the WalkMe content you have created is in the left Items List, and the content that you have added to the Menu, which is available to your end-users, is in the right column.
What is the Help tab?
- Items added to the help tab are normally resources and guidance that are helpful for users and can be access multiple times.
What is the Task tab?
The icons next to each item indicate what kind of item it is:

To add content to the Menu:
- Navigate to WalkMe Console > Menu Organizer
- Drag your desired content from the Items List into the desired tab in the Menu:
The order the items are in the tab are the order they will appear in the Menu Player.
Tip
You can convert Items that are not Onboarding Tasks by adding them to the Task tab.
- The converted item will automatically have the Goal:
- Resource: Resource Opened
- Smart Walk-Thru: Smart Walk-Thru Completed
- Change the converted item's goal via the Editor.
To remove items, hover over the item and click the minus icon.
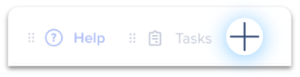
Add a Tab
You can create one additional tab:
- Click the plus icon next to Tasks
- Select the relevant tab type (Onboarding vs. Help)
- Name the tab
- Drag the tab to the desired order
You can choose which tab is the default tab, the one your users will see when they open the WalkMe Menu. Setting Tasks as your default tab increases the user engagement with your Onboarding Task Menu.
Save, Publish, Discard Content
- When you have finished adding content to the WalkMe Menu, click Save
- When you are ready to publish the Menu, click Publish

- To see how the WalkMe Menu will appear to your users, open the WalkMe Editor and click Preview

Make the WalkMe Menu your own by tailoring it to match your brand's look and feel. You can easily customize colors, styles, and layout with the built-in settings, or take it a step further by editing the CSS for even deeper personalization.
Customize WalkMe Menu

Tip Tuesday Videos
Technical Notes
- Sorting search results alphabetically is not supported


