WalkMe Share
Brief Overview
WalkMe Share is the most efficient way to get peer and stakeholder feedback on your WalkMe implementation. Manage feedback through comments, screenshots, and embedded knowledge base articles.
Get WalkMe implementation feedback from your entire team and across your entire company to get the most out of your WalkMe implementation, from start to finish.

Use Cases
Use WalkMe Share screenshots to:
- Receive peer review on your Smart Walk-Thrus by sharing screenshots with other experienced builders
- Create a database of screenshots of your most successful Smart Walk-Thrus to guide future builders
- Onboard and train new builders faster by providing examples of successful builds created by other experienced builders
- Download your Smart Walk-Thru as a PDF, PowerPoint, or jpeg, and present it to enhance the DAP skills of others
Use WalkMe Share video exports to:
- Offer how-to videos on all your articles for users without extra effort
- Quickly share videos with customers or employees to resolve support issues
- Save time by eliminating the need to capture, edit, and host videos
Setup
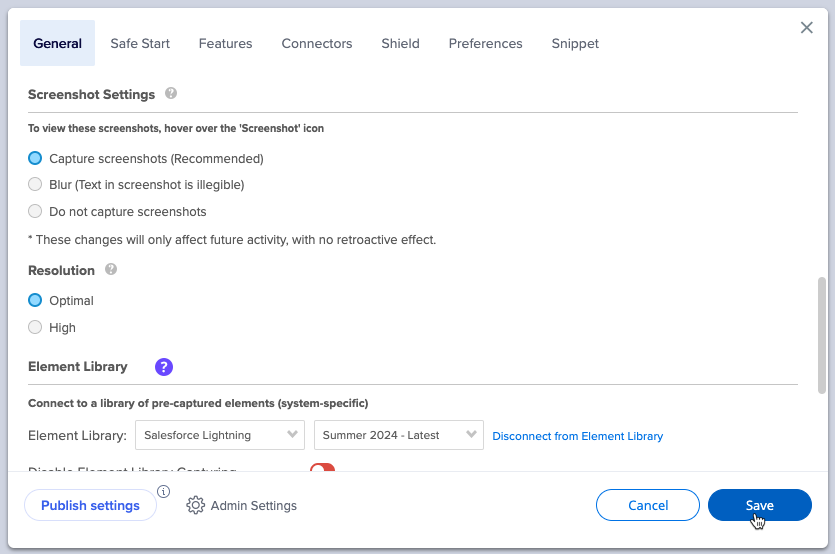
To setup WalkMe Share, you will need to enable screenshot capture in the WalkMe Editor.
- Open the WalkMe Editor
- Go to Settings
- Click System settings
- In the General tab, scroll down to the Screenshot Settings
- Turn on Capture screenshots (Recommended)
- Click Save
How It Works
WalkMe Share pulls screenshots directly from the WalkMe Editor during the capture element process.
WalkMe Share Domains
- US/Global Data Center: share.walkme.com
- EU Data Center: eu-share.walkme.com
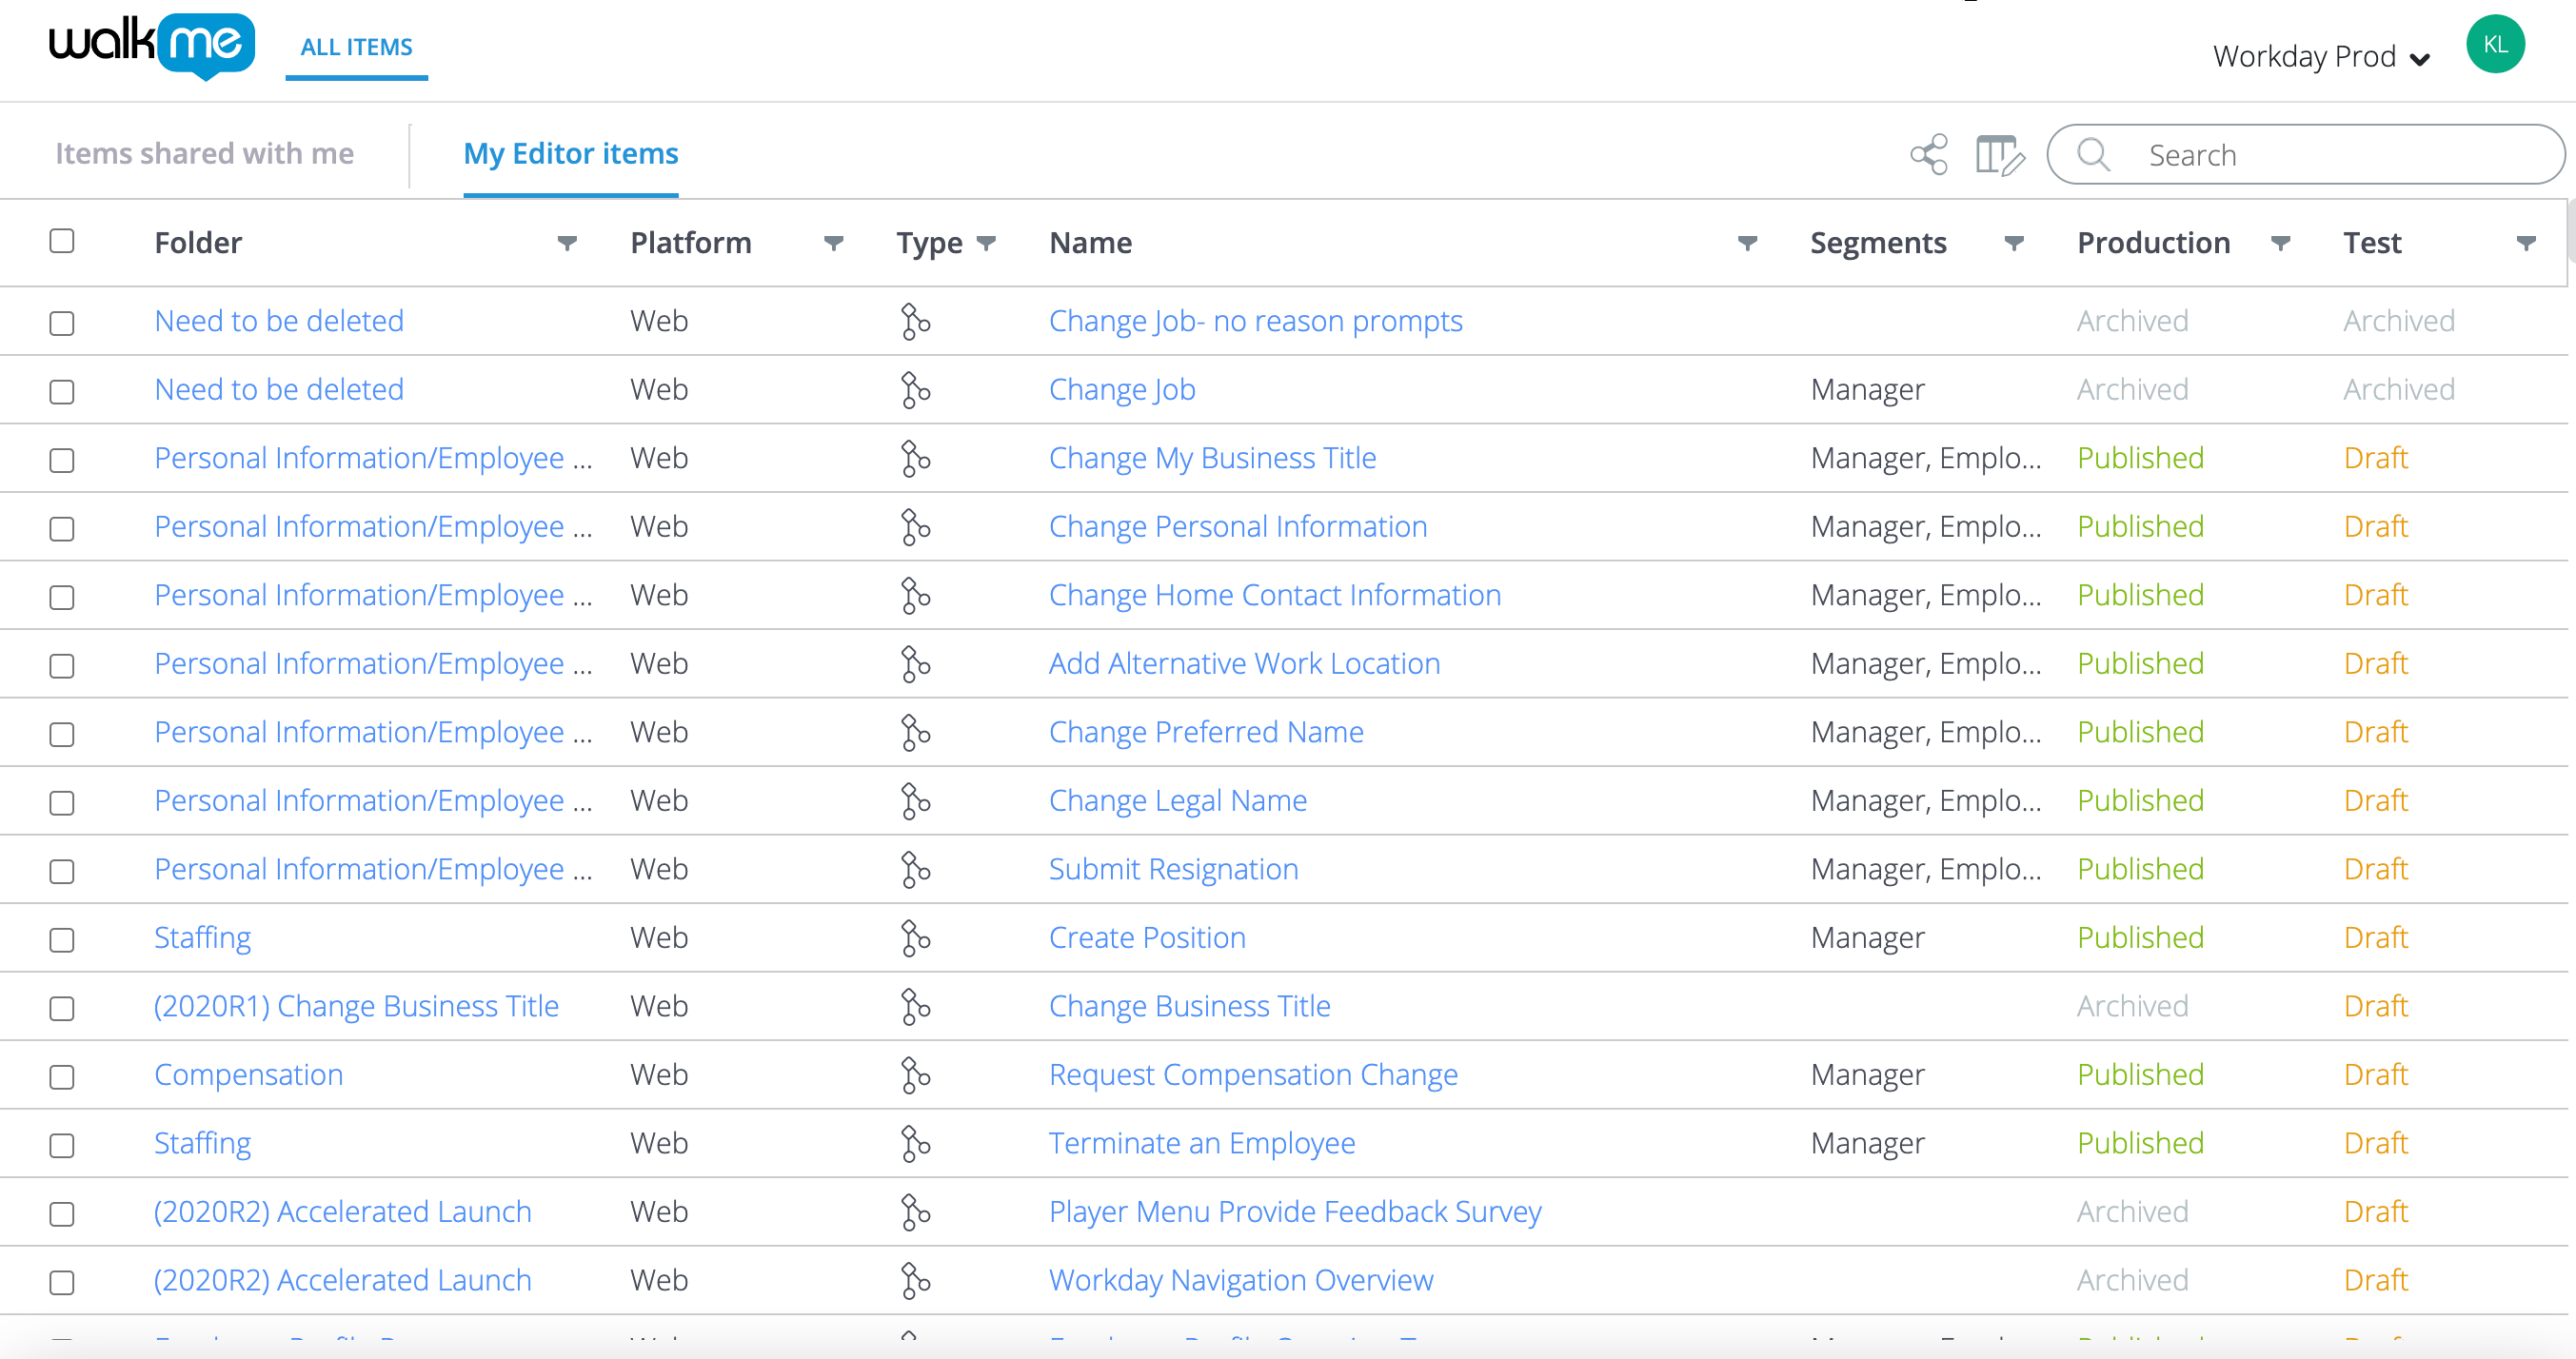
Shared Items Page
The Shared Items page shows a table display of items that a user created in their own WalkMe Editor account and items that other WalkMe users shared with them.
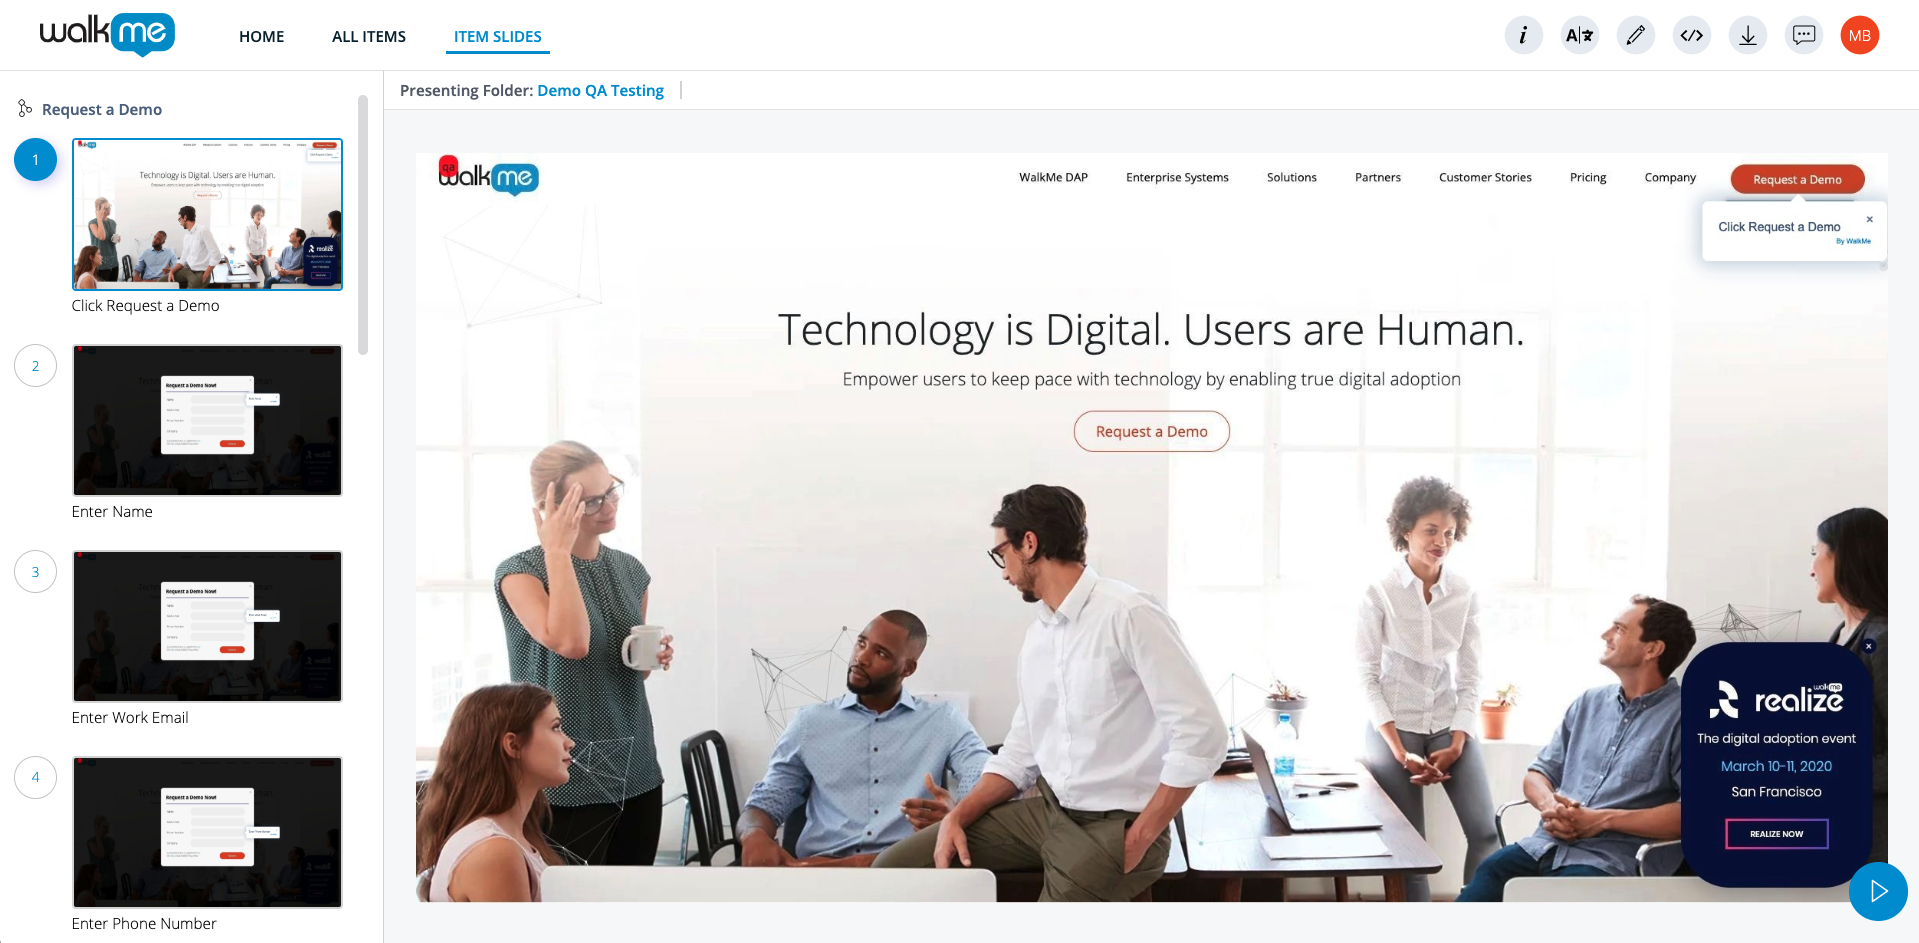
Presentation Page
Quickly demo a WalkMe build using the WalkMe Share Presentation page with its flexible, collaborative, and intuitive interface. WalkMe Share presentations can be shared, opened, and edited by multiple users simultaneously.
Technical Notes
-
Rebranding WalkMe Share's documents to match a customer's company branding is not supported and was deprecated in late 2020.
-
Customers can download all the slides as a zip file of jpgs and place them into their own branded documents.
-