Brief Overview
The WalkMe Editor is used for building, managing, and publishing Smart Walk-Thrus and other WalkMe Apps. Once the editor is installed on your computer, simply download the editor extension to your browser of choice to start building.
For more detailed guidance on how to install the editor, please follow the instructions in this article: Install the WalkMe Editor
Learn more about the editor experience
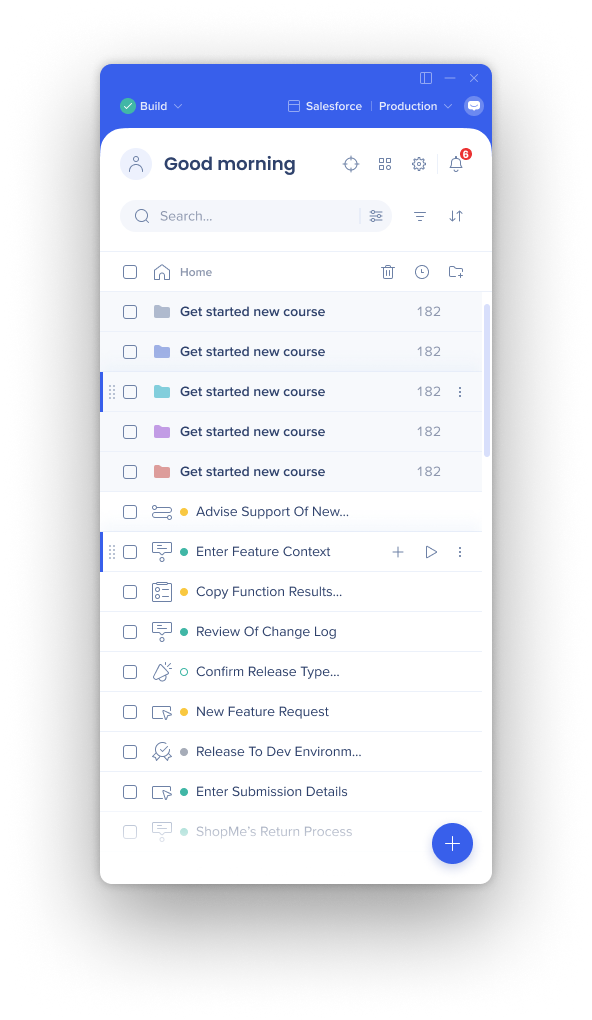
Watch the WalkMe Beyond: Editor 101 Webinar

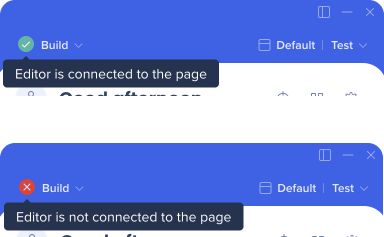
Connection Icon
- The circle icon in the upper left indicates if the editor is connected to the browser
- The editor must be connected to the browser to build WalkMe content
- Green checkmark: Editor is connected to the page
- Red X: Editor is not connected to the page (make sure you have the page open which you're building on)
Build/Published Mode Selector
- The mode selector lets you toggle between Build mode and Published mode
- This way you can view and test published content without the need to switch between different browser profiles

How to Use Build and Published Mode Selector
System Selection
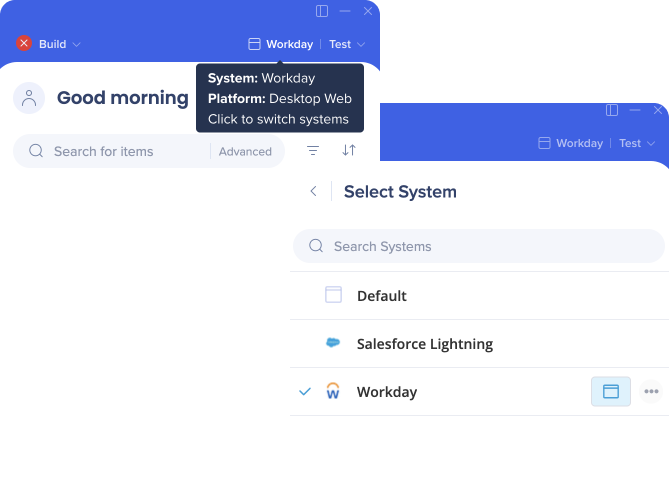
- Before you begin building, it is important to make sure that you are working on the correct system associated with your account
- You can see the name of the system in the top right of the editor
- Note: If the system name is too long, hover over it to view the full name
- To switch between systems, simply click on the name of the system in the editor and then choose the system you want to work on from the Select System screen
Environment Selection
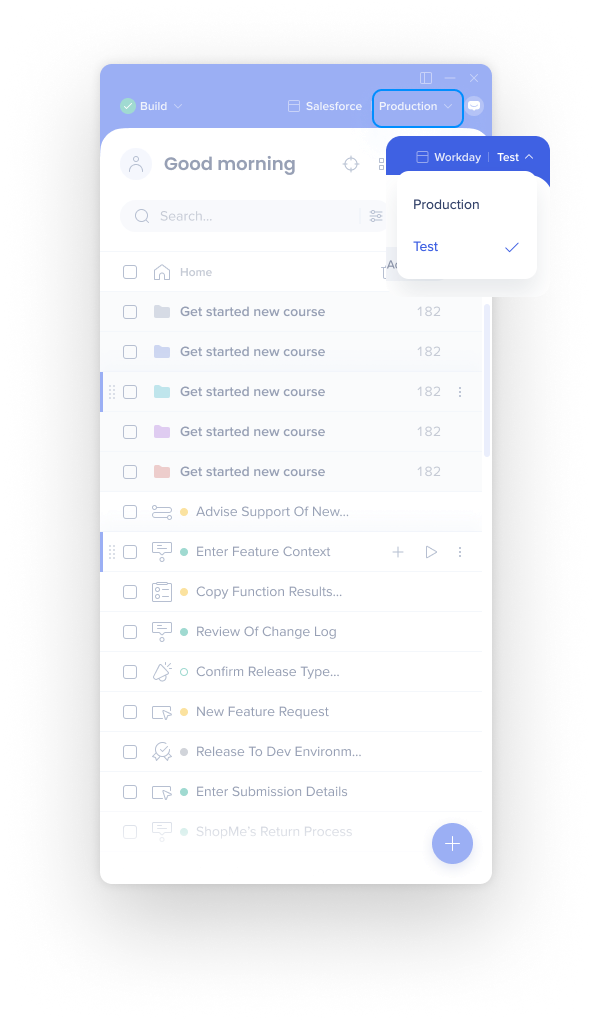
- All content that was created is viewable in the editor, but items may have different publish states across different environments
- For example, a content item may be published in the test environment for QA testing, but still in draft mode in the production environment
- The state of each item can be viewed in each of the environments
- To switch between environments, click on the environment dropdown in the upper right corner of the editor and select the environment you want to view
Settings
- The editor holds many important settings for WalkMe functionality, such as unique user settings, attributes, flow tracker settings, customization, and more
- You can access settings by clicking on the Gear icon

Apps
The new WalkMe Apps menu offers a central place to access your WalkMe apps, divided into the following categories: Apps, Data, Admin
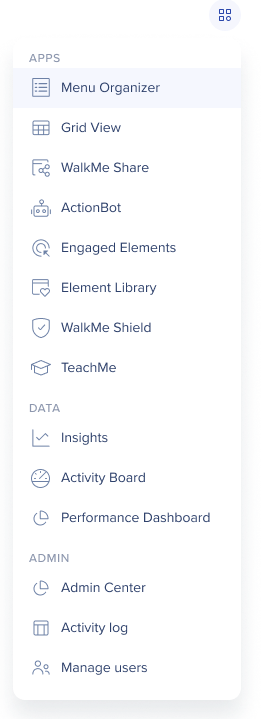
Search
- Use search to quickly locate your items
- Advanced search allows you to locate, update, and maintain Element Selections within a WalkMe implementation by Id, class, text, URL, and more

WalkMe Advanced Search
Segments and Filters
- Create segments and filters for better organization and to manage the building experience
- Click on the Segment icon to manage existing segments and use the + Create Segment button to create new ones
- The Filter icon lets you filter content by item type, segments, status, and creator
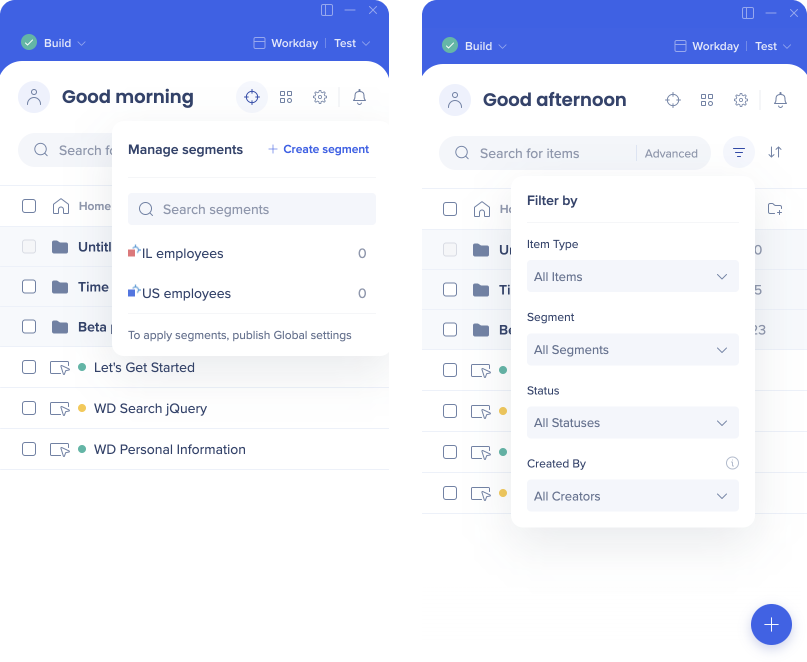
Editor Segments & Filters
Create New Item
- Click on the Blue + icon to create a new item
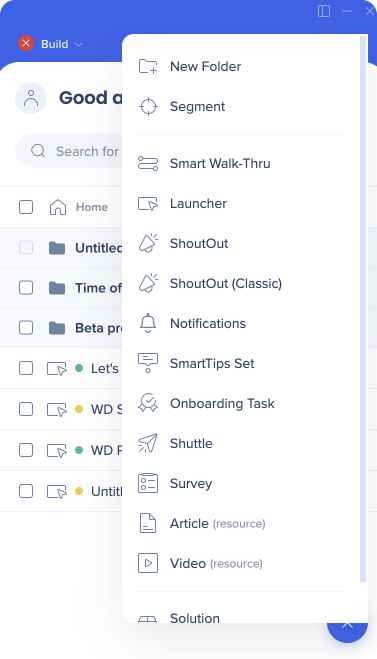
Create New Folder
- Click on the + New Folder button to create a new folder
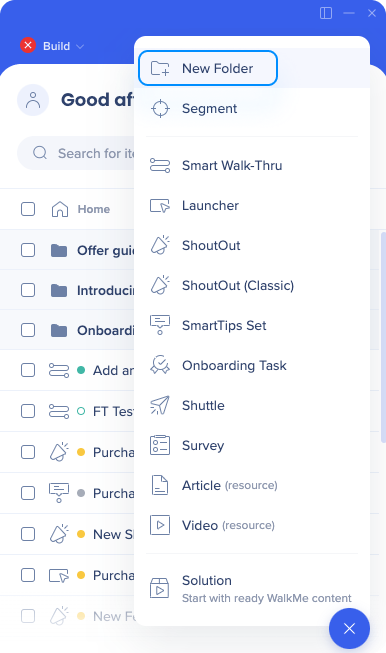
Editor Folders & Recent Items
Recovering deleted content
If you need to restore a deleted Smart Walk-Thru, Launcher, or other item, please reach out to Support.
Show Recent Items
- Click on the Clock icon to see items you've recently worked on
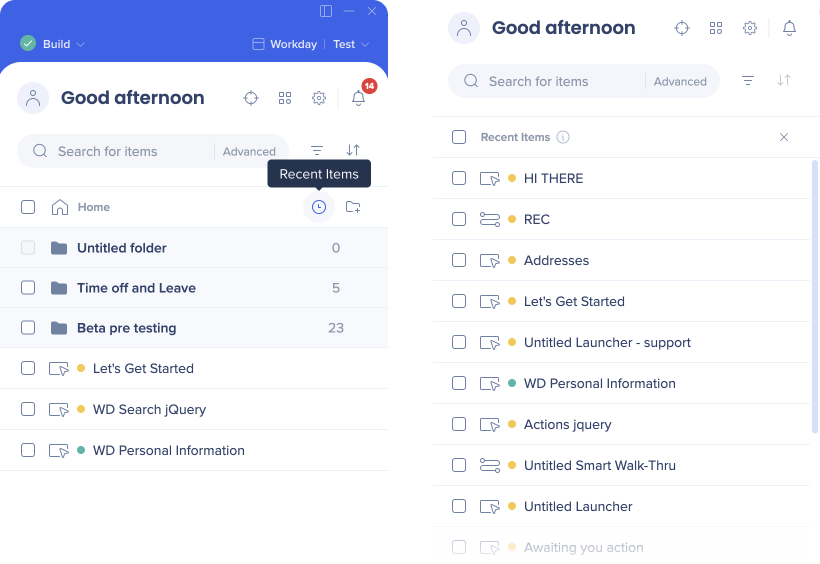
Editor Folders & Recent Items
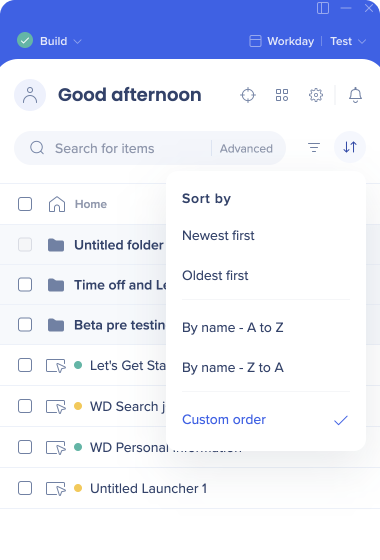
Sort
- Click on the Arrows icon to sort your items by name or by creation date
- Custom order organizes according to the user preference
- Tip: You can drag and drop to reorganize your items
Preview
- Preview the selected items to see how they're working
- There are three preview options available:
- Quick preview: View all items in default language
- Multi-language preview: View all items in all languages
- Published content only: View content that was published to Test
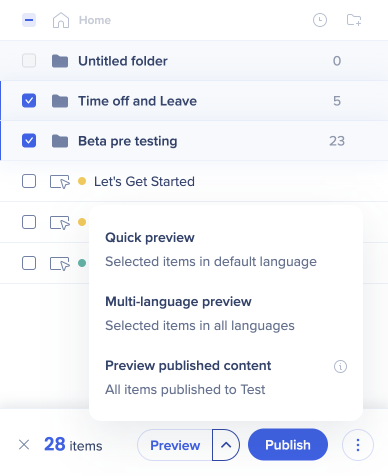
Previewing WalkMe Content
Publishing
Notifications
- Click on the Bell icon to review your new recommendations available or to review a new message from the WalkMe Assistant team


![]()


