Publishing
Brief Overview
Publishing allows you to select, organize, test and publish items that you create in the WalkMe Editor to your different environments. Publishing is an important part of the building process. Whether it's to test out your implementation on a sandbox environment or release it to your users, you'll need to understand how to properly configure and publish your WalkMe items. Publishing makes the items you create available on a server, but in order for a user to see your published items they need to have the associated snippet running in their browser. Learn more about the WalkMe snippet.
Use Cases
- Test WalkMe items on a Sandbox environment
- Remove WalkMe Items from an environment by archiving them
- Organize and configure how items appear in the WalkMe Menu
- Publish items to your Production environment
How It Works
Publishing WalkMe items saves them to an associated file on a server. This file has a unique ID (GUID) that matches the ID of your WalkMe Editor account.
To access these files from a browser, the end-user must have the snippet with the same ID running in their browsers. When the JavaScript snippet runs, it looks for the file with the same ID on the server to determine which WalkMe items to run on the environment. WalkMe also checks this file to determine how items should appear on the environment, including the specific items in the Menu, the order in which they appear, or even if they appear in the Menu at all.
When you click Publish, only the items you select will be published. Items that were already published do not need to be published again. You will receive a message notifying you of how many new items are about to be published. You also have the option to publish your Global settings along with your WalkMe items. It is best practice to leave this box unchecked and publish WalkMe items and Global settings separately - for more information on Global settings.
Publishing Environments
When publishing, you have the option to publish to one or more environments, such as Test or Production. These environments use the same ID code but their snippets are slightly different. For example, the Test snippet will have the same ID but include the word ”test” in the link.
Since each environment has a slightly different snippet, WalkMe views them as distinct; for example, when you publish an item to the Test environment, those published items are only available to users that have the Test snippet running in their browsers.
Having a unique snippet for each environment allows you to test different WalkMe items in a Sandbox (Staging) environment before they are released to your end-users on a Production environment.
The WalkMe snippet runs in all major browsers and can be deployed by either manually writing it into the HTML (Source code) of the website, or by inserting it using a browser extension.
Process Overview
WalkMe recommends the following process to help you set up and prepare to publish your WalkMe items and also some best practices to follow:
- Ensure WalkMe is deployed on your site: In order for WalkMe to work, it has to be deployed on your site. Learn more about the WalkMe Snippet.
- Go over design: WalkMe has pre-made themes or you can customize for yourself. Customizable components include step balloons, Launchers, the Player Menu, the widget, and much more using CSS and the ShoutOut Visual Editor. Check that the design and colors compliment your site and are consistent across applications.
- Add Goals: The usage graph in Insights is only half of the information you need to track success. The best way to track success is to use Goals. Learn more about Goals.
- Set Unique User ID Settings: User tracking allows you to see if individual users are reaching their WalkMe goals. By enabling user tracking, you will be able to see an individual's progress as well as their usage of all the other Apps in the WalkMe Analytics Module. There are a few ways to identify unique users. The easiest is to use WalkMe ID where each user will be assigned an ID. However other methods can be more accurate. The WalkMe ID is useful for tracking large numbers of users, specifically for external sites. However, it is not ideal for internal sites where you want WalkMe to remember your user. For Salesforce users, WalkMe can track the Salesforce User ID. Learn more about Salesforce variables. For non-Salesforce users, we recommend using variables. You can also use a Cookie or jQuery to identify your users. However, variables, Cookies, and jQuery will require you to supply a way to identify the user.
- Publish to Test Environment and Run Quality Assurance Tests: Make sure to test all of the items you plan to deploy. Testing ensures that your users have the best possible experience and don't see breakages or broken links. Also, review text for typos and grammatical errors. Learn more about QA with the self-paced course Test Your Implementation at the Digital Adoption Institute.
- Organize the menu: Use the Menu Organizer in the Publishing Menu to organize the order in which your items will appear in the Help and Task (if you have Onboarding) tabs. Learn more about organizing the WalkMe Menu below.
Previewing WalkMe Items
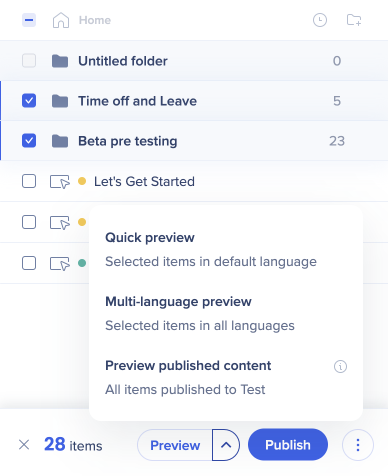
Before using the Publish menu, you have the option to preview your work while using the WalkMe Editor. This allows you to view how your implementation will work on the site, without having to publish anything or install the snippet in the site or browser window. While in preview mode, use the Flow Tracker to see what is happening when a Walk-Thru plays. Learn more about the Flow Tracker.
Organizing The Menu
WalkMe allows you to customize how your items appear in the Player Menu.
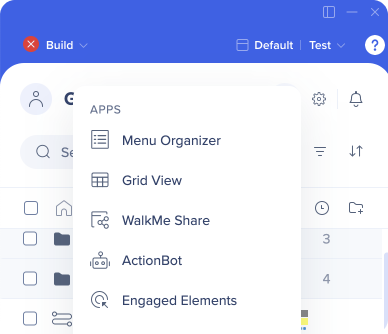
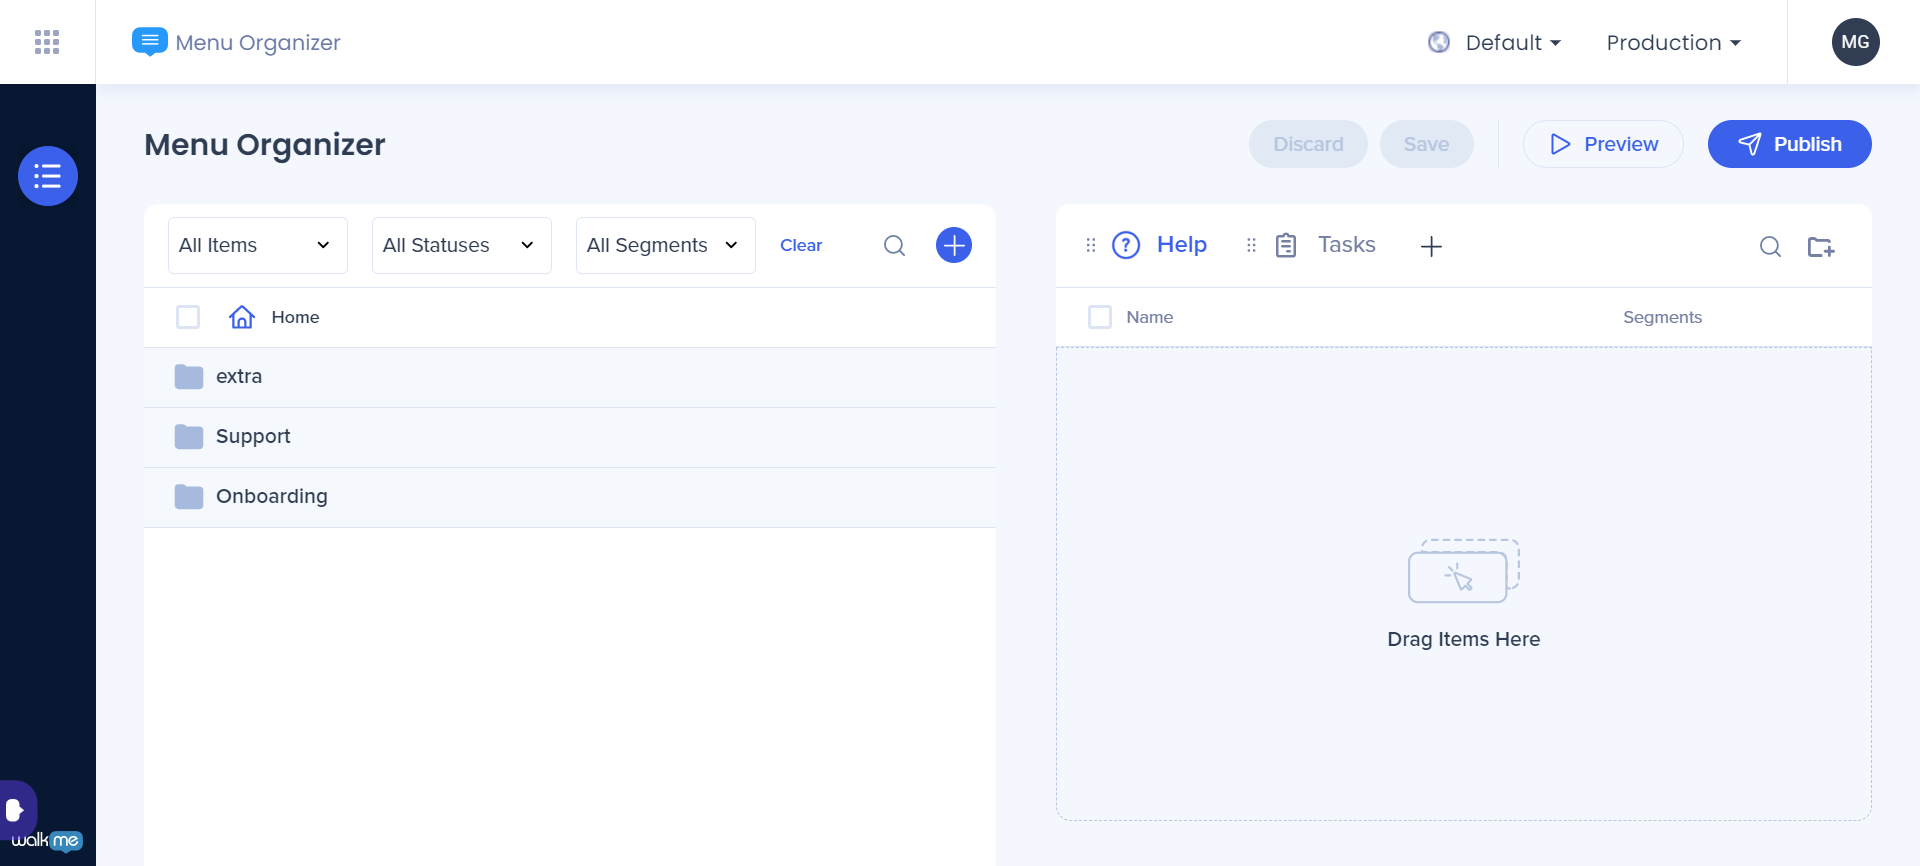
Select Menu Organizer in the apps menu in the Editor to open it on console.walkme.com/menu.
On the left side of the console are all the items you've created in the Editor.
To add items to the menu, simply click and drag them to the “End User View” on the right side. Which is divided into two tabs Help and Tasks.
On the right is a list of items that appear in the menu once they have been published. All new items created in the Editor automatically appear here. To remove an item from the menu, simply hover over it and click the remove item red icon. This removes the item from the menu but does not delete it. To change the order that items appear in the menu, simply click and drag them up or down in the list. Items listed at the top of the menu often are clicked much more often, so it's important to consider item order.
Onboarding Task List
Above the right menu, you can view your Onboarding Task list where you can similarly reorder and remove tasks for onboarding. Onboarding Tasks appear in a separate tab in the WalkMe Menu called Tasks, but it must be enabled for your account in Onboarding Settings to appear in the Menu. Learn more about Onboarding.
By default, the Help menu appears first when users open the Menu but below the Menu, you can change the default tab to Tasks instead of Help.
Publishing WalkMe Items
Before you publish, make sure to install the WalkMe Snippet on your site; otherwise, WalkMe will not appear on your environment. Learn more about the Snippet.
- View your content on the different environments to get a better understanding of what you currently have published on which environment.
- Select the specific items you wish to publish.
- Click on the Publish button.
- Select the environment you wish to publish.
- Select if you would like to Publish Global Settings.
- View the Summary provided before continuing to make sure everything is correct:
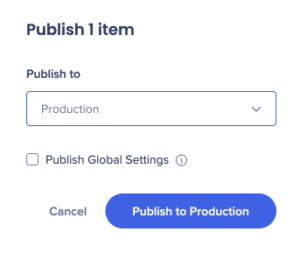
- Click on the Publish to “environment” button, you will see a progress bar showing the steps:
- Starting to publish
- Retrieving the data
- Uploading the files
- Finalizing publishing
- Done
- If a step fails, an error message will appear showing where it failed which will enable Support to help resolve the issue quicker.
- Parallel-publish for multi-user Editor accounts is supported - meaning a case where two users (or more) linked to the same account can perform interchanging publishes (AKA multi-publish).
Note: SmartTips are published by Set, but it is possible to disable a specific SmartTip so it cannot be published. Learn more about SmartTips.
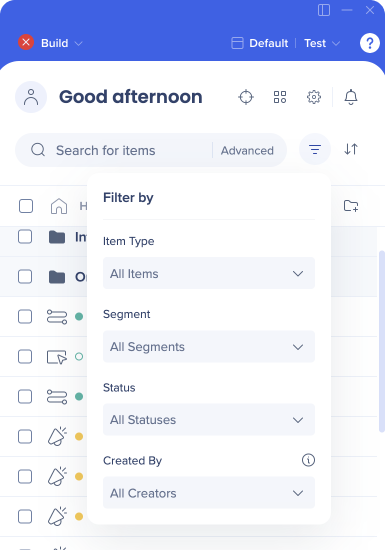
Filtering Content to Publish
In many cases, users would like to publish only part of the content they have in the editor. Users would like to be able to find the content they'd plan to publish.
E.g. users would like to only publish content that has been published & modified. Or to only publish content that is segmented to the sales audience.
To do so, users may simply filter the content they'd like to publish (e.g. filter by publishing state or segment), click the select all checkbox, and then Publish.
Publish Statuses
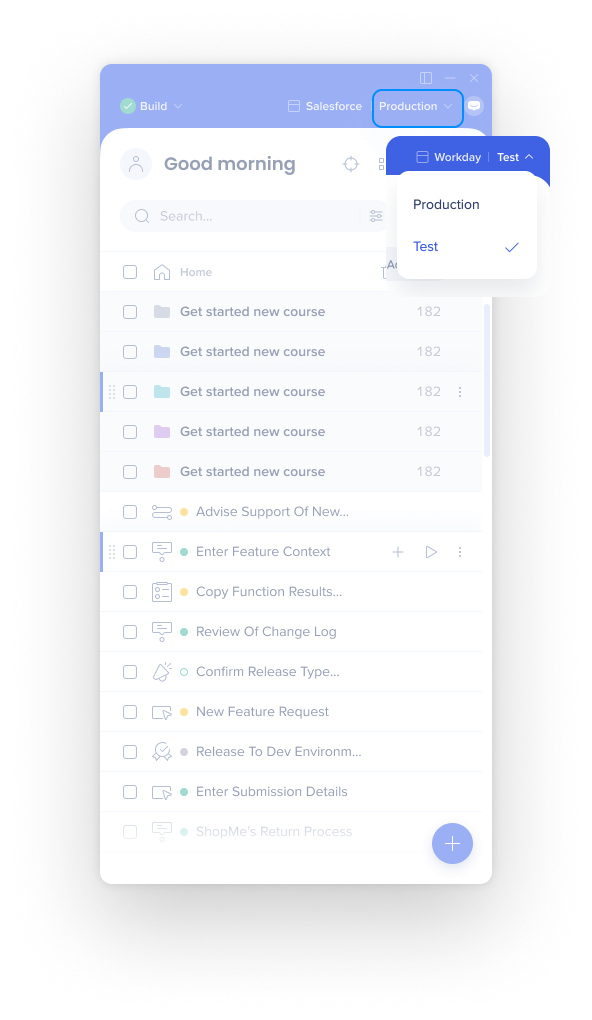
Next to each of the item's icon (illustrating the type of item), there is a circle icon that shows its current publishing status. These statuses change when switching between different environments.
| Icon | Description |
|---|---|
 Draft Draft |
Orange circle icon denotes item is in Draft mode. Draft items are not published to the server. |
 Published Published |
Green circle icon denotes Published status. Published items are saved on the server and have not been modified in the Editor since they were published. |
 Modified Modified |
Empty green circle icon denotes Modified status. Modified items are currently published, but have been modified in the Editor after publication. Publication is required to add modified changes to the published item. |
 Archived Archived |
Grey circle icon denotes Archived status. Archived items were previously published, but have been removed from the server or unpublished. |
Switching environment views
The editor's content list view shows all the content that was created in the Editor.
However content items may have different publishing states across different environments. Meaning the same item may be published in the Test environment while still be in draft mode in the Production environment.
E.g. Users that have completed working on a new Smart Walk-Thru for a new process (named "How to Edit Profile Image"), may then publish that item to the Test environment in order to run QA tests before publishing to production.
You can view the publish state of each item in each of their environments by clicking the environment at the top bar in the Editor and selecting the environment from the dropdown menu:
Publishing settings
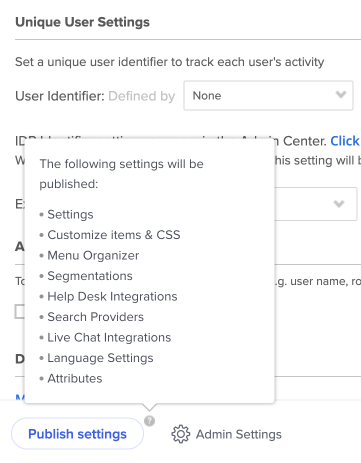
If you would like to publish changes to the settings, without publishing any other content.
Publish settings button appear in - Setting - Customize - Menu
Publishing settings includes publishing the following:
- Settings
- Customize items & CSS
- Menu Organizer
- Segmentations
- Help Desk Integration
- Search Providers
- Live Chat Integrations
- Language Settings
It's not possible to publish different settings separately. E.g. it's not possible to publish segmentations without customizations.
Archiving WalkMe Items
To unpublish a WalkMe Item from an environment, you must archive it. Archiving a WalkMe item removes it from the server so it is no longer available to users. Archiving is necessary if you wish to delete a published item.
To archive item(s):
- Select all items you wish to archive
- Click Archive at the bottom of the Editor
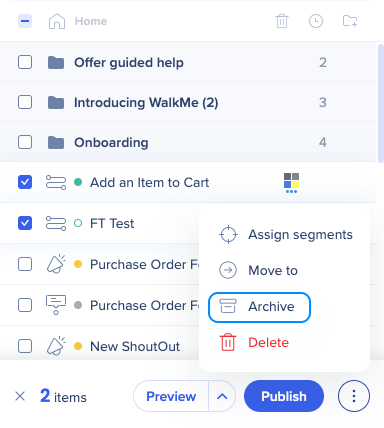
- Once the Archive icon has been clicked, you will be prompted with the summary and confirmation popup
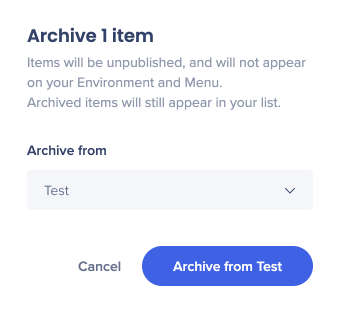
- Click Archive from Test / Production
Unarchiving WalkMe Items
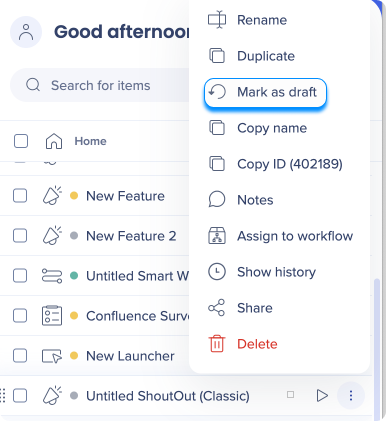
If you want to bring your item back from the archive:
- Click on the Options menu next to the item
- Select Mark as draft
Deleting WalkMe Items
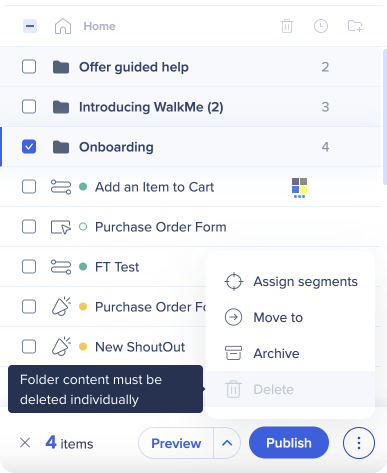
Deleting WalkMe items is similar to publishing. To Delete, you can simply select the item/s to be deleted and click the delete icon.

If the item was published, you will first be notified that you need to first archive it from the environments it was published to.
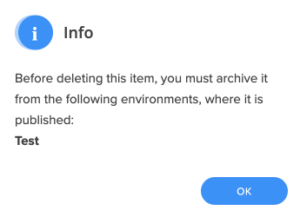
If the item wasn't published, or was already archived, a confirmation message will pop up:
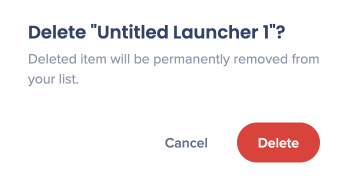
Please note: Content in Folders must be deleted individually and does not support Multi-Delete.
Accessing the Snippet
You can access the unique snippet for your Editor account from the System settings in the settings menu. The snippet is a piece of JavaScript code that allows WalkMe to run in a browser.
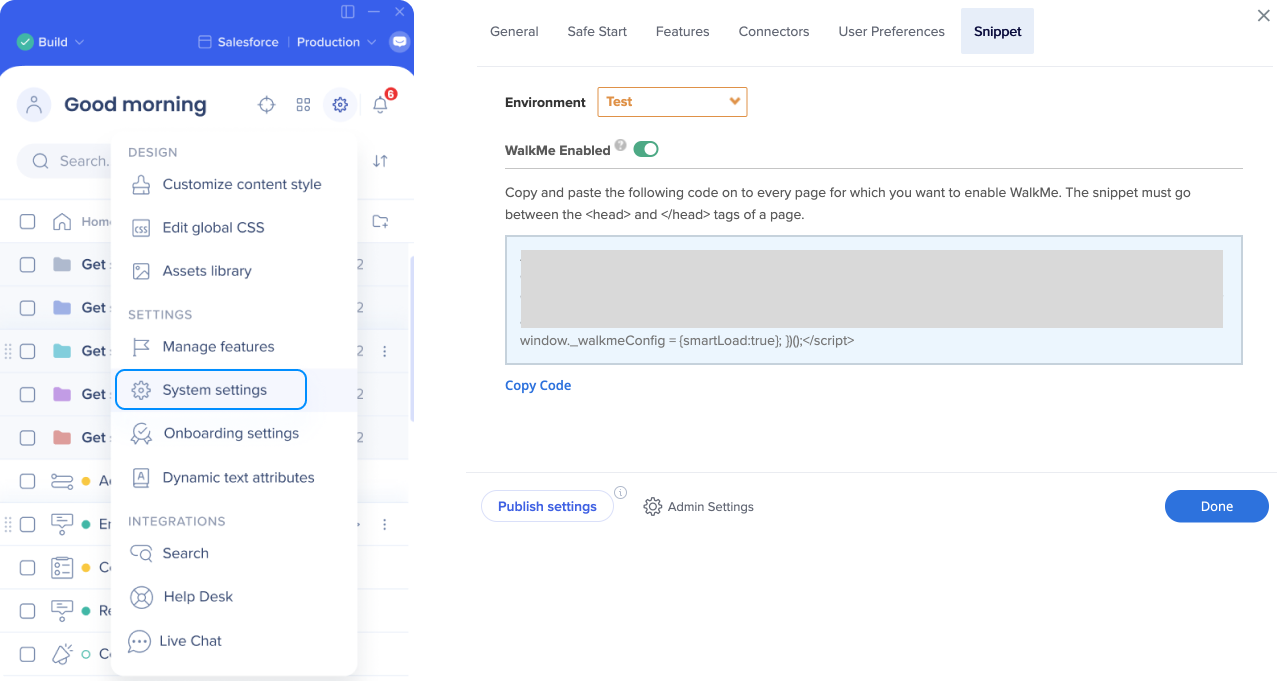
From the Snippet tab, select your desired environment, choose whether the snippet uses a secure protocol (HTTPS) and copy the code so you can paste it into the header of your application.
The snippet can also be deployed by using an extension if you are unable to install it directly into the HTML code of your site.
The Snippet is slightly different for each environment. When installing the Snippet into your site be sure to use select the correct environment before you copy the code.
WalkMe Enabled Toggle Switch
If for some urgent reason you must disable WalkMe in any environment, you may simply click the WalkMe Enabled toggle. Once toggled OFF, the WalkMe snippet will be deactivated.
Impact of Updates to the WalkMe Editor
WalkMe regularly updates the WalkMe Editor and we notify all customers in advance about upcoming feature releases. When the Editor is updated, the WalkMe items you currently have published are not affected. The Editor account and features included in it may change, but the files that you have published remain unchanged on the server.
To update items so they include new features from a product release, you must modify these items and re-publish them.

