Brief Overview
Insights Reports already give you access to all your WalkMe data, allowing you to examine your data in many different ways and variations. The Insights Report Builder takes this a step further and allows you to create custom reports tailored specifically for your needs with a self-service tool.
The Report Builder guides you through the process to create your own customized reports, beginning with choosing a template that best suits your needs, and then offering additional columns and filters for data enhancement.
Once the report is created it can be used in WalkMe just as any other report: it can be exported and subscribed to.
How It Works
Create a Report
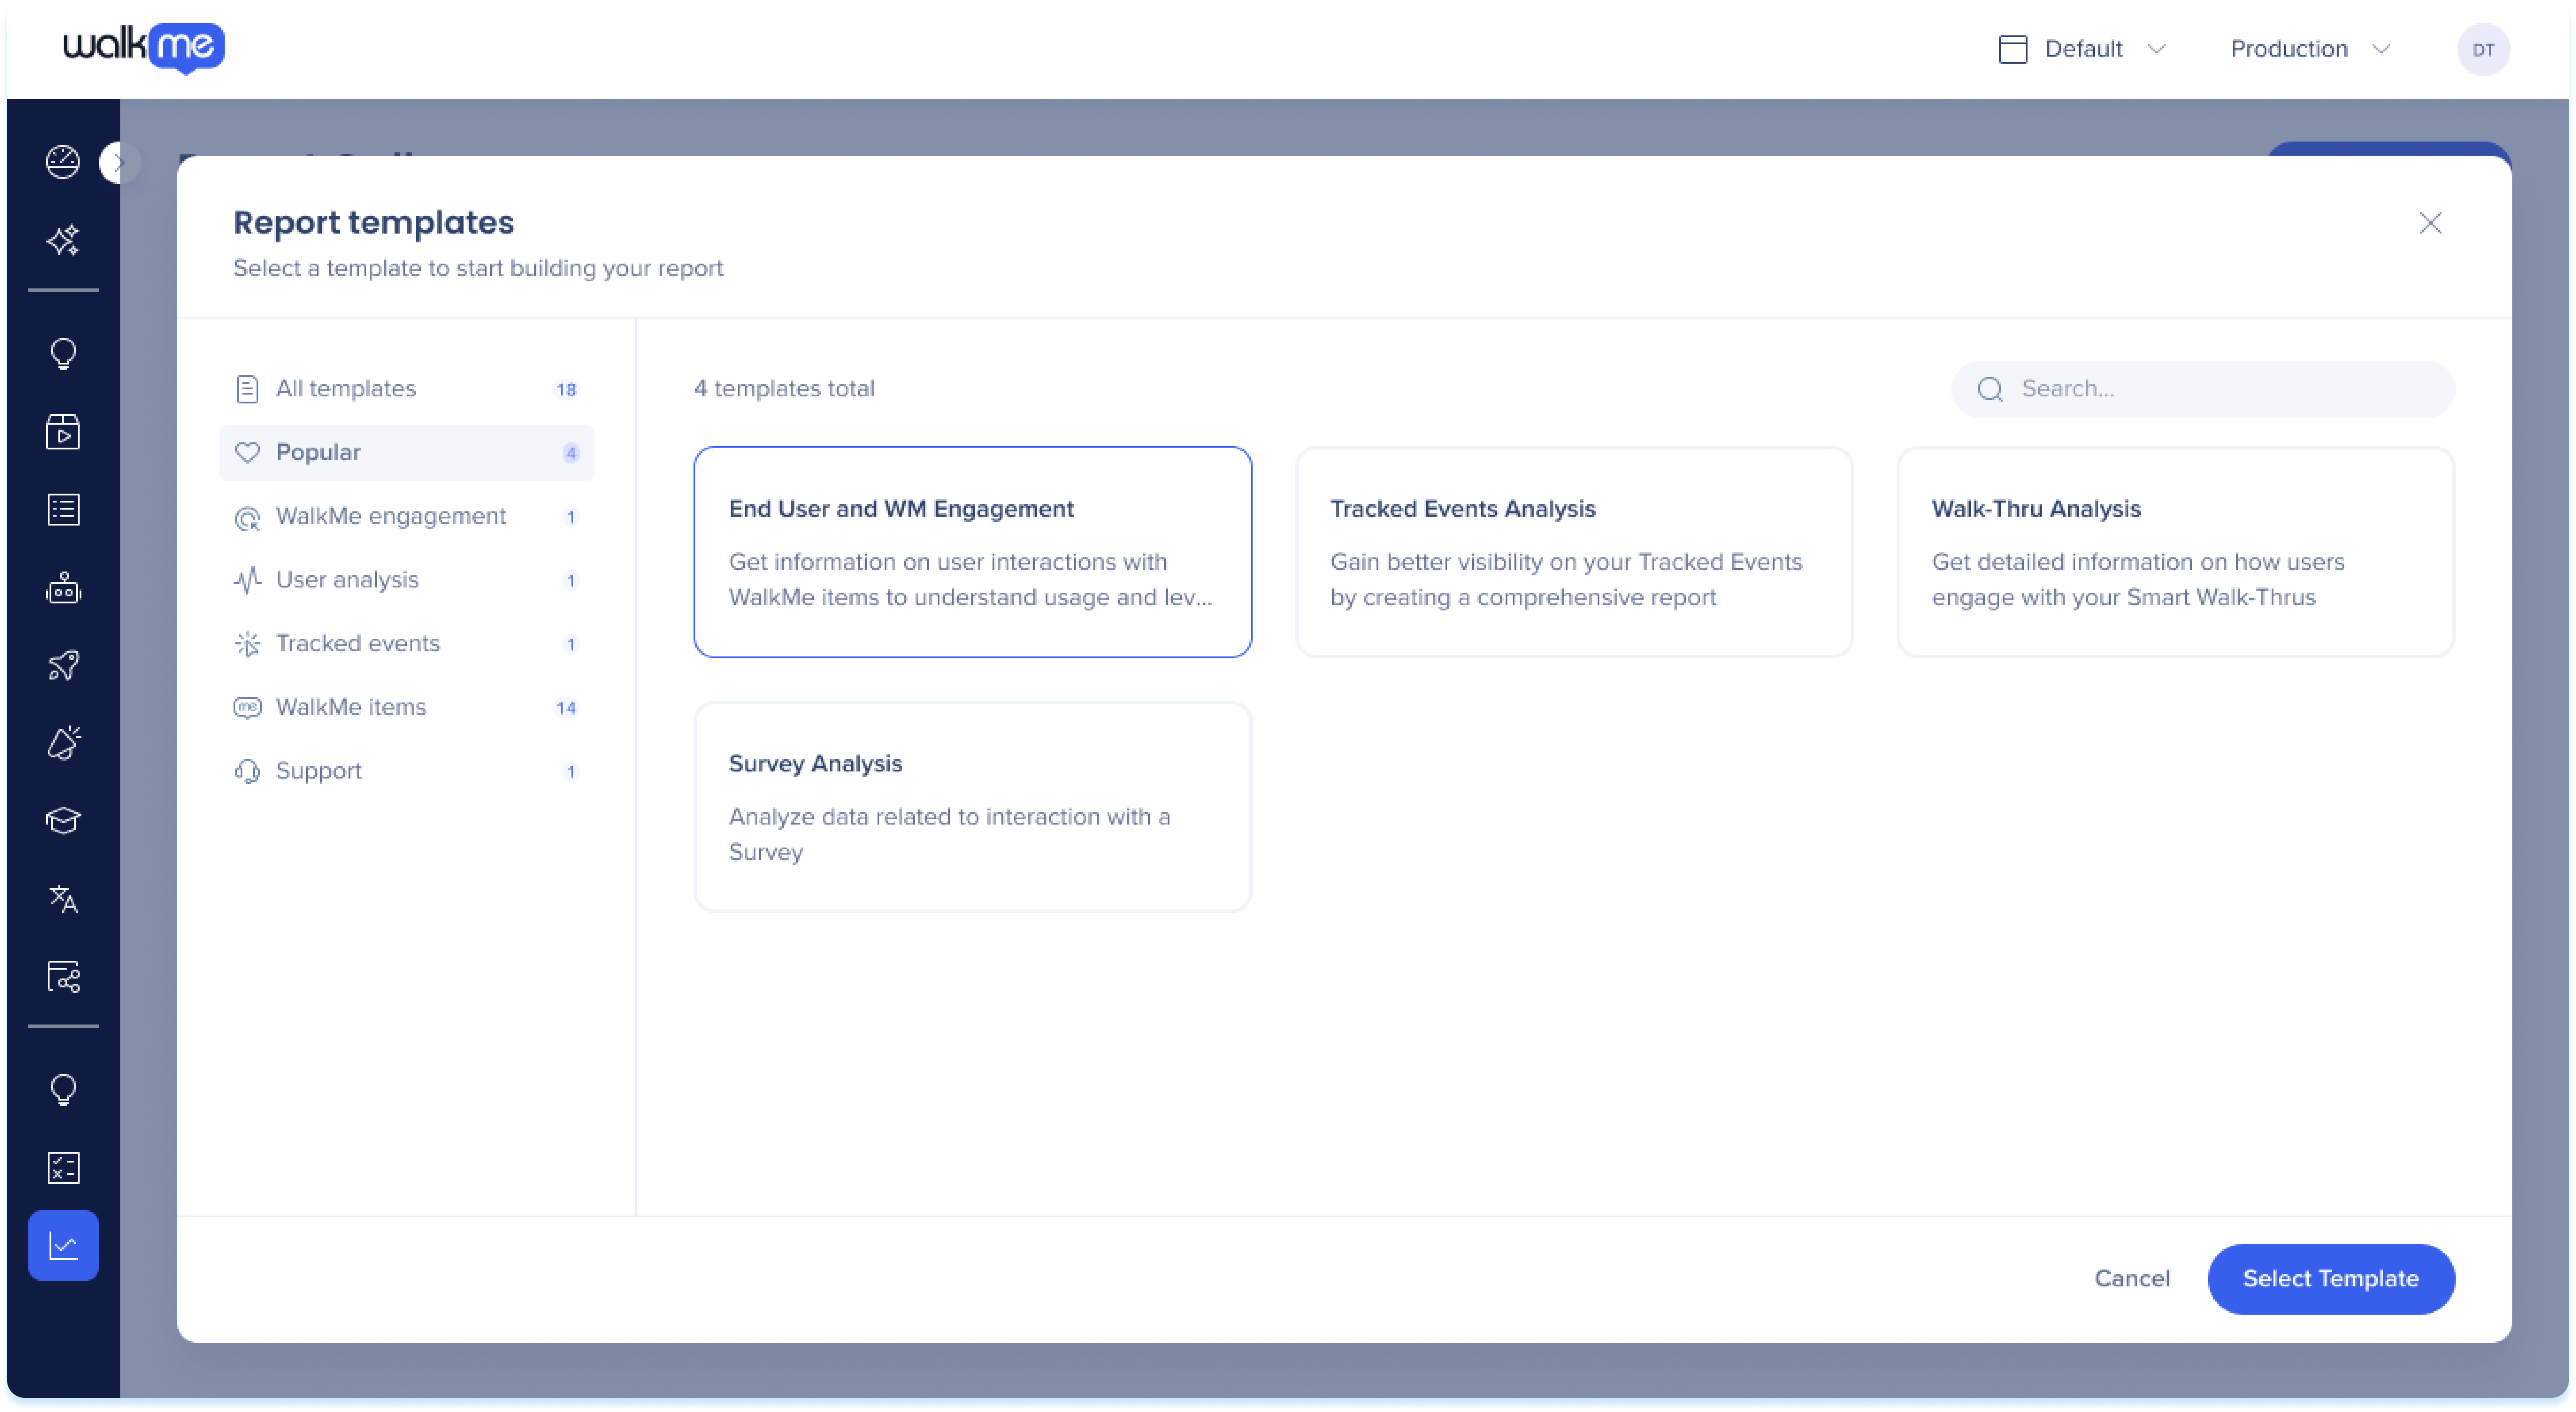
Step 1: Choose Report Template
To begin using the Report Builder, follow the steps below:
- Go to the Reports Gallery page in the WalkMe Console
-
Click the + Create Report button
-
Choose from the available pre-defined templates to begin building your report
-
Click Select template
Step 2: Add Report Columns
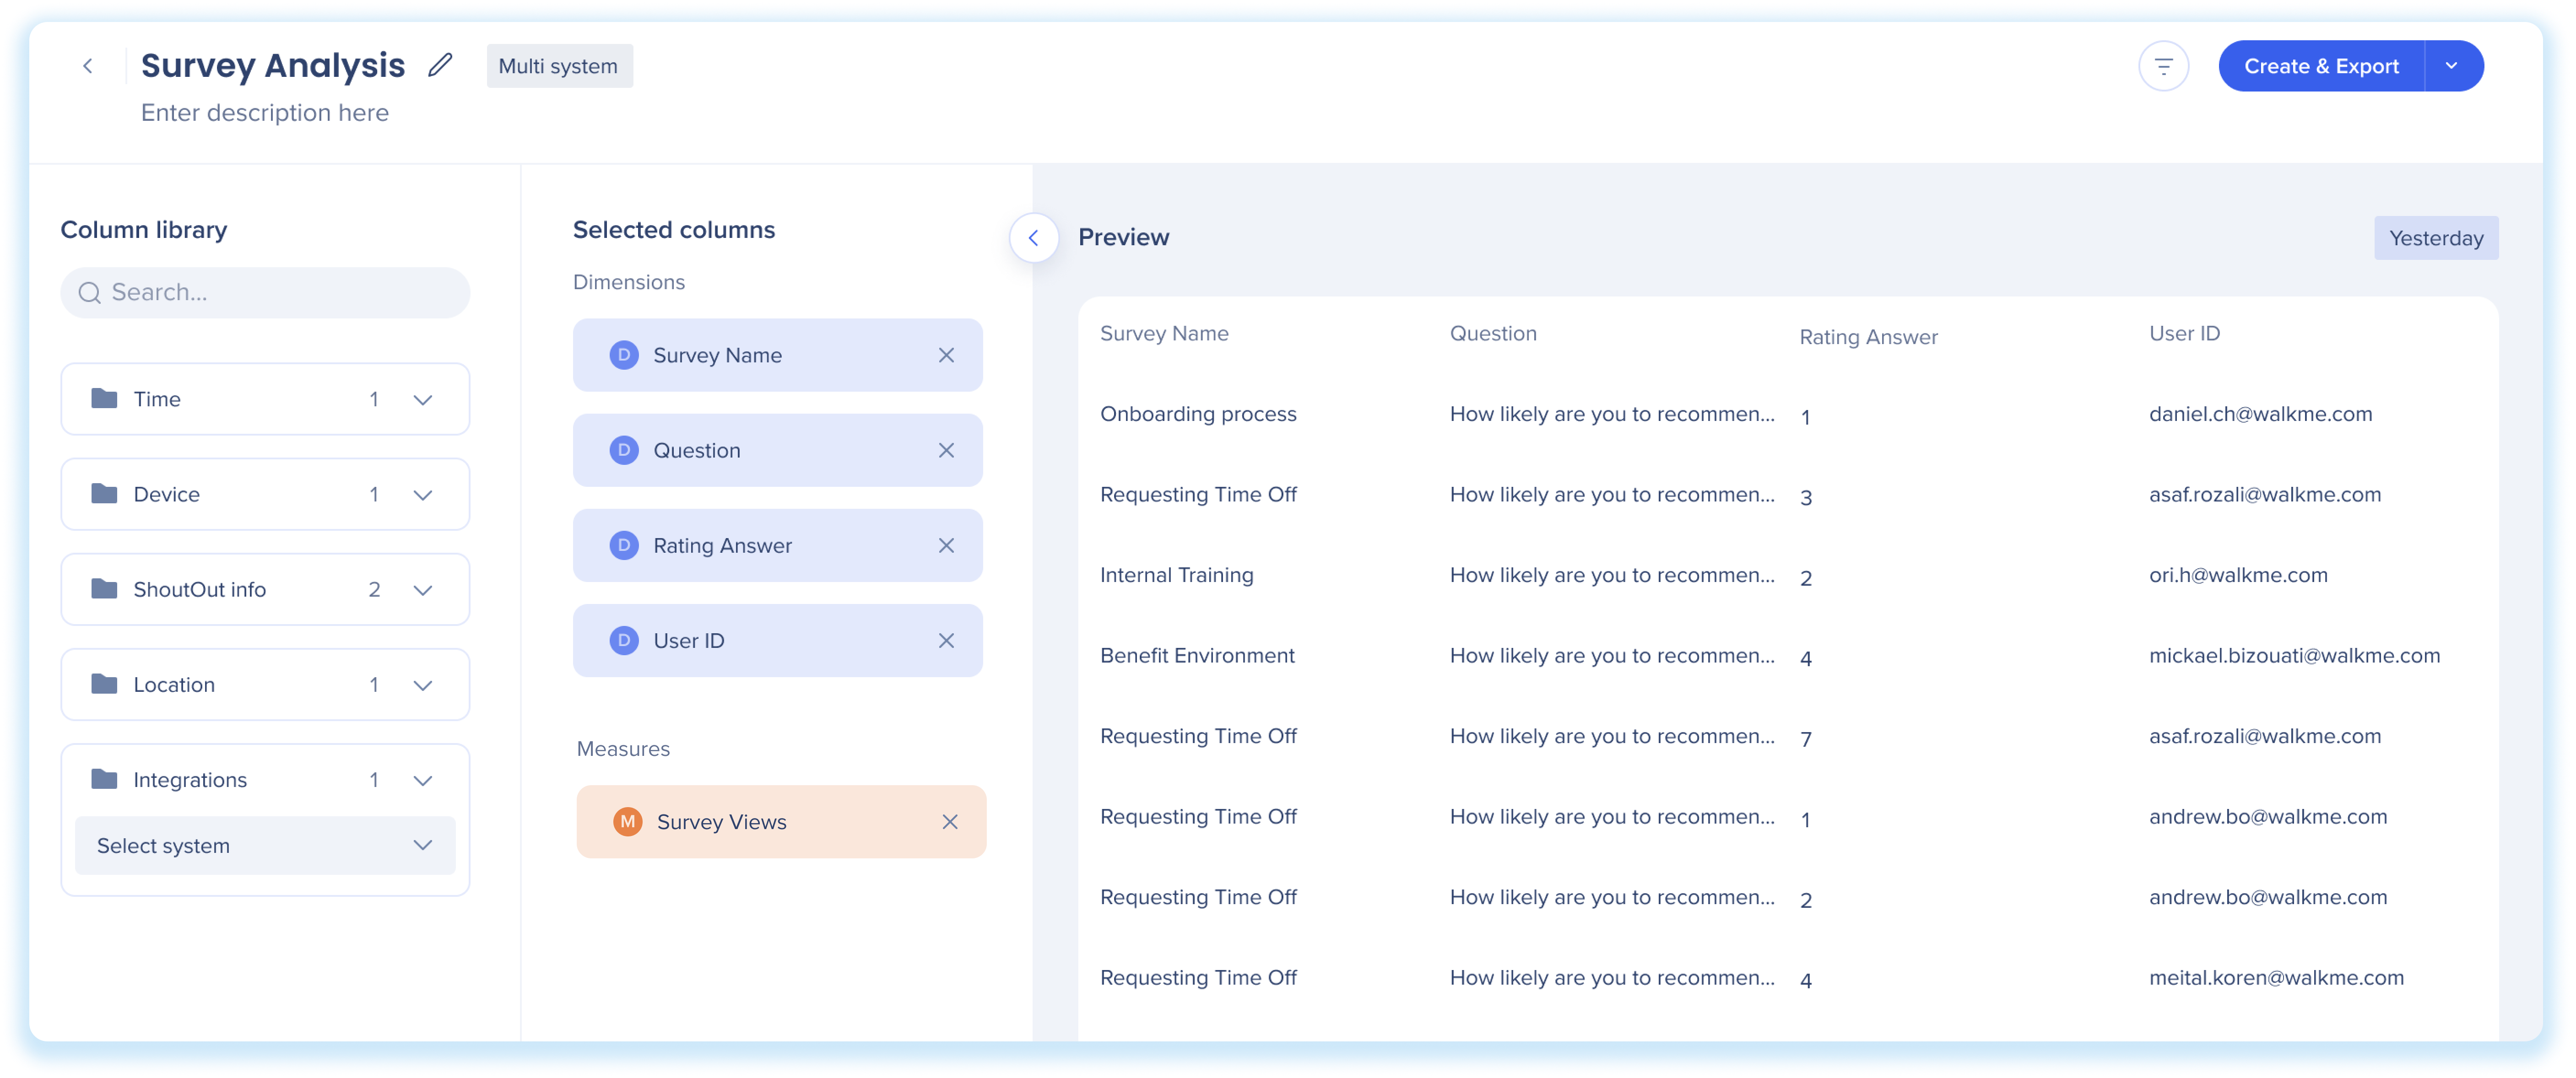
After selecting a template, the Report Builder will show the available columns in the Column library that can be added to the report.
-
Select columns to add to the report
-
Drag and drop (or double click) the dimensions and measures from the library into the Selected columns section to add them to the report
-
You can rearrange your columns in the order you would like them to appear in your report and use the X button to remove any undesired fields
-
Optional: Hover over a column name and click the pencil icon to rename a measure or dimension
About Dimensions & Measures
Dimensions and measures are different ways to display your data columns in the table.
-
Dimensions: Display written values you can use to categorize and filter your data, affecting the level of details in the report
-
Examples: Country, End-user ID, ShoutOut name, Language, Browser version
-
Measures: Display numerical values you can use to measure, aggregate, summarize and count your data
-
Examples: Task view, ShoutOut plays, Events, Goals completed, Number of users who clicked ShoutOut
Integration/Behavior Based Segmentation fields in column library
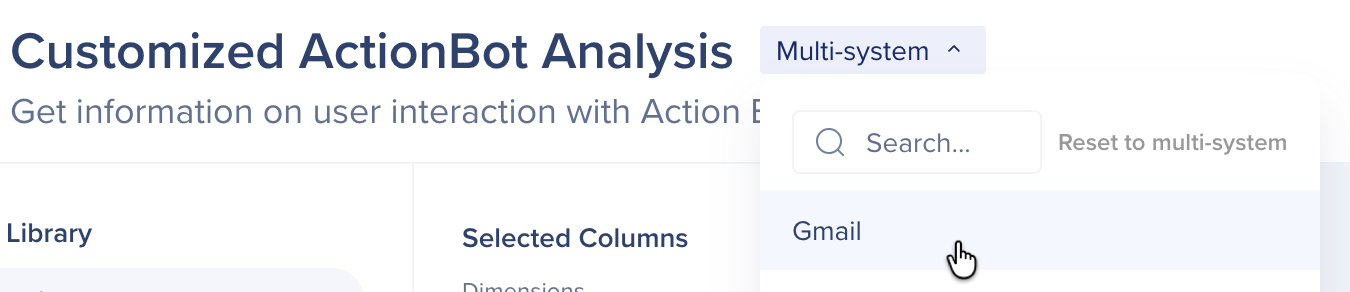
These fields are based on individual systems. Select a system, and the report status will update accordingly. Then, choose the integration field for that system to add to the selected columns.
Tip
Looking for your specific WalkMe item in your report? Make sure to include an identifiable field, such as "Survey Name" in the report.
Step 3: View Preview, and Modify Report Filters and System
Preview
The preview shows a sample of the data, allowing you to see a snapshot of the report's content and verify that the selected columns / filters are working as intended. Note that the preview is for understanding the report, not a testing playground.
Sample data is from the previous day. If unavailable, it shows data from the last week. The date tag in the upper-right corner indicates the timeframe as "Yesterday" or "Last Week" and cannot be changed.
Modify the report
-
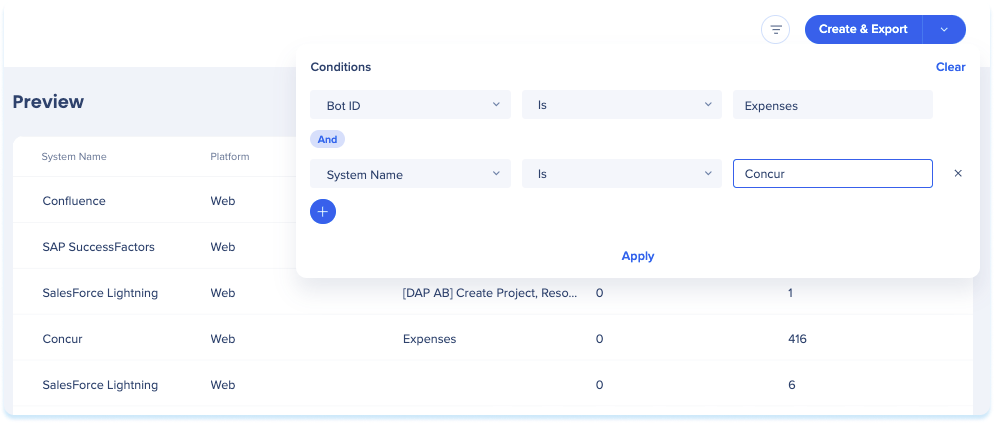
Filters
-
 Click the Filters icon to filter the report based on specific conditions
-
Add a rule with the desired field, condition, and value to filter the report
-
Click Apply
Note
-
More than 1 filter can be used together in an AND statement
-
Filters are only available for Dimension Columns
-
Default preview is set to the Production environment but can be changed with filters
2. System dropdown
-
-
Multi-system: Select multi-system to include data from all systems
-
Single-system: When choosing a single-system, the dropdown will only display systems with active integrations or behavioral segments (which is why not all your systems may appear)
Reset to multi-System: After selecting a single system, you can return to multi-system mode by clicking the Reset to multi-system button in the dropdown.
Note
- Be aware that IDP integrations behave differently compared to other integrations
- Unassigning a system from an IDP does not delete the IDP schema or attributes
Step 4: Set Name and Description
Once you are satisfied with the format of the report:

Step 5: Save and Export
-
Click the Create & Export button
-
Click the dropdown and Select Create in order to create without exporting
-
This will save the report in the My reports tab in the Reports Gallery where it can be exported later
-
Select the date range of the report data from the Date picker dropdown
-
Select the systems that the data will be pulled from
-
Select the environment that the data will be pulled from
-
Optional: Click the Send by Email toggle to send the report to a list of recipients
-
Enter the emails of the recipients under the Recipients field
-
Type a custom email subject in the Email Subject field
-
Tick Subscribe if you'd like to both export and create a report subscription
-
Click Create & Export
Note
-
The report will be generated and added to the Generated reports tab under Reports & Subscriptions. From there, the report can be download
-
The report will also be listed in the My reports tab in the Report Gallery

Common Report Builder Fields
See a list of commonly used measures and dimensions that are available as fields in the Report Builder.
Common Report Builder Fields
Technical Notes
-
Account level reports cannot be created with the Report Builder
-
Using OR condition between different columns is not supported; we found a very small number of use-cases so we decided to invest in other areas and wait for more customer feedback
-
Requests for additional fields are welcome - They should be treated as new feature requests
-
An option to have one template to include all fields has been investigated and rejected due to feasibility issues
-
See a blank for Item Name?
-
If you see a blank for Item Name in your preview or exported report, it means that the event is an internal process and not related to any WalkMe item types (for example: "WalkMe" or "Player")
-
To view only interactions with specific WalkMe items, it's best to filter out these irrelevant events. We recommend using the filter "Item Name is not null" to remove them from your report
-
Any user with Insights Access permissions can view, create, and modify reports
Roles and Permissions


