Brief Overview
The WalkMe snippet is what allows WalkMe to run on your site. Pages or browsers that include the snippet are able to access published WalkMe files on a server, allowing users to access and play content.
The snippet is a piece of JavaScript code that must be running in a user's browser for WalkMe to work on the page. Each snippet is tied to a specific WalkMe Editor account. When items are published in the WalkMe Editor, they are accessible to users that have the associated snippet running on their browser.
Follow the steps below to deploy WalkMe using a snippet.
Note
- The snippet is a piece of code that needs to be added to your website for the desired functionality
- You must have access to the code of the application in order to install the snippet directly to the site
🎓 Digital Adoption Institute
Deployment Guide
Note
Depending on your implementation method, you will need either the snippet code, or the snippet URL.
1a. Obtain the snippet code
Expand
The snippet code is available from the WalkMe Editor. Learn how to install the editor.
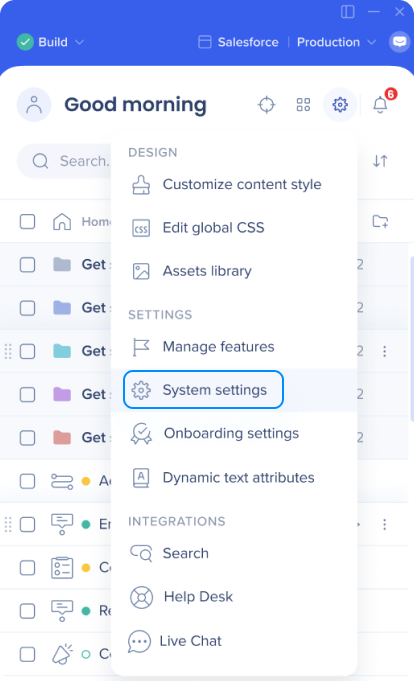
- Click the Settings icon in the editor to open System settings

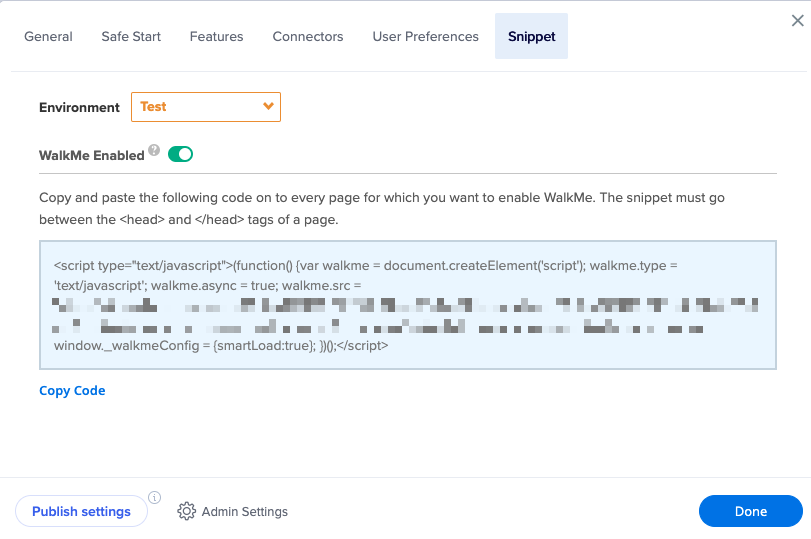
- Go to the Snippet tab

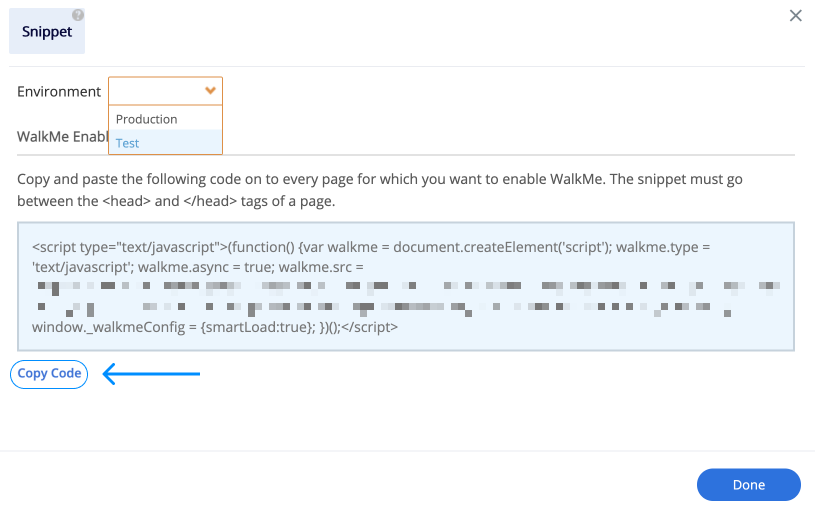
- Select the correct environment from the dropdown (Test/Production)
- Each environment has a slightly different snippet code
- If you have a test/sandbox/staging site, select the Test snippet
- If you would like the snippet for publishing to your end-users, select the Production snippet

The environment open in the editor will automatically be selected.
- Click Copy Code to copy the snippet

1b. Obtain the snippet URL
Expand
The snippet URL is available from the WalkMe Editor. Learn how to install the editor.
- Click the Settings icon in the editor to open System settings

- Go to the Snippet tab

- Select the correct environment from the dropdown (Test/Production)
- Each environment has a slightly different snippet code
- If you have a test/sandbox/staging site, select the Test snippet
- If you would like the snippet for publishing to your end-users, select the Production snippet

The environment open in the editor will automatically be selected.
- Copy the value displayed after “walkme.src=”. For example, “https://cdn.walkme.com/users//walkme__https.js”.
2a. Add the snippet to your website's backend
Expand
- Log in to the backend or content management system (CMS) of your website
- Navigate to the section of your CMS that allows you to edit the header or footer of your website
- Find the section where you can add custom code or scripts
- Paste the snippet code (copied in step 1) into the designated area in the header/footer section of your CMS
Tips
- The header/footer section is typically found in the settings, appearance, or theme customization area
- This section might be referred to as "Custom Scripts," "Header Scripts," "Footer Scripts," or something similar
- If you are not familiar with how to access the backend, you will need to consult with your website developer or administrator for assistance
Required
- The WalkMe snippet must be placed in the HTML of every page you want WalkMe to load on
- WalkMe checks for a unique user ID (UUID) upon page load
Best Practice: Place the snippet after the login page
- The UUID is not available until the user is logged in
- If the desired UUID is not available, a randomly generated session ID will be created
- If you need to create certain content on the login page, please make sure that a complete page load occurs after logging in - This is necessary for capturing UUID
- For single page applications: If WalkMe loads on the login page, a page refresh will be required after logging in to make sure the UUID can be loaded
Important Note
- Only one snippet should be added per page
- When adding the snippet, please do not make any changes
- If you make changes, you may experience unintended issues and WalkMe will not be able to support your implementation
2b. Add the snippet to your application's settings
Expand
- Search for WalkMe in your application settings (relevant for WalkMe integrations)
- Paste the snippet URL code (copied in step 1) into the designated area
Tip
- Make sure you have copied only the Snippet URL
- The section is typically found in the settings or configuration area
- If you are not familiar with how to access this, you will need to consult with your administrator for assistance
3. Save the changes
Expand
Save the changes in your CMS and the WalkMe Editor.
- After pasting the Snippet Code, save the changes in your site or application
- Note: This action may involve pressing a "Save," "Update," or "Publish" button
- Go to System settings in the editor
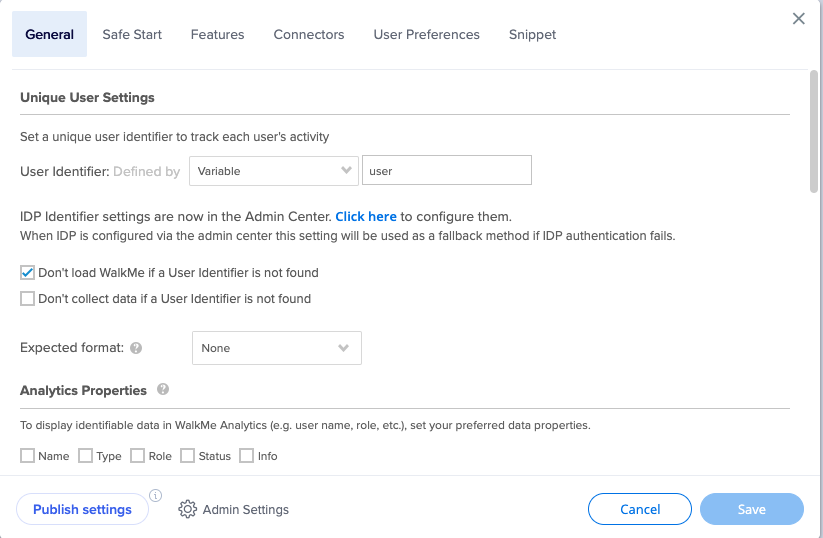
- In the General tab, click Publish settings


Note
In order for WalkMe to load correctly on the site, it is necessary to publish the settings from the editor. This will generate the required files and enable WalkMe to function properly.
4. Verify installation
Expand
- Visit your website and go to the specific page where you want the snippet code to work
- Inspect the page to make sure that the desired functionality or feature is now active
- If you notice that the Snippet Code is not working as expected, double-check the placement of the code
- If you still have issues, you can reach out to our support team for assistance
Once the snippet is in place, you will be able to see your published content from the Editor. To test the snippet and make sure it's set up correctly:
- Open your site
- Right-click and select inspect the page
- Open the console
- Enter the following text query: _walkMe.getEnvId()
- This command will return a value indicating which environment loaded:
- 0 = Production
- 1 = Preview
- 2 = Play
- 3 = Test
- Undefined = The snippet is not set up properly and you should contact support for assistance
That's it! You have successfully installed the snippet code on your website. If you have any further questions or need assistance, please don't hesitate to reach out to us.
Note
If you aren't able to retrieve the snippet code, please contact our support team.


