Brief Overview
The Users page allows you to add, view and edit your WalkMe users. Access it from admin.walkme.com under User Management.

Use Cases
- Improve user management consistency across accounts
- Help WalkMe admins manage team permissions by standardizing role distribution and hierarchy in each account
- Add a new permission type to support basic use cases (separate publish to Production/Test)
- Increase account security by reducing the number of “Admin” users per account
Access
To access Users, open the User Management tab in the WalkMe Admin Center. Choose the link for your data center.
WalkMe Admin Center
How It Works
Create or Add a New User
- Click on the + icon
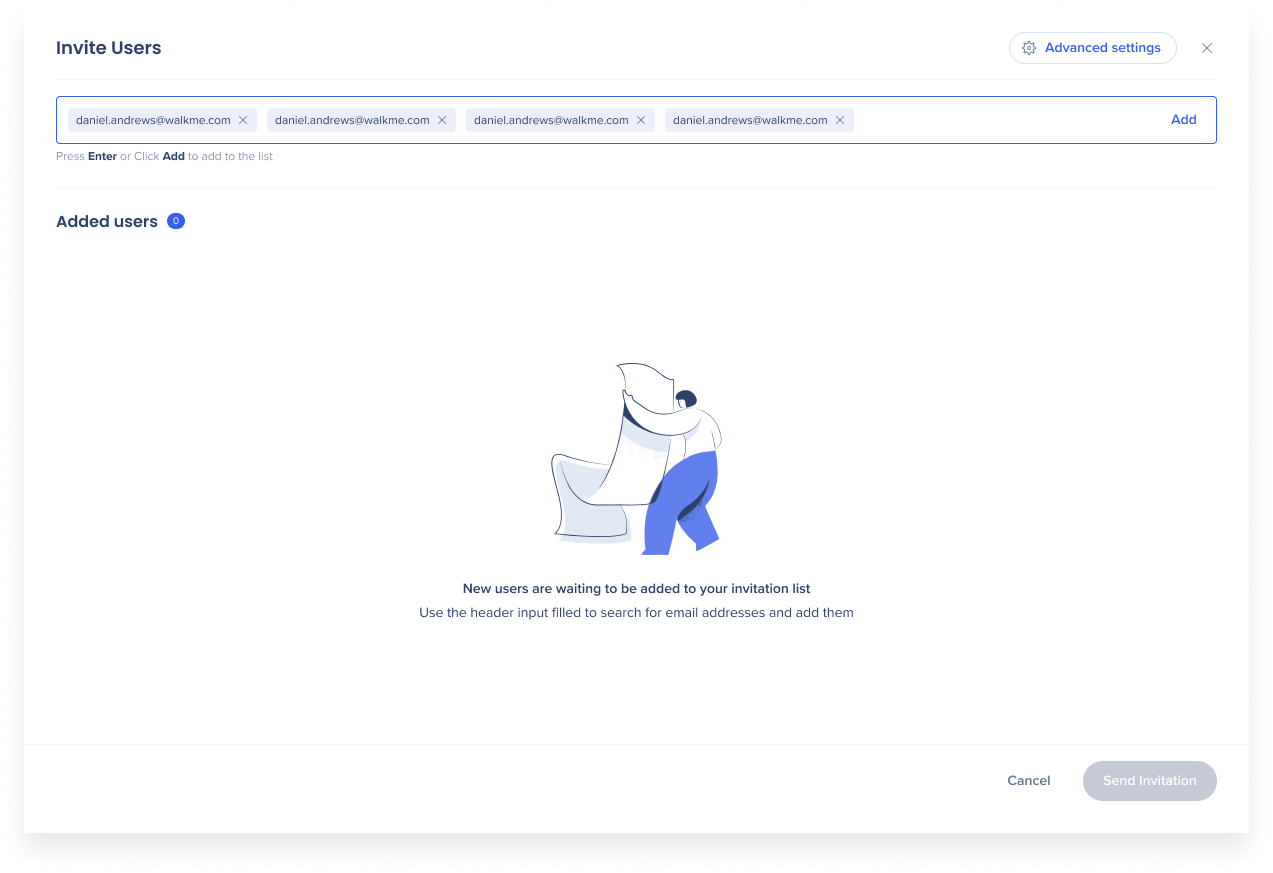
- Enter the email address of the new user or users. You can bulk upload users by copying and pasting them from a csv file.
- Click Add or press Enter to add the user(s) to the list
- Choose which role and system(s) to assign to the user
Only one role can be assigned to a user. This role will apply to the user for all Systems they are assigned to.
- Select Login method and enter SSO ID SSO information will only display if you have SSO enabled in the Security tab
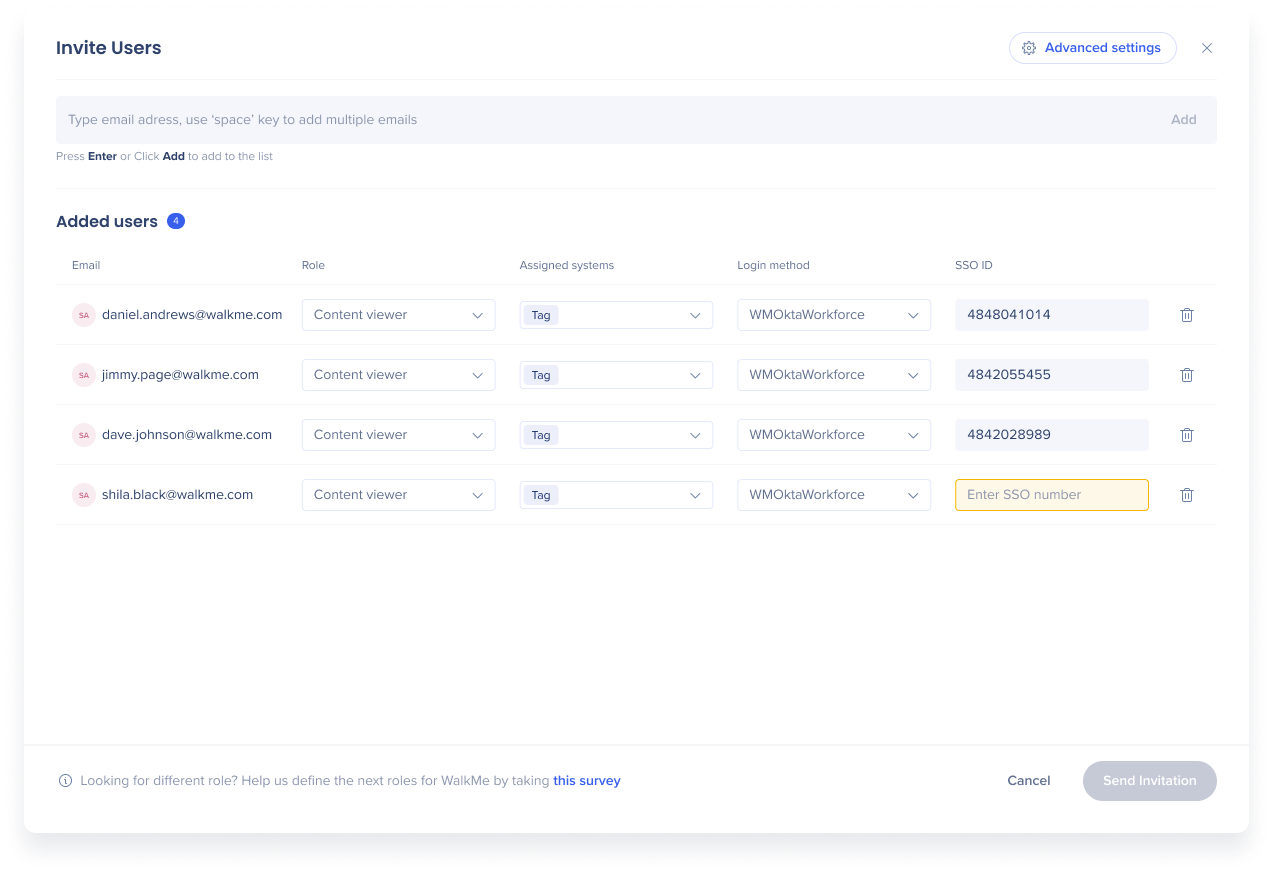
- Click Send Invitation to send an activation email to the user(s)
- The user will immediately receive an e-mail prompting them to activate their WalkMe account.
Note
The email might go to the Spam folder.
- The user must click Activate My Account in the email and it will navigate them to the WalkMe login page
- The new user can set up their WalkMe account by entering a password and clicking Sign Up
- Passwords must be at least 10 characters and contain 1 special character
Note
Please set a temporary password even if your company is using SSO. The subsequent log in will be with SSO.
View a user's status
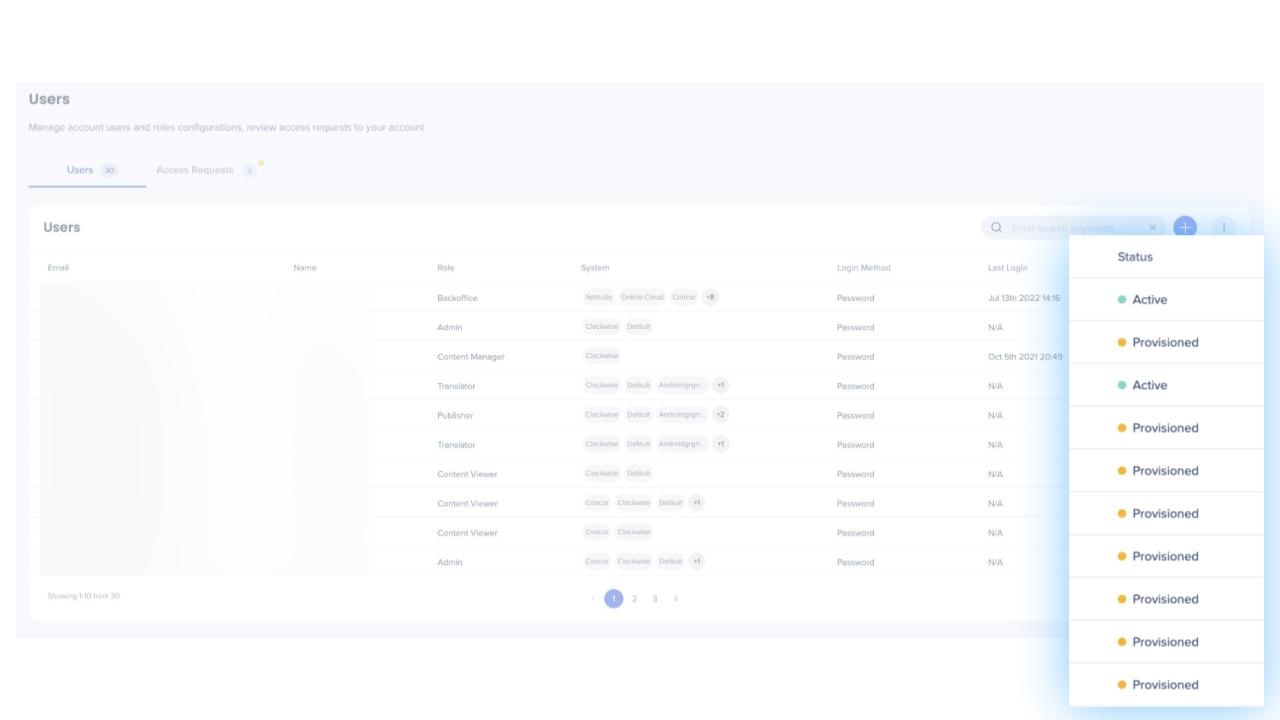 Go to the Users Page
- View the "Status" column in the Users' table
Resend a activation email
- Click on the relevant user from the Users list
- The user must be in orange "Provisioned" status to re-activate
- Click Resend Email to resend the activation email to the user
Reset a user's password
- Click on the relevant user from the Users list
- The user must be in green "Active" status
- Click on Reset Password Via Email to send an email prompting a user to reset their password
Edit a user
- Click on the User row you want to edit
- Change the desired details
- Click Save
Note
User email cannot be edited after the user is created. If you want to change the username or the email, you'll need to create a new account.
Manage access requests
- The Access Requests tab is visible only to users with Admin role
- Here, Admins can review requests from users who want to join the account
- The Admin can assign a role, system(s), and SSO to those users in the same way as described in the steps above
Export users list
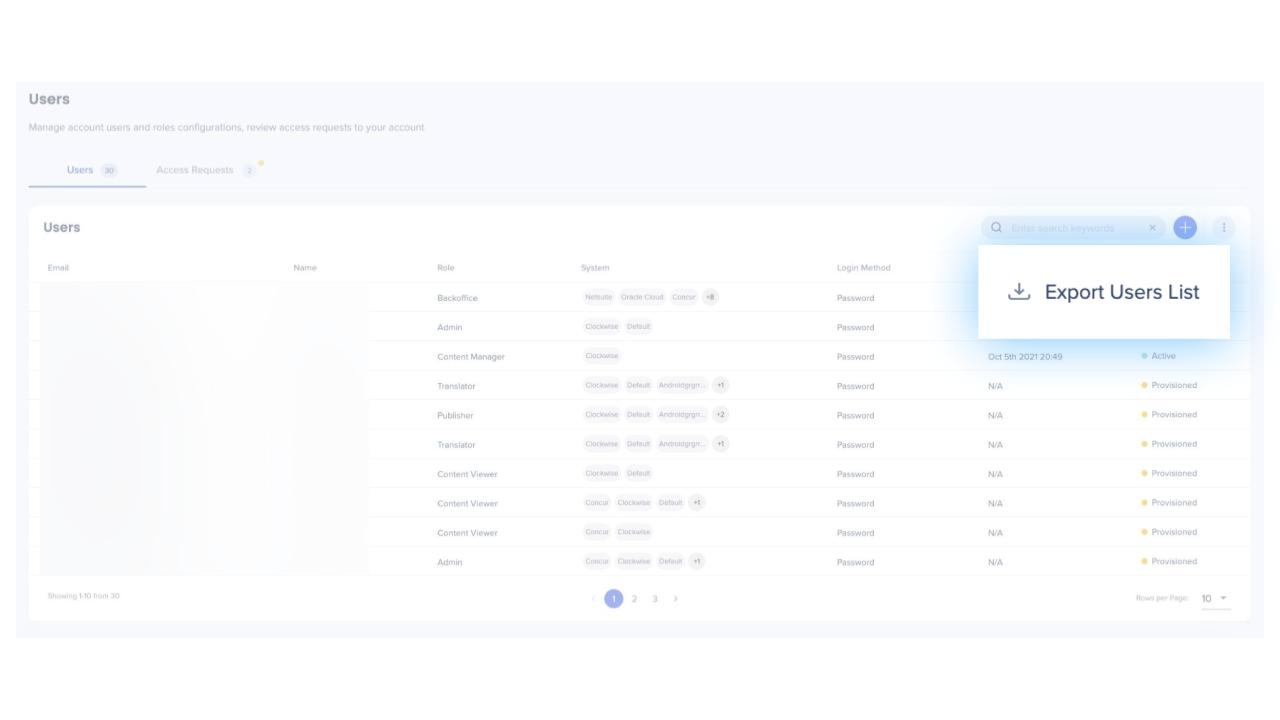
- On the Users tab, click the button with the three dots
- Click Export Users List
Disable a User
- In the Users page, either select the checkbox next to the user name or open the options menu and click Disable Users.
Note
For bulk deletion of users the recommended method is to use checkboxes

- A pop-up displays, click Disable Users

- The disabled users are moved to Inactive users.

Note
Only Active users can be disabled. This can be done on an individual or bulk action basis. If several users with different statuses are seleted to be disabled. The action will be blocked.
Important
Partner uses cannot be disabled not deleted.
Important
The last remaining admin on an account can't be disabled or deleted. This would remove all access to the Admin Center, preventing critical actions like managing users, assigning systems, or viewing activity logs.
Enable a User
-
In the Users page, either select the checkbox next to the user name or open the options menu and click Enable User.

Note
For bulk enabling of users the recommended method is to use checkboxes.
-
A pop-up displays, click Enable User.

Managing Users via the Editor
Users with admin permissions can manage users and systems in the editor.
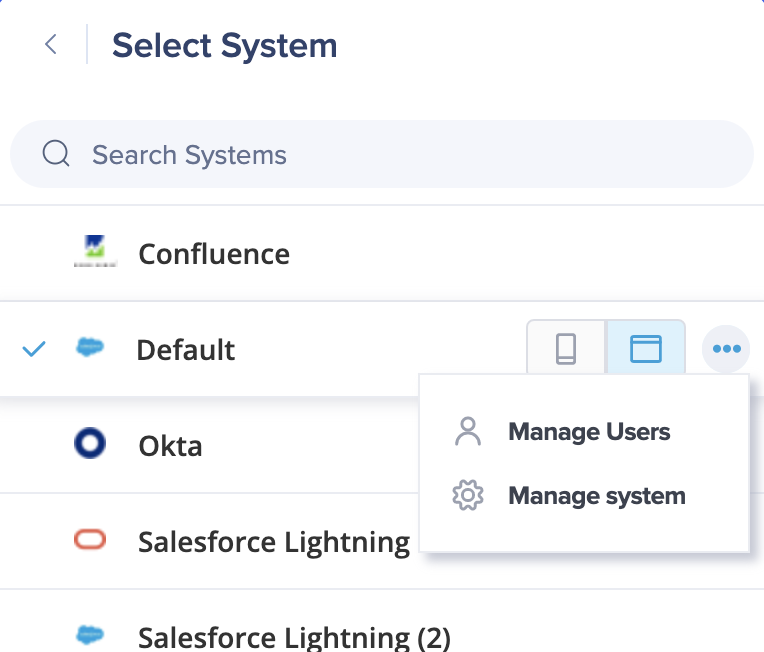
- Click on the name of the system you're currently on
- Click on the Options menu
- Manage Users – Allows you to view current system users, invite new users, and access link to Users & Roles in the Admin Center
- Manage Systems – Opens the Systems screen in the Admin Center
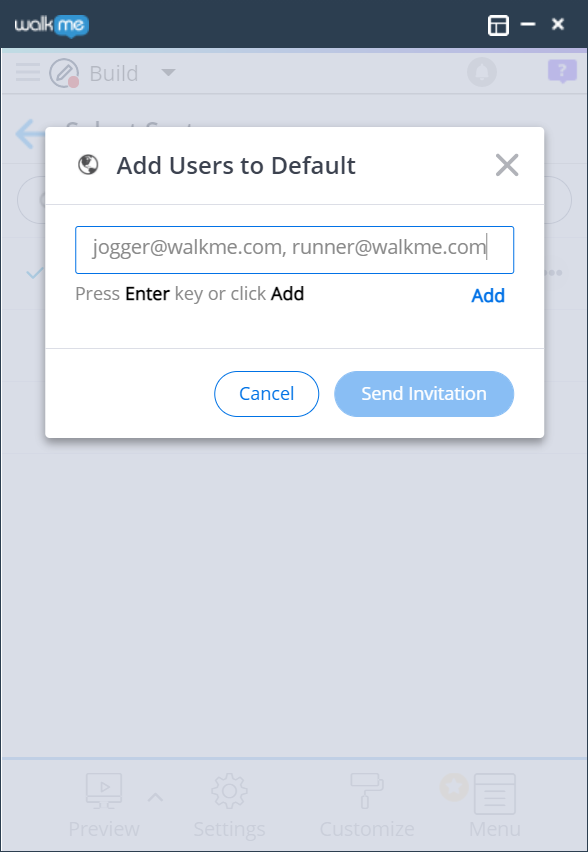
After clicking Manage Users you will be able to view the current users for a system and invite new users to join by using the Invite Users icon:

Invite Users
By clicking the Invite Users icon, users with Write permissions can invite users to the System.
- Option to bulk invite users by pasting directly from Excel, Google Sheet, etc.
- Pasting or typing a list of users can be done in one of the following options:
- Separated by semicolons (';')
- Separated by line breaks
- Separated by spaces
- Separated by commas (',')
Press enter on keyboard or click Add once finished entering new user email addresses.
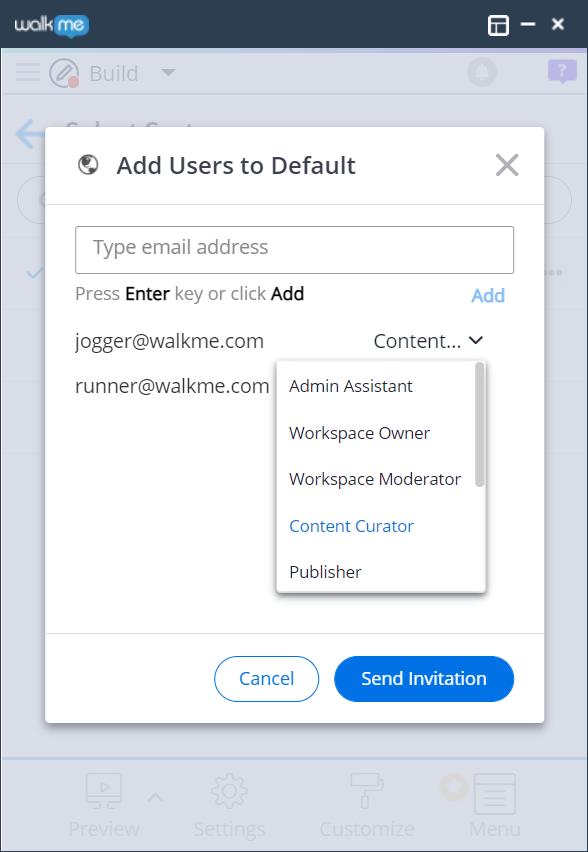
- Once added to the list, a User's role can be modified using the Roles dropdown
- Note: A user that already exists in the Account cannot be edited from the Editor since the role is set in the Account level and affects others Systems
- Please use the Admin Center to edit an existing role
- Sending the invitation will send an email with an activation link to the invited user or users
Learn more about Systems and Account Management.


