Brief Overview
System management lets you configure and manage individual systems. From a single system, you can control environments, extension URLs, user access, language detection, data collection, accessibility, and building preferences.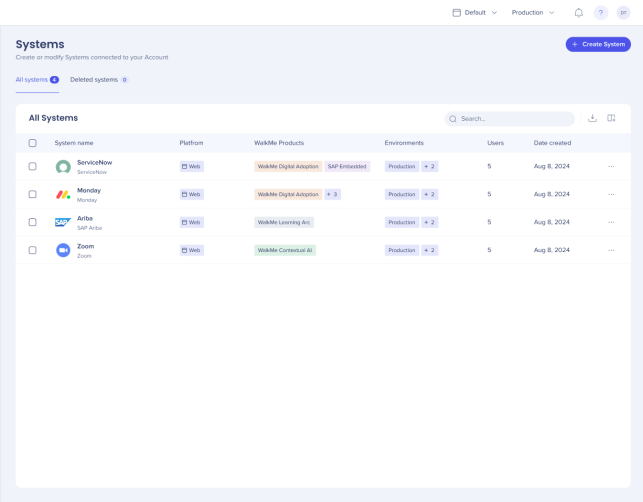
Access
To access a system in the console:
-
- Open the WalkMe Console:
- Select Admin
- Select Systems Management
To access a system in the Admin Center:
-
- Open the WalkMe Admin Center:
- Select a system
How It Works
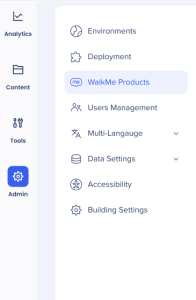
On the Systems page you can view and manage all systems associated with your account. Once you select a system you will be able to manage all of its settings and tabs will be available:
-
Environments
-
Deployment (was Extension)
-
WalkMe Products
-
Users Management
-
Multi-Language
-
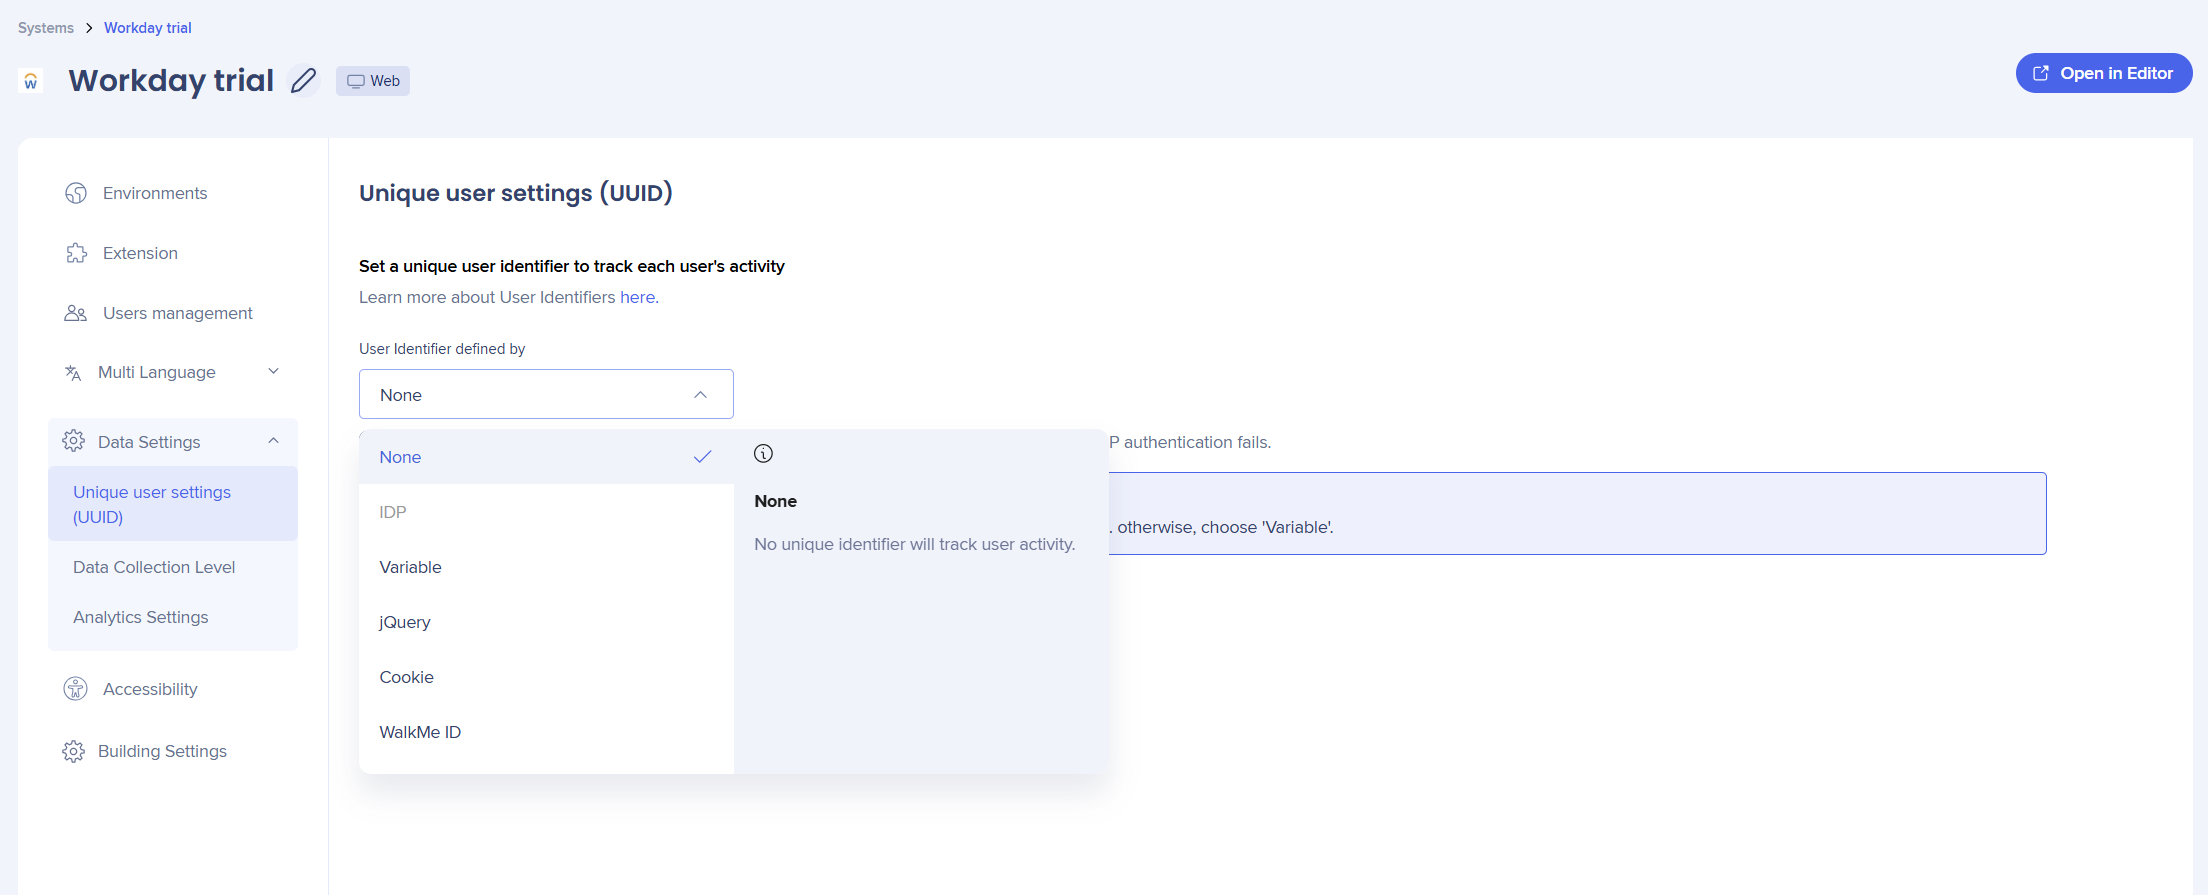
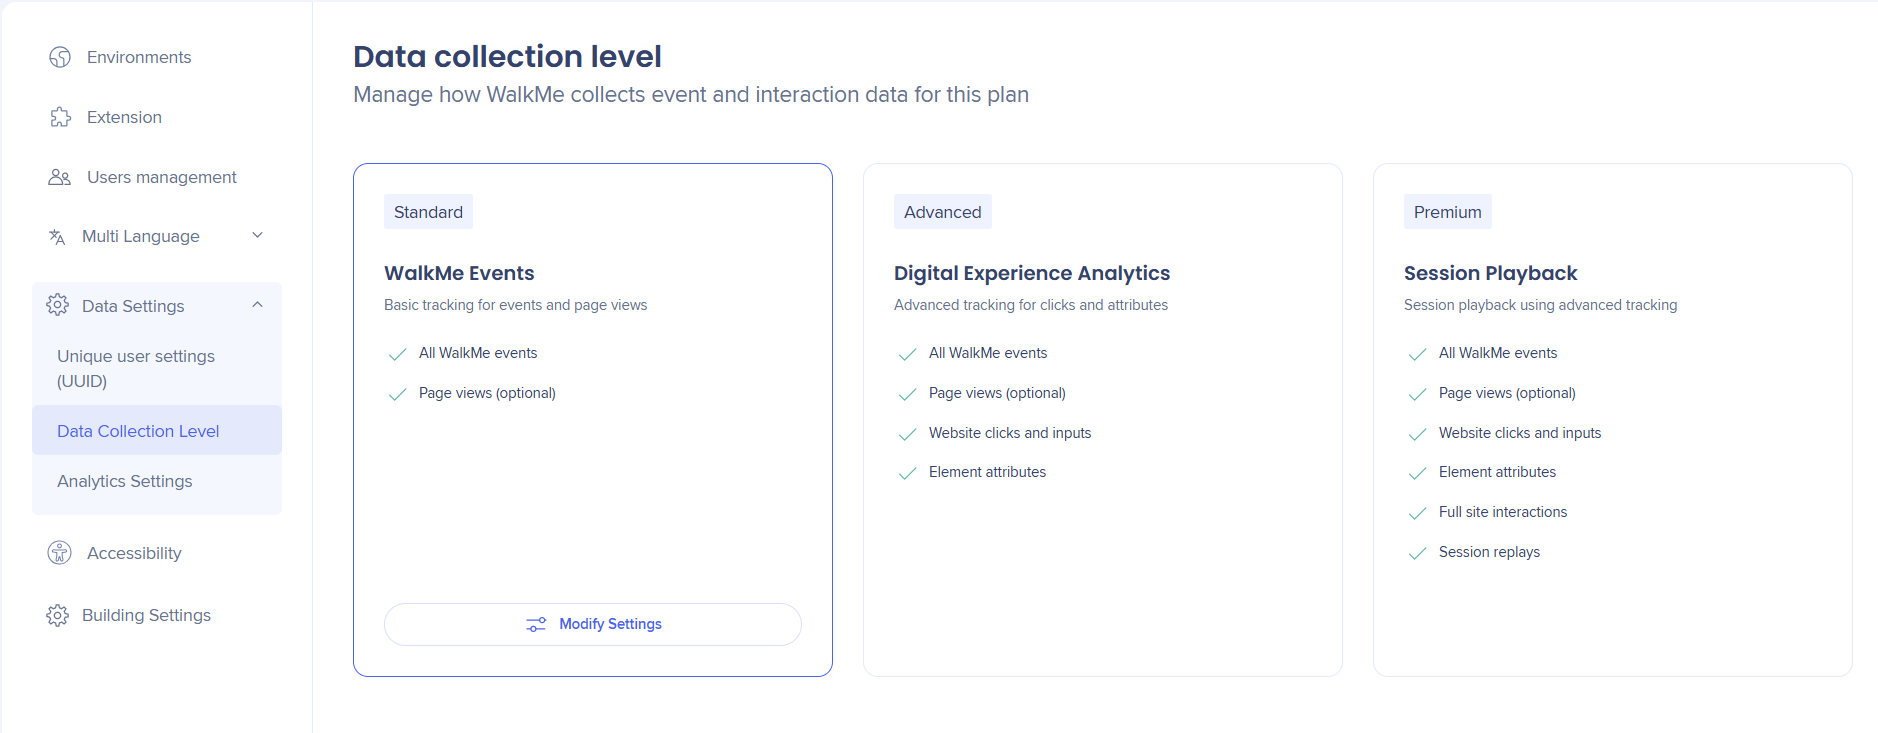
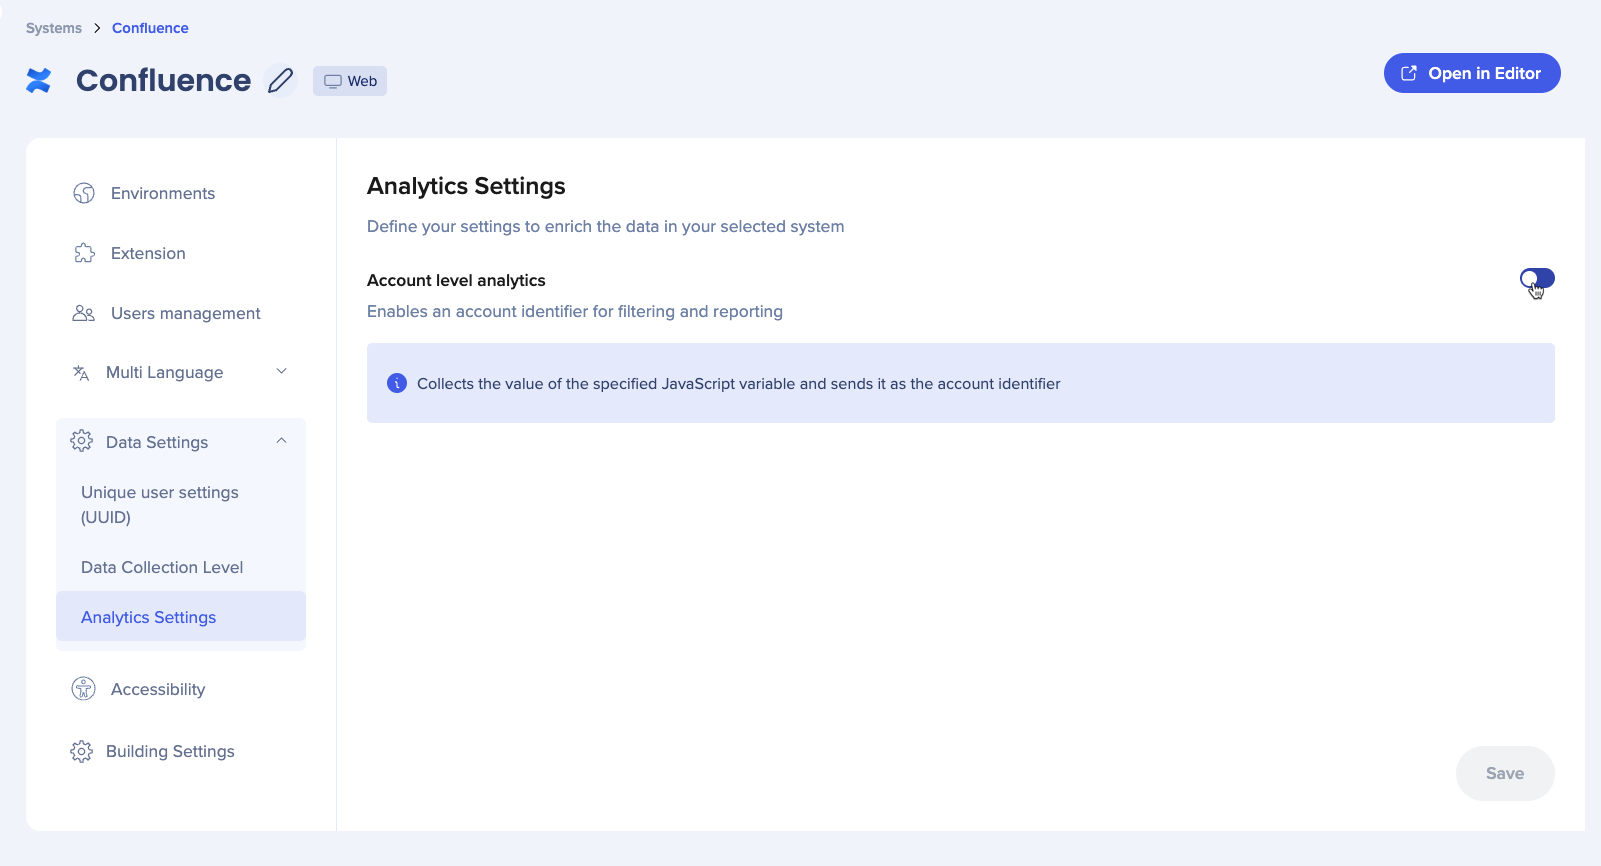
Data Settings
-
Accessibility
-
Building Settings
Note
All system management settings apply to both Web and Mobile Web platforms.
WalkMe Systems
Environments
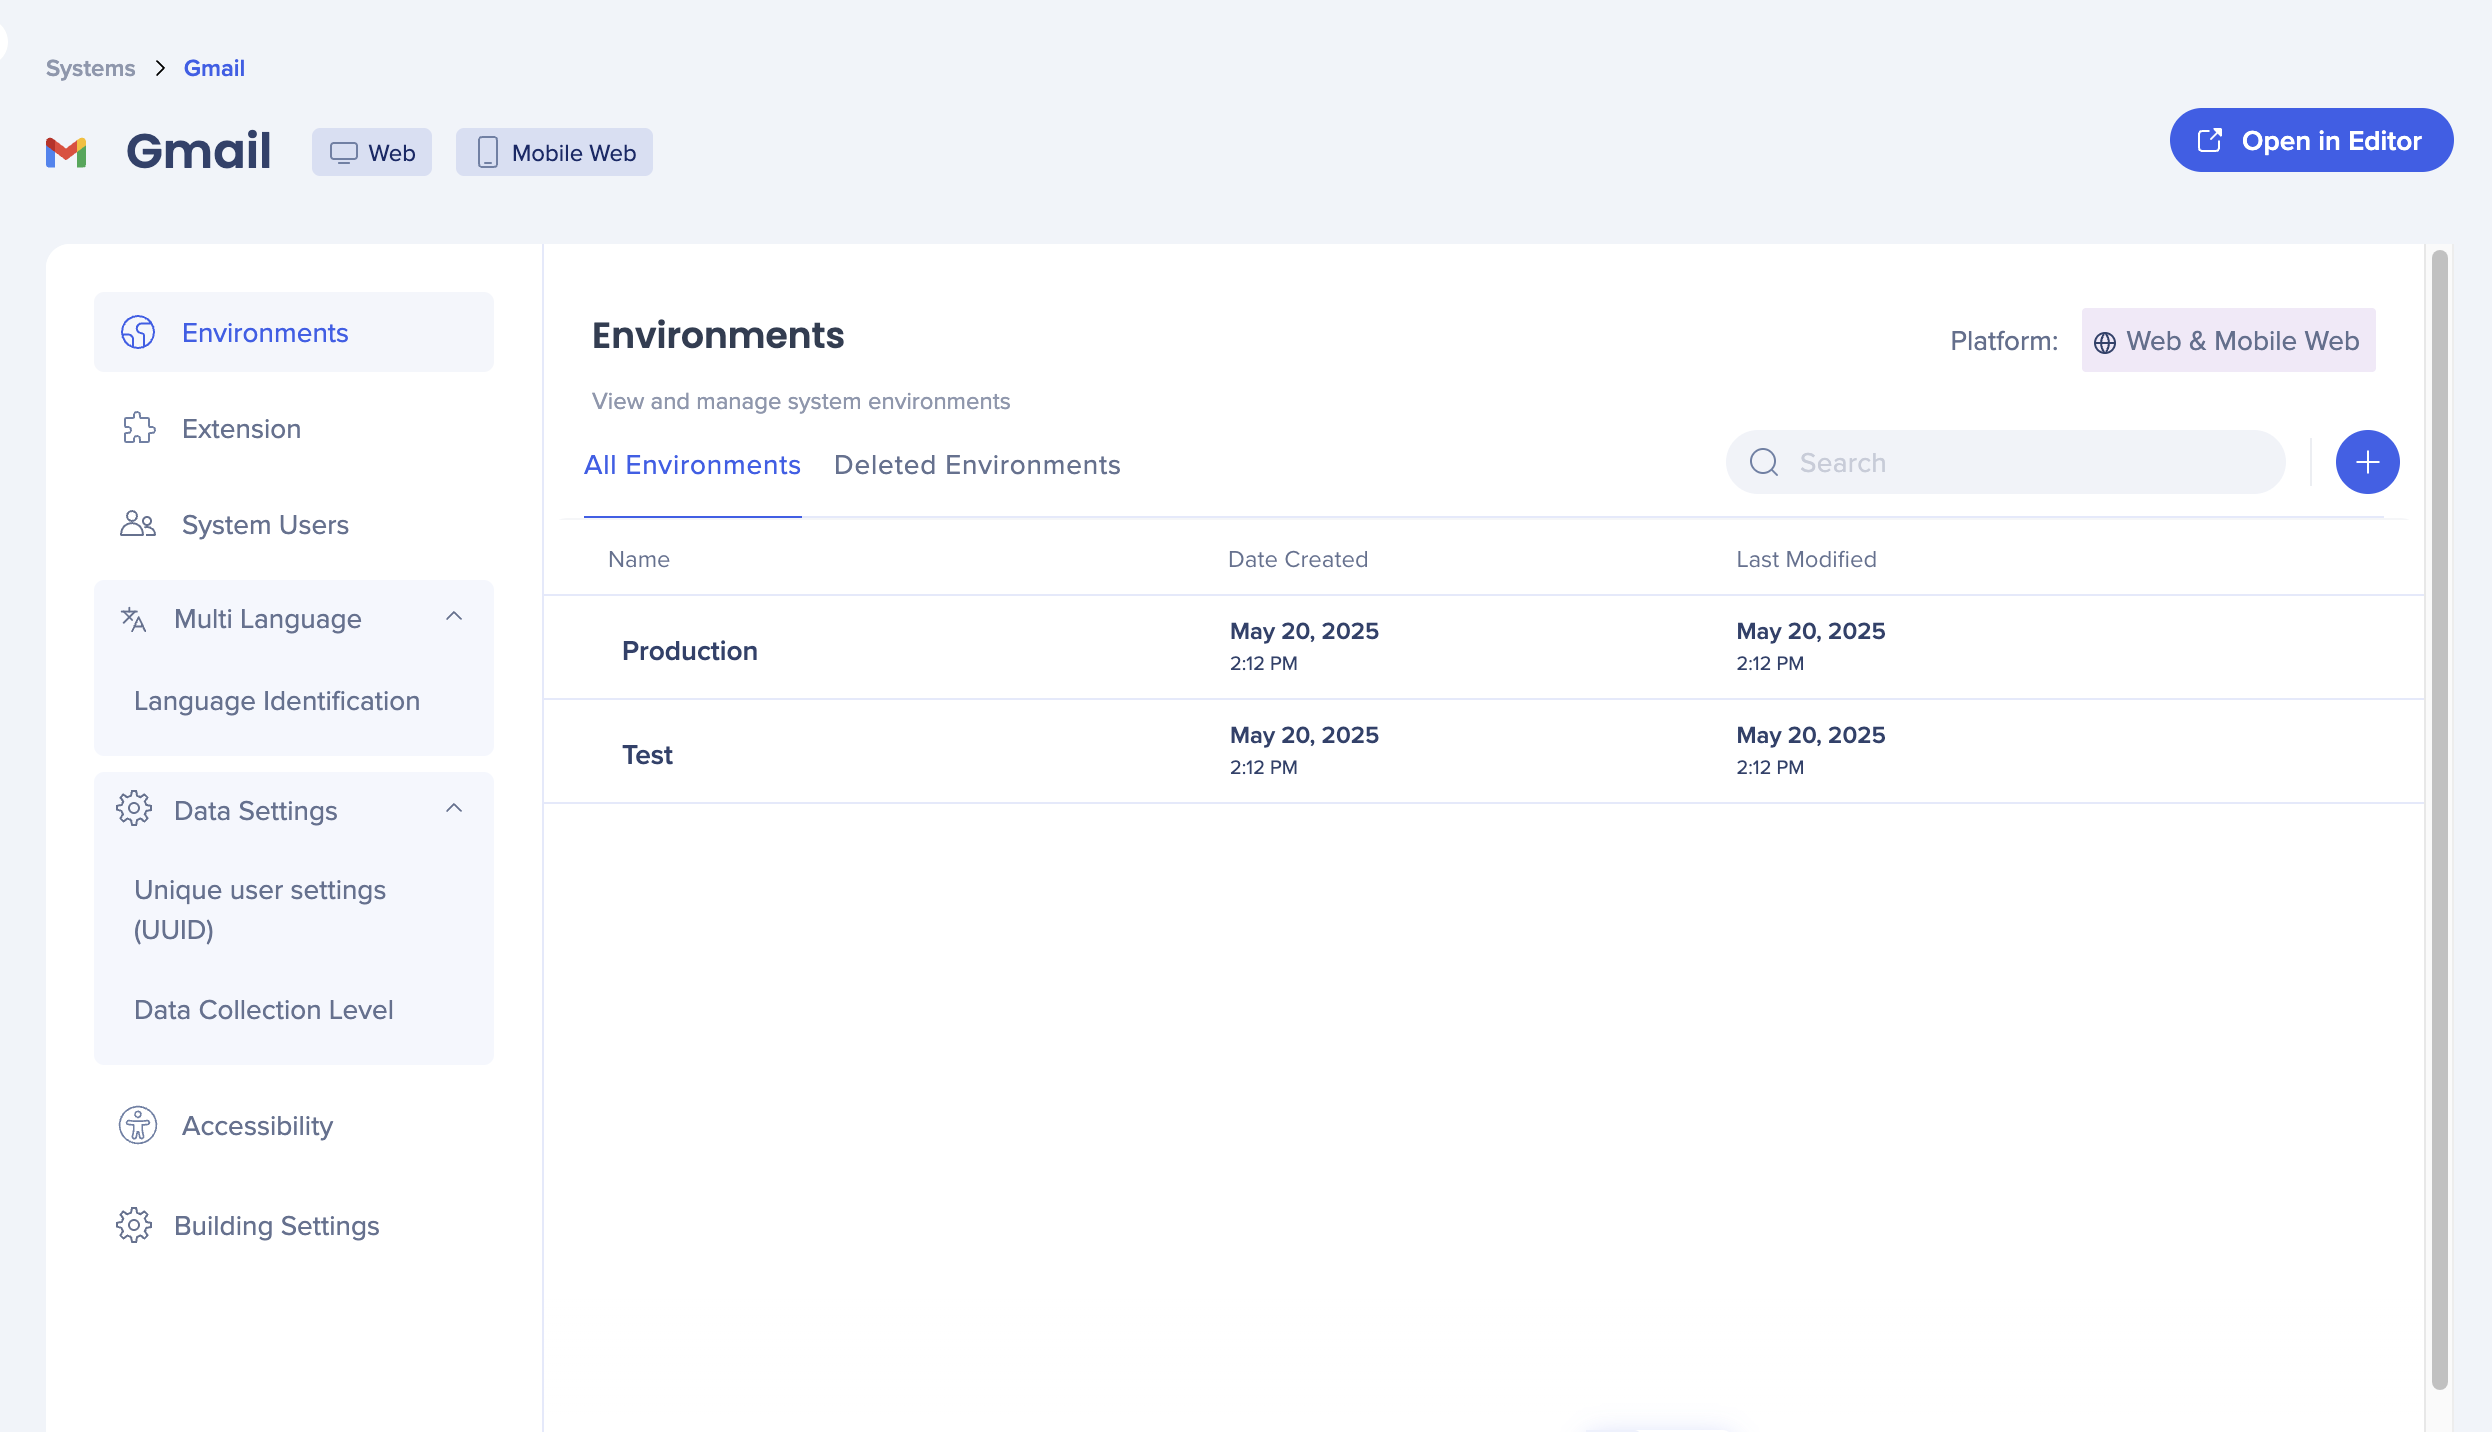
The Environments tab lets you set up and manage the deployment environments for your system. Two default environments — Production and Test — are created automatically and can't be renamed or deleted. You can create custom environments and copy their deployment snippets for use in your build.
System Environments
Deployment (was Extension)
This lets you configure the URLs your extension uses per environment. Each account includes one extension automatically. New systems are added to it but remain inactive by default.

Deployment (was Extension) In Admin Center
WalkMe Products
View and manage your WalkMe product entitlements for a specific system.
https://support.walkme.com/wp-admin/post.php?post=155289&action=edit
Users Management
View and manage the users and groups assigned to your system. Users can be assigned to groups, and roles apply across all systems — not per system.

System Users Management
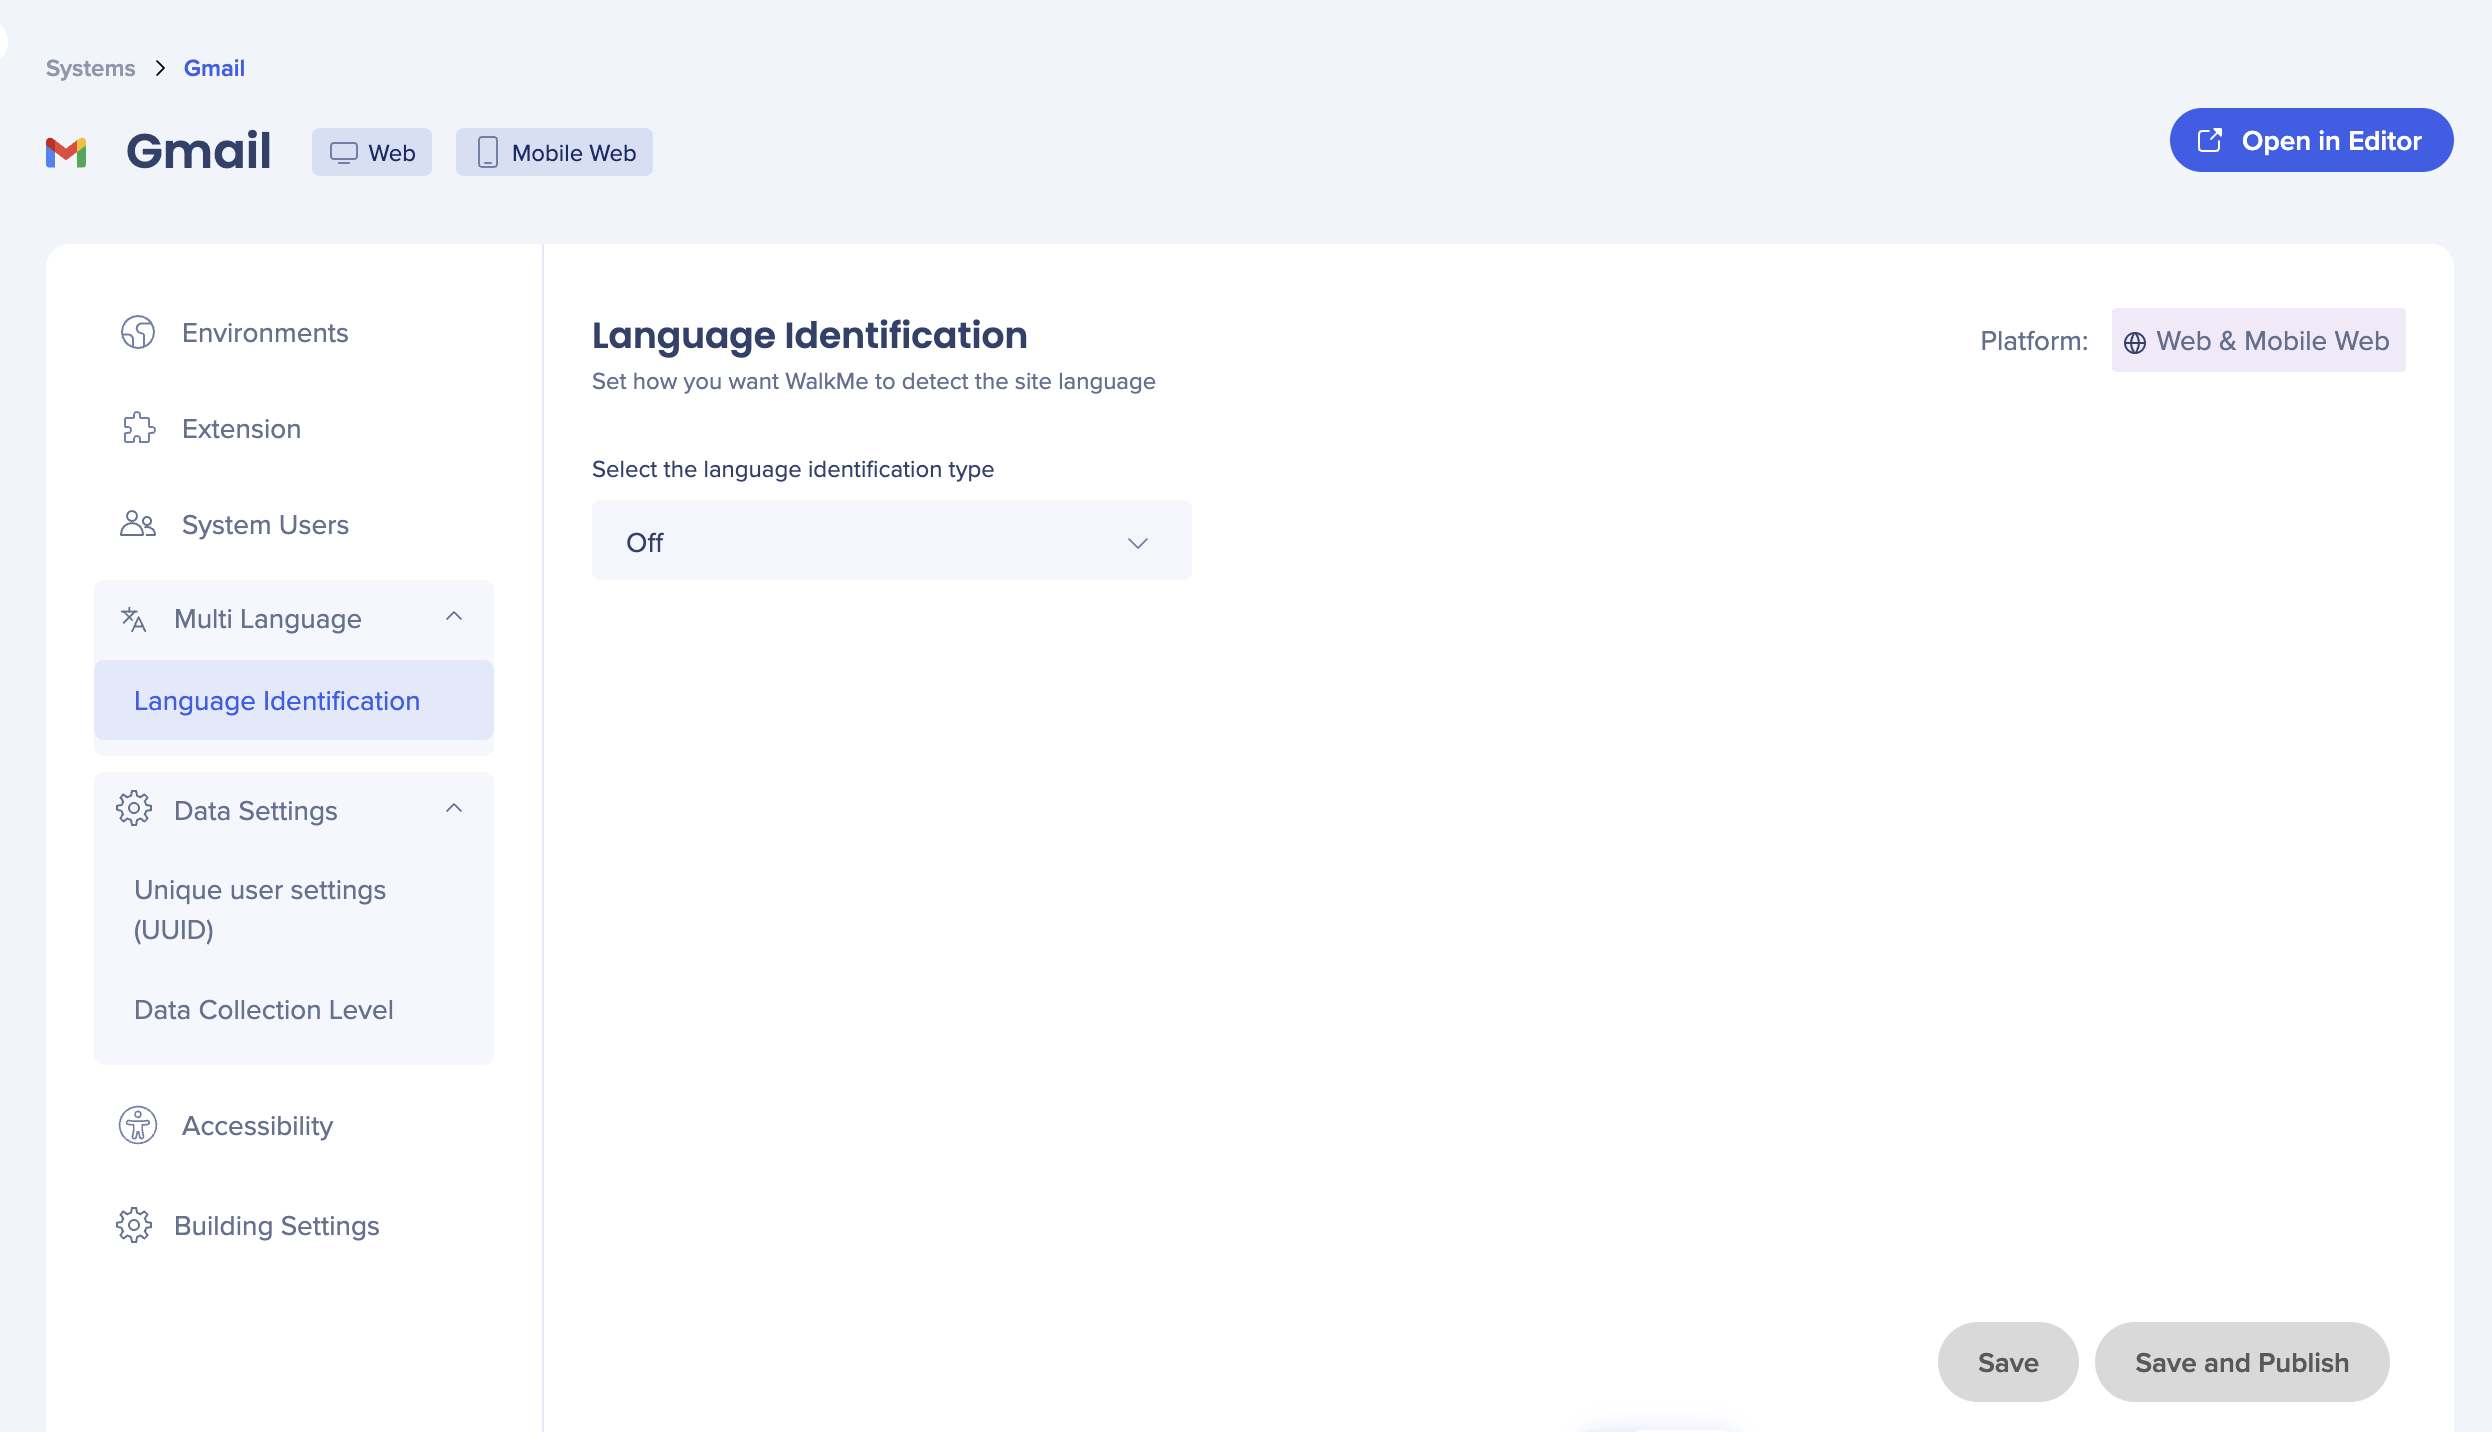
Select how WalkMe identifies the language of your site. Available options include HTML language attributes, auto-detect, URL parameter, site variable, local storage, cookie, and jQuery. All settings apply to both web and mobile web platforms.
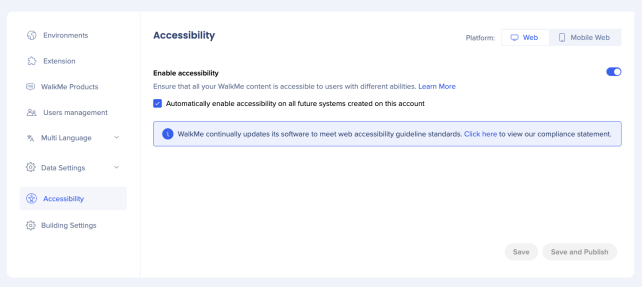
Accessibility
Turn on accessibility at the system or account level. Turning it on at the account level means any new system you create will have accessibility turned on by default. This doesn't affect existing systems.
Accessibility Settings
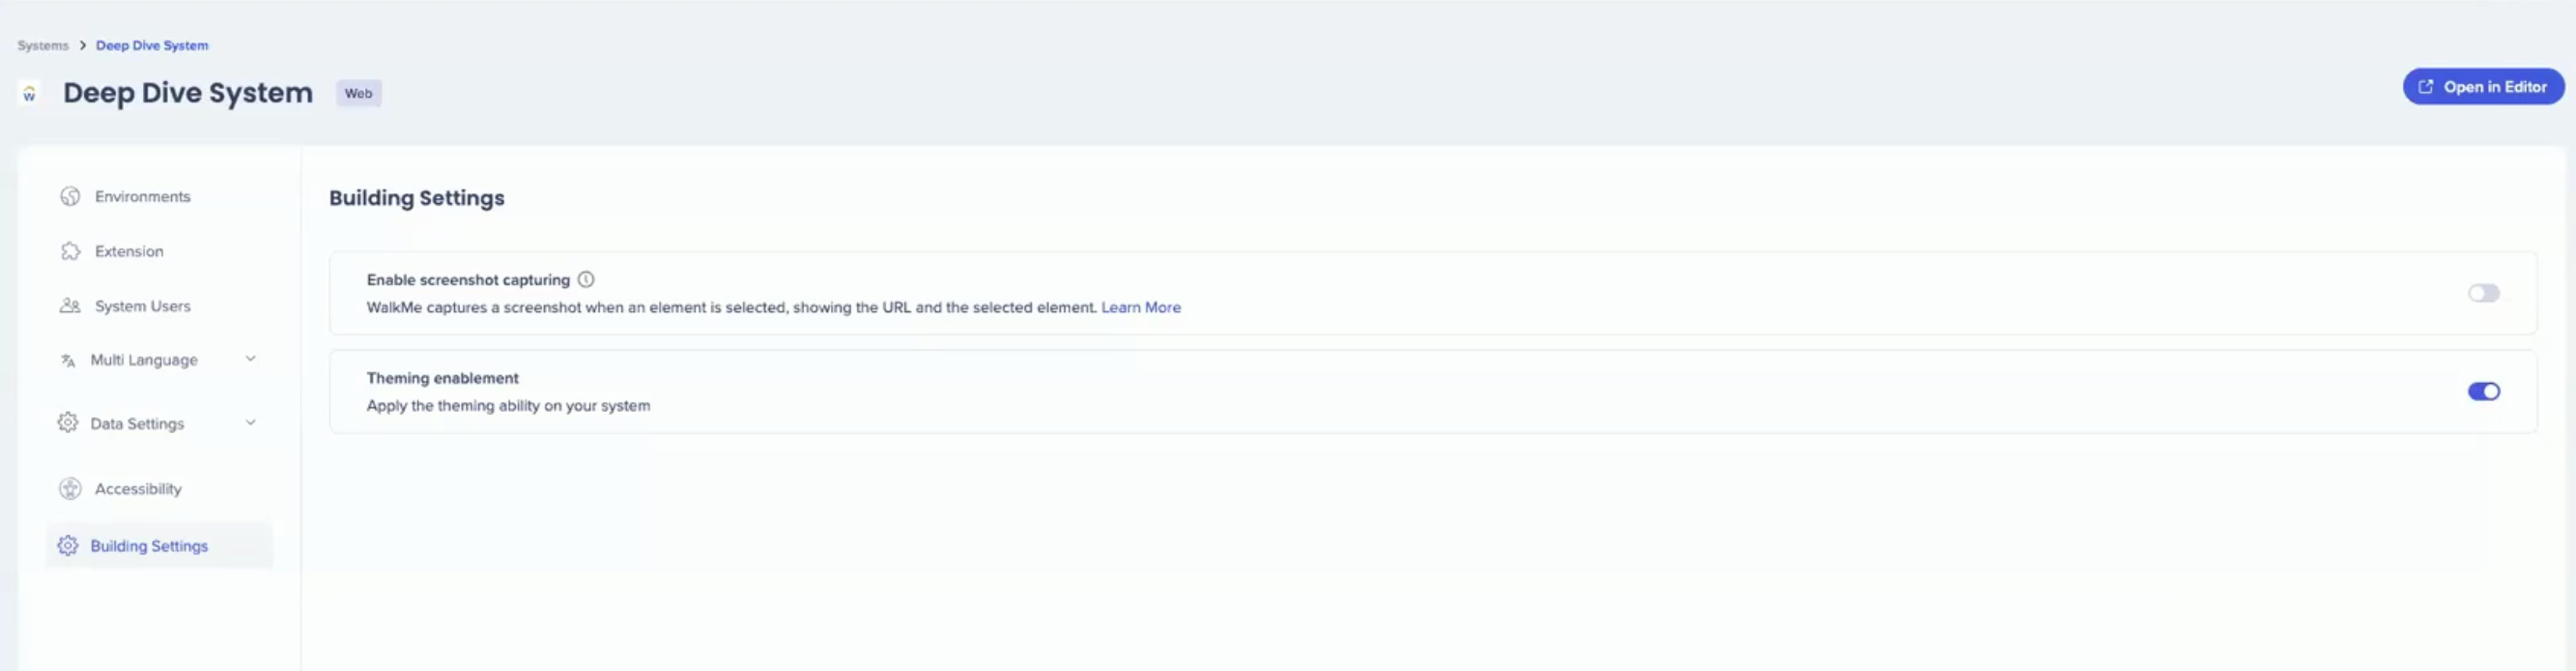
Building Settings
- Turn on Enable screenshot capturing to save a screenshot each time an element is captured for a step, rule, SmartTip, or launcher
- The screenshot will include the element highlighted by the element selector
- Select Blur the screenshots if you want the screenshots to be blurred
Screenshots
- Turn on Theming enablement to enable theming for the system
Theming
Technical Notes
- Production and Test environments are created automatically and can't be renamed or deleted
- Custom environment names must be a single word, no spaces or special characters, with a maximum of 100 characters — the name "Preview" isn't allowed
- User roles apply across all systems; they can't be set differently per system