Brief Overview
steps are balloon steps that are not attached to any specific element. They can be used to give general information or guidance, without attaching the message to any page element.
Popup are used to draw your users attention to featured text. Unlike regular step balloons, popups are not attached to an element but appear in the center of the page. Popups can be placed anywhere within a Smart Walk-Thru.
Use Cases
Popups are commonly used to enhance the user experience by communicating a message about your site or the process the user is completing. Popups can also be used for promotional purposes.
Common examples of how to use popups include:
- Showing a success message at the end of a process
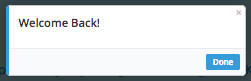
- Placing a welcome message at the beginning of an Auto Play Smart Walk-Thru when users arrive on your site
How It Works
Popups can be created in the Smart Walk-Thru as you are initially building or added later. The popup will appear to the user in the center of the screen, unattached to any element.
Popups can be used anywhere in the main path or a branch of the Smart Walk-Thru.
🎓 Digital Adoption Institute
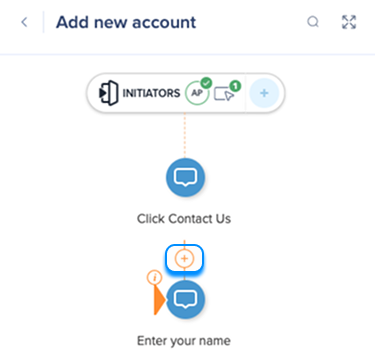
- Open the Smart Walk-Thru where you will add the popup step
- Hover between the two steps where you want to add the popup step
- Click the Orange plus sign
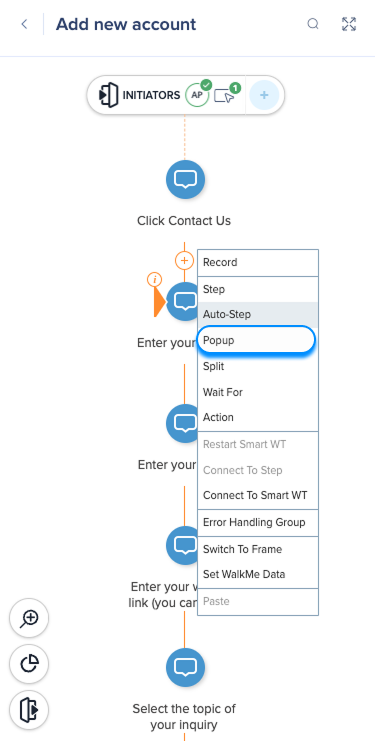
- Select Popup
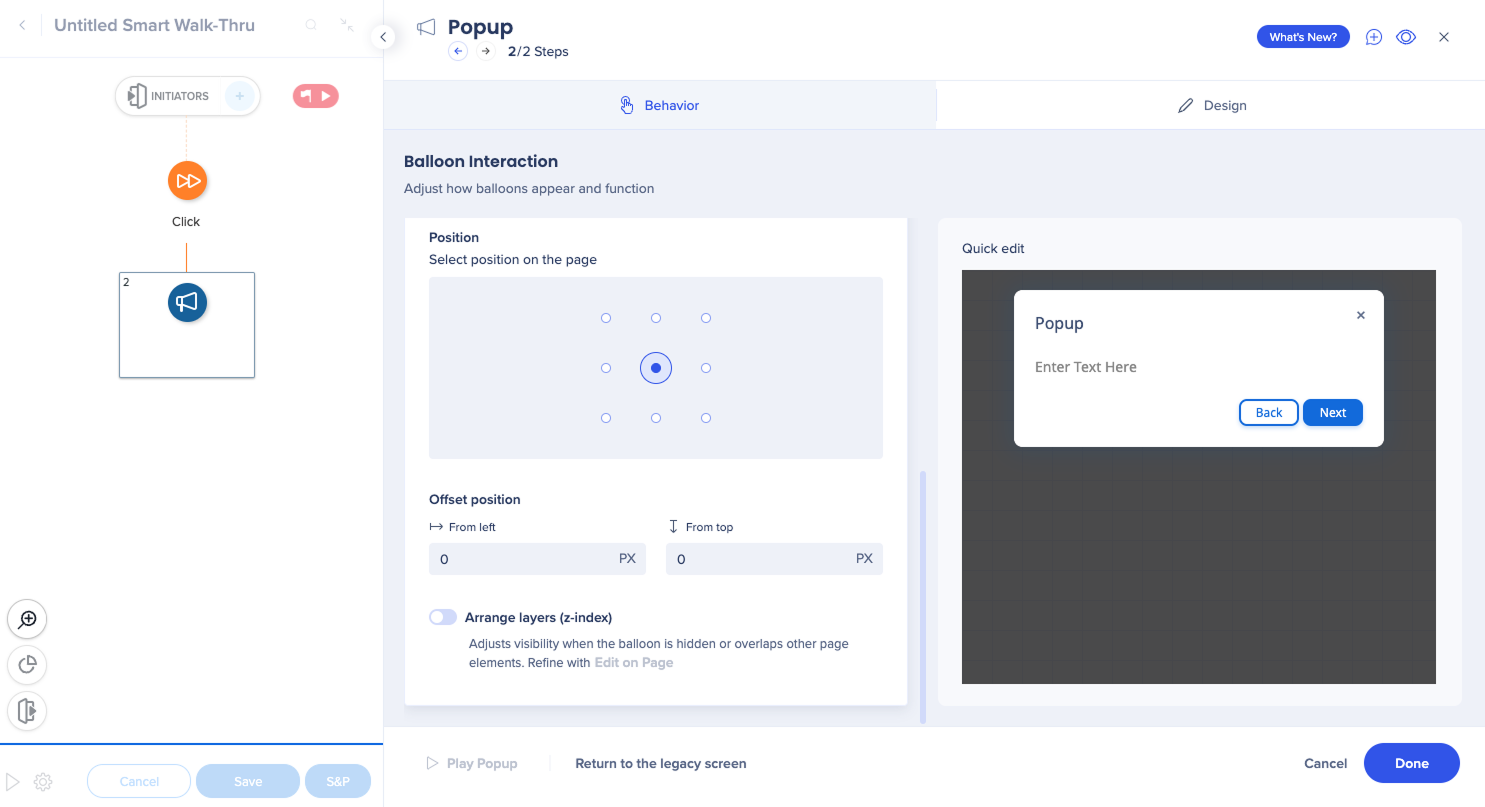
Behavior tab
In the Behavior tab, configure the following:
- Use the Quick edit screen to change the text of the popup
- Step triggers: Add a custom trigger for the popup step - not available when Display During Automation is turned on
- Additional navigation buttons:
- Back: Goes back to the previous step, but only shown if the previous step had a Next trigger
- Cancel: End the Smart Walk-Thru
- X (close): Shows an X for users to close ballon - recommended not to remove
- Display during automation: Displays the popup step continuously while an automation is in process

- Overlay controls: Use the grid to determine where the popup step will appear on the screen
- Arrange layers (z-index): Adjust visibility when the balloon is hidden or overlaps with other elements
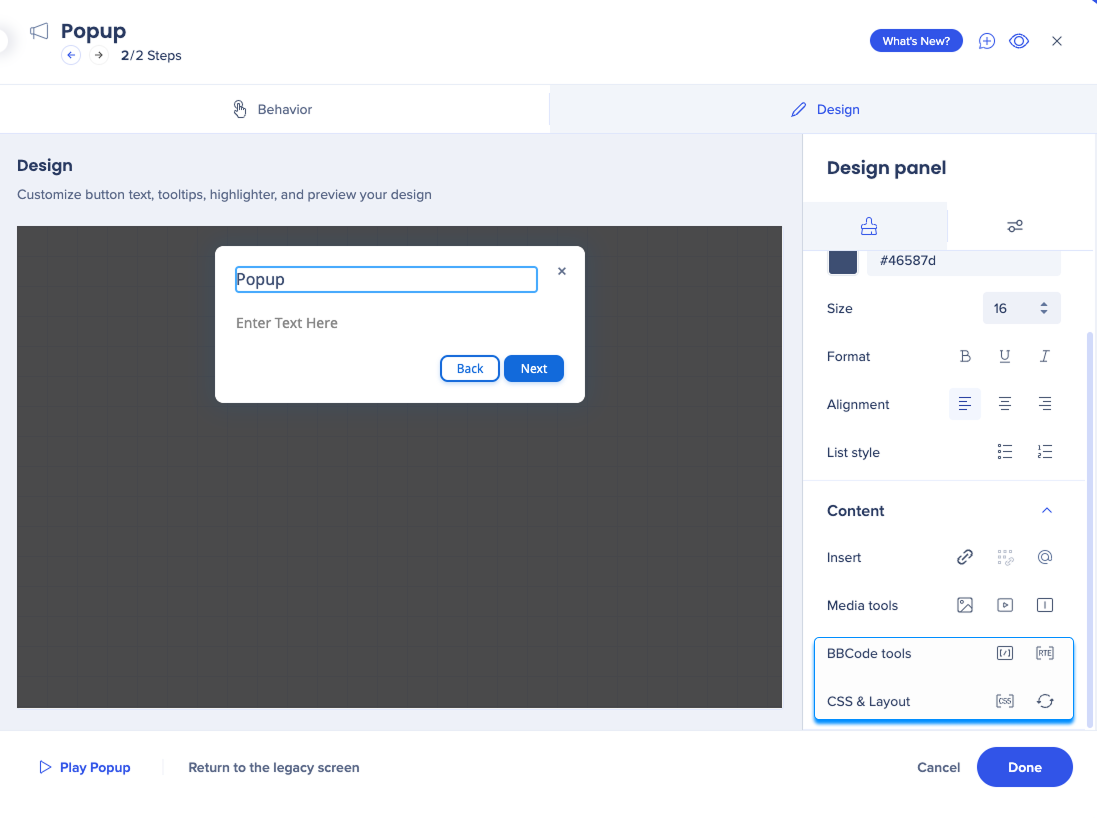
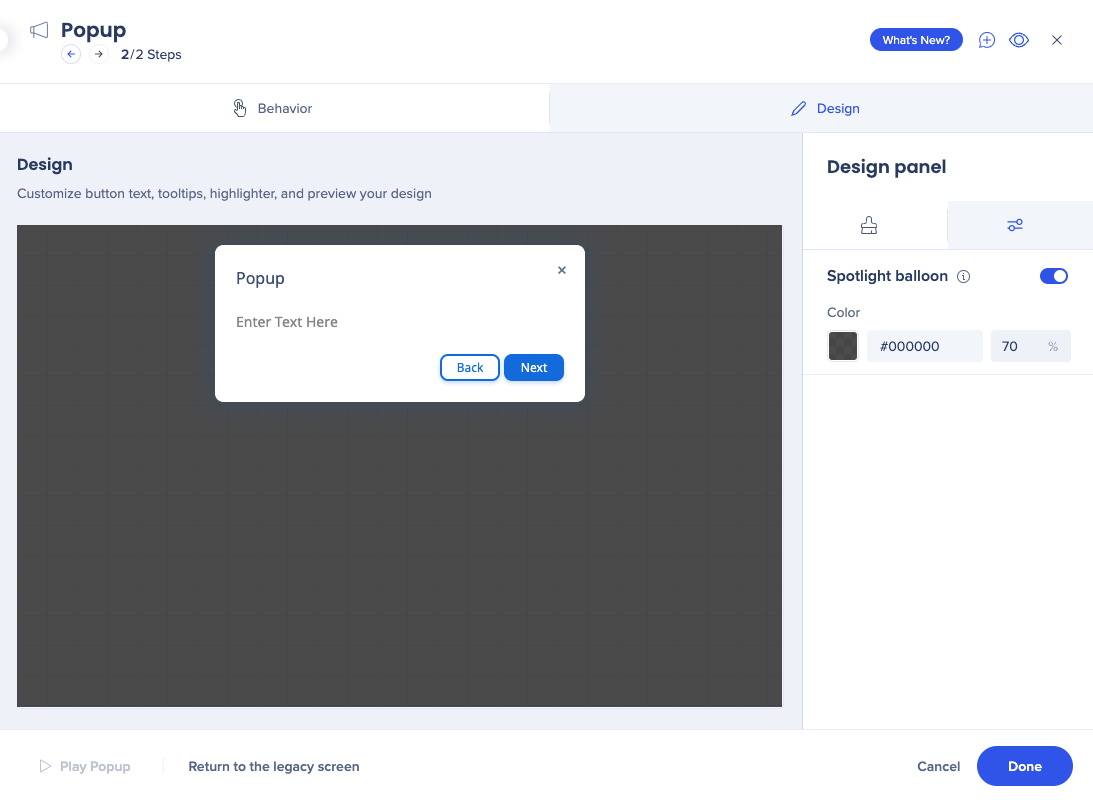
Design tab
In the Design tab:
- Edit text properties, such as color, size, format, etc.
- Edit balloon content, using different tools, including BBcode and CSS
- Enable spotlight if you want to add a screen overlay
Note
- If a popup step is moved by the user, the following popup steps in the Smart Walk-Thru will appear in the same location of previous step
- If a new Smart Walk-Thru is played, the first popup of that flow will appear on the same display (in case the user has more than one monitor) as the last Smart Walk-Thru but on the predefined location set by the builder
Display During Automation
To prevent users from interrupting an automation process when playing flow steps, including auto-steps and wait-for-steps, following the popup, turn on Display During Automation.
Flow Steps
Turning on Display During Automation will enable the popup to remain on screen during the automation and notify users that an automation is in process. This prevents users from interrupting the automation by clicking on the screen and stopping the Smart Walk-Thru.
This is useful in situations where users are unaware that an automation is occurring and they aren't notified, it might even look as if their computer is being remotely controlled.
The popup will stop showing once the automation ends.
For example, once the Smart Walk-Thru has reached the last step or if it's followed by a regular step or another popup.
Tip
- Set up another popup after the last flow step to let users know the automation process finished
- Mention in the first popup to wait until there is a message showing the process has ended
Technical Notes
- Consecutive overlays with different colors or opacity are not supported
- "Close after playing" can be turned on only when a flow step is after the popup
- The flow step must be saved to be available in the dropdown
- The page must finish loading for the popup to reappear
Tip Tuesday Videos


