Brief Overview
This article provides an overview of Smart Walk-Thru step types and explains how each one behaves in the WalkMe Editor. If you are new to building Smart Walk-Thrus, start with the Getting Started Guide to learn the basics of creating your first flow.
Smart Walk-Thru: Getting Started Guide
Step Types
In a Smart Walk-Thru, some steps are visible to your users and appear as balloons that guide them through a process. Regular steps and popup steps are visible balloons. They have a blue icon in the Smart Walk-Thru map.
All other step types are flow steps. Flow steps do not appear to the user—instead, they control how the Smart Walk-Thru progresses, branches, or responds to conditions in the application. They have an orange icon in the Smart Walk-Thru map.
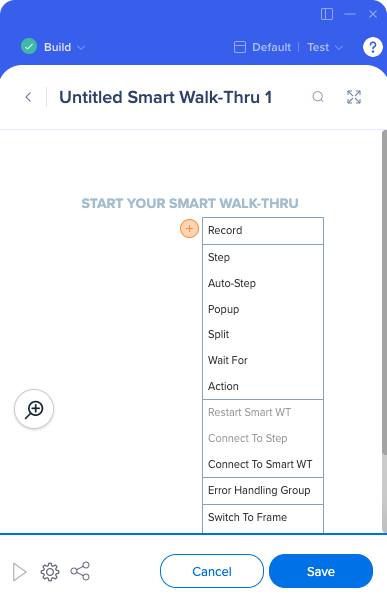
Steps
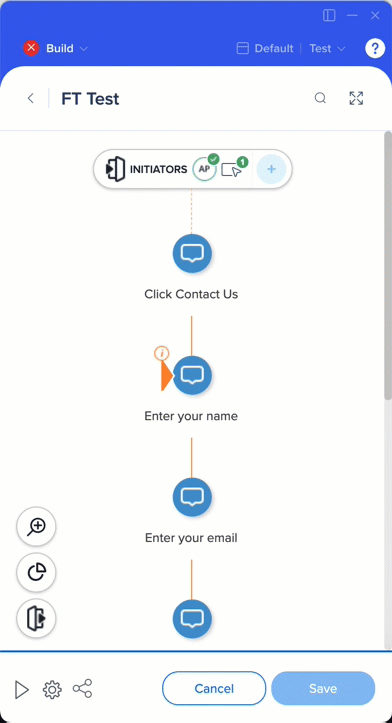
 A step appears as a balloon attached to an element on the screen and guides the user through a process. Steps are visible to end users and appear as blue balloons in the Smart Walk-Thru map. Each step has a trigger that determines what action advances the flow.
 Popup steps draw attention by displaying a balloon not attached to any element. They appear centered on the page and can be placed anywhere in a Smart Walk-Thru. Use popups when you need context or an announcement before continuing the flow.
Popup Steps: Getting Started Guide
Auto-Steps
Automate element-oriented actions on behalf of a user
 Auto-steps perform actions on behalf of the user, including clicking, hovering, focusing on fields, or entering text automatically. These steps help speed up repetitive or complex tasks.
Auto-Steps: Getting Started Guide
Split steps
Accommodate alternative paths through a process
 Split steps create a rule and sends users down different paths depending on if that rule evaluates as true or false. For example, use a Split to identify if a user is logged in to determine at which point you should start the flow.
Splits: Getting Started Guide
Wait-For steps
Wait for certain conditions before continuing guidance
 Wait-For steps pause the Smart Walk-Thru until a condition is met. They rely on the Rule Engine to determine the correct moment to continue.
Wait For Steps: Getting Started Guide
Action steps
Automate page-oriented actions on behalf of a user
 Action Steps perform actions such as opening a menu, refreshing the page, navigating to a URL, playing a ShoutOut, or opening ActionBot.
Action Step: Getting Started Guide
Restart Smart Walk-Thru
Run the Smart Walk-Thru again
 Restart Smart Walk-Thru lets users rerun the same Smart Walk-Thru, which is helpful when you want to reuse the introductory steps.
Restart Smart Walk-Thru Steps
Automations
If a Smart Walk-Thru is running as automation alongside another flow, restarting it will restart the initial Smart Walk-Thru. In these cases, leave the last step as is and set the frequency to Always.
Connect to Steps
Connect to Steps return a branch created by a Split back into the main flow. This option appears only at the end of a branch that is not yet connected.
Connect to Smart Walk-Thru
Connect Smart Walk-Thru to another process
 Connect to Smart Walk-Thru lets you reuse steps across multiple flows. This is recommended for keeping Smart Walk-Thrus under 10–12 steps and improving flow performance.
Connect to Smart Walk-Thru Step
Error Handling Group
Help users despite errors
 Error Handling Groups contain steps that guide a user when something goes wrong. These groups activate when the associated rule identifies an error, such as an error message being visible or a URL containing an error parameter.
Error Handling: Getting Started Guide
Switch to Frame
Play steps across domains
Switch to Frame allows a Smart Walk-Thru to continue across domains, including iFrames or HTML popups. Use this step when the user journey spans multiple frames.
Set WalkMe Data
Use cookies to track user behavior
Set WalkMe Data sets a variable that can be stored locally in the user's browser. These values can then be used in rules, Splits, segmentation, or automation.
Set WalkMe Data Flow Steps
Step Controls
When you hover over a step in the Editor, additional controls appear:
- Play previews the flow from that step forward
- View screenshot displays the captured screenshot of where the step was created
- Duplicate step copies the step
- Add Start Point converts the step into a Start Point
- Delete step removes the step from the flow
- Options menu provides access to Add Peer Step or Convert to Auto-Step

Peer steps
Peer Steps play simultaneously at the same moment in the flow. Use them when you want multiple balloons or highlights to appear at once.
Manage Steps
Managing steps effectively keeps your Smart Walk-Thru organized, easy to understand, and simple to update. These actions help you rearrange, copy, and locate steps as your flow grows.
Search for a step
Use the search icon or keyboard shortcut to quickly locate steps in large flows:
- Select Find a step in the editor

- Use cmd+F (Mac) / ctrl+F (Windows)
Searching is especially helpful in Smart Walk-Thrus with many branches or conditional paths.
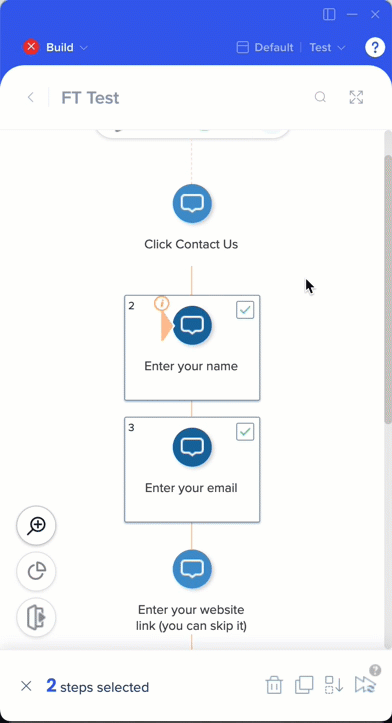
Move steps
Reordering steps allows you to refine the sequence of your flow or adjust how users progress through a process.
To move multiple steps within a Smart Walk-Thru flow:
- Select the steps you want to move
- Select Move steps
- Choose whether to place the steps Before or After another step
- Select which step
- Select Move
To move a single step, drag it to the new location in the flow.
Translations don't move
If the step contains translations, those translations will not move and must be added again after relocation.
Copy steps
To copy a step:
- Select the step you want to copy
- Select Copy
- Select + to paste steps
Smart Walk-Thru Features Tip Tuesday Video
Technical Notes
- Text with hyperlinks cannot be copied or pasted. Add hyperlinks manually from the Step Editor.
- Duplicating or copying steps does not copy translations.
- Duplicating or copying balloons does not copy custom CSS unless the CSS is saved to My Designs.
- As a workaround, copy and paste the custom CSS from the original balloon into the duplicated balloon if needed.
- The Back button does not appear in full preview. It appears only in Step Preview and after the Smart Walk-Thru is published.
Why do some steps have a “Back” button and others don’t?


