Brief Overview
Easily manage all your systems from one place with the Admin Center.
WalkMe's Admin Center offers a unified tool that brings all your essential system settings into a single, user-friendly interface. This centralized view simplifies system management, helping you configure and maintain systems with greater ease and efficiency.
Access
To access the system management settings, open the Systems page in the WalkMe Admin Center. Choose the link for your data center.
WalkMe Admin Center
How It Works
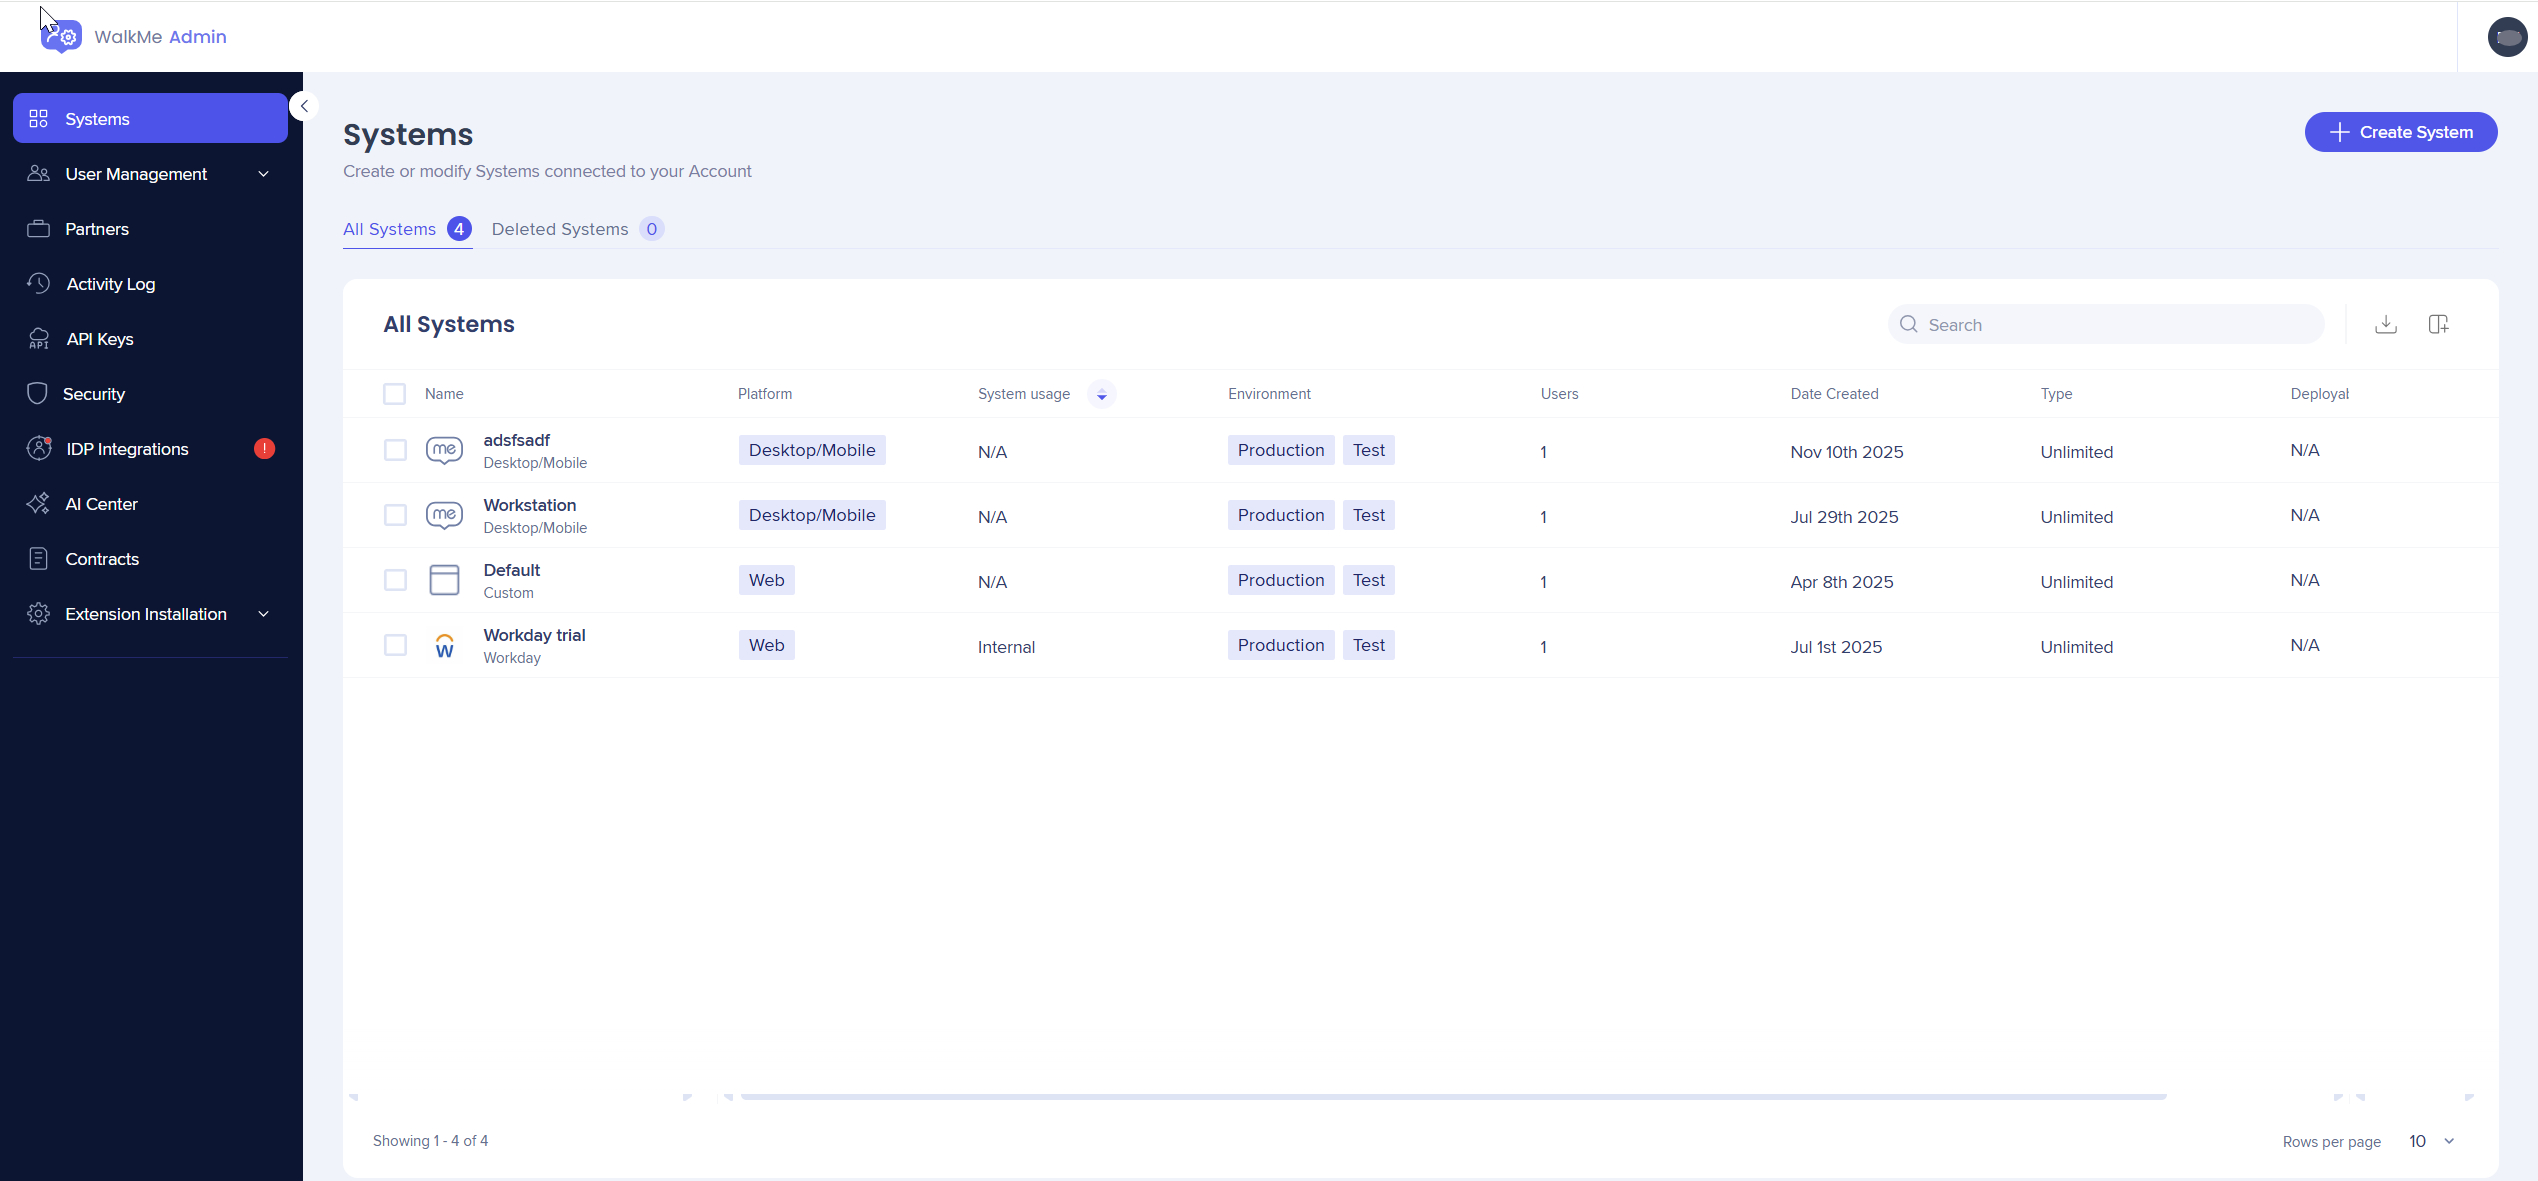
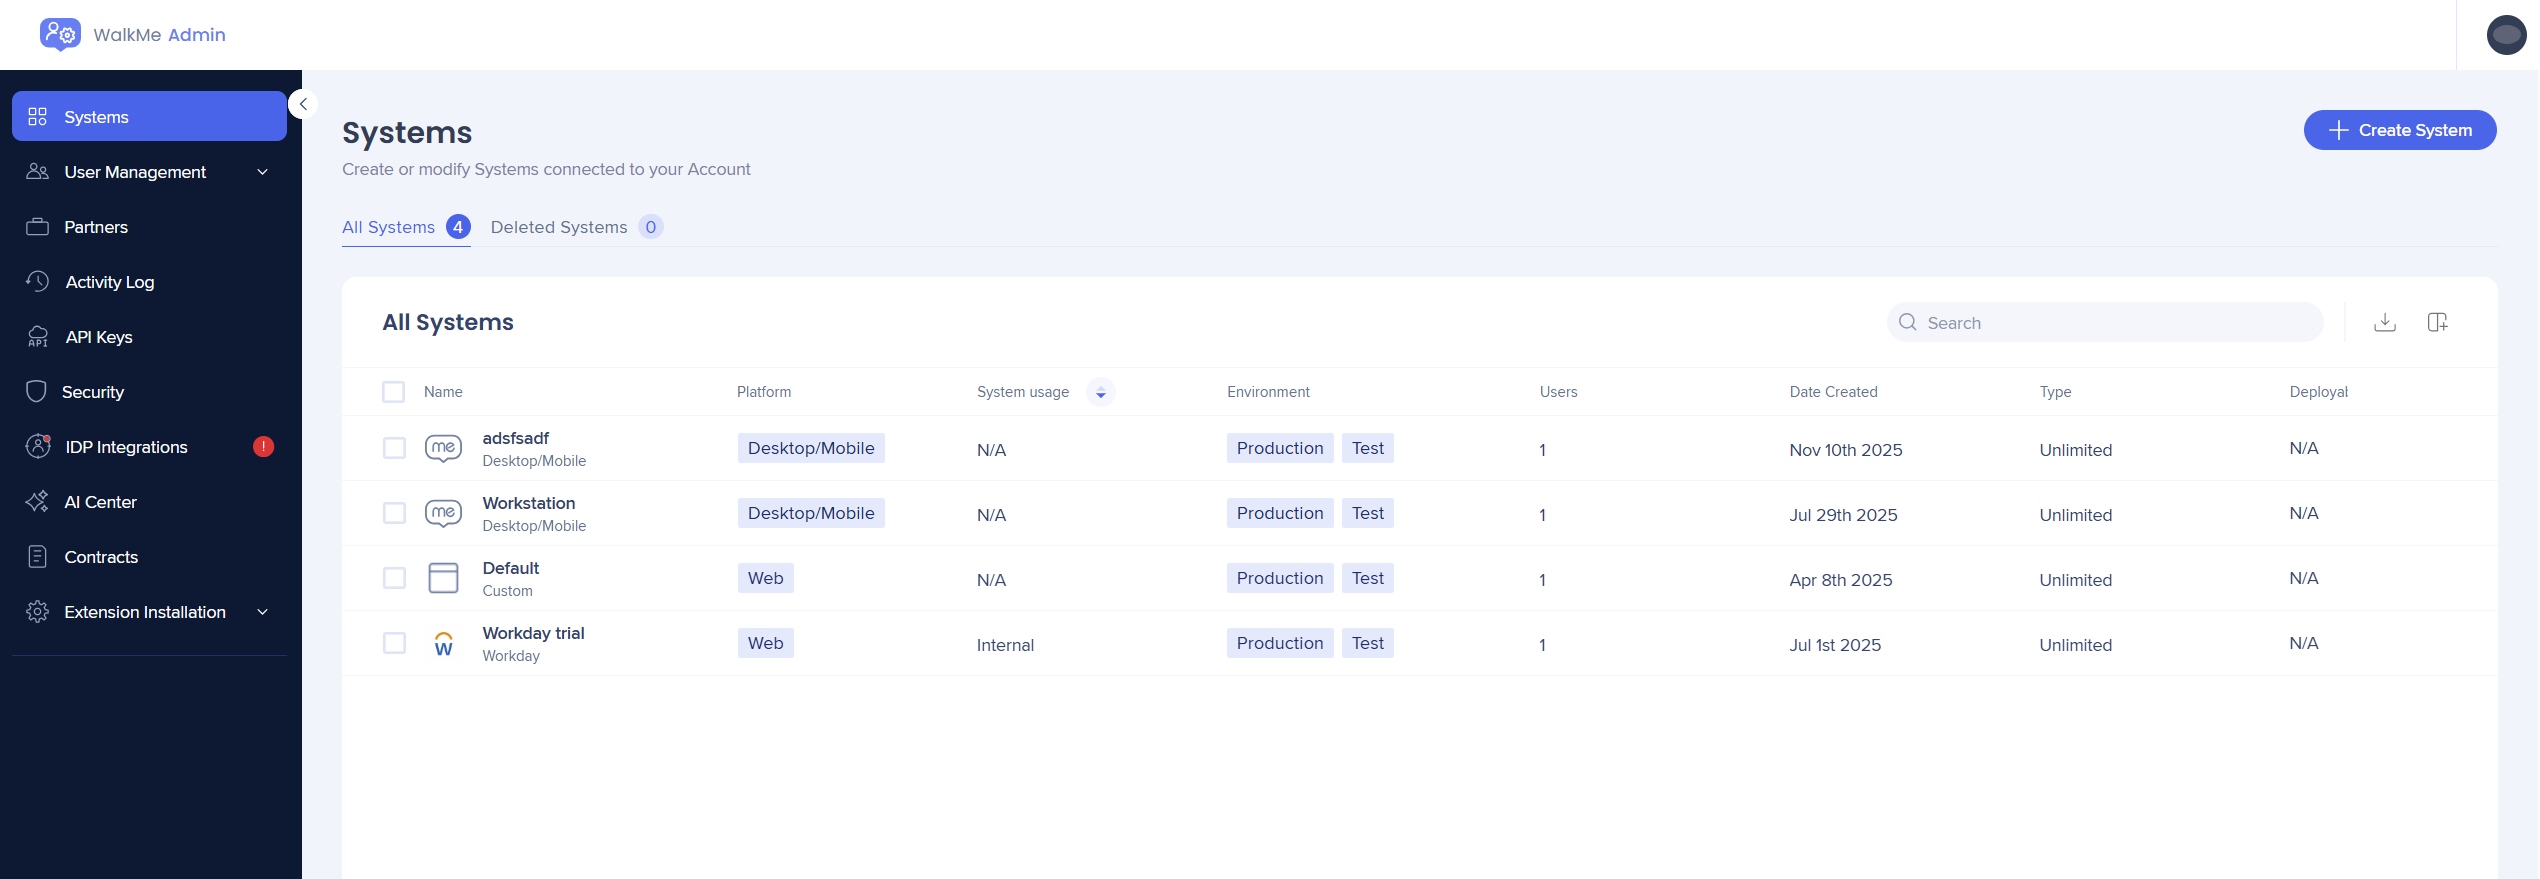
Systems page
You can see view and manage all systems associated with your account.
Select the Options menu next to a system to:
WalkMe Systems
System settings
Once you select a system from the Systems page you will be able to manage all of its settings and 7 tabs will be available:
-
Environments
-
Extension
-
System Users
-
Multi-language
-
Data Settings
-
Accessibility
-
Building Settings
Note
All system management settings apply to both Web and Mobile Web platforms.
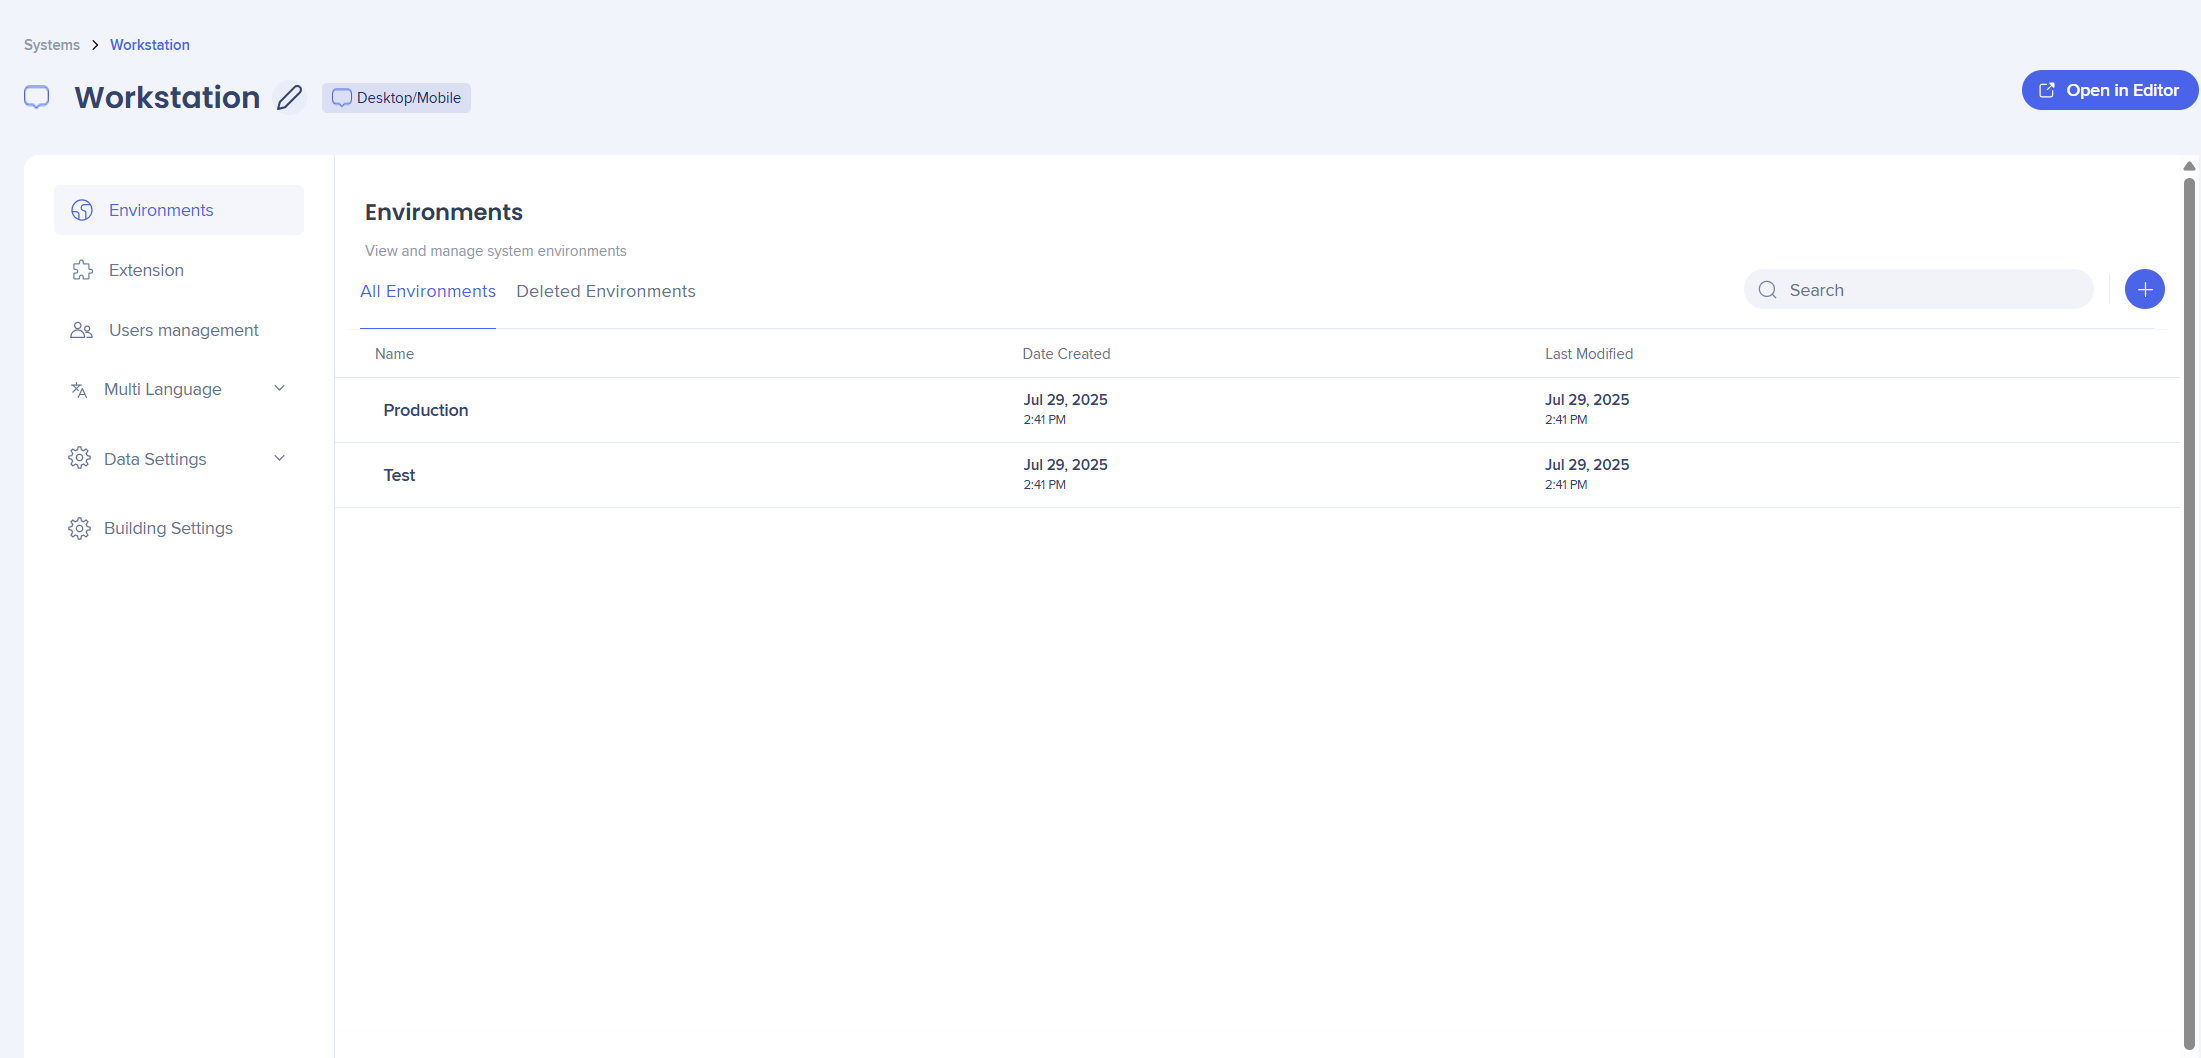
Environments
In the Environment tab, manage all environment related configurations:
- The default "Production" and "Test" environments are automatically created
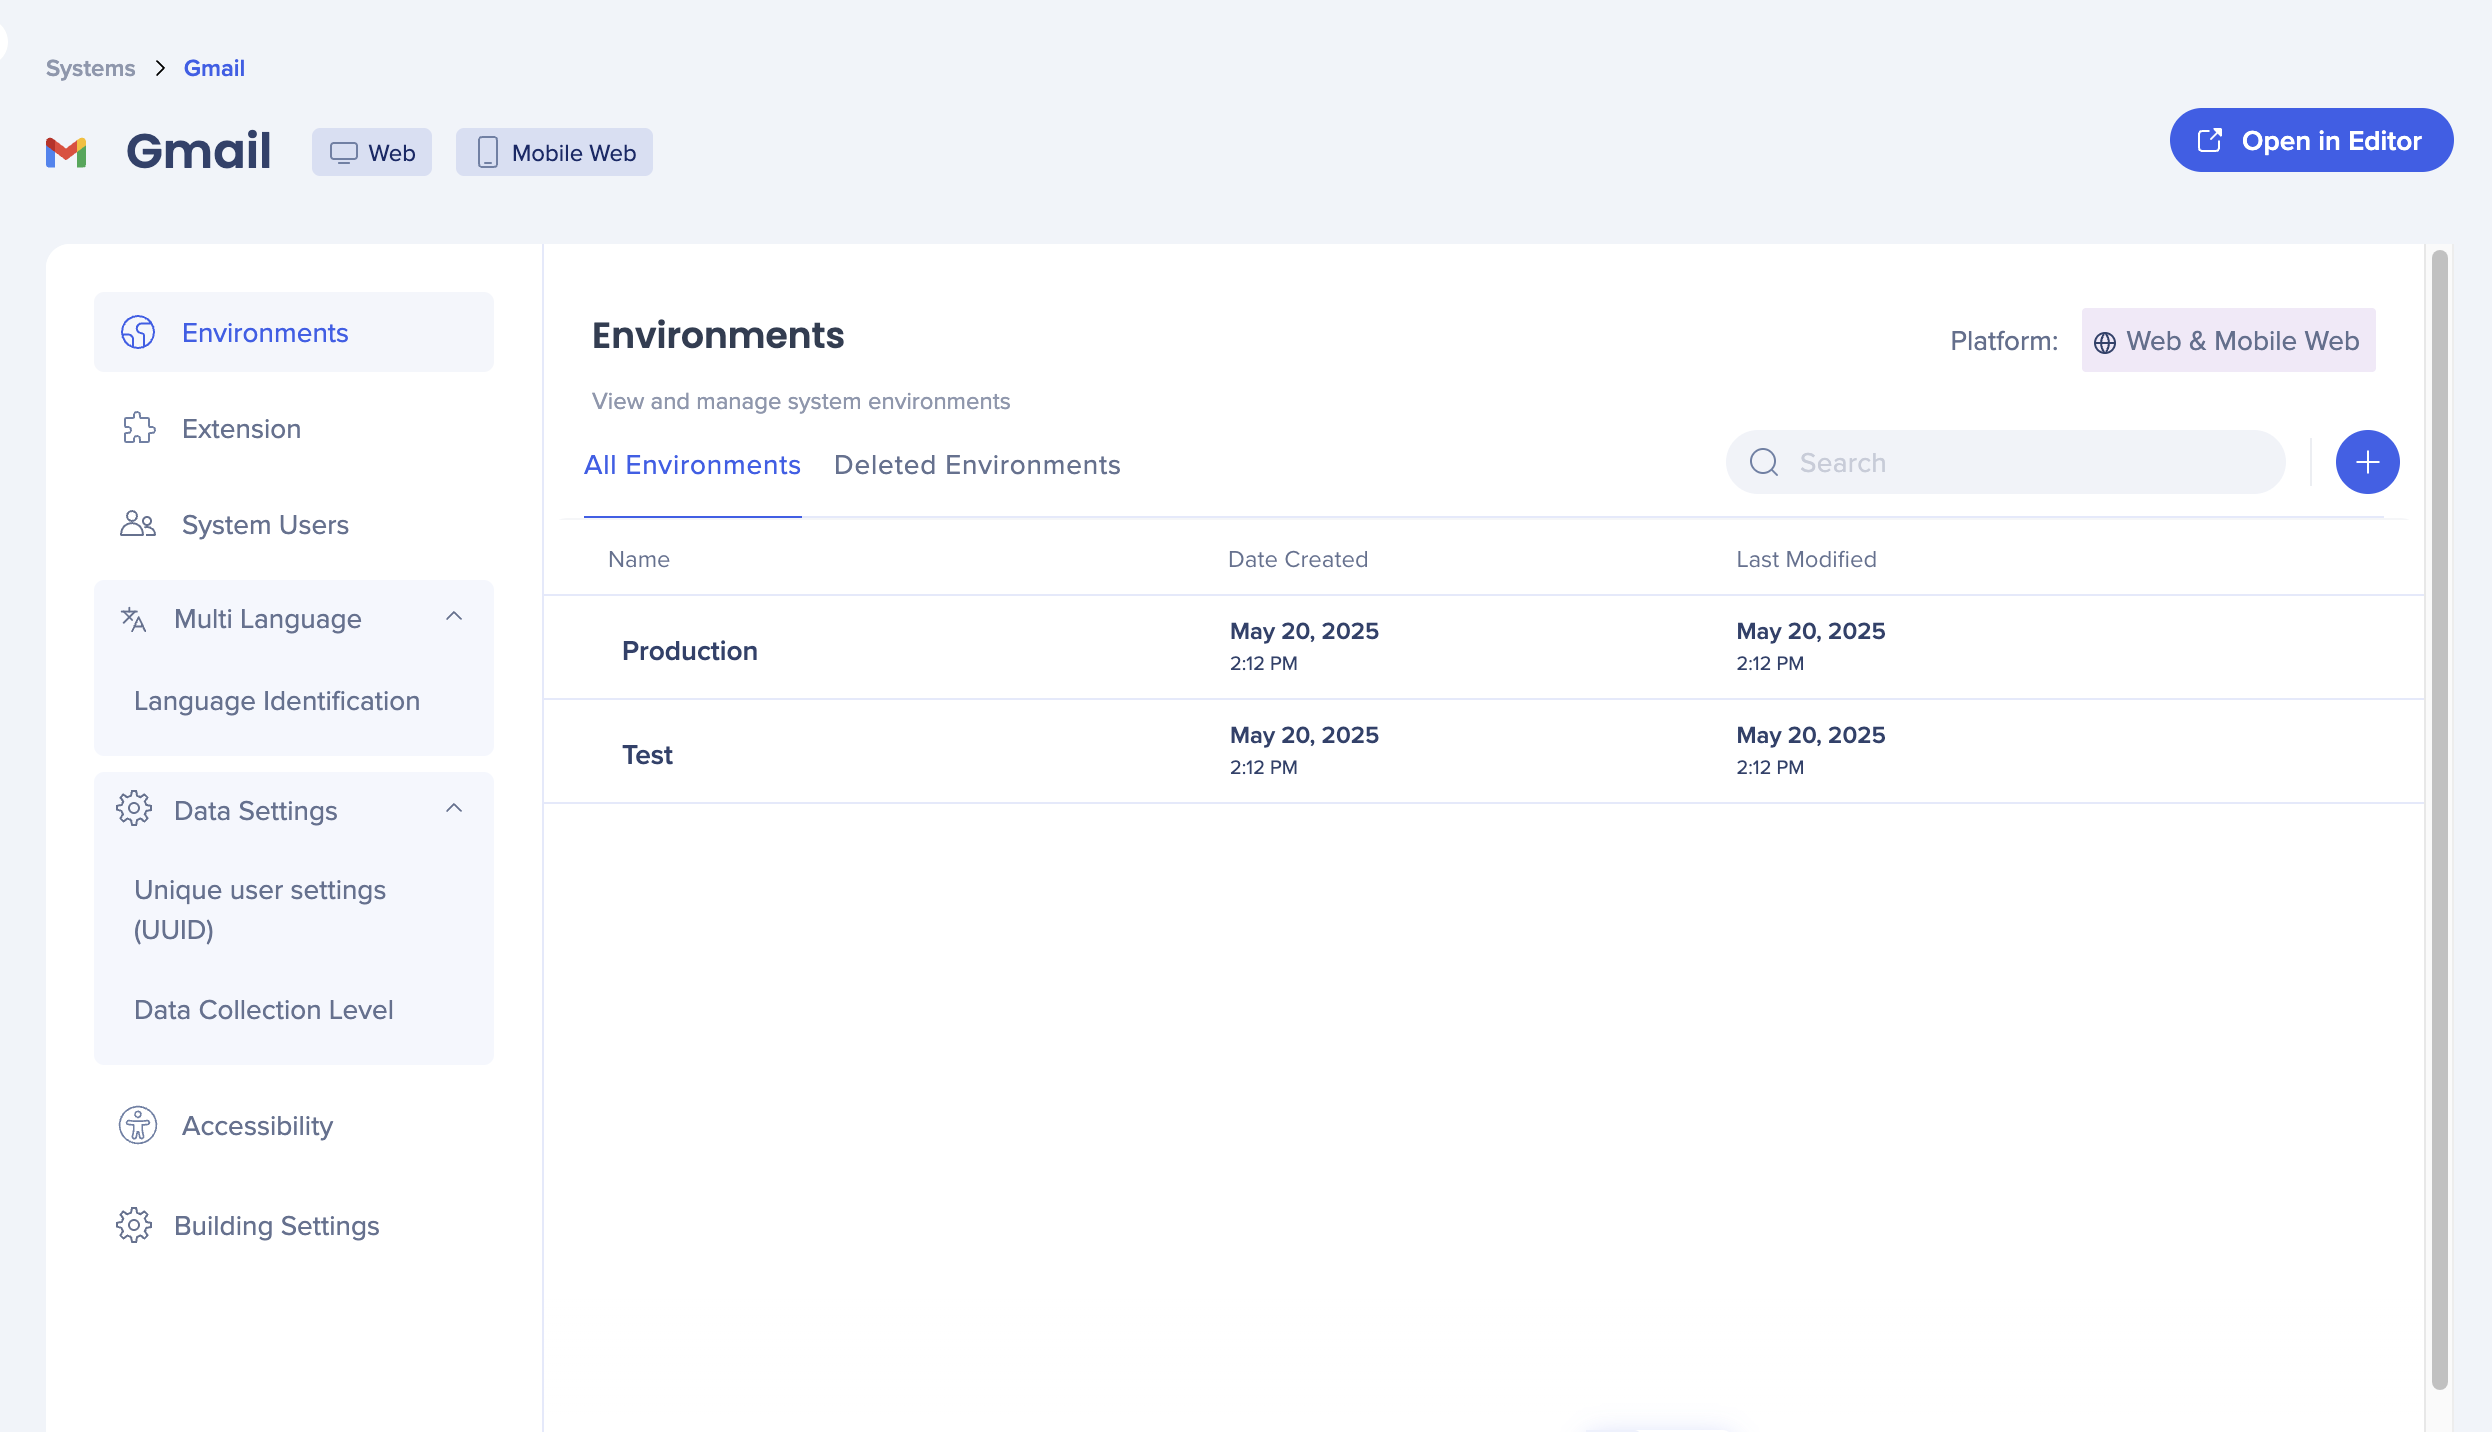
- These default environments cannot be renamed or deleted
- Select the blue + to create a new custom environment

Once created, you can copy the corresponding snippet for deployment.
If your deployment method uses an extension, configure URLs in the Extension tab.

For detailed requirements, see Extension section.
Renaming and deleting environments
You can rename and delete custom environments but not "Production" and "Test".
-
- Hover over the custom environment
- Select the Options (three dots) menu
- Click Rename or Delete

Restoring deleted environments
- Go to the Deleted Environments tab
- Hover over the environment
- Select the Restore button

Extension
Each account includes an automatically created Extension, to which new systems are added but remain inactive by default.
Extension settings can be managed per environment.

Configure:
Your extension URLs and settings in the Extension Settings page.
"
Extension Settings in Admin Center
System Users
Two tabs display under User management. Users and Groups.
Users can be assigned to a group from the Groups tab.
This tab displays a list of all users assigned to work on the system.
Info
- All settings under the User management tab apply to both and Desktop/Mobile platforms.
- Users cannot have different roles for different systems
- The role is granted once and applied to all systems to which the user has been added
- Select the + button to remove or add additional users to the system

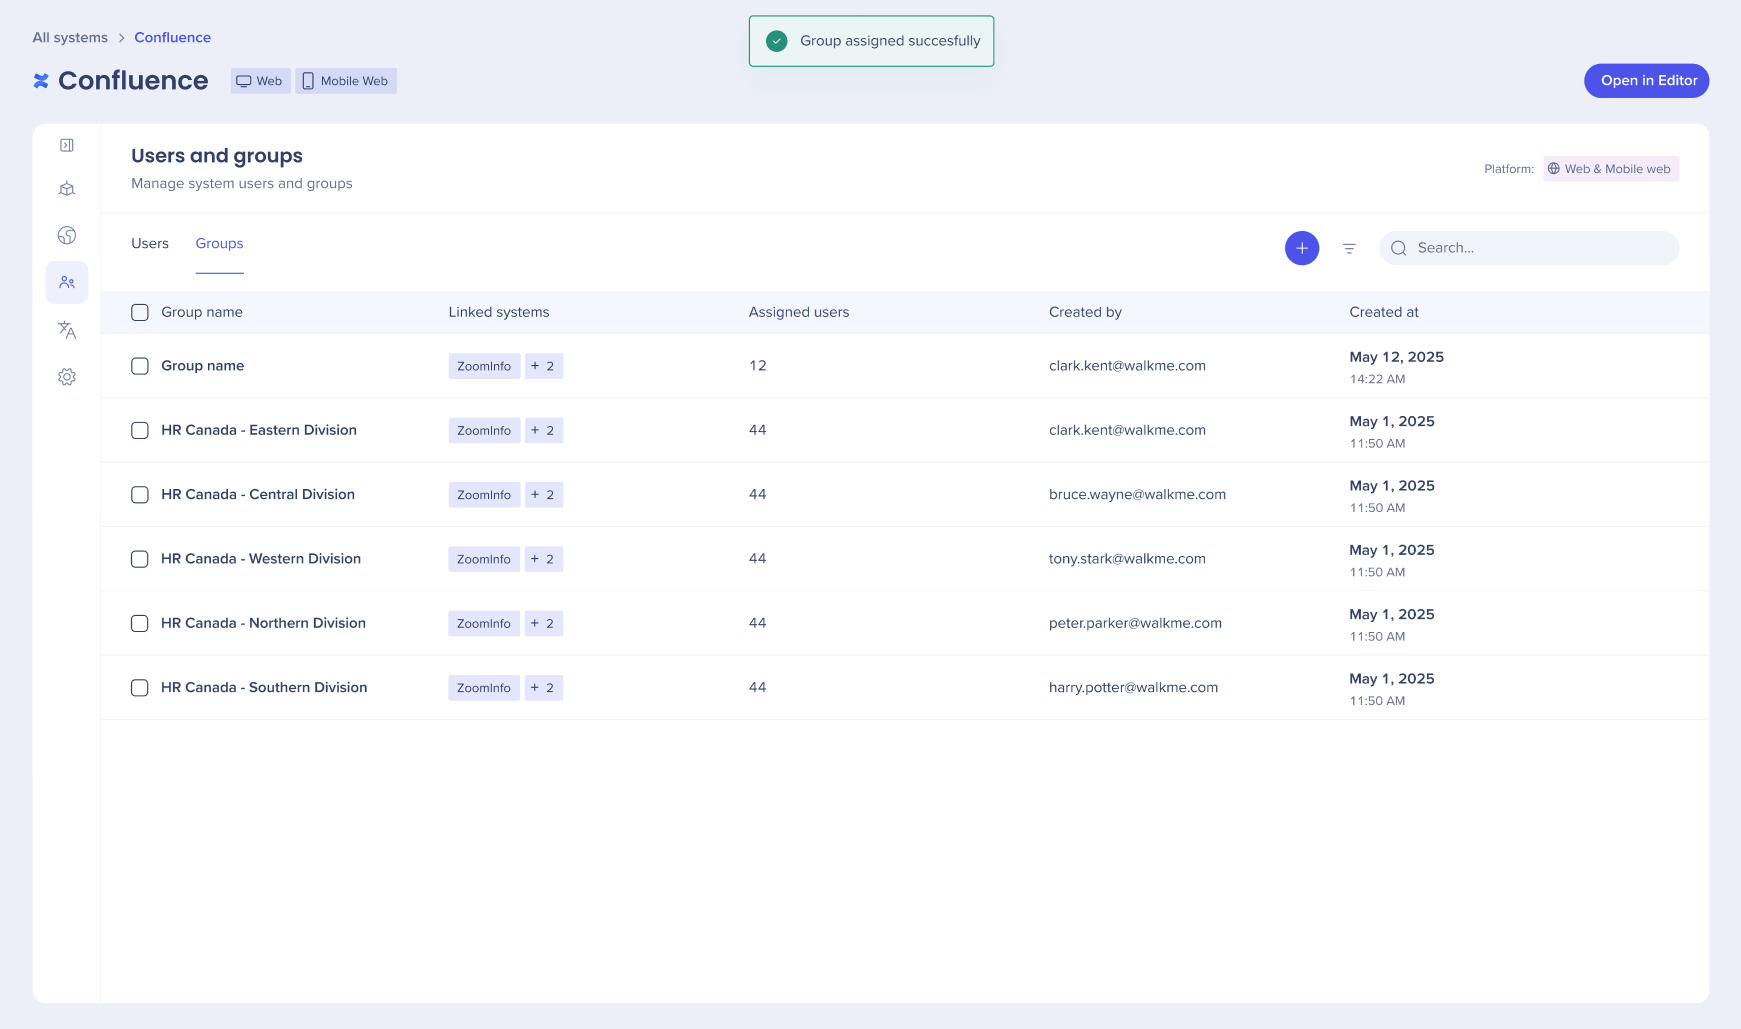
- Select Assign new group either search for the group or click your selection

- Members of the group display when hovered over
 A pop up displays when a group is added
 4. Select the icon to remove a group
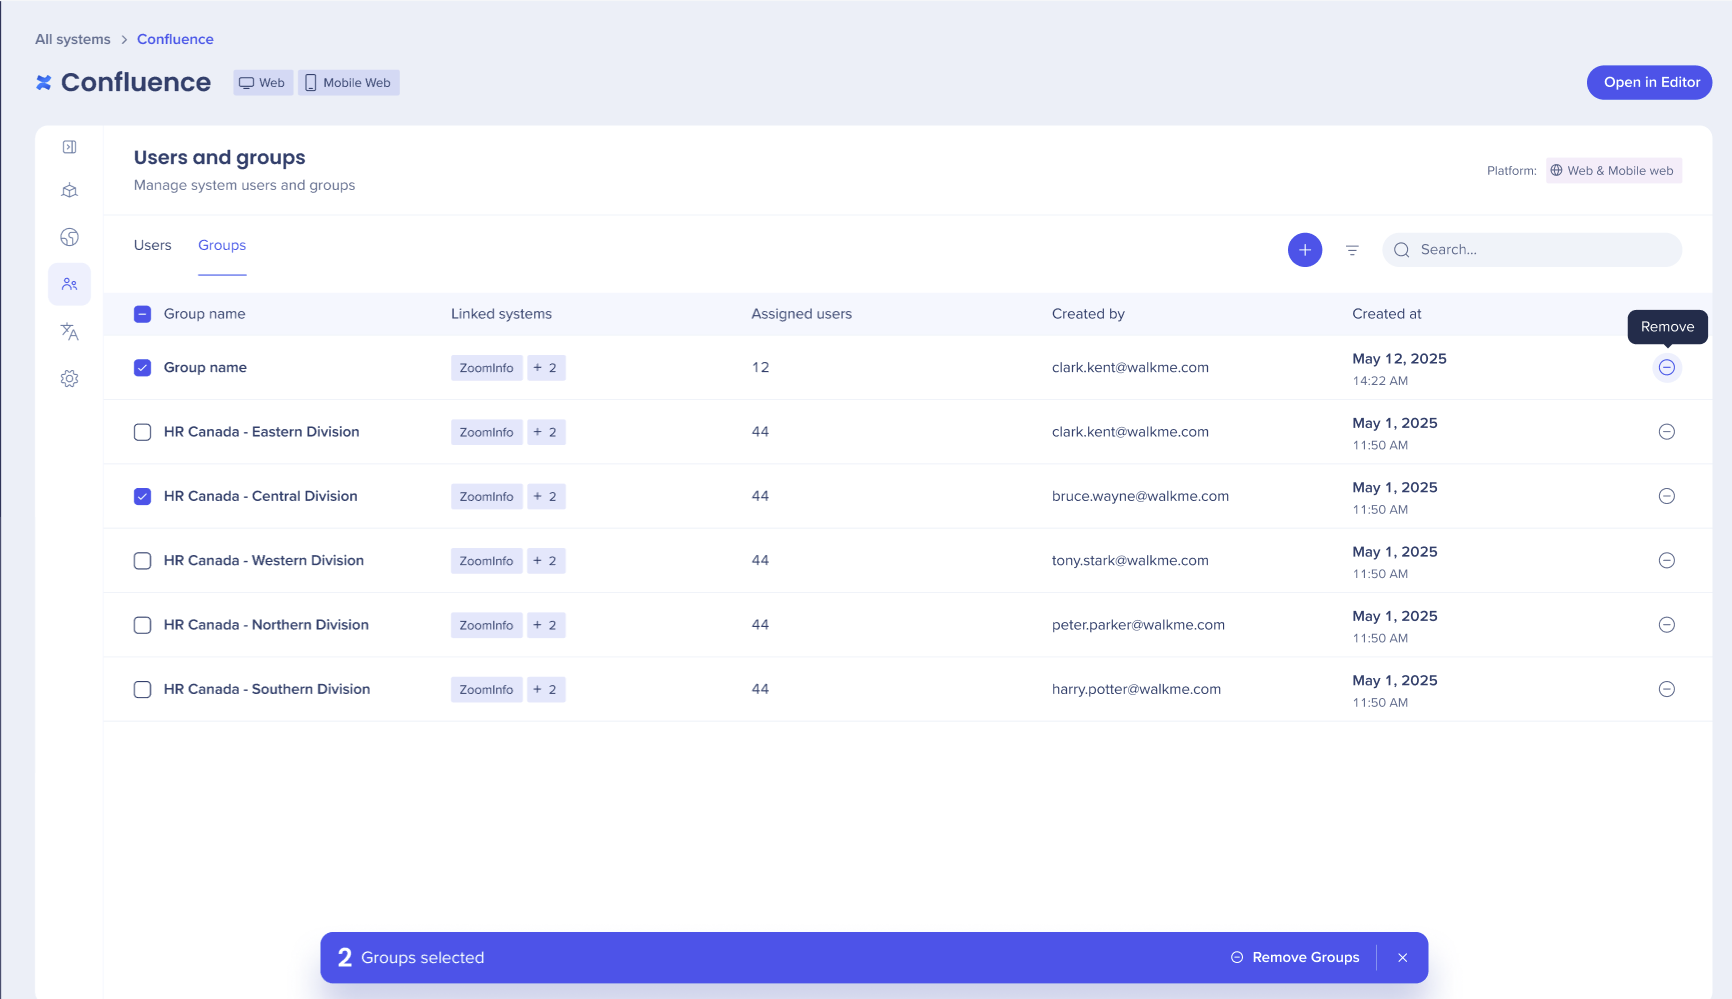 5. A confirmation popup displays, confirm decision to remove group
 6. Select the icon to remove a user
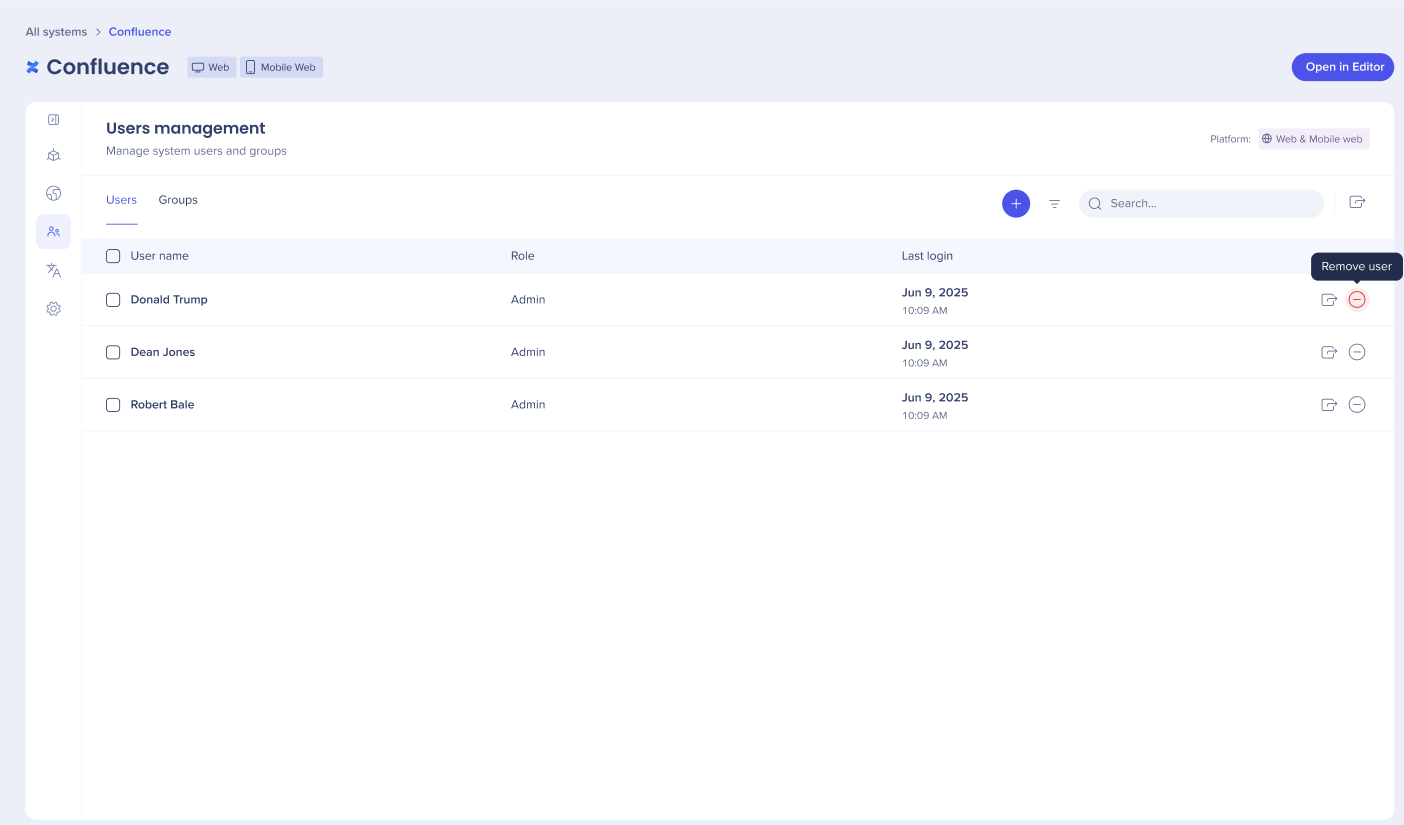
7. A confirmation popup displays, confirm decision to remove a user

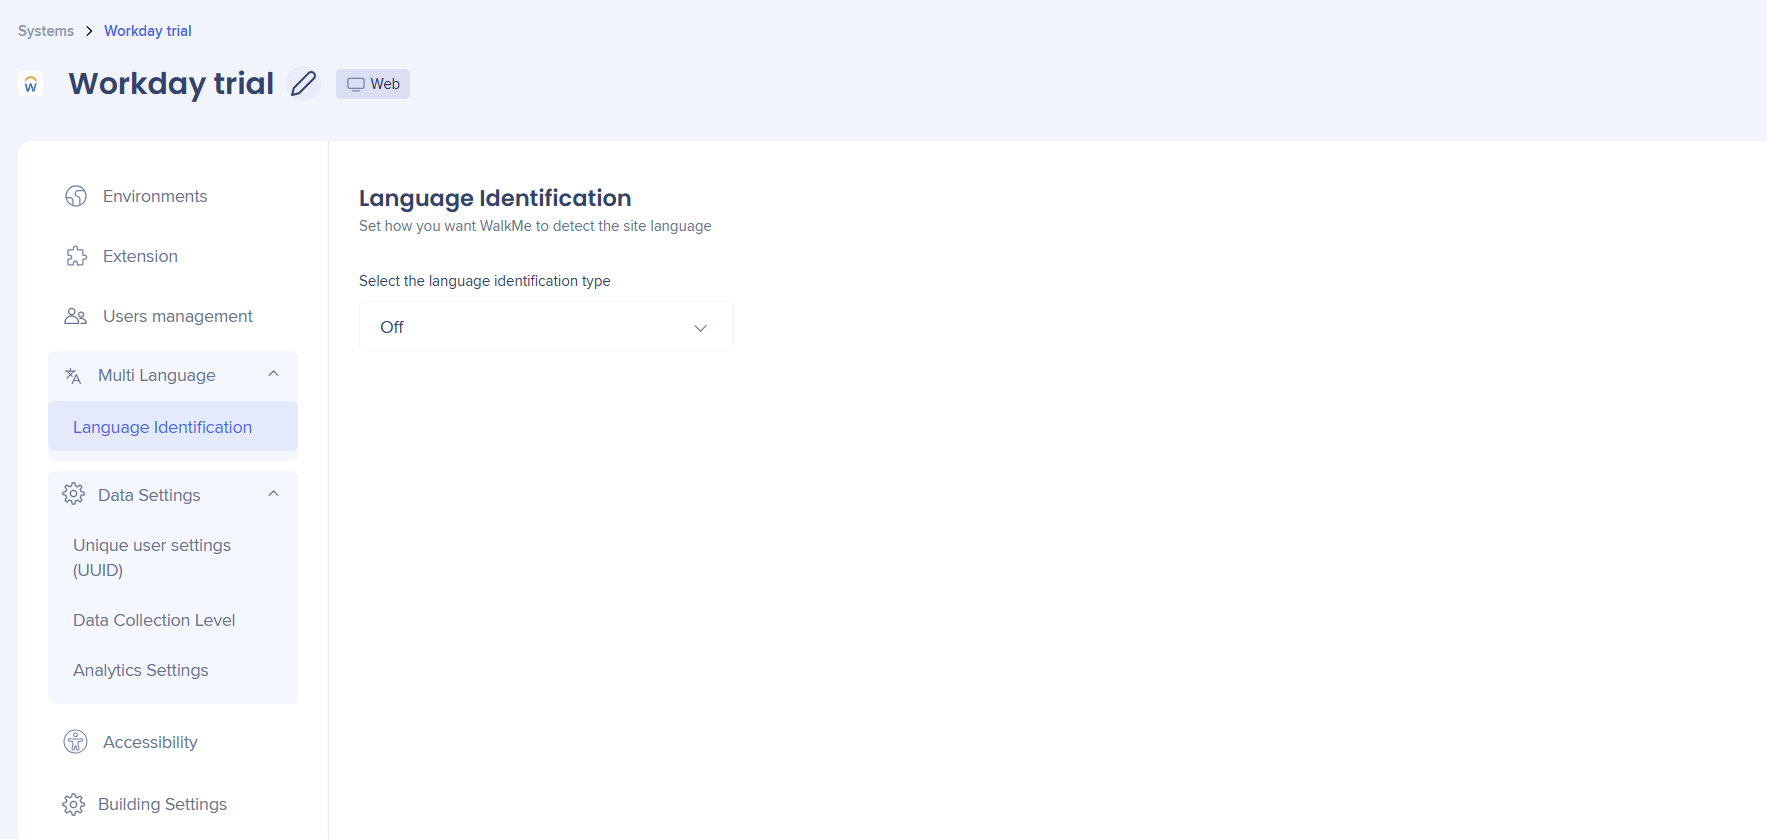
In the Multi-Language tab you can select how you want WalkMe to identify the site language.
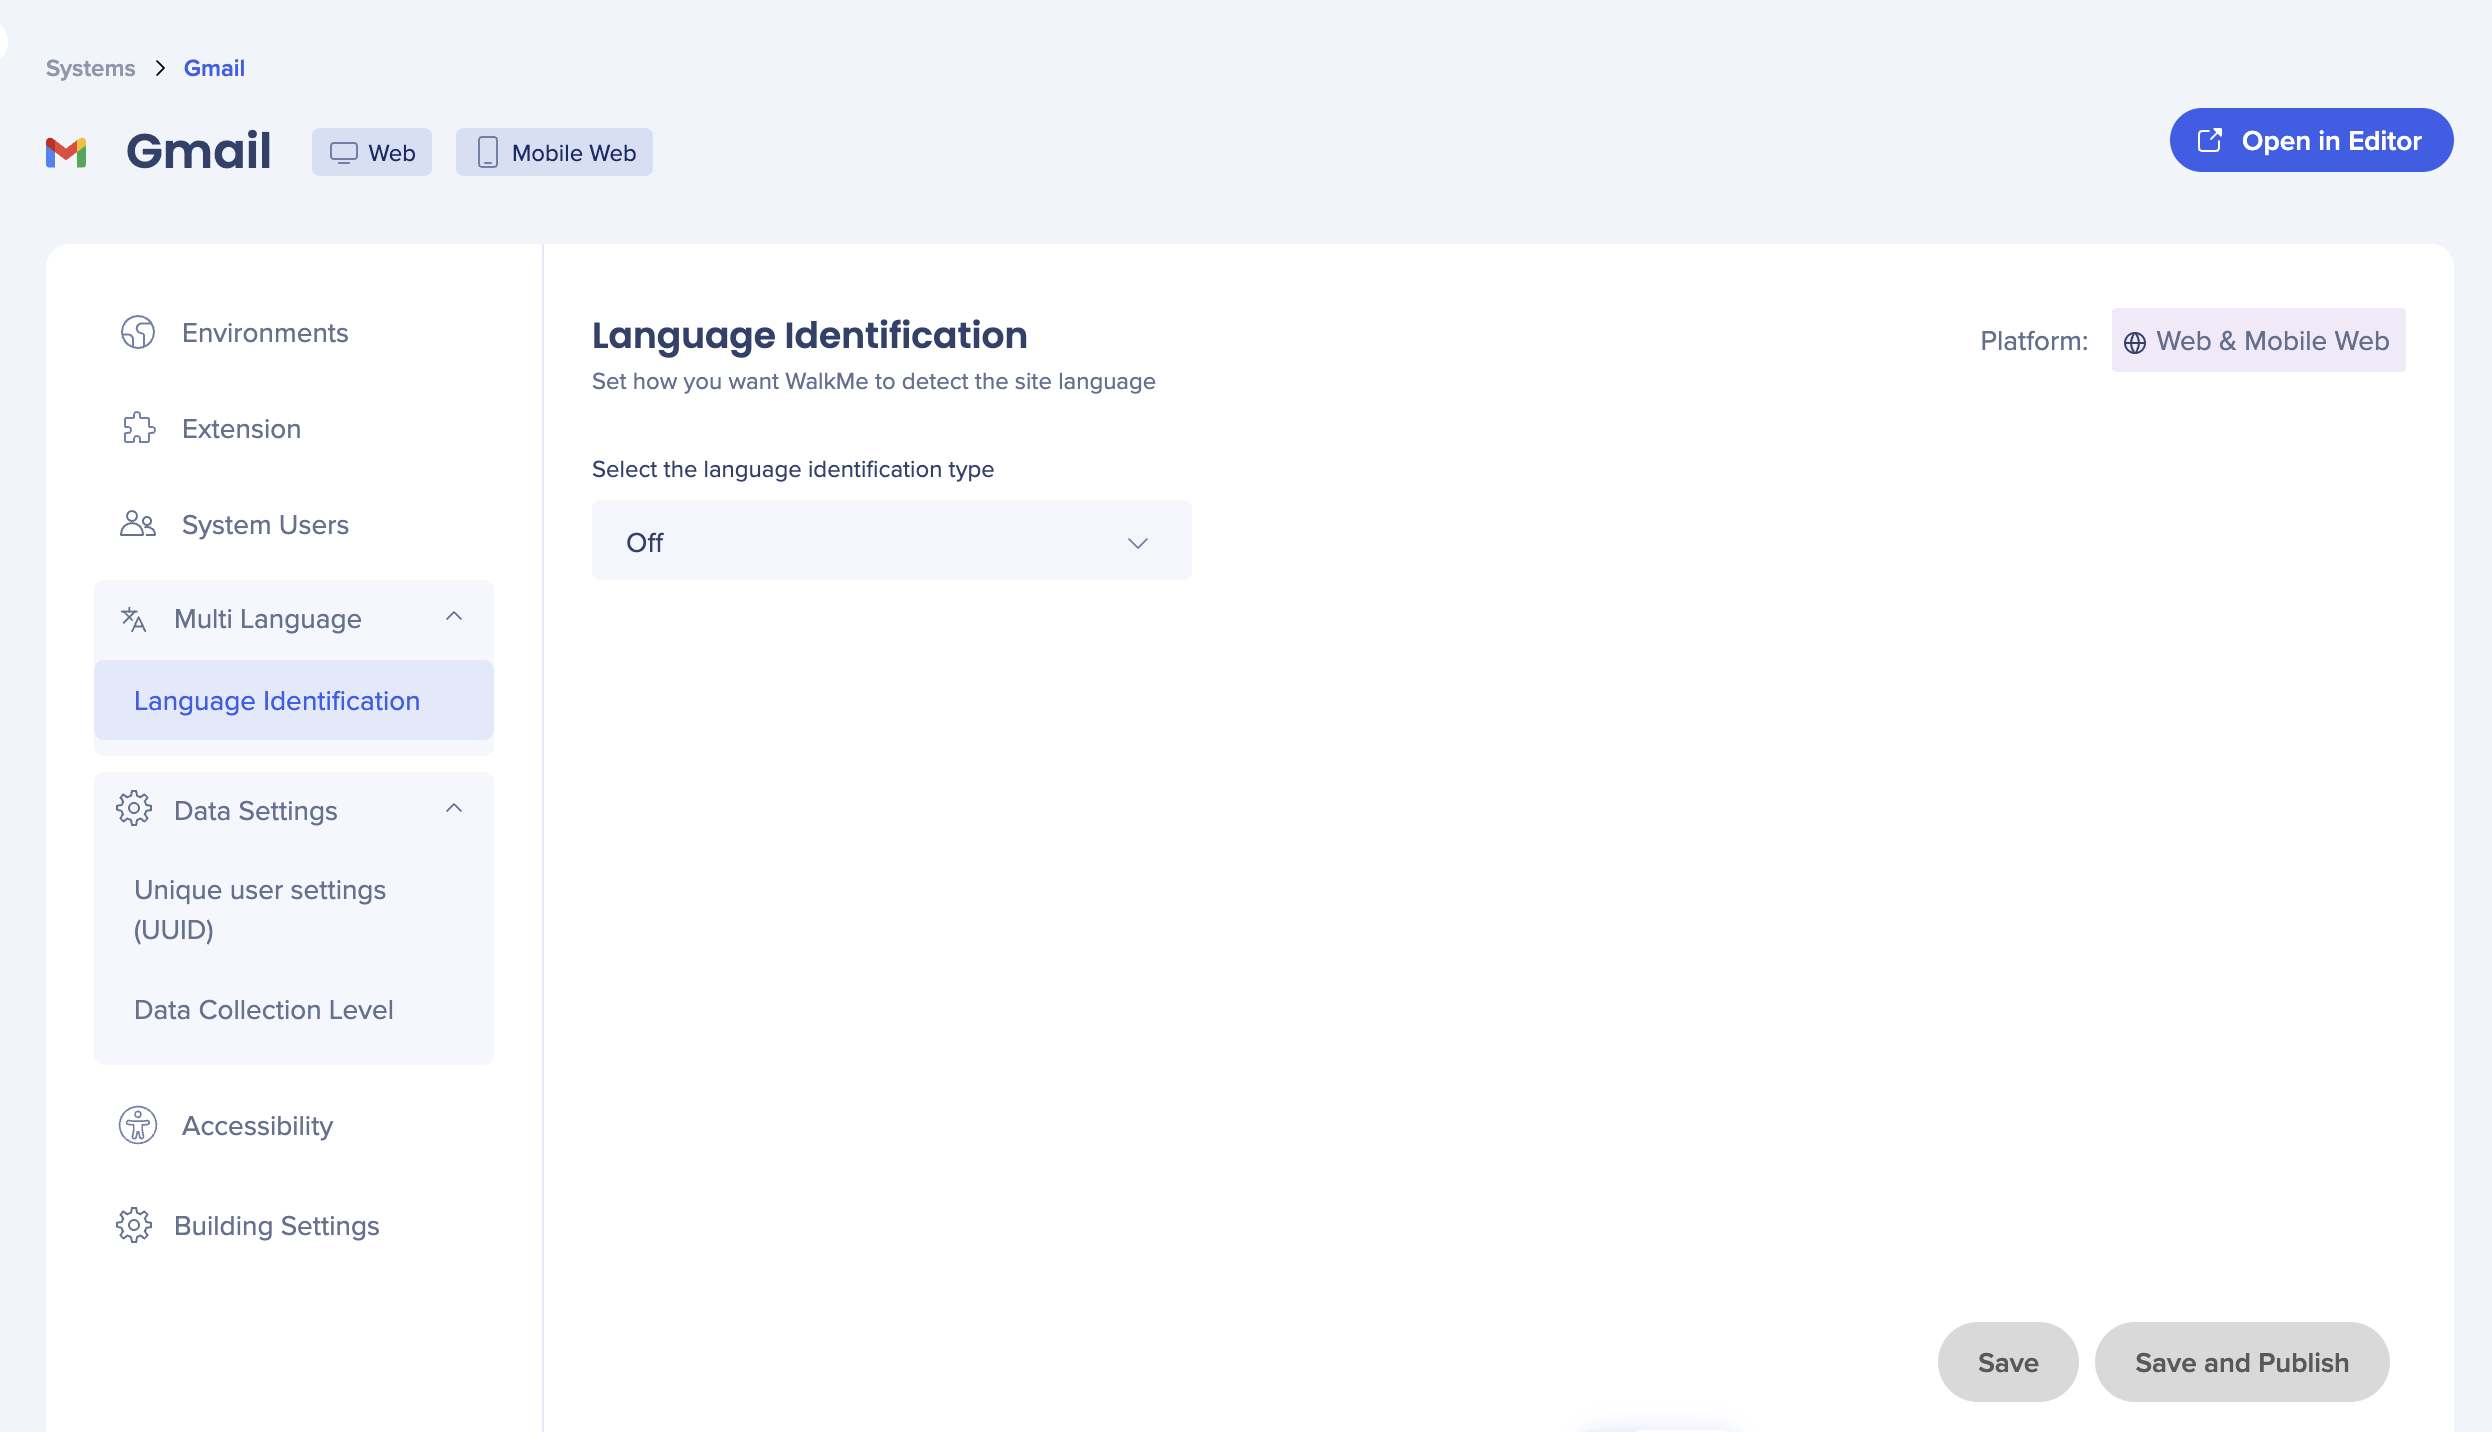
The available options are:
- HTML language attributes
- Auto-detect
- URL parameter
- Site variable
- Local storage
- Cookie
- jQuery
All settings under the Systems Users tab apply to both Web and Mobile Web platforms.

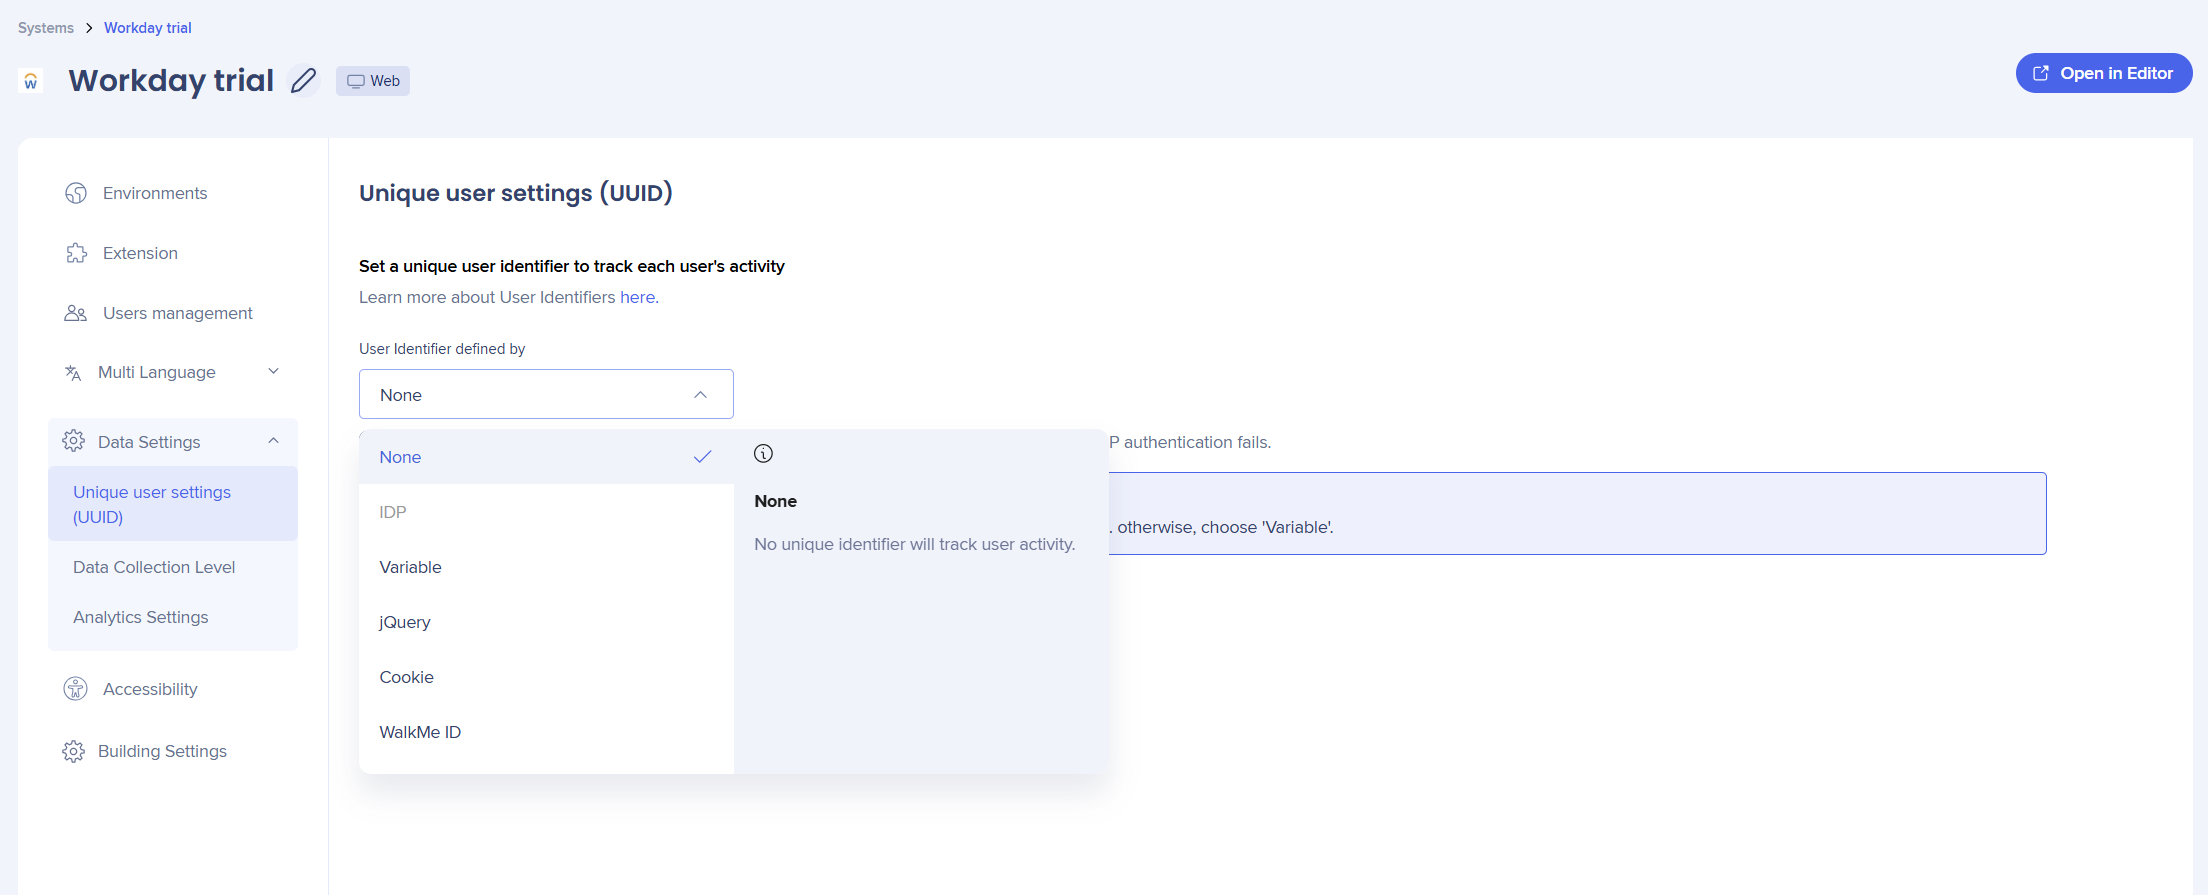
Unique user identifier (UUID)
Set a UUID to define how you would like to collect data about your end users.
- Hovering over each value in the UUID dropdown will show a tooltip
- For accounts with an IDP already configured, this option will be pre-selected
Unique User Settings (UUID)
Expected Format
- The purpose of the expected format is to validate the value entered by the user in the User Identifier field.
- Available values include:
- Email
- GUID
- Integer
- Custom Regex
- None (Default)
Unique User Settings (UUID) apply separately for Web and Mobile Web platforms.
Data Collection Level
Select the level of data collection for WalkMe Insights
Note
Data collection level settings apply separately for Web and Mobile Web platforms.
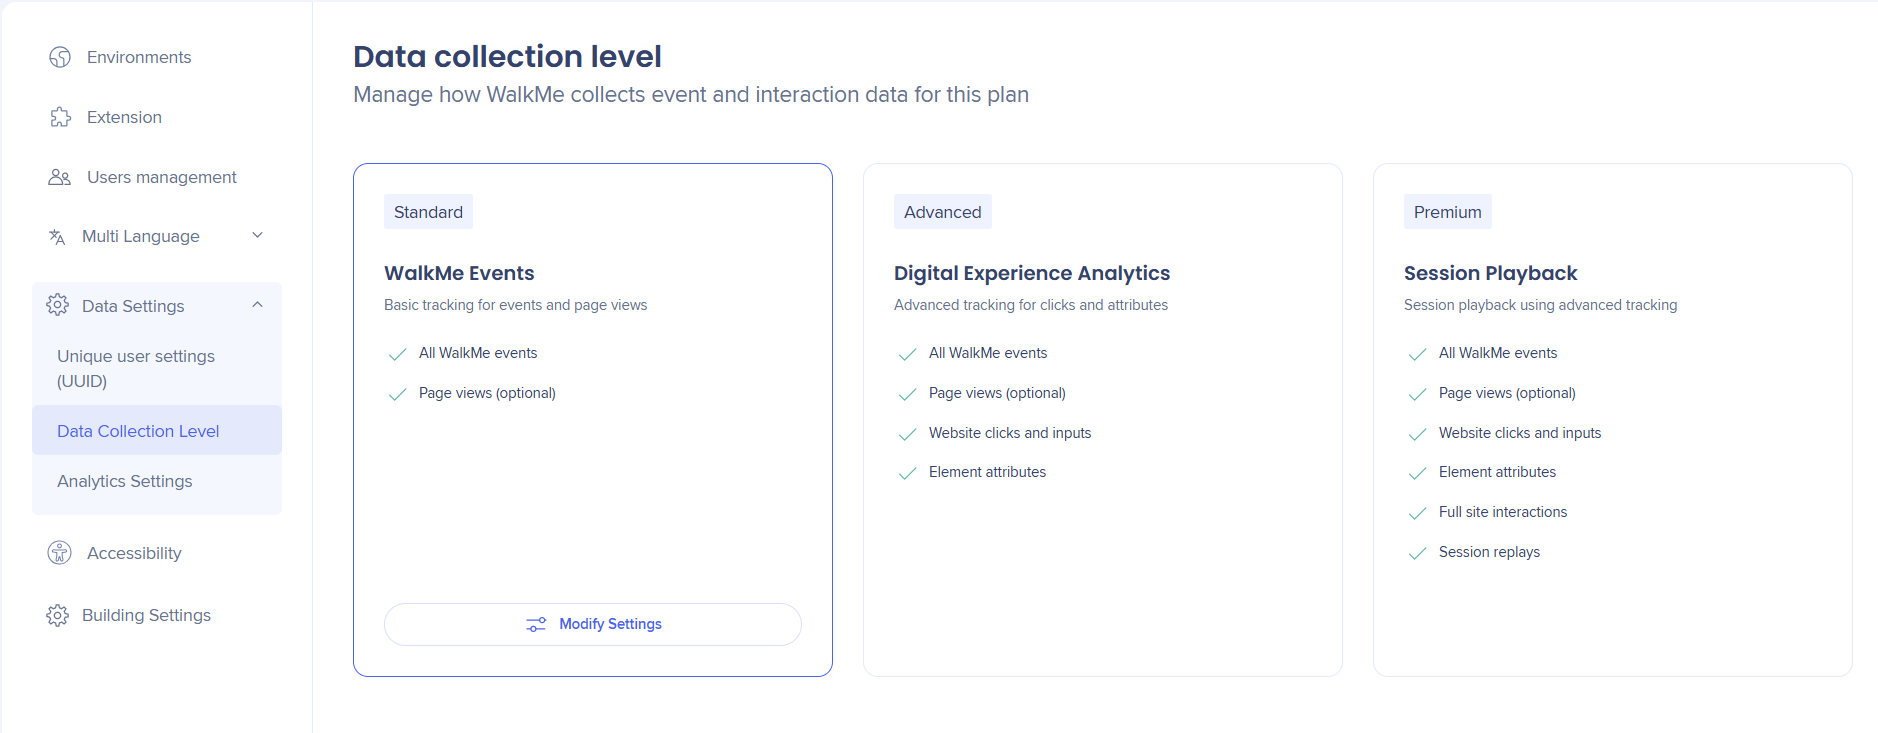
Data Collection Level Settings
Accessibility
You can use the Accessibility tab to enable accessibility on the system or account level. Enabling it on the account level means that any new system created will have accessibility settings turned on by default, but won't affect any existing systems.
-
You can now have the option to enable accessibility on the system or account level
-
To enable the accessibility setting, turn ON the toggle
-
If you wish to enable accessibility for the entire account, meaning any new system created will have accessibility settings turned ON by default (not apply on already existing systems), check the relevant checkbox
-
If accessibility has been enabled at the account level by a WalkMe employee through Backoffice , the toggle will be turned ON by default
-
There will be no option to turn it OFF independently; contact support if you want accessibility to be disabled
-
Accessibility settings apply separately for Web and Mobile Web platforms.
Accessibility Settings

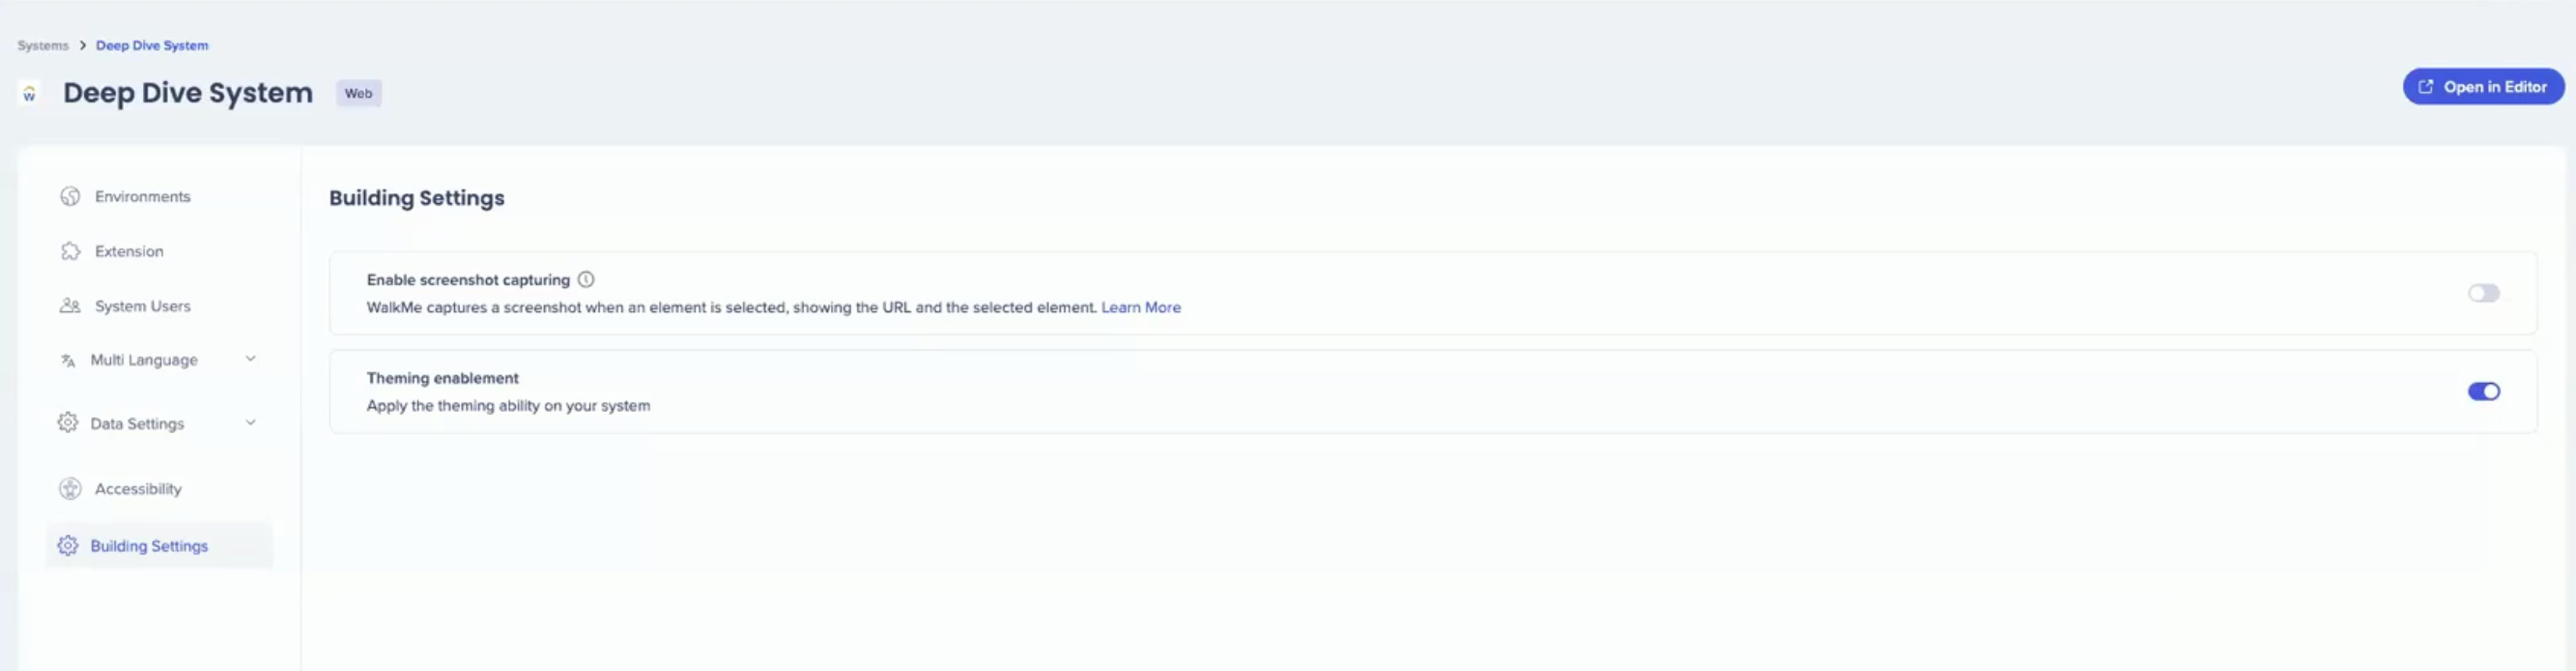
Building Settings
Building settings let you enable screenshot settings and theming for your system.
- Turn on Enable screenshot capturing to take a screenshot when an element is captured for a step, rule, SmartTip, or launcher
- The screenshot will include the element highlighted by the element selector
- Select Blur the screenshots if you want the screenshots to be blurred
Screenshots
- Turn on Theming enablement to enable Theming for the system
Theming
Technical Notes
- "Production" and "Test" environments are automatically generated during system creation
- These two environments are immutable, meaning they cannot be altered (renamed or deleted)
- The name assigned to the environment must be a single word with a maximum length of 100 characters, without spaces or special characters, and cannot be "Preview"


