WalkMe Menu for Desktop provides a centralized hub for all of your work applications, making it easy to find and access everything you need in one place. This way, you don't have to switch between different applications all day, saving time and increasing productivity.
This article is an overview of the desktop menu experience after it's been deployed in your organization. It will review how to get started with the desktop menu, how you can use it, and what to expect.
In the end, the menu is your companion and how you use it depends on what kind of support you need during your work day.
Note on available features
Your organization may have customized the desktop menu and some features described in this article may not apply to you. We've indicated which features can be enabled or disabled by the WalkMe admin at your organization.
Get to Know
The desktop menu can be used for a variety of purposes. Here are some examples of how the menu can help you:
Manage tickets or tasks that you're assigned to or reviewing with homepage widgets, allowing you to prioritize your workload more efficiently
Get notified on important updates from your organization via desktop notifications
View content curated by your organization for you, ensuring that you have access to the most up-to-date and relevant resources
All-in-one search, saving you time to find information across all of your apps
Desktop menu terms
To help you get to know the desktop menu, here's a quick terminology review:
Integrations: Menu integrations are the apps that you connect to your desktop menu. Some apps are enabled by default by your organization, and other apps you can decide to connect by going to the menu Integrations page
Widget: Some integrations have homepage widgets that display helpful information from that app
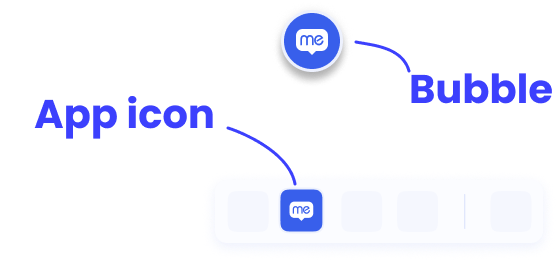
Bubble: Open the desktop menu with the drag and drop icon that is always available on your desktop screen
Accessing the Desktop Menu
Depending on how your organization deployed the desktop menu, you can either open the menu from the on-screen Bubble on your desktop or simply search for Walkme Menu in your application list.
If this is your first time opening the menu, click the Sign In button, which opens your browser so you can log in with your work email.
WalkMe Menu Product Tour
If your organization enabled integrations for the menu, you will be guided through a brief onboarding experience that includes connecting your work apps and a quick tour of the desktop menu's interface.
The onboarding experience is only available if your organization enabled app integration
Choose your preferred language
Before you begin the onboarding experience, you can select which language your preferred language for the menu.
The WalkMe Menu and the onboarding flow is localized (translated) into the following languages:
English
Portuguese
Spanish
German
Chinese Simplified
Turkish
Japanese
French
Korean (NEW)
After selecting the preferred language, click Save My Preferences. The desktop menu will switch to that language and then continue the onboarding experience.
You can change the application language anytime in Settings -> Preferences.
Setup Wizard
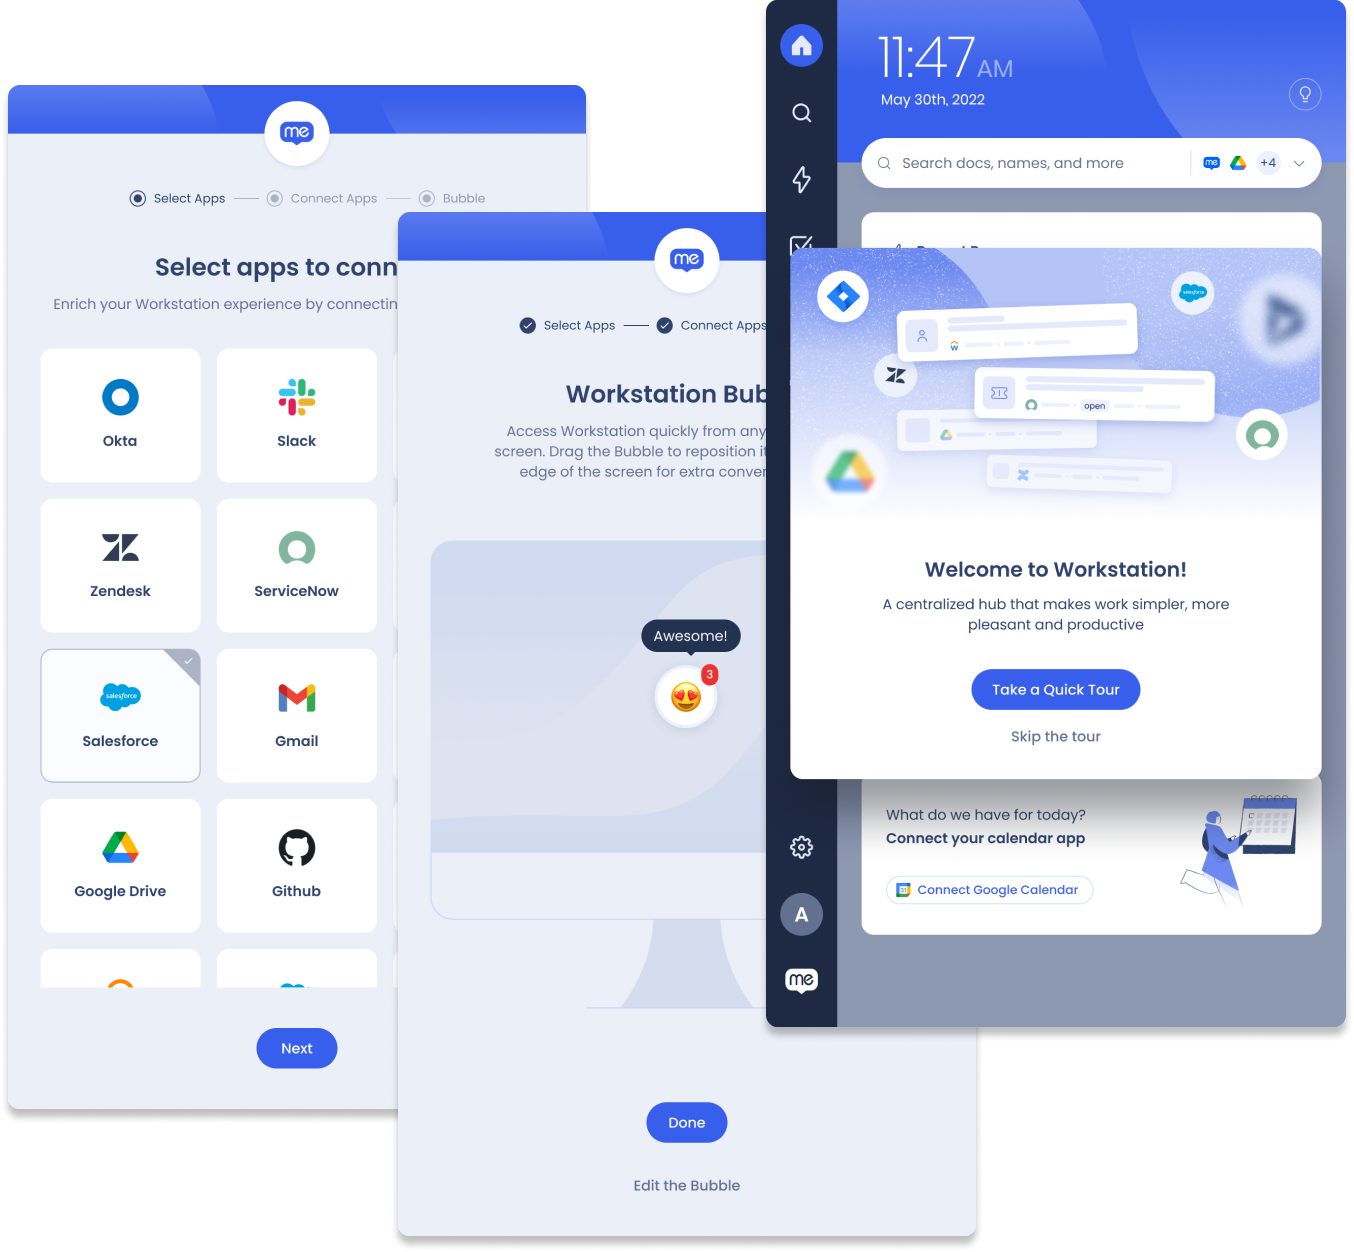
The setup wizard starts the first time you sign-in to the desktop menu and lets you quickly connect all of the apps you need so that the menu will be ready for you when you first use it.
To setup integrations via the wizard:
Select all of the apps that are relevant to your work
Click connect for each app
Sign-in to the app
Continue for each app
If you changed your mind and don't want to connect an app, click Skip Step
You can add or remove integrations later by going to the Settings page -> Integrations.
The next step in the onboarding experience is to customize your Bubble:
Click Customize Bubble to open a list of emojis
Choose your new Bubble emoji
Click Done
If you would like to disable the desktop menu bubble, click the Show Menu Bubble toggle to turn it off.
Finally, you'll be asked if you want to take a quick product tour.
Didn't get to experience the onboarding?
You can access it anytime, in the Settings page-> Help-> Start Product Tour
Desktop Menu Bubble
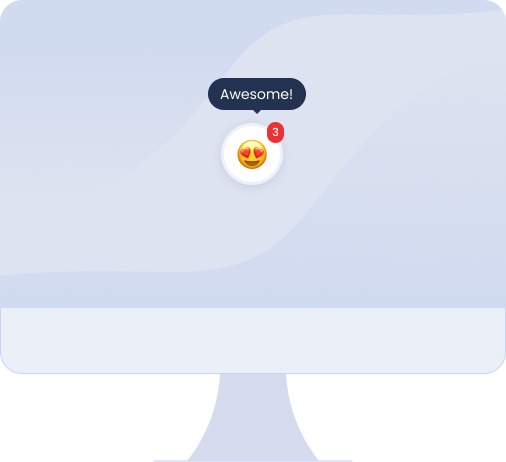
The bubble is a drag and drop icon that opens desktop menu. You can move it around and place it anywhere on your screen. It can float on the screen, or snap to the side. It's always accessible so you can quickly open desktop menu anytime you need it!
You can customize the Bubble with an emoji of your choice to add a little fun to your screen, or turn it off if it's not your style.
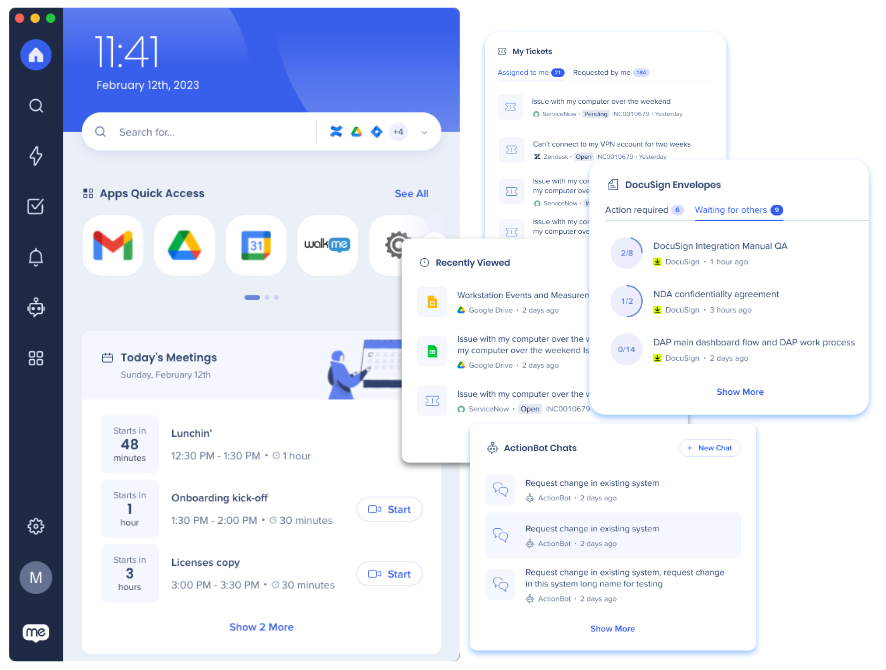
Search across all of your resources and integrated apps with the search bar
Interact with the homepage widgets for a quick view of your tickets, tasks, or content
Widgets
Some of the app integrations come with a homepage widget. Widgets provide a brief overview of whatever is going on in that application. For example, the ServiceNow widget displays tickets assigned to you or requested by you. The Calendar widget, which can integrate with Google or Outlook calendars, lists your next meetings including one-click access to the virtual meeting room, like Zoom.
If the integrated app has a widget, it will be automatically added to the homepage.
The menu's enterprise search functionality allows you to quickly find the information you need from across your organization, eliminating the need to spend time searching through multiple applications or resources. This can save you time and increase productivity.
Simply search for the content in the search bar and the desktop menu will look throughout the integrated apps and resources.
You can also filter the search to specific apps:
Click the dropdown next to the search bar
Select the apps you want to limit the search to
Recent Searches
You can view your recent searches by clicking into the search bar, or check out the Recently Viewed widget to view the content that you most recently interacted with.
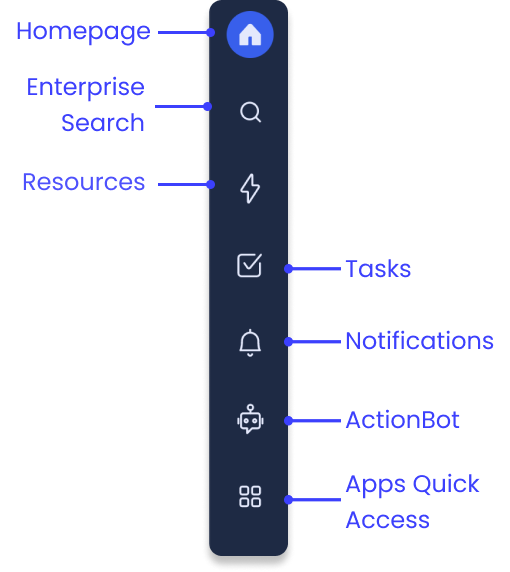
The desktop menu sidebar is how you navigate to different pages. What appears in your sidebar is dependent on how your organization configured the desktop menu.
The sidebar can include the following:
Homepage: Available on all desktop menus
Search: Available on all desktop menus
Resources: Enabled by your organization if they connected WalkMe Resources
Tasks: Enabled by your organization if they connected WalkMe Onboarding Tasks
Notifications: Available on all desktop menus
ActionBot: Enabled by your organization if they connected a WalkMe ActionBot conversation
Apps Quick Access: Enabled by you if you connect your Okta to desktop menus
Resources
The Resources page is where you can access information curated by your organization. These are WalkMe Resources, which is an item that is built using WalkMe. Resources include articles and videos and they can be segmented to target specific people based on department, location, or other filters. So if you see a Resource in the Resources page someone in your organization made it just for you!
Use the Recent Resources widget to quickly find the WalkMe resources you use most.
Are you a WalkMe Builder?
If you are a builder and will be creating Resources for the WalkMe Menu for Desktop and Mobile, these articles might be helpful to you:
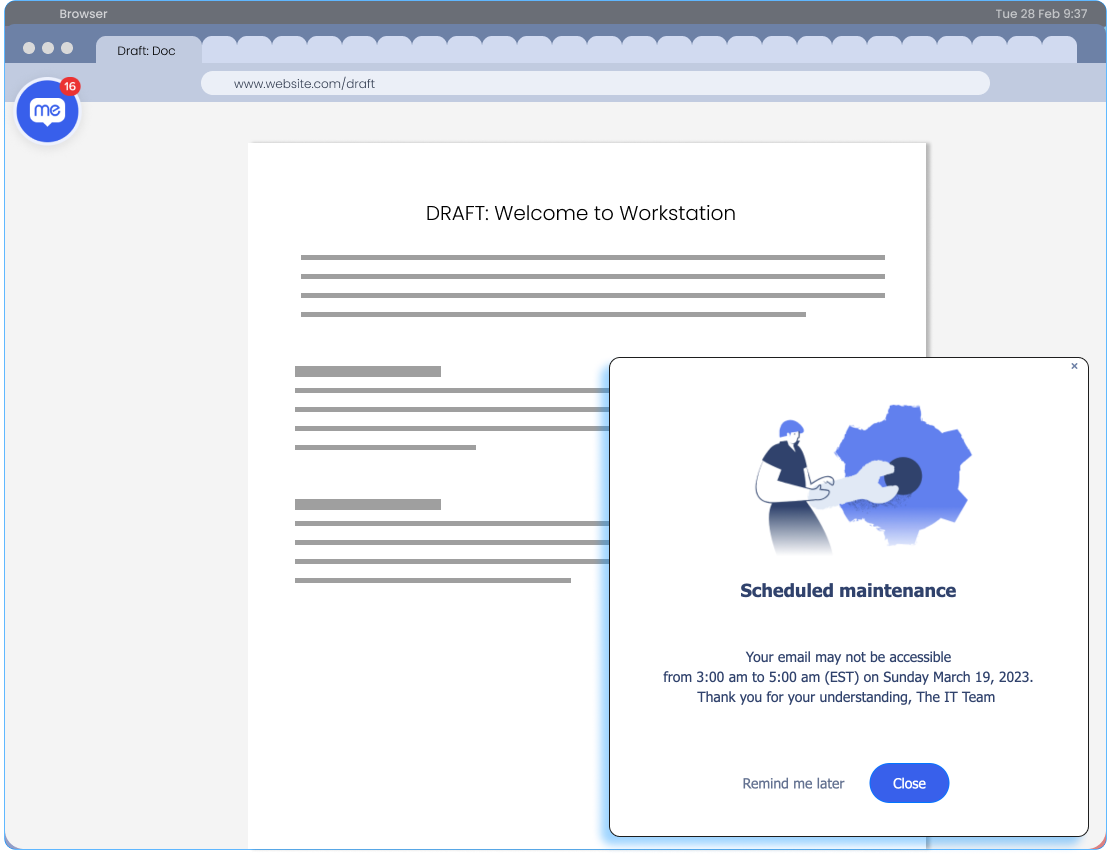
Don't miss out on anything! The desktop menu offers a communication hub for your organization to keep you updated on what's going on. Notifications can be sent as a push notification or a pop up. Push notifications appear in your computer's notification tray. Pop ups, on the other hand, appear on your screen.
In both cases, your bubble will have a red indicator to let you know that you have unread notifications. You can read all your unread notifications in the Notification page.
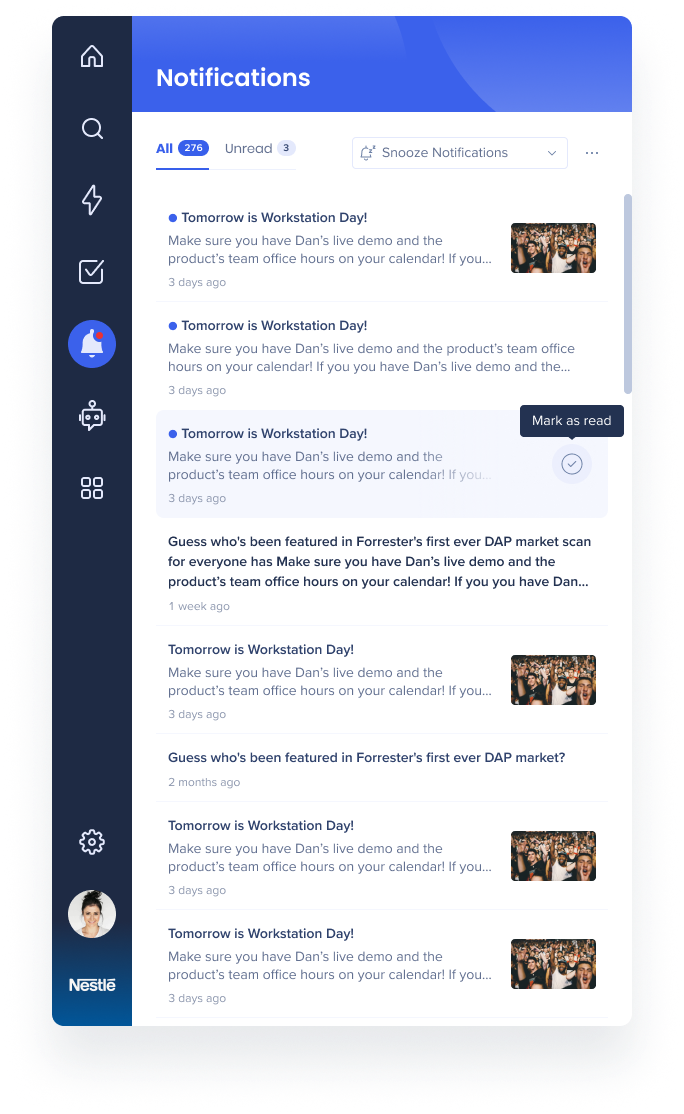
From the Notifications page you can:
View all live notifications:
Click a notification to open it in full
Snooze notifications:
Select how long you want to snooze notifications from the dropdown
Notifications will appear in your notification list, but you won't be notified
Mark all notifications as read:
Click the three dot menu in the corner
Click Mark all as read
Notifications are made in the WalkMe Console Communication Center. From here, the Communicator (the person who makes and sends the notification) can determine how long the notification is available in your notification list. After a notification's timeline has ended, it will no longer be available in the list.
Are you a Communicator?
If you are a Communicator and have access to the WalkMe Console and Communication Center, these articles might be helpful for you:
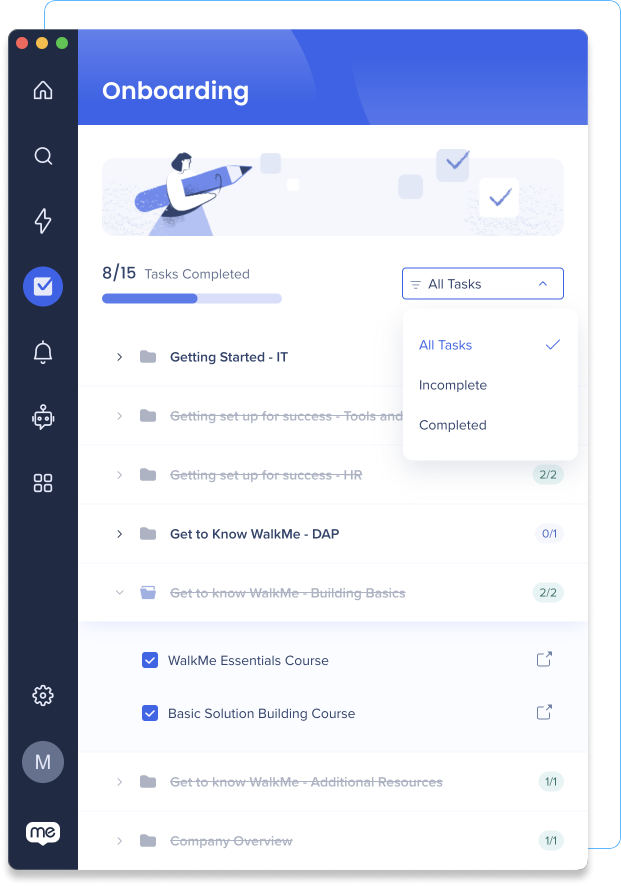
The Tasks page is a helpful resource for new employees to get started with the organization or role. Just like Resources, the tasks are made by your organization and segmented for you. Tasks are built with WalkMe items and can help you get started in your new role, such as walking you through creating a profile, signing up for HR benefits, or setting up an expense account.
Tasks is an enabled feature so it will only be available on your desktop menu if your organization added Tasks. The name of this page may change depending on the tasks were built.
As you complete each task, your progress will be updated in the progress bar. By following this checklist, you can accelerate your training and improve your understanding of your organization and role.
Are you a Builder?
If you are a Builder and have access to the WalkMe Console and Content Manager, these articles might be helpful for you to publish tasks to the desktop menu:
The desktop menu's ActionBot can help you navigate complex processes or find important resources, eliminating the need to spend time figuring things out on your own. This saves you time and reduces frustration, allowing you to focus on more important tasks.
ActionBot is an enabled feature so it will only be available on your desktop menu if your organization built an ActionBot
The ActionBot utilizes WalkMe items like Smart Walk-Thrus or AutoPlay to complete tasks for you. For example, ActionBot can help submit a request for time off. The Bot will converse with you to collect the information it needs to submit the time off form. Then, it launches a Smart Walk-Thru to fill in all of the data on your org's HR platform.
Are you a WalkMe Builder?
If you are a builder and will be creating ActionBot conversations for the desktop menu, these article might be helpful to you:
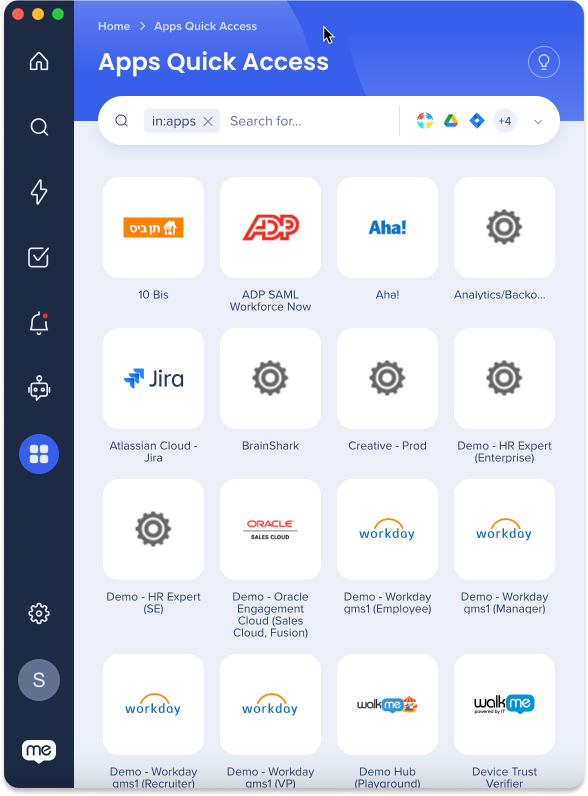
The Apps Quick Access page is available if you have the Okta integration. The page lists all of your Okta applications so that you can easily view and find the app you need.
Settings
The Settings page is where you can personalize your desktop menu, view technical information, or find helpful guides on how to use the desktop menu.
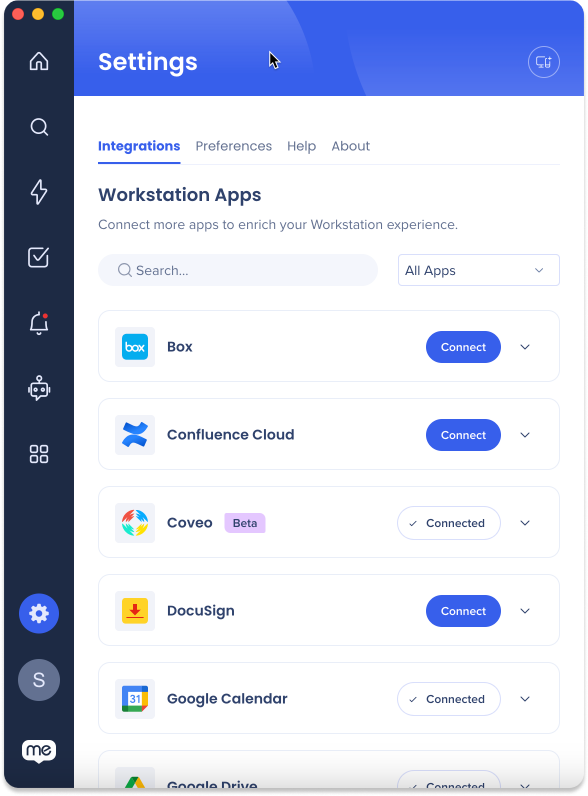
Integrations
The integrations tab is where you connect your work applications to the desktop menu. This integrates the app's information so that you can search for its content or add a widget to the homepage.
To integrate an app to your desktop menu:
Go to Settings -> Integrations
FInd the app you want to integrate
Click Connect next to the app
Follow the sign-in process for that app
Done! If the integration includes a widget, it will appear on your homepage.
Integrations is an enabled feature so it will only be available on your desktop menu if your organization enabled them.
The preferences tab allows you to personalize your desktop menu. You can change the language, date and time formatting, or customize your bubble's emoji.
You can also connect another menu device.
Click on the options below and follow the instructions to change the settings in your desktop menu:
To change the menu language:
Go to the Settings page -> Preferences -> Application language
Select your language from the dropdown
Click Yes, Apply on the confirmation pop-up
Change the clock display format
You can change the homepage clock to display between 24-hour (13:00) or 12-hour (1:00 p.m.) format:
Go to the Settings page -> Preferences -> Clock display
To enable 24-hour format, turn the toggle on
To enable 12-hour format, turn the toggle off
Change the date display format
To change the homepage date display:
Go to the Settings page -> Preferences -> Date display
Select the format you want from the dropdown
Month DD, YYYY (November 12, 2023)
DD/MM/YYYY (12/11/2023)
MM/DD/YYYY (11/12/2023)
Enable quick access hotkey
You can open the desktop menu by pressing on your keyboard - Cmd+Shift+E (Mac) or CTRL+Shift+E (Windows).
Go to the Settings page -> Preferences -> Enable quick access hotkey
To enable the hotkey, turn the toggle on
To disable the hotkey, turn the toggle off
Open application in background
To open the desktop menu in the background, toggle the Open application in the background setting. This will launch the app during operating system start-up without appearing on the screen, remaining minimized in the task bar.
Resize the text
You can make the text larger on the desktop menu, we recommend keeping it at 100%.
Go to the Settings page -> Preferences -> Display size
Select the display size you want (100%, 150%, 200%)
Click Yes, Apply on the confirmation pop-up to confirm the change
Connect another device
You can have WalkMe Menu on another desktop device. Connecting the menu between devices connects your integrations between these devices.
To connect another menu:
On your desktop menu, go to the Settings page -> Preferences -> Connect another device
Click Generate Code
Type the code in the new device
Done
Bubble settings
From Settings page -> Preferences -> Bubble settings you can enable or disable the bubble and change the emoji.
The Help tab provides links to WalkMe's Help Center and quick tips on how to use the desktop menu, including the Product Tour.
From Settings -> Help, you can:
View helpful keyboard shortcuts so you can navigate the desktop menu without a mouse
Send feedback about your menu experience
Take a quick product tour of the desktop menu
Reload the desktop menu
You can also reload with Cmd+R (Mac) or CTRL+R (Windows)
About
All the technical information about your desktop menu is in the About tab. You can also send us your feedback by clicking the Send Feedback button and filling out the short survey about your experience.
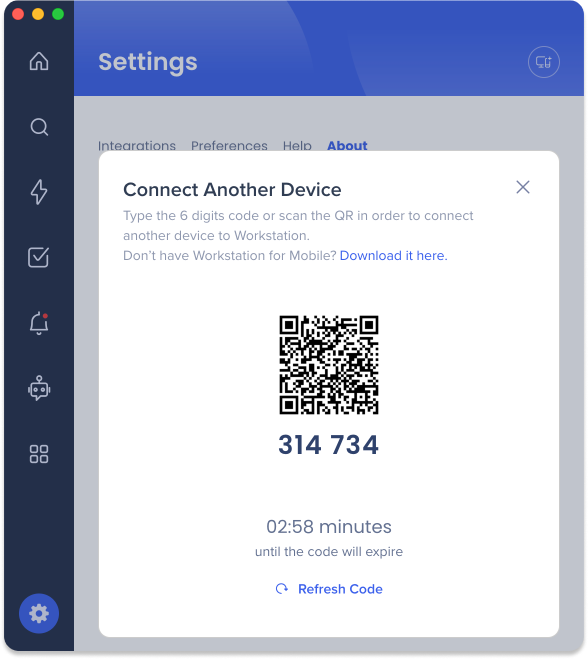
Connect Another Device
Connect to multiple devices to enjoy a continuous menu experience. Download the WalkMe Menu for Mobile app and have access to your most important resources on-the-go.
To connect another device from the mobile menu:
On the login page of the mobile menu, click Connect Another Device
On your connected device, go to Settings > Preferences
Select Connect Another Device
Typethe 6 digit verification code
Alternatively, click Scan QR Code on Mobile and scan the QR code from the connected device
To access the 6 digit verification code / QR code, click the connect another device icon in the top right of the Settings page.
That's it! Enjoy your desktop menu experience.
Technical Notes
If the product tour was disabled for a system, the Start Product Tour button will be hidden from the desktop menu Help page